开发环境
android studio 2.0
添加依赖
找到当前项目的
build.gradle文件,添加依赖的jar包。或者在as中选中file,选择project structure,选中你的module然后选择dependencies,添加library dependency即可。
dependencies {
    compile fileTree(include: ['*.jar'], dir: 'libs')
    testCompile 'junit:junit:4.12'
    compile 'com.android.support:appcompat-v7:23.4.0'
    compile 'com.android.support:recyclerview-v7:23.4.0'
    compile 'com.android.support:cardview-v7:23.4.0'
}
主布局文件
<android.support.v7.widget.RecyclerView
        android:id="@+id/RecyclerView"
        android:layout_width="match_parent"
        android:layout_height="0dp"
        android:layout_weight="1"
        android:layout_marginTop="50dp"
        >
</android.support.v7.widget.RecyclerView>
Item布局文件
主要是使用cardView将控件都包起来!这儿就只加了一个TextView。
<?xml version="1.0" encoding="utf-8"?>
<android.support.v7.widget.CardView  xmlns:android="http://schemas.android.com/apk/res/android"
    android:orientation="vertical"
    android:layout_width="match_parent"
    android:layout_height="80dp"
    android:layout_margin="10dp"
    >
    <TextView
        android:id="@+id/tab1_item_text"
        android:layout_width="wrap_content"
        android:layout_height="wrap_content"
        android:text="this is item"
        android:textSize="20dp"
        android:layout_gravity="center"
        android:textColor="@color/colorAccent"/>

</android.support.v7.widget.CardView >
创建 Adapter
要使用RecyclerView其实和ListView差不多的,都需要一个适配器,当然现在不是继承baseAdapter了,而是继承RecyclerView.Adapter,ViewHolder你要继承,实现你自己的Item控件。一般的使用,只需要实现RecyclerView中的三个方法:
onCreateViewHolder();//这里面主要是初始化空间,返回一个ViewHolder。
onBindViewHolder(); //这里面主要是绑定数据到控件。
getItemCount();     //返回数据的条数。
public class GyRecyclerViewAdapter extends RecyclerView.Adapter<GyRecyclerViewAdapter.MyViewHolder> {

    private List<String> data;
    private Context context;

    /**
     * 自定义构造方法,用于初始化数据和context
     * @auth Gy
     * created at 2016/8/18 14:26
     */
    public GyRecyclerViewAdapter(Context context, List<String> data) {
        super();
        this.context = context;
        this.data = data;
    }


    @Override
    public MyViewHolder onCreateViewHolder(ViewGroup parent, int viewType) {
        context = parent.getContext();
        View itemView = LayoutInflater.from(context).inflate(R.layout.tab1_item,parent,false);
        MyViewHolder holder = new MyViewHolder(itemView);
        return holder;
    }

    @Override
    public void onBindViewHolder(MyViewHolder holder, int position) {
        holder.textView.setText(data.get(position));
    }

    @Override
    public int getItemCount() {
        return data.size();
    }
    class MyViewHolder extends RecyclerView.ViewHolder{

        public TextView textView;

        public MyViewHolder(View itemView) {
            super(itemView);
            textView = (TextView) itemView.findViewById(R.id.tab1_item_text);
        }
    }

}
使用
recyclerView = (RecyclerView) view.findViewById(R.id.GyRecyclerView);

//      设置布局管理器
        LinearLayoutManager linearLayoutManager = new LinearLayoutManager(context);
        linearLayoutManager.setOrientation(LinearLayoutManager.VERTICAL);

        recyclerView.setLayoutManager(linearLayoutManager);

//      创建数据集
        List<String> data = new ArrayList<>();
        for(int i = 0;i<20;i++){
            data.add("item "+i);
        }

//      创建Adapter
        GyRecyclerViewAdapter gyRecyclerViewAdapter = new GyRecyclerViewAdapter(this.getContext(),data);
//      设置Adapter
        recyclerView.setAdapter(gyRecyclerViewAdapter);
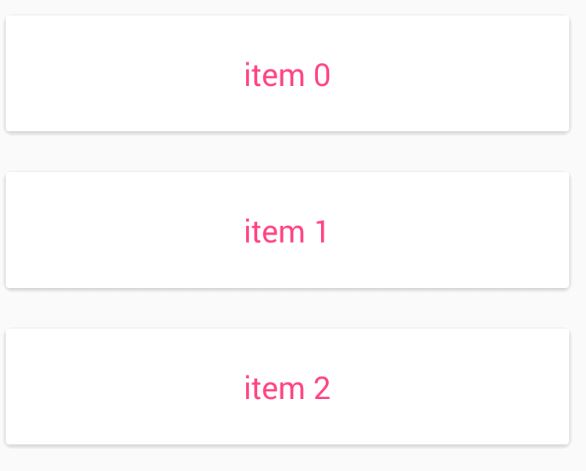
最终效果

当然,也就可以自定义分割线,定义点击事件,定义动画。这些后面慢慢来实现。


 163
163

 被折叠的 条评论
为什么被折叠?


