


试验环境:
- centos7 x64 最小化安装
- mysql80-community-release-el7-3.noarch.rpm
- 或mysql-8.0.17-linux-glibc2.12-x86_64.tar.xz
说明:
linux下安装mysql这里有两种方式
- 1.基于rpm安装
- 2.完全手动安装
参考文章:
- https://blog.csdn.net/github_39533414/article/details/80144890
一、基于rpm方式安装
1.1 在mysql官网上下载对应的rpm包:
https://dev.mysql.com/downloads/repo/yum/

1.2 将这个rpm包用winscp工具拷贝到linux“/soft”目录下
1.3 安装rpm:yum -y install mysql80-community-release-el7-3.noarch.rpm
[root@localhost soft]# yum -y install mysql80-community-release-el7-3.noarch.rpm
已加载插件:fastestmirror
正在检查 mysql80-community-release-el7-3.noarch.rpm: mysql80-community-release-el7-3.noarch
mysql80-community-release-el7-3.noarch.rpm 将被安装
正在解决依赖关系
--> 正在检查事务
---> 软件包 mysql80-community-release.noarch.0.el7-3 将被 安装
--> 解决依赖关系完成

依赖关系解决

=====================================================================================================================================
 Package                              架构              版本                源                                                  大小
=====================================================================================================================================
正在安装:
 mysql80-community-release            noarch            el7-3               /mysql80-community-release-el7-3.noarch             31 k

事务概要
=====================================================================================================================================
安装  1 软件包

总计:31 k
安装大小:31 k
Downloading packages:
Running transaction check
Running transaction test
Transaction test succeeded
Running transaction
  正在安装    : mysql80-community-release-el7-3.noarch                                                                           1/1
  验证中      : mysql80-community-release-el7-3.noarch                                                                           1/1

已安装:
  mysql80-community-release.noarch 0:el7-3

完毕!
1.4 安装mysql:yum install -y install mysql-community-server
[root@localhost soft]# yum install -y install mysql-community-server
已加载插件:fastestmirror
Loading mirror speeds from cached hostfile
 * base: mirrors.huaweicloud.com
 * extras: mirrors.huaweicloud.com
 * updates: ftp.sjtu.edu.cn
没有可用软件包 install。
正在解决依赖关系
--> 正在检查事务
---> 软件包 mysql-community-server.x86_64.0.8.0.17-1.el7 将被 安装
--> 正在处理依赖关系 mysql-community-common(x86-64) = 8.0.17-1.el7,它被软件包 mysql-community-server-8.0.17-1.el7.x86_64 需要
--> 正在处理依赖关系 mysql-community-client(x86-64) >= 8.0.11,它被软件包 mysql-community-server-8.0.17-1.el7.x86_64 需要
--> 正在处理依赖关系 net-tools,它被软件包 mysql-community-server-8.0.17-1.el7.x86_64 需要
--> 正在检查事务
---> 软件包 mysql-community-client.x86_64.0.8.0.17-1.el7 将被 安装
--> 正在处理依赖关系 mysql-community-libs(x86-64) >= 8.0.11,它被软件包 mysql-community-client-8.0.17-1.el7.x86_64 需要
---> 软件包 mysql-community-common.x86_64.0.8.0.17-1.el7 将被 安装
---> 软件包 net-tools.x86_64.0.2.0-0.24.20131004git.el7 将被 安装
--> 正在检查事务
---> 软件包 mariadb-libs.x86_64.1.5.5.60-1.el7_5 将被 取代
--> 正在处理依赖关系 libmysqlclient.so.18()(64bit),它被软件包 2:postfix-2.10.1-7.el7.x86_64 需要
--> 正在处理依赖关系 libmysqlclient.so.18(libmysqlclient_18)(64bit),它被软件包 2:postfix-2.10.1-7.el7.x86_64 需要
---> 软件包 mysql-community-libs.x86_64.0.8.0.17-1.el7 将被 舍弃
--> 正在检查事务
---> 软件包 mysql-community-libs-compat.x86_64.0.8.0.17-1.el7 将被 舍弃
--> 解决依赖关系完成

依赖关系解决

=====================================================================================================================================
 Package                                 架构               版本                                 源                             大小
=====================================================================================================================================
正在安装:
 mysql-community-libs                    x86_64             8.0.17-1.el7                         mysql80-community             3.0 M
      替换  mariadb-libs.x86_64 1:5.5.60-1.el7_5
 mysql-community-libs-compat             x86_64             8.0.17-1.el7                         mysql80-community             2.1 M
      替换  mariadb-libs.x86_64 1:5.5.60-1.el7_5
 mysql-community-server                  x86_64             8.0.17-1.el7                         mysql80-community             415 M
为依赖而安装:
 mysql-community-client                  x86_64             8.0.17-1.el7                         mysql80-community              32 M
 mysql-community-common                  x86_64             8.0.17-1.el7                         mysql80-community             589 k
 net-tools                               x86_64             2.0-0.24.20131004git.el7             base                          306 k

事务概要
=====================================================================================================================================
安装  3 软件包 (+3 依赖软件包)

总计:453 M
总下载量:447 M
Downloading packages:
Delta RPMs disabled because /usr/bin/applydeltarpm not installed.
警告:/var/cache/yum/x86_64/7/mysql80-community/packages/mysql-community-client-8.0.17-1.el7.x86_64.rpm: 头V3 DSA/SHA1 Signature, 密 钥 ID 5072e1f5: NOKEY
mysql-community-client-8.0.17-1.el7.x86_64.rpm 的公钥尚未安装
(1/2): mysql-community-client-8.0.17-1.el7.x86_64.rpm                                                         |  32 MB  00:02:16
(2/2): mysql-community-server-8.0.17-1.el7.x86_64.rpm                                                         | 415 MB  00:26:00
-------------------------------------------------------------------------------------------------------------------------------------
总计                                                                                                 294 kB/s | 447 MB  00:26:00
从 file:///etc/pki/rpm-gpg/RPM-GPG-KEY-mysql 检索密钥
导入 GPG key 0x5072E1F5:
 用户ID     : "MySQL Release Engineering <mysql-build@oss.oracle.com>"
 指纹       : a4a9 4068 76fc bd3c 4567 70c8 8c71 8d3b 5072 e1f5
 软件包     : mysql80-community-release-el7-3.noarch (installed)
 来自       : /etc/pki/rpm-gpg/RPM-GPG-KEY-mysql
Running transaction check
Running transaction test
Transaction test succeeded
Running transaction
  正在安装    : mysql-community-common-8.0.17-1.el7.x86_64                                                                       1/7
  正在安装    : mysql-community-libs-8.0.17-1.el7.x86_64                                                                         2/7
  正在安装    : mysql-community-client-8.0.17-1.el7.x86_64                                                                       3/7
  正在安装    : net-tools-2.0-0.24.20131004git.el7.x86_64                                                                        4/7
  正在安装    : mysql-community-server-8.0.17-1.el7.x86_64                                                                       5/7
  正在安装    : mysql-community-libs-compat-8.0.17-1.el7.x86_64                                                                  6/7
  正在删除    : 1:mariadb-libs-5.5.60-1.el7_5.x86_64                                                                             7/7
  验证中      : mysql-community-libs-8.0.17-1.el7.x86_64                                                                         1/7
  验证中      : net-tools-2.0-0.24.20131004git.el7.x86_64                                                                        2/7
  验证中      : mysql-community-server-8.0.17-1.el7.x86_64                                                                       3/7
  验证中      : mysql-community-common-8.0.17-1.el7.x86_64                                                                       4/7
  验证中      : mysql-community-client-8.0.17-1.el7.x86_64                                                                       5/7
  验证中      : mysql-community-libs-compat-8.0.17-1.el7.x86_64                                                                  6/7
  验证中      : 1:mariadb-libs-5.5.60-1.el7_5.x86_64                                                                             7/7

已安装:
  mysql-community-libs.x86_64 0:8.0.17-1.el7                     mysql-community-libs-compat.x86_64 0:8.0.17-1.el7
  mysql-community-server.x86_64 0:8.0.17-1.el7

作为依赖被安装:
  mysql-community-client.x86_64 0:8.0.17-1.el7                      mysql-community-common.x86_64 0:8.0.17-1.el7
  net-tools.x86_64 0:2.0-0.24.20131004git.el7

替代:
  mariadb-libs.x86_64 1:5.5.60-1.el7_5

完毕!
1.5 启动mysql:
[root@localhost soft]# systemctl start mysqld.service
[root@localhost soft]# systemctl status mysqld.service
● mysqld.service - MySQL Server
   Loaded: loaded (/usr/lib/systemd/system/mysqld.service; enabled; vendor preset: disabled)
   Active: active (running) since 一 2019-08-26 18:43:48 CST; 28s ago
     Docs: man:mysqld(8)
           http://dev.mysql.com/doc/refman/en/using-systemd.html
  Process: 15909 ExecStartPre=/usr/bin/mysqld_pre_systemd (code=exited, status=0/SUCCESS)
 Main PID: 15997 (mysqld)
   Status: "Server is operational"
   CGroup: /system.slice/mysqld.service
           └─15997 /usr/sbin/mysqld

8月 26 18:43:28 localhost.localdomain systemd[1]: Starting MySQL Server...
8月 26 18:43:48 localhost.localdomain systemd[1]: Started MySQL Server.
1.6 查看mysql默认安装密码:
[root@localhost soft]# grep "password" /var/log/mysqld.log
2019-08-26T10:43:37.022246Z 5 [Note] [MY-010454] [Server] A temporary password is generated for root@localhost: 2Qyo)zfespVs
1.7 使用默认密码登录mysql:
root@localhost soft]# mysql -uroot -p
Enter password:
Welcome to the MySQL monitor.  Commands end with ; or \g.
Your MySQL connection id is 8
Server version: 8.0.17

Copyright (c) 2000, 2019, Oracle and/or its affiliates. All rights reserved.

Oracle is a registered trademark of Oracle Corporation and/or its
affiliates. Other names may be trademarks of their respective
owners.

Type 'help;' or '\h' for help. Type '\c' to clear the current input statement.

mysql>
1.8 修改root密码:
mysql> ALTER USER 'root'@'localhost' IDENTIFIED BY 'test(123456)TEST';
Query OK, 0 rows affected (0.03 sec)
修改密码后现在就可以正常的去操作了。
二、基于mysql安装包安装
2.1 下载mysql安装包
下载地址:https://dev.mysql.com/downloads/mysql/

网盘下载地址:https://pan.baidu.com/s/1bGBriTUB5Iafq1_9uhclYA
2.2 将mysql-8.0.17-linux-glibc2.12-x86_64.tar.xz上传到linux目录“/usr/local”下
2.3 解压这个安装包
tar -Jxf mysql-8.0.17-linux-glibc2.12-x86_64.tar.xz
[root@localhost local]# tar -Jxf mysql-8.0.17-linux-glibc2.12-x86_64.tar.xz
[root@localhost local]#
解压后在“/usr/local”下面将会多一个目录“mysql-8.0.17-linux-glibc2.12-x86_64”
将这个目录重命名为mysql:mv mysql-8.0.17-linux-glibc2.12-x86_64 mysql
[root@localhost local]# mv mysql-8.0.17-linux-glibc2.12-x86_64 mysql
2.4 创建mysql用户组及用户,并给mysql用户设置密码
[root@localhost local]# groupadd mysql
[root@localhost local]# useradd -r -g mysql mysql
[root@localhost mysql]# passwd mysql
更改用户 mysql 的密码 。
新的 密码:123qweGHJ
重新输入新的 密码:123qweGHJ
passwd:所有的身份验证令牌已经成功更新。
2.5 修改mysql配置文件:(/etc/my.cnf)
首先解释下:my.cnf文件最初就存在,这是因为centos7中安装了mariadb
最终修改的结果如下:
# For advice on how to change settings please see
# http://dev.mysql.com/doc/refman/5.6/en/server-configuration-defaults.html
# *** DO NOT EDIT THIS FILE. It's a template which will be copied to the
# *** default location during install, and will be replaced if you
# *** upgrade to a newer version of MySQL.

[mysqld]

# Remove leading # and set to the amount of RAM for the most important data
# cache in MySQL. Start at 70% of total RAM for dedicated server, else 10%.
# innodb_buffer_pool_size = 128M

# Remove leading # to turn on a very important data integrity option: logging
# changes to the binary log between backups.
# log_bin

# These are commonly set, remove the # and set as required.
basedir = /usr/local/mysql
datadir = /usr/local/mysql/data
port = 3306
# server_id = .....
socket = /tmp/mysql.sock
character-set-server = utf8mb4
collation_server = utf8mb4_general_ci
skip-name-resolve
log-error = /usr/local/mysql/data/error.log
pid-file = /usr/local/mysql/data/mysql.pid
lower_case_table_names=1

# Remove leading # to set options mainly useful for reporting servers.
# The server defaults are faster for transactions and fast SELECTs.
# Adjust sizes as needed, experiment to find the optimal values.
# join_buffer_size = 128M
# sort_buffer_size = 2M
# read_rnd_buffer_size = 2M

sql_mode=NO_ENGINE_SUBSTITUTION,STRICT_TRANS_TABLES
配置文件中注意几点:
character-set-server = utf8mb4:表示mysql服务器级别默认的字符集编码,最好设置为utf8mb4;lower_case_table_names=1:表示mysql中将表名一律转为小写;(其实取值有0、1或2,其中2是最理想的状态,但是这个配置在window、linux、macos下表现的不一致,所以还是取1吧,只不过取1后,所有的表名都强制小写了。)
2.6 在mysql目录下新建data文件夹用于存放数据库文件
[root@localhost mysql]# mkdir data
2.7 在mysql当前目录下设定目录的访问权限(注意后面的小点,表示当前目录)
[root@localhost mysql]# chown -R mysql .
[root@localhost mysql]# chgrp -R mysql .
[root@localhost mysql]# ll
总用量 452
drwxr-xr-x.  2 mysql mysql   4096 6月  27 06:35 bin
drwxr-xr-x.  2 mysql mysql      6 8月  26 23:01 data
drwxr-xr-x.  2 mysql mysql     86 6月  27 06:35 docs
drwxr-xr-x.  3 mysql mysql    261 6月  27 06:35 include
drwxr-xr-x.  6 mysql mysql   4096 6月  27 06:35 lib
-rw-r--r--.  1 mysql mysql 336955 6月  25 18:23 LICENSE
-rw-r--r--.  1 mysql mysql 101805 6月  25 18:23 LICENSE.router
drwxr-xr-x.  4 mysql mysql     30 6月  27 06:35 man
-rw-r--r--.  1 mysql mysql    687 6月  25 18:23 README
-rw-r--r--.  1 mysql mysql    700 6月  25 18:23 README.router
drwxrwxr-x.  2 mysql mysql      6 6月  27 06:35 run
drwxr-xr-x. 28 mysql mysql   4096 6月  27 06:35 share
drwxr-xr-x.  2 mysql mysql     77 6月  27 06:35 support-files
drwxr-xr-x.  3 mysql mysql     17 6月  27 06:35 var
2.8 初始化数据库
[root@localhost mysql]# ./bin/mysqld --initialize --user=mysql --basedir=/usr/local/mysql --datadir=/usr/local/mysql/data --lower_case_table_names=1
注意:执行后在/usr/local/mysql/data/error.log文件中找到下面一行:
这个密码就是root的初始密码。
.
附:
如果因为某种原因(比如:将lower_case_table_names从默认的0改成1),你想要重新初始化mysql,那么直接清空这个data文件夹(咳咳,注意备份数据!!!)重新运行这个初始化命令即可。

2.9 启动mysql:./support-files/mysql.server start
[root@localhost mysql]# ./support-files/mysql.server start
Starting MySQL............ SUCCESS!
[root@localhost mysql]# ps -aux|grep mysql
root       7690  0.2  0.1 113312  1644 pts/1    S    18:08   0:00 /bin/sh /usr/local/mysql/bin/mysqld_safe --datadir=/usr/local/mysq/data --pid-file=/usr/local/mysql/data/mysql.pid
mysql      7893 20.4 37.6 1355728 375092 pts/1  Sl   18:08   0:04 /usr/local/mysql/bin/mysqld --basedir=/usr/local/mysql --datadir=/usr/local/mysql/data --plugin-dir=/usr/local/mysql/lib/plugin --user=mysql --log-error=/usr/local/mysql/data/error.log --pid-file=/usr/local/mysql/data/mysql.pid --socket=/tmp/mysql.sock --port=3306
root       7948  0.0  0.0 112724   988 pts/1    S+   18:08   0:00 grep --color=auto mysql
2.10 登录mysql,修改root用户密码:
./bin/mysql -uroot -p
alter user 'root'@'localhost' identified by '123456';
注意使用上面生成的密码:tklkPTcwb6?l
修改成功后退出登录exit
[root@localhost mysql]# ./bin/mysql -uroot -p
Enter password:
Welcome to the MySQL monitor.  Commands end with ; or \g.
Your MySQL connection id is 10
Server version: 8.0.17

Copyright (c) 2000, 2019, Oracle and/or its affiliates. All rights reserved.

Oracle is a registered trademark of Oracle Corporation and/or its
affiliates. Other names may be trademarks of their respective
owners.

Type 'help;' or '\h' for help. Type '\c' to clear the current input statement.

mysql> use mysql
ERROR 1820 (HY000): You must reset your password using ALTER USER statement before executing this statement.
mysql> alter user 'root'@'localhost' identified by '123456';
Query OK, 0 rows affected (0.03 sec)

mysql>
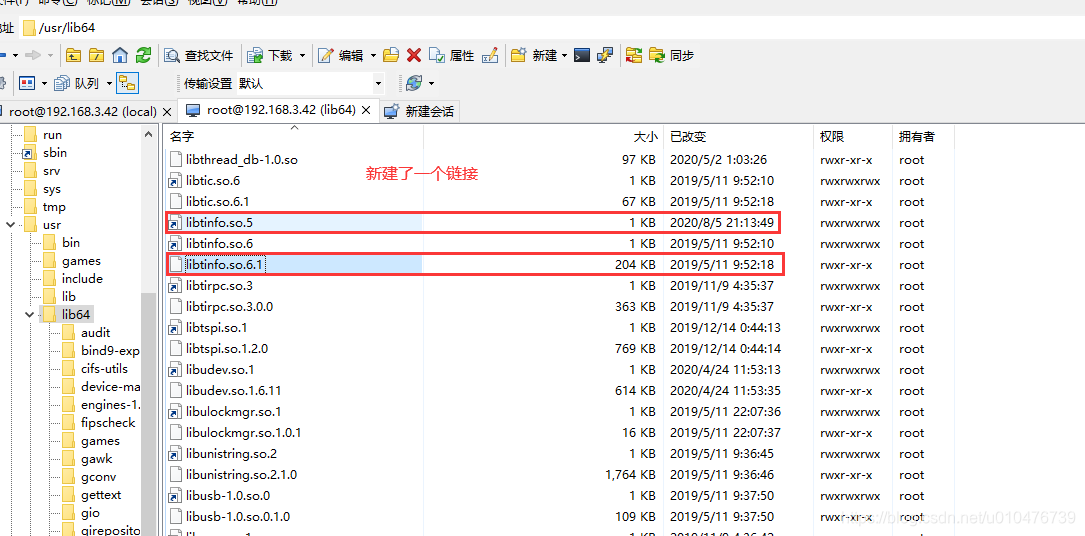
注意:后来,我用centos8安装这个版本的MySQL时,走到这一步,提示:
[root@localhost mysql]# ./bin/mysql -uroot -p
./bin/mysql: error while loading shared libraries: libtinfo.so.5: cannot open shared object file: No such file or directory
解决办法:添加个连接ln -s /usr/lib64/libtinfo.so.6.1 /usr/lib64/libtinfo.so.5就可以了。
其实,可以观察以下目录:
2.11 配置mysql允许远程访问:
创建远程登录对象:CREATE USER 'root'@'%' IDENTIFIED BY '123456';
授权远程登录:grant all privileges on *.* to 'root'@'%' with grant option;
强制刷新:flush privileges;
mysql> CREATE USER 'root'@'%' IDENTIFIED BY '123456';
Query OK, 0 rows affected (0.01 sec)

mysql> grant all privileges on *.* to 'root'@'%' with grant option;
Query OK, 0 rows affected (0.00 sec)

mysql> flush privileges;
Query OK, 0 rows affected (0.00 sec)
2.12 mysql的启动、停止、重启命令
启动命令: ./support-files/mysql.server start
重启命令:./support-files/mysql.server restart
停止命令:./support-files/mysql.server stop
[root@localhost mysql]# pwd
/usr/local/mysql
[root@localhost mysql]# ./support-files/mysql.server start
Starting MySQL.. SUCCESS!
[root@localhost mysql]# ./support-files/mysql.server restart
Shutting down MySQL.. SUCCESS!
Starting MySQL.. SUCCESS!
[root@localhost mysql]# ./support-files/mysql.server stop
Shutting down MySQL.. SUCCESS!
客户端连接:./bin/mysql -hlocalhost -P3306 -uroot -p
,简写形式:./bin/mysql -uroot -p
2.13 mysql8的用户密码问题
说明: 由于mysql8的密码采用了“caching_sha2_password”模式,而老版的是“mysql_native_password”模式,所以造成很多客户端连接不上。
解决方案: 1. 升级客户端 2.修改mysql8的密码模式
如何修改mysql8的密码模式:
- 在my.cnf 文件中添加:default_authentication_plugin=mysql_native_password 然后重启mysql,之后新建的用户都是“mysql_native_password”模式的
- 对于安装时已经存在的用户(比如:root)或想给单个用户设定密码模式的可以采用如下命令:
mysql> alter user 'root'@'%' identified with mysql_native_password by '123456';
Query OK, 0 rows affected (0.00 sec)

mysql> flush privileges;
Query OK, 0 rows affected (0.01 sec)


 953
953

 被折叠的 条评论
为什么被折叠?
被折叠的 条评论
为什么被折叠?
 到【灌水乐园】发言


