


引言
在现代GUI应用程序开发中,定时器是一个不可或缺的组件。Qt Quick提供了Timer元素,使开发者能够在QML应用中轻松实现基于时间的功能,如动画、延迟执行、周期执行等。本文将通过实际案例介绍QML中Timer的使用方法及其核心特性,帮助开发者更好地掌握这一重要工具。
相关阅读
- Qt官方文档:QML Timer类型参考
Timer基本属性
根据Qt 6官方文档,QML Timer组件有以下核心属性:
| 属性名 | 类型 | 默认值 | 说明 |
|---|---|---|---|
| interval | int | 1000 | 定时器触发的时间间隔(毫秒) |
| repeat | bool | false | 是否重复触发 |
| running | bool | false | 定时器是否正在运行 |
| triggeredOnStart | bool | false | 启动后是否立即触发一次 |
| onTriggered | signal | - | 定时器触发时的信号处理器 |
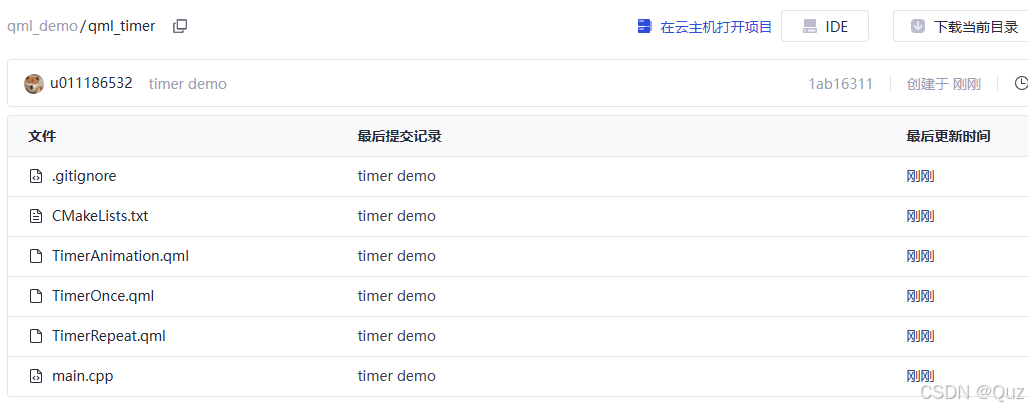
项目结构
下面是本示例项目的结构图:
这个演示项目包含三个QML示例,分别展示了定时器的不同用法:
TimerOnce.qml: 单次触发定时器TimerRepeat.qml: 重复触发定时器TimerAnimation.qml: 使用定时器实现动画效果
示例说明
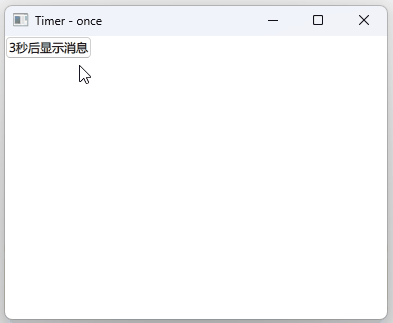
示例1:单次触发定时器
import QtQuick
import QtQuick.Controls

Window {
    width: 640
    height: 480
    visible: true
    title: qsTr("Timer - once")

    Button {
        text: "3秒后显示消息"
        onClicked: {
            timer.start()
            message.text = "计时开始..."
        }
    }

    Label {
        id: message
        anchors.centerIn: parent
    }

    Timer {
        id: timer
        interval: 3000 // 3秒
        onTriggered: message.text = "时间到!"
    }
}
代码解析:
- 创建了一个简单的窗口,包含一个按钮和一个标签
- 定义了一个
Timer对象,设置间隔为3000毫秒(3秒) - 当按钮点击时,启动定时器,并设置标签文本为"计时开始…"
- 3秒后,定时器触发
onTriggered信号,将标签文本更改为"时间到!" - 由于未设置
repeat: true,定时器只会触发一次
运行效果:
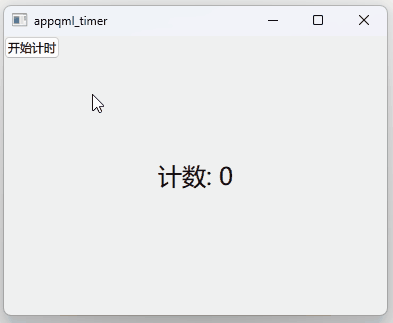
示例2:重复触发定时器
import QtQuick 2.15
import QtQuick.Controls 2.15

ApplicationWindow {
    visible: true
    width: 400
    height: 300

    property int count: 0

    Button {
        text: timer.running ? "停止计时" : "开始计时"
        onClicked: {
            if (timer.running) {
                timer.stop()
            } else {
                count = 0
                timer.start()
            }
        }
    }

    Label {
        anchors.centerIn: parent
        text: "计数: " + count
        font.pixelSize: 24
    }

    Timer {
        id: timer
        interval: 1000 // 1秒
        repeat: true // 设置为周期性触发
        onTriggered: count++
    }
}
代码解析:
- 创建了一个应用窗口,定义了一个整数属性
count用于计数 - 设置了一个按钮,用于开始/停止定时器
- 使用
Timer对象,设置间隔为1000毫秒(1秒) - 关键是设置了
repeat: true,使定时器重复触发 - 每次定时器触发时,
count值增加1 - 按钮文本根据定时器状态动态变化
- 点击按钮时,如果定时器正在运行则停止,否则重置计数并启动定时器
运行效果:
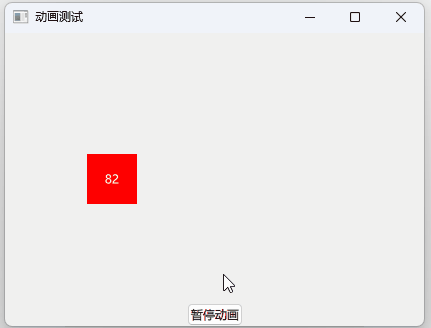
示例3:使用定时器实现动画
import QtQuick
import QtQuick.Controls

ApplicationWindow {
    visible: true
    width: 600
    height: 400
    title: "动画测试"

    Rectangle {
        id: box
        width: 50
        height: 50
        color: "red"
        x: 0
        y: parent.height/2 - height/2

        Timer {
            id: moveTimer
            interval: 16 // 约60fps
            repeat: true
            running: true
            onTriggered: {
                box.x += 2
                if (box.x > box.parent.width - box.width) {
                    box.x = 0
                }
            }
        }

        Text {
            anchors.centerIn: parent
            text: Math.round(parent.x)
            color: "white"
        }
    }

    Button {
        text: moveTimer.running ? "暂停动画" : "执行动画"
        onClicked: {
            if (moveTimer.running) {
                moveTimer.stop()
            } else {
                moveTimer.start()
            }
        }
        anchors.bottom: parent.bottom
        anchors.horizontalCenter: parent.horizontalCenter
    }
}
代码解析:
- 创建了一个应用窗口,包含一个红色方块和一个按钮
- 定义了一个
Timer对象,设置较短的间隔(16毫秒,约60fps)以实现流畅动画 - 设置
repeat: true和running: true,使定时器在应用启动时立即开始重复运行 - 每次定时器触发时,红色方块向右移动2个像素
- 当方块移出窗口右边界时,重置到左侧
- 方块中央显示其x坐标
- 按钮可以控制动画的暂停和继续
运行效果:
主函数
#include <QGuiApplication>
#include <QQmlApplicationEngine>

int main(int argc, char *argv[])
{
    QGuiApplication app(argc, argv);

    QQmlApplicationEngine engine;
    QObject::connect(
        &engine,
        &QQmlApplicationEngine::objectCreationFailed,
        &app,
        []() { QCoreApplication::exit(-1); },
        Qt::QueuedConnection);
    engine.loadFromModule("qml_timer", "TimerAnimation");

    return app.exec();
}
这个main.cpp文件是Qt QML应用程序的入口点:
- 创建了一个Qt GUI应用程序实例,设置QML引擎并连接错误处理信号
- 加载
TimerAnimation.qml作为主界面
注意:在代码中可以看到加载的是TimerAnimation.qml,如果要运行其他示例,需要修改此行代码,例如改为engine.loadFromModule("qml_timer", "TimerOnce")或engine.loadFromModule("qml_timer", "TimerRepeat")。
总结
本文通过三个示例详细介绍了QML中Timer组件的不同应用场景:
- 单次触发定时器:适用于延迟执行某个操作,如显示消息、执行延迟加载等
- 重复触发定时器:适用于需要定期执行的任务,如计数器、轮询等
- 基于定时器的动画:虽然QML提供了专门的动画系统,但在某些特殊情况下,使用Timer也可以实现自定义动画效果
工程下载
完整代码可在以下链接获取:GitCode QML Timer示例


 171
171

 被折叠的 条评论
为什么被折叠?
被折叠的 条评论
为什么被折叠?
 到【灌水乐园】发言


