1. Alert 基本的使用
1.1 实现
/// 提示框
struct AlertBootcamp: View {
    @State var showAlert: Bool = false
    @State var alertType: MyAlerts? = nil
    @State var alertTitle: String = ""
    @State var alertMessage: String = ""
    @State var backgroundColor: Color = Color.yellow

    enum MyAlerts{
        case sucess
        case error
    }

    var body: some View {
        testView1
        //testView2
        //testView3
    }

    // 方式一 基本提示框操作
    var testView1: some View{
        ZStack {
            // 背景颜色
            backgroundColor.ignoresSafeArea()
            // 按钮点击
            Button("Click here") {
                showAlert.toggle()
            }
            //Presented 展现
            .alert(isPresented: $showAlert) {
                getAlert1()
            }
        }
    }

    //获取提示框
    func getAlert1() -> Alert{
        //Alert(title: Text("There was an error"))
        return Alert(
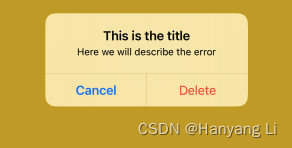
            title: Text("This is the title"),
            message: Text("Here we will describe the error"),
            //Alert.Button.destructive(Text("Delete")
            primaryButton: .destructive(Text("Delete"), action: {
                backgroundColor = .red
            }),
            secondaryButton: .cancel())
    }
}
1.2 效果图:

2. Alert 提示框修改其内容
2.1 实现
// 方式二 提示框修改其内容
var testView2: some View{
    ZStack {
        // 背景颜色
        backgroundColor.ignoresSafeArea()
        // 按钮点击
        VStack {
            Button("Button 1") {
                alertTitle = "Error uploading video"
                alertMessage = "The video could not be uploaded"
                showAlert.toggle()
            }
            .padding()

            Button("Button 2") {
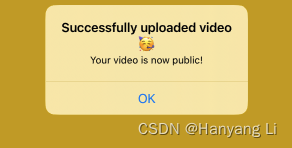
                alertTitle = "Successfully uploaded video 🥳"
                alertMessage = "Your video is now public!"
                showAlert.toggle()
            }
        }
        .alert(isPresented: $showAlert, content: getAlert2)
    }
}

// 获取提示框
func getAlert2() -> Alert{
    return Alert(
        title: Text(alertTitle),
        message: Text(alertMessage),
        dismissButton: .default(Text("OK")))
}
2.2 效果图:

3. Alert 以枚举的方式显示
3.1 实现
// 方式三,以枚举的方式显示提示框
var testView3: some View{
    ZStack {
        // 背景颜色
        backgroundColor.ignoresSafeArea()
        // 按钮点击
        VStack {
            Button("Button 1") {
                alertType = .error
                showAlert.toggle()
            }
            .padding()
            Button("Button 2") {
                alertType = .sucess
                showAlert.toggle()
            }
        }
        .alert(isPresented: $showAlert, content: getAlert3)
    }
}

func getAlert3() -> Alert{
    switch alertType{
    case .error:
        return Alert(title: Text("There was an error!"))
    case .sucess:
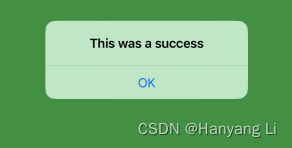
        return Alert(title: Text("This was a success"), message: nil, dismissButton: .default(Text("OK"), action: {
            backgroundColor = .green
        }))
    default:
        return Alert(title: Text("Error"))
    }
}
3.2 效果图:


 9万+
9万+


 被折叠的 条评论
为什么被折叠?


