


一、本地文件配置
Springboot配置文件加载原理及流程【源码分析】_springboot加载配置文件源码-CSDN博客
1、加载流程:
SpringApplication.run(..) -> new SpringApplication(primarySources).run(args) ->初始化 ->#prepareEnvironment -> BootstrapApplicationListener和ConfigFileApplicationListener
2、new SpringApplication(..)加载META-INF/spring.factories中配置的initializers和Listener
public SpringApplication(ResourceLoader resourceLoader, Class<?>... primarySources) {
    ...
    setInitializers((Collection) getSpringFactoriesInstances(ApplicationContextInitializer.class));
    setListeners((Collection) getSpringFactoriesInstances(ApplicationListener.class));
    ...
}
3、#prepareEnvironment
private ConfigurableEnvironment prepareEnvironment(SpringApplicationRunListeners listeners,
       DefaultBootstrapContext bootstrapContext, ApplicationArguments applicationArguments) {
    // 1、创建environment
    ConfigurableEnvironment environment = getOrCreateEnvironment();
    configureEnvironment(environment, applicationArguments.getSourceArgs());
    ConfigurationPropertySources.attach(environment);

    //2、引入jar包类路径下META-INF/spring.factories文件中配置的监听器
    listeners.environmentPrepared(bootstrapContext, environment);
    DefaultPropertiesPropertySource.moveToEnd(environment);
    Assert.state(!environment.containsProperty("spring.main.environment-prefix"),
          "Environment prefix cannot be set via properties.");
    //3、加载environment 注入IOC容器中
    bindToSpringApplication(environment);
    if (!this.isCustomEnvironment) {
       EnvironmentConverter environmentConverter = new EnvironmentConverter(getClassLoader());
       environment = environmentConverter.convertEnvironmentIfNecessary(environment, deduceEnvironmentClass());
    }
    ConfigurationPropertySources.attach(environment);
    return environment;
}
3.1、listeners.environmentPrepared(bootstrapContext, environment)
void environmentPrepared(ConfigurableBootstrapContext bootstrapContext, ConfigurableEnvironment environment) {
    doWithListeners("spring.boot.application.environment-prepared",
          (listener) -> listener.environmentPrepared(bootstrapContext, environment));
}

@Override
public void environmentPrepared(ConfigurableBootstrapContext bootstrapContext,
       ConfigurableEnvironment environment) {
    this.initialMulticaster.multicastEvent(
          new ApplicationEnvironmentPreparedEvent(bootstrapContext, this.application, this.args, environment));
}

@Override
public void multicastEvent(ApplicationEvent event) {
    multicastEvent(event, resolveDefaultEventType(event));
}

@Override
public void multicastEvent(final ApplicationEvent event, @Nullable ResolvableType eventType) {
    ResolvableType type = (eventType != null ? eventType : resolveDefaultEventType(event));
    Executor executor = getTaskExecutor();
    for (ApplicationListener<?> listener : getApplicationListeners(event, type)) {
       if (executor != null) {
          executor.execute(() -> invokeListener(listener, event));
       }
       else {
          invokeListener(listener, event);
       }
    }
}
4、BootstrapApplicationListener
5、ConfigFileApplicationListener
@Override
public void onApplicationEvent(ApplicationEvent event) {
    if (event instanceof ApplicationEnvironmentPreparedEvent) {
       onApplicationEnvironmentPreparedEvent(
             (ApplicationEnvironmentPreparedEvent) event);
    }
    if (event instanceof ApplicationPreparedEvent) {
       onApplicationPreparedEvent(event);
    }
}

private void onApplicationEnvironmentPreparedEvent(
       ApplicationEnvironmentPreparedEvent event) {
    List<EnvironmentPostProcessor> postProcessors = loadPostProcessors();
    postProcessors.add(this);
    AnnotationAwareOrderComparator.sort(postProcessors);
    for (EnvironmentPostProcessor postProcessor : postProcessors) {
       postProcessor.postProcessEnvironment(event.getEnvironment(),
             event.getSpringApplication());
    }
}

@Override
public void postProcessEnvironment(ConfigurableEnvironment environment,
       SpringApplication application) {
    addPropertySources(environment, application.getResourceLoader());
    configureIgnoreBeanInfo(environment);
    bindToSpringApplication(environment, application);
}
5.1、ConfigFileApplicationListener#addPropertySources()将配置文件解析并加载到environment中
protected void addPropertySources(ConfigurableEnvironment environment,
       ResourceLoader resourceLoader) {
    RandomValuePropertySource.addToEnvironment(environment);
    try {
       new Loader(environment, resourceLoader).load();
    }
    catch (IOException ex) {
       throw new IllegalStateException("Unable to load configuration files", ex);
    }
}
(1)、ConfigFileApplicationListener#Loader#load()

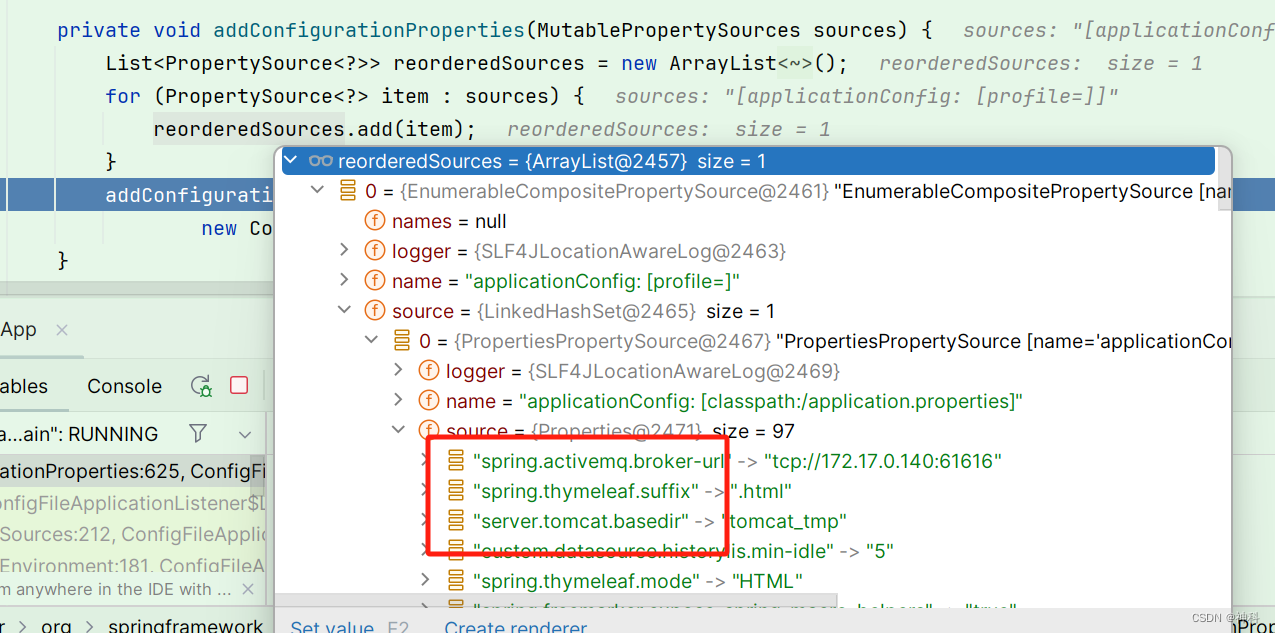
(2)、ConfigFileApplicationListener#Loader#addConfigurationProperties
二、http请求配置
1、发布配置:curl -X POST "http://127.0.0.1:8848/nacos/v1/cs/configs?dataId=dataid&group=test&content=HelloWorld"
2、获取配置:curl -X GET "http://127.0.0.1:8848/nacos/v1/cs/configs?dataId=dataid&group=test"
三、sdk获取配置
1、依赖
<dependency>
    <groupId>com.alibaba.nacos</groupId>
    <artifactId>nacos-client</artifactId>
</dependency>
2、代码
public class App {
    public static void main(String[] args) throws NacosException, IOException {
        Properties properties = new Properties();
        properties.put(PropertyKeyConst.SERVER_ADDR,"localhost");
        ConfigService configService = NacosFactory.createConfigService(properties);

        //添加监听
        configService.addListener("nacos.cfg.dataId", "test", new Listener() {
            @Override
            public Executor getExecutor() {
                return null;
            }
            @Override
            public void receiveConfigInfo(String configInfo) {
                System.out.println("接收消息:"+configInfo);
            }
        });

        //发布配置
        configService.publishConfig("nacos.cfg.dataId", "test","127.0.0.1:6379");

        //获取配置
        System.out.println(configService.getConfig("nacos.cfg.dataId", "test",5000));

        System.in.read();
    }
}
四、nacos获取配置
1、引入依赖
<dependency>
    <groupId>com.alibaba.cloud</groupId>
    <artifactId>spring-cloud-starter-alibaba-nacos-config</artifactId>
</dependency>

<dependency>
    <groupId>org.springframework.cloud</groupId>
    <artifactId>spring-cloud-starter-bootstrap</artifactId>
</dependency>
2、创建bootstrap.yaml文件,并配置
spring:
cloud:
nacos:
server-addr: localhost:8848
config:
file-extension: yaml
application:
name: config
profiles:
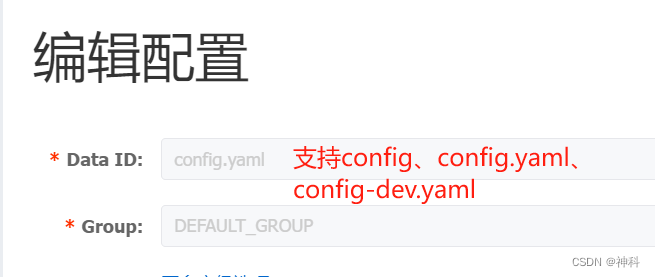
active: dev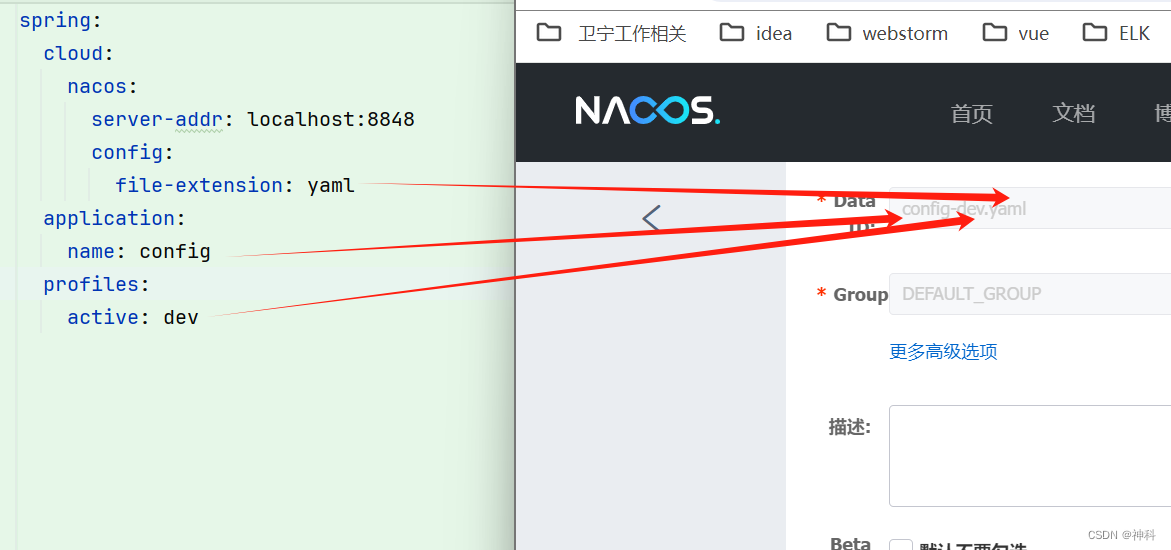 3、接口获取
public class ConfigController {

    @Value("${value:}")
    private String value;

    /*
    * 1、nacos配置获取
    * */
    @RequestMapping("/nacosvalue")
    public String nacosConfigValue(){
        return "value:"+value;
    }

    @Resource
    private Environment environment;
    /*
    * 2、环境变量获取
    * */
    @RequestMapping("/envvalue")
    public String envConfigValue(){
        return "value:"+this.environment.getProperty("value");
    }
}
4、nacos config修改值 @value没有实时更新
(1)、注解增加@RefreshScope
@RestController
@RequestMapping("/event")
@RefreshScope
public class ConfigController {
(2)、共享配置额外增加 refresh: true
spring:
  cloud:
    nacos:
      # nacos作为配置中心的地址
      server-addr: localhost:8848
      config:
        file-extension: yaml
        shared-configs[0]: # mysql.yaml
          data-id: mysql.yaml
          refresh: true
        shared-configs[1]: # redis.yaml
          data-id: redis.yaml
          refresh: true
  application:
    name: config
  profiles:
    active: dev
5、通用服务nacos 配置中心设置

6、不同服务公共配置:例如增加mysql和redis
(1)、nacos配置

(2)、服务启动日志
Located property source: [BootstrapPropertySource {name='bootstrapProperties-config-dev.yaml,DEFAULT_GROUP'},
BootstrapPropertySource {name='bootstrapProperties-config.yaml,DEFAULT_GROUP'},
BootstrapPropertySource {name='bootstrapProperties-config,DEFAULT_GROUP'},
BootstrapPropertySource {name='bootstrapProperties-redis.yaml,DEFAULT_GROUP'},
BootstrapPropertySource {name='bootstrapProperties-mysql.yaml,DEFAULT_GROUP'}]
(3)、bootstrap.yaml配置\
spring:
  cloud:
    nacos:
      # nacos作为配置中心的地址
      server-addr: localhost:8848
      config:
        file-extension: yaml
        shared-configs[0]: # mysql.yaml
          data-id: mysql.yaml
        shared-configs[1]: # redis.yaml
          data-id: redis.yaml
  application:
    name: config
  profiles:
    active: dev


 7万+
7万+


 被折叠的 条评论
为什么被折叠?
被折叠的 条评论
为什么被折叠?
 到【灌水乐园】发言


