


k8s初始化过程解析
[root@k8s-master ~]# kubeadm init
–apiserver-advertise-address=10.10.10.100
–image-repository registry.aliyuncs.com/google_containers
–kubernetes-version v1.25.0
–service-cidr=10.1.0.0/16
–pod-network-cidr=10.2.0.0/16
–cri-socket /var/run/cri-dockerd.sock
–service-dns-domain=cluster.local
–ignore-preflight-errors=all
W0219 22:03:38.471584 10600 initconfiguration.go:119] Usage of CRI endpoints without URL scheme is deprecated and can cause kubelet errors in the future. Automatically prepending scheme “unix” to the “criSocket” with value “/var/run/cri-dockerd.sock”. Please update your configuration!
[init] Using Kubernetes version: v1.25.0
1、[preflight] 环境检查和拉取镜像 kubeadm config images pull
[preflight] Running pre-flight checks
[preflight] Pulling images required for setting up a Kubernetes cluster
[preflight] This might take a minute or two, depending on the speed of your internet connection
[preflight] You can also perform this action in beforehand using ‘kubeadm config images pull’
2、[cert] 生成k8s证书和etcd证书。
[certs] Using certificateDir folder “/etc/kubernetes/pki”
[certs] Generating “ca” certificate and key
[certs] Generating “apiserver” certificate and key
[certs] apiserver serving cert is signed for DNS names [k8s-master kubernetes kubernetes.default kubernetes.default.svc kubernetes.default.svc.cluster.local] and IPs [10.1.0.1 10.10.10.100]
[certs] Generating “apiserver-kubelet-client” certificate and key
[certs] Generating “front-proxy-ca” certificate and key
[certs] Generating “front-proxy-client” certificate and key
[certs] Generating “etcd/ca” certificate and key
[certs] Generating “etcd/server” certificate and key
[certs] etcd/server serving cert is signed for DNS names [k8s-master localhost] and IPs [10.10.10.100 127.0.0.1 ::1]
[certs] Generating “etcd/peer” certificate and key
[certs] etcd/peer serving cert is signed for DNS names [k8s-master localhost] and IPs [10.10.10.100 127.0.0.1 ::1]
[certs] Generating “etcd/healthcheck-client” certificate and key
[certs] Generating “apiserver-etcd-client” certificate and key
[certs] Generating “sa” key and public key
3、[kubeconfig] 生成kubeconfig文件,可以理解为认证文件。链接apiserver认证
[kubeconfig] Using kubeconfig folder “/etc/kubernetes”
[kubeconfig] Writing “admin.conf” kubeconfig file
[kubeconfig] Writing “kubelet.conf” kubeconfig file
[kubeconfig] Writing “controller-manager.conf” kubeconfig file
[kubeconfig] Writing “scheduler.conf” kubeconfig file
[kubelet-start] Writing kubelet environment file with flags to file “/var/lib/kubelet/kubeadm-flags.env”
4、[kubelet-start] 生成kubelet配置文件,启动kubelet
[kubelet-start] Writing kubelet configuration to file “/var/lib/kubelet/config.yaml”
[kubelet-start] Starting the kubelet
5、[control-plane] 部署管理节点组件,用镜像启动容器,可以使用命令查看: kubectl get pods -n kube-system
[control-plane] Using manifest folder “/etc/kubernetes/manifests”
[control-plane] Creating static Pod manifest for “kube-apiserver”
[control-plane] Creating static Pod manifest for “kube-controller-manager”
[control-plane] Creating static Pod manifest for “kube-scheduler”
6、[etcd] 部署etcd数据库,用镜像启动容器
[etcd] Creating static Pod manifest for local etcd in “/etc/kubernetes/manifests”
7、[wait-control-plane] 等待管理面板
[wait-control-plane] Waiting for the kubelet to boot up the control plane as static Pods from directory “/etc/kubernetes/manifests”. This can take up to 4m0s
8、[apiclient] 检测所有控制面板状态
[apiclient] All control plane components are healthy after 13.004448 seconds
9、[upload-config] 上传配置文件到k8s集群中
[upload-config] Storing the configuration used in ConfigMap “kubeadm-config” in the “kube-system” Namespace
10、[kubelet] 配置文件存储到master节点中
[kubelet] Creating a ConfigMap “kubelet-config” in namespace kube-system with the configuration for the kubelets in the cluster
11、[upload-certs] 上传证书存储到k8s集群中
[upload-certs] Skipping phase. Please see --upload-certs
12、[mark-control-plane] 给管理节点添加一个标签:[node-role.kubernetes.io/master(deprecated) node-role.kubernetes.io/control-plane node.kubernetes.io/exclude-from-external-load-balancers],并且添加一个污点:[node-role.kubernetes.io/master:NoSchedule]
[mark-control-plane] Marking the node k8s-master as control-plane by adding the labels: [node-role.kubernetes.io/control-plane node.kubernetes.io/exclude-from-external-load-balancers]
[mark-control-plane] Marking the node k8s-master as control-plane by adding the taints [node-role.kubernetes.io/control-plane:NoSchedule]
13、[bootstrap-token] 自动为每个节点颁发证书
[bootstrap-token] Using token: hjdyqz.byzmutnkmn448i5z
[bootstrap-token] Configuring bootstrap tokens, cluster-info ConfigMap, RBAC Roles
[bootstrap-token] Configured RBAC rules to allow Node Bootstrap tokens to get nodes
[bootstrap-token] Configured RBAC rules to allow Node Bootstrap tokens to post CSRs in order for nodes to get long term certificate credentials
[bootstrap-token] Configured RBAC rules to allow the csrapprover controller automatically approve CSRs from a Node Bootstrap Token
[bootstrap-token] Configured RBAC rules to allow certificate rotation for all node client certificates in the cluster
[bootstrap-token] Creating the “cluster-info” ConfigMap in the “kube-public” namespace
14、[kubelet-finalize] 更新“/etc/kubernetes/kubelet.conf”以指向可旋转的kubelet客户端证书和密钥
[kubelet-finalize] Updating “/etc/kubernetes/kubelet.conf” to point to a rotatable kubelet client certificate and key
15、[addons] 部署相关插件,coreDNS、kube-proxy
[addons] Applied essential addon: CoreDNS
[addons] Applied essential addon: kube-proxy
16、代表K8S-master已经成功安装
Your Kubernetes control-plane has initialized successfully!
To start using your cluster, you need to run the following as a regular user:
17、创建k8s集群配置文件,制订了,默认的ssl证书在哪,api-server的地址,等信息
mkdir -p $HOME/.kube
sudo cp -i /etc/kubernetes/admin.conf $HOME/.kube/config
sudo chown
(
i
d
−
u
)
:
(id -u):
(id−u):(id -g) $HOME/.kube/config
Alternatively, if you are the root user, you can run:
export KUBECONFIG=/etc/kubernetes/admin.conf
18、pod分布再多个机器上,pod互相之间链接,得部署,集群网络,选用网络插件
You should now deploy a pod network to the cluster.
Run “kubectl apply -f [podnetwork].yaml” with one of the options listed at:
https://kubernetes.io/docs/concepts/cluster-administration/addons/
19、使用如下命令,将k8s-node加入集群即可
Then you can join any number of worker nodes by running the following on each as root:
kubeadm join 10.10.10.100:6443 --token hjdyqz.byzmutnkmn448i5z
–discovery-token-ca-cert-hash sha256:18ce7af434e99a8edd527be3ea83603e68c50fb676b7cf9eeeb169f5ded88b7f
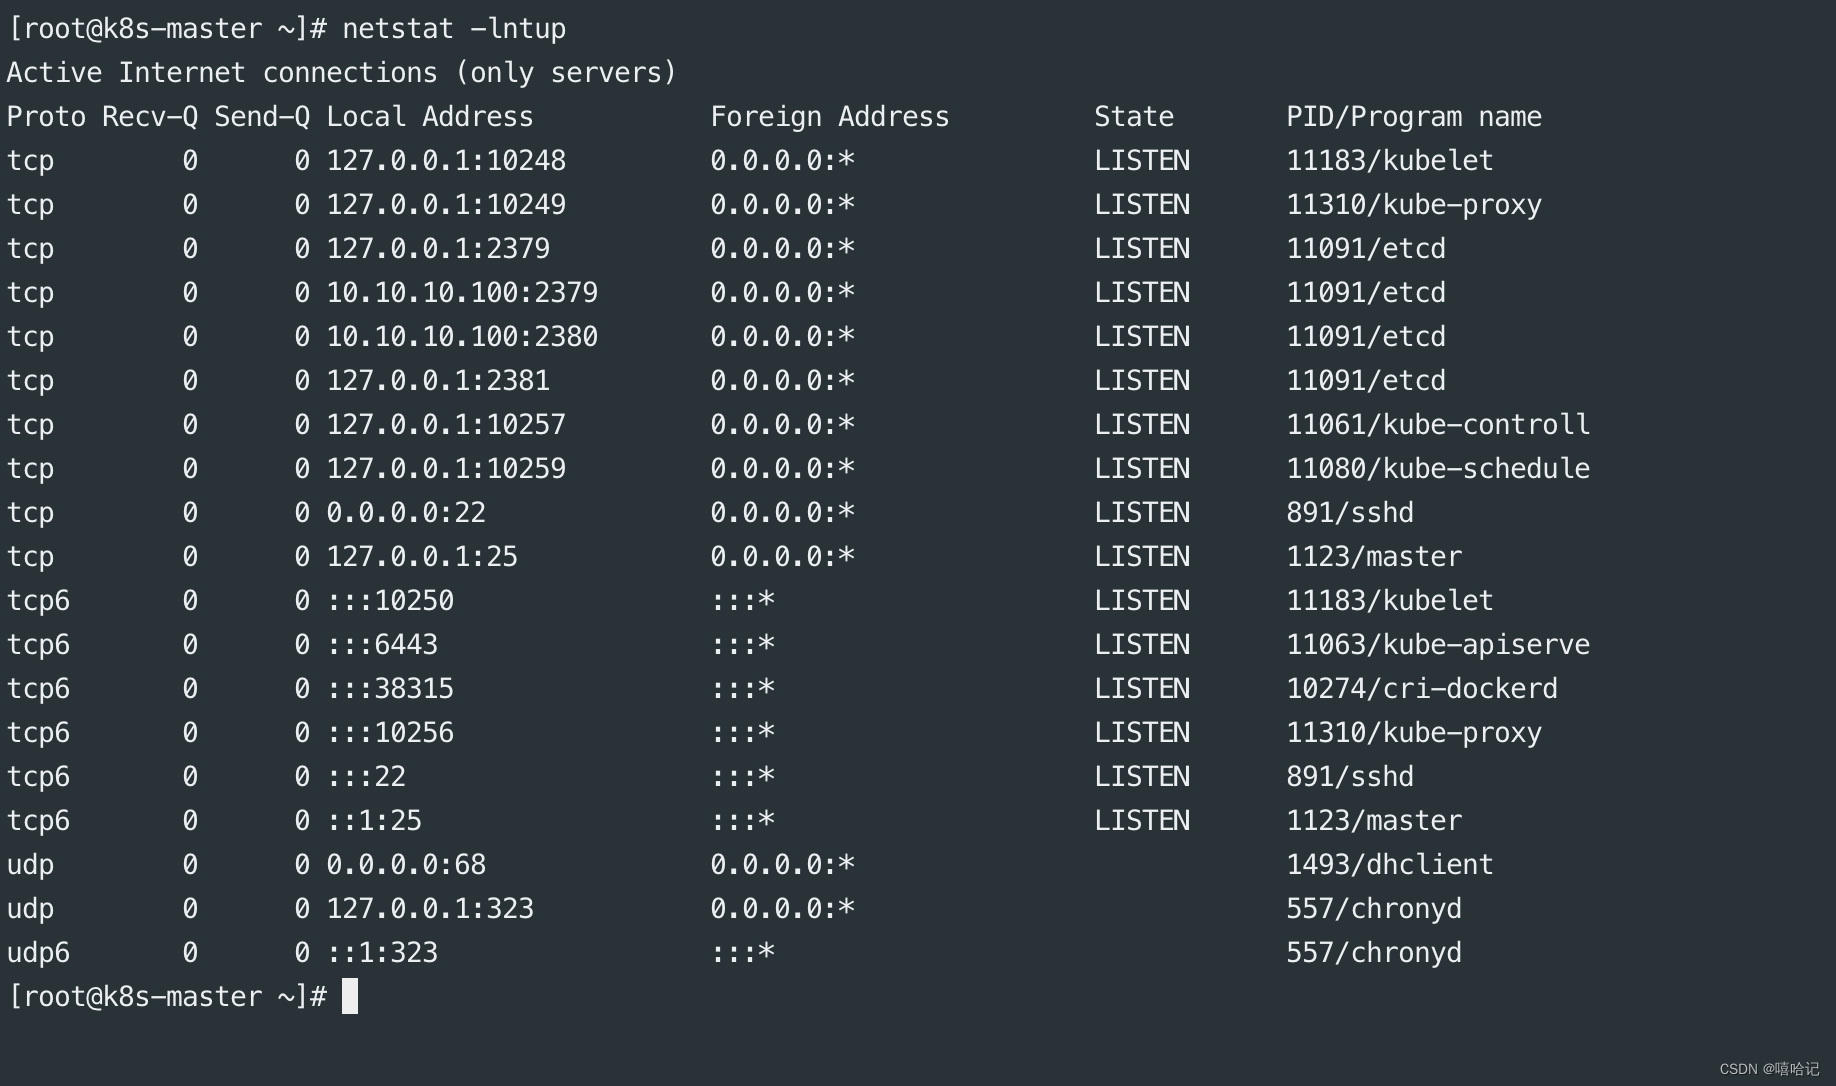
k8s 初始化后,查看master节点都启动了那些端口
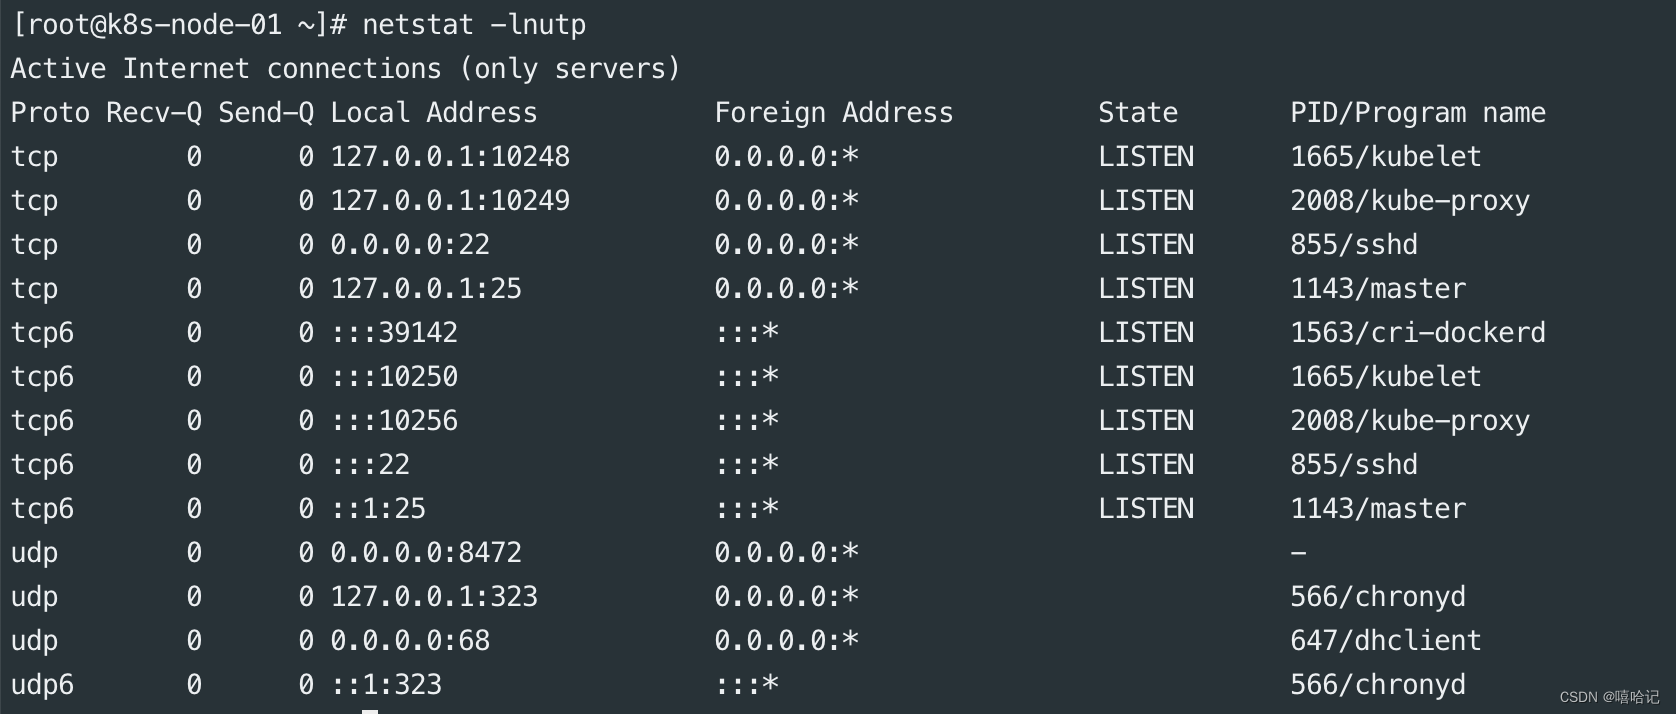
k8s初始化node节点加入到master节点后都启动了那些端口
pod是如何被创建到目标机器上的(原理流程)?
- 在master节点上,写yaml描述你对容器的运行要求,创建pod的要求,eg:install-mysql.yml
- (kubectl create -f install-mysql.yml)使用kubectl命令去创建,应用这个资源描述文件,才会涉及k8s组件交互发出请求,我需要创建一个pod去运行mysql了,请求发给谁?(api-server)
- 验证kubectl命令发来的请求是否被允许,利用本地的https证书,直接写入kubectl配置文件的该请求被允许后才会被执行
- api-server将mysql-pod创建的信息记录到etcd数据库中(数据库记录了一些信息, mysql镜像版本,容器名,是否需要暴露端口)
- api-server会通知下一个组件,调度器组件,schedule准备pod调度
- schedule调度,回去etcd里面查询,部署的pod信息是什么,schedule调度判断出一个合适的node节点去部署pod(选择好了具体的机器,还未执行)
- scheduler调度器,回告诉api-server自己决定pod要部署到哪个node节点上
- api-server 会将这个部署信息存储到etcd里,数据库更新(mysql本身的容器信息+绑定关系,部署到那台机器上)
- api-server会通知node节点机器,node节点机器上的kubelet去读取etcd数据库里面的信息,根据这些信息创建mysql镜像并且创建pod。


 1840
1840


 被折叠的 条评论
为什么被折叠?
被折叠的 条评论
为什么被折叠?
 到【灌水乐园】发言


