


先看效果:
原图: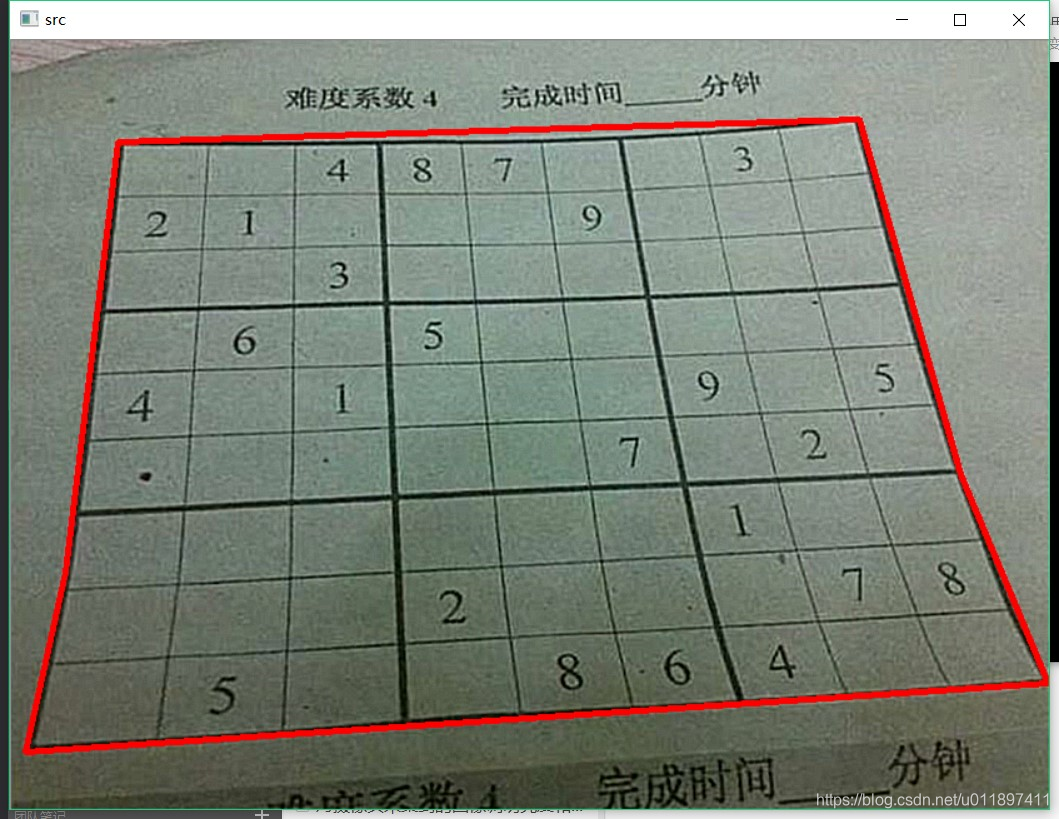
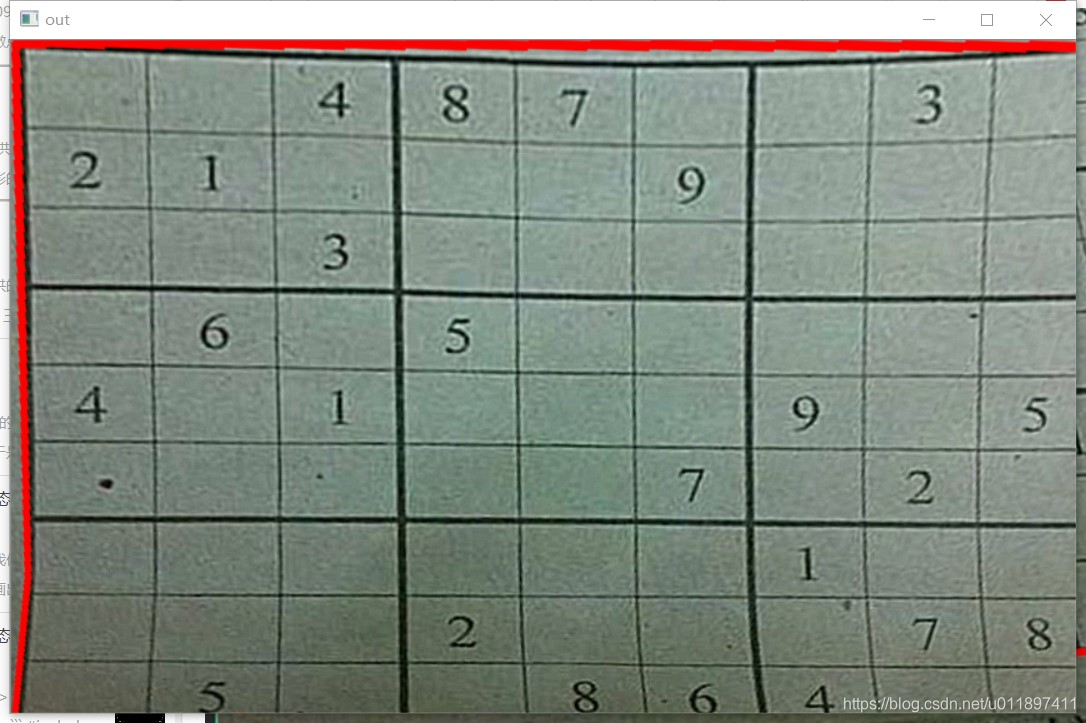
透视变换后:
透视变换
其实只要经历了前面的步骤之后,来到这一步就很简单了。
你只需要知道 OpenCV图像变换(仿射变换与透视变换) 这个是什么你就做得出了。
透视变换: 在原图和目标图确定四个点,就可以透视变换了。
但是在本例中,因为四个点是数独的框的四个顶点,所以确定这四个定点有些技巧。
在前面的过程中,不是有 findContours()查找轮廓这个吗,方法选取CV_CHAIN_APPROX_SIMPLE,这种方法只是存储轮廓的顶点,透视变换时用到的顶点就是从这里面提出来的。
轮廓的顶点坐标经过approxPolyDP()都保存在了approxPolyDP这个“二维数组”里面。
我们只需要输出到显示器上,就可以看见这些坐标值了,这就确定了原图的四个顶点!
然后再来确定目标图的四个顶点
这里用到了RotatedRect类、minAreaRect函数
经过以下代码
RotatedRect box = minAreaRect(cv::Mat(contours[index]));
box就保存了 由contours保存的轮廓顶点 而确定的一个矩阵。(但是 是不是真的矩阵还不清楚,但肯定的是它具有矩阵的一些基本信息,比如说:长,宽。其实也是只用到了长宽)
然后调用透视变换函数即可。
注意
- 这里要注意的还是透视变换的四个点的确定,要好好理解!
- 关于box确定的矩阵还有一个注意地方就是 box.boundingRect().height
这句语句的boundingRect(),你会发现跳到 RotatedRect 类定义的时候找不到关于它的一些信息。 - 原图的透视变换的四个顶点一定一定要输出看看,再重新赋值~~~
- 根据筛选出的四边形的四个顶点进行透视变换(顶点顺序很重要)
根据筛选出的四边形的四个顶点进行透视变换(顶点顺序很重要)
根据筛选出的四边形的四个顶点进行透视变换(顶点顺序很重要)
Talk is cheap.show you the code.
#include "opencv2/core/core.hpp"
#include "opencv2/highgui/highgui.hpp"
#include "opencv2/imgproc/imgproc.hpp"
#include <iostream>
using namespace std;
using namespace cv;
int main()
{
	Mat src = imread("01.png");

	GaussianBlur(src, src, Size(3, 3), 0, 0);

	//拉普拉斯锐化
	Mat kernel(3, 3, CV_32F, Scalar(-1));
	kernel.at<float>(1, 1) = 8.9;
	filter2D(src, src, src.depth(), kernel);

	Mat gray, thresh;
	cvtColor(src, gray, CV_BGR2GRAY);

	//namedWindow("thresh",0);

	adaptiveThreshold(gray, thresh, 255, ADAPTIVE_THRESH_GAUSSIAN_C, THRESH_BINARY_INV, 77, 15);

	//轮廓提取
	Mat element = getStructuringElement(MORPH_RECT, Size(3, 3));
	erode(thresh, thresh, element);
	dilate(thresh, thresh, element);

	//imshow("11",thresh);

	vector<vector<Point> > contours0;
	vector<Vec4i> hierarchy;
	findContours(thresh, contours0, hierarchy, CV_RETR_EXTERNAL, CV_CHAIN_APPROX_SIMPLE, Point());
		vector<vector<Point> > contours;
	contours.resize(contours0.size());

	for (int i = 0; i < contours0.size(); i++)
	{
		approxPolyDP(contours0[i], contours[i], 10, true);//15是为了得到一个矩形,小于15的数回得到更多的点
	}
		//选出最大面积的多边形
	double area = 0;
	int index = 0;
	for (int i = 0; i < contours.size(); i++)
	{
		if (contourArea(contours[i])>area)
		{
			area = contourArea(contours[i]);
			index = i;//87
		}
	}

	//最外围轮廓的显示
	if (contourArea(contours[index])>50000)
	{
		Scalar color(0, 0, 255);
		drawContours(src, contours, index, color, 4, 8);

		//下面的方法一样可以画出
		//从而验证了 contours 保存的是点,其实它就是-_-!
		//for (int i = 0; i < contours[index].size(); i++)
		//{
		//	if (i + 1 >= contours[index].size())
		//		line(src, contours[index][i], contours[index][0], (0, 0, 255),4,8);
		//	else
		//		line(src, contours[index][i], contours[index][i+1], (0, 0, 255),4,8);
		//}
	}


	最外围轮廓顶点的显示
	//cout << "contours[index]: " << endl << contours[index] << endl;
	//for (int i = 0; i < contours[index].size(); i++)
	//{
	//	circle(src, contours[index][i], 15, (0,0,255), 2, 8, 0);
	//}


	//透视变换,顶点的顺序很重要!
	vector<Point2f> corner;//上面提取轮廓的顶点
	corner.push_back(Point(83, 80));
	corner.push_back(Point(652, 61));
	corner.push_back(Point(13, 548));
	corner.push_back(Point(798, 495));

	vector<Point2f> PerspectiveTransform;//透视变换后的顶点
	RotatedRect box = minAreaRect(cv::Mat(contours[index]));
	PerspectiveTransform.push_back(Point(0, 0));
	PerspectiveTransform.push_back(Point(box.boundingRect().width - 1, 0));
	PerspectiveTransform.push_back(Point(0, box.boundingRect().height - 1));
	PerspectiveTransform.push_back(Point(box.boundingRect().width - 1, box.boundingRect().height - 1));

	cout << "corner: " << endl << corner << endl;

	//获取变换矩阵
	Mat M = getPerspectiveTransform(corner, PerspectiveTransform);//Order of points matters!

	//cout << "PerspectiveTransform: " << endl << PerspectiveTransform << endl;

	Mat out;//提取出的数独方框
	cv::Size size(box.boundingRect().width, box.boundingRect().height);
	warpPerspective(src, out, M, size, 1, 0, 0);

	imshow("src", src);
	imshow("out", out);
	while (uchar(waitKey()) == 'q') {}
	return 0;
}
参考
- 关于透视变换:
OpenCV图像变换(仿射变换与透视变换) - 关于RotatedRect类、minAreaRect函数:
OpenCV之RotatedRect类、minAreaRect函数详解 - boundingRect():
swift中关于boundingRect 的一个坑


 348
348


 被折叠的 条评论
为什么被折叠?
被折叠的 条评论
为什么被折叠?
 到【灌水乐园】发言


