


- 创建一个Maven工程
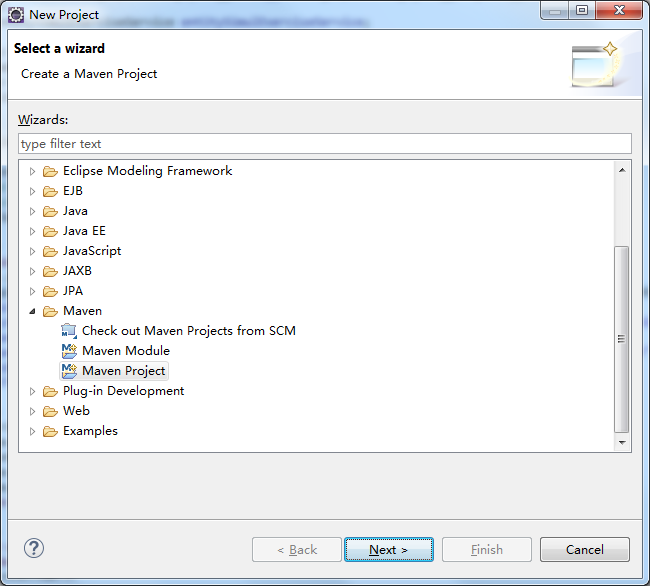
打开 Eclipse ,File->New->project ->Maven Project
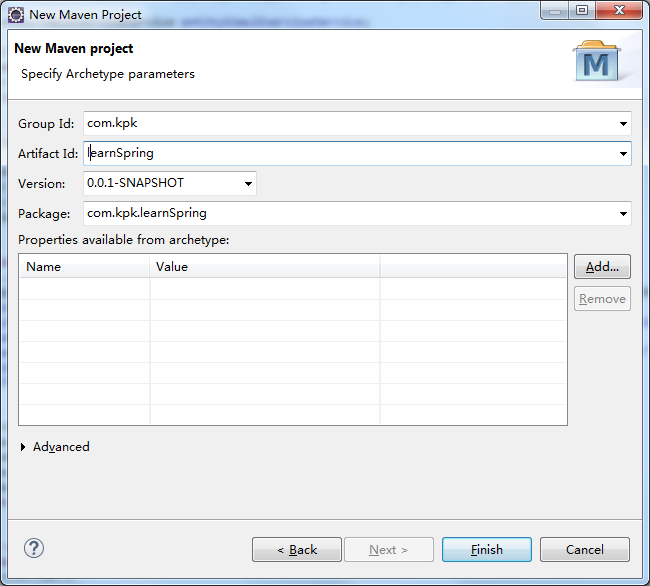
点几个Next之后,来到这个界面
填上GroupId 和 Artifact Id 后,点击Finish
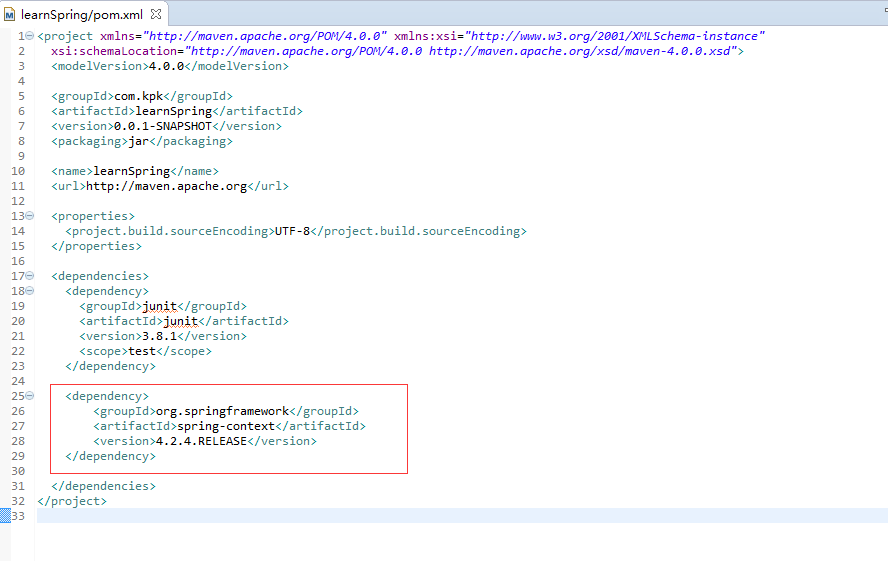
找到pom.xml文件,添加spring的依赖
    <dependency>
        <groupId>org.springframework</groupId>
        <artifactId>spring-context</artifactId>
        <version>4.2.4.RELEASE</version>
    </dependency>
我的添加完后变成这个样子
2, Spring bean
一个简单的 Spring bean.
新建一个叫HelloWorld的类
package com.kpk.learnSpring;

public class HelloWorld {
    private String name;

    public void printHello() {
        System.out.println("Spring 3 : Hello ! " + name);
    }

    public String getName() {
        return name;
    }

    public void setName(String name) {
        this.name = name;
    }
}
3,
Spring bean 配置文件
创建Spring配置文件,并声明所有可用的Spring bean。
File : applicationContext.xml
<beans xmlns="http://www.springframework.org/schema/beans"
    xmlns:xsi="http://www.w3.org/2001/XMLSchema-instance"
    xsi:schemaLocation="http://www.springframework.org/schema/beans
    http://www.springframework.org/schema/beans/spring-beans-3.0.xsd">

    <bean id="helloBean" class="com.kpk.learnSpring.HelloWorld">
        <property name="name" value="fupeng" />
    </bean>

</beans>
4, 编写执行代码
package com.kpk.learnSpring;

import org.springframework.context.ApplicationContext;
import org.springframework.context.support.ClassPathXmlApplicationContext;

/**
 * Hello world!
 *
 */
public class App
{
    public static void main(String[] args) {
        ApplicationContext context = new ClassPathXmlApplicationContext(
                "applicationContext.xml");
        HelloWorld obj = (HelloWorld) context.getBean("helloBean");
        obj.printHello();
    }
}
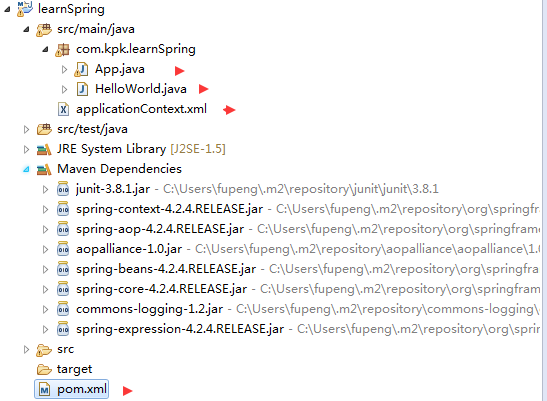
最后,文件的目录结构像这样
运行App的结果


 239
239

 被折叠的 条评论
为什么被折叠?
被折叠的 条评论
为什么被折叠?
 到【灌水乐园】发言


