


1.选项菜单OptionsMenu
选项菜单自动放在菜单栏,也比较简单
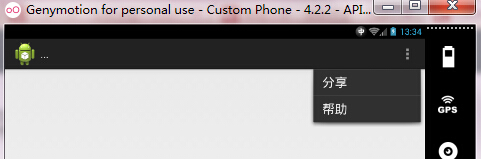
在活动中重写两个方法,onCreateOptionsMenu和onOptionsItemSelected,用于菜单项的创建和菜单项的选择操作。
创建菜单项方式1:
使用自定义菜单资源,xml文件名为main.xml,文件位置:工程目录/res/menu/main.xml。
<?xml version="1.0" encoding="utf-8"?>
<menu xmlns:android="http://schemas.android.com/apk/res/android" >

    <item
        android:id="@+id/share"
        android:title="@string/share"
        android:showAsAction="ifRoom|withText"/>

    <item
        android:id="@+id/help"
        android:title="@string/help"
        android:showAsAction="ifRoom|withText"/>
</menu>
java代码:
@Override
public boolean onCreateOptionsMenu(Menu menu) {
        getMenuInflater().inflate(R.menu.main, menu);//得到菜单项资源
        return super.onCreateOptionsMenu(menu);
}
创建菜单项方式2:
直接在onCreateOptionsMenu方法中定义。
private static final int ITEM1 = Menu.FIRST;
private static final int ITEM2 = Menu.FIRST+1;
@Override
public boolean onCreateOptionsMenu(Menu menu) {
menu.add(0, ITEM1, 0, "分享");//ITEM1 -->> Item项id
menu.add(0, ITEM2, 0, "帮助");
return true;
}选择事件方法:
@Override
public boolean onOptionsItemSelected(MenuItem item) {
        switch (item.getItemId()) {
        //相对于使用menu资源时,使用xml资源文件中的id
//      case R.id.share:
//          setTitle(item.getTitle());
//          break;
//
//      case R.id.help:
//          setTitle(item.getTitle());
//          break;

        //相对于直接创建时,使用创建时的id寻找对象
        case ITEM1:
            setTitle(item.getTitle());
            break;

        case ITEM2:
            setTitle(item.getTitle());
            break;

        default:
            break;
        }
        return super.onOptionsItemSelected(item);
}
2.上下文菜单ContextMenu
上下文菜单相对于ui控件而言,长按后会弹出上下文菜单,如文本框等等。
需要重写onCreateContextMenu和onContextItemSelected方法,并要对控件注册上下文菜单。
public class ContextMenuActivity extends Activity {

    private EditText editText;
    private static final int ITEM1 = Menu.FIRST;
    private static final int ITEM2 = Menu.FIRST + 1;

    @Override
    protected void onCreate(Bundle savedInstanceState) {
        super.onCreate(savedInstanceState);
        setContentView(R.layout.activity_context_menu);

        editText = (EditText) findViewById(R.id.editText1);
        registerForContextMenu(editText);//注册上下文菜单
    }

    @Override
    public void onCreateContextMenu(ContextMenu menu, View v,
            ContextMenuInfo menuInfo) {
        if (R.id.editText1 == v.getId()) {
            menu.add(0, ITEM1, 0, "设置");
            menu.add(0, ITEM2, 0, "更多");
        }
        super.onCreateContextMenu(menu, v, menuInfo);
    }

    @Override
    public boolean onContextItemSelected(MenuItem item) {
        switch (item.getItemId()) {
        case ITEM1:
            setTitle(item.getTitle());
            break;
        case ITEM2:
            setTitle(item.getTitle());
            break;

        default:
            break;
        }
        return super.onContextItemSelected(item);
    }
}
3.弹出式菜单PopupWindow
看上去更像一个对话框
3.1.定义一个弹出式菜单用到的布局文件,文件名menu_layout.xml
<?xml version="1.0" encoding="utf-8"?>
<LinearLayout xmlns:android="http://schemas.android.com/apk/res/android"
    android:layout_width="fill_parent"
    android:layout_height="wrap_content"
    android:gravity="bottom"
    android:background="#78cada"
    android:orientation="horizontal" >

    <LinearLayout
        android:id="@+id/home"
        android:layout_width="fill_parent"
        android:layout_height="wrap_content"
        android:layout_weight="1"
        android:orientation="vertical" >

        <ImageView
            android:layout_width="fill_parent"
            android:layout_height="wrap_content"
            android:paddingTop="5dp"
            android:src="@drawable/ic_launcher" />

        <TextView
            android:layout_width="fill_parent"
            android:layout_height="wrap_content"
            android:gravity="center"
            android:text="首页"
            android:textColor="#fff" />
    </LinearLayout>

    <LinearLayout
        android:id="@+id/my"
        android:layout_width="fill_parent"
        android:layout_height="wrap_content"
        android:layout_weight="1"
        android:gravity="center"
        android:orientation="vertical" >

        <ImageView
            android:layout_width="wrap_content"
            android:layout_height="wrap_content"
            android:src="@drawable/ic_launcher" />

        <TextView
            android:layout_width="wrap_content"
            android:layout_height="wrap_content"
            android:text="我的"
            android:textColor="#fff" />
    </LinearLayout>

    <LinearLayout
        android:id="@+id/more"
        android:layout_width="fill_parent"
        android:layout_height="wrap_content"
        android:layout_weight="1"
        android:orientation="vertical" >

        <ImageView
            android:layout_width="fill_parent"
            android:layout_height="wrap_content"
            android:paddingTop="18dp"
            android:src="@drawable/ic_launcher" />

        <TextView
            android:layout_width="fill_parent"
            android:layout_height="wrap_content"
            android:gravity="center"
            android:paddingTop="5dp"
            android:text="更多"
            android:textColor="#fff" />
    </LinearLayout>

</LinearLayout>
3.2.java代码
相关定义
private View layout;
private PopupWindow pop;
private boolean open = false;//菜单是否已弹出标识位
封装在一个方法中即可,然后使用按钮触发等等
protected void popupWindow() {
        layout = getLayoutInflater().inflate(R.layout.menu_layout, null);//获取布局资源
        pop = new PopupWindow(layout, LayoutParams.WRAP_CONTENT, LayoutParams.WRAP_CONTENT);//实例化PopupWindow对象并设置显示宽高
        pop.showAtLocation(layout, Gravity.BOTTOM | Gravity.CENTER_HORIZONTAL, 0, 0);//设置显示位置

        //找到指定view
        View home = layout.findViewById(R.id.home);
        //view的点击事件
        home.setOnClickListener(new OnClickListener() {

            @Override
            public void onClick(View v) {
                setTitle("select :home");
                pop.dismiss();
                open = false;
            }
        });
        View my = layout.findViewById(R.id.my);
        my.setOnClickListener(new OnClickListener() {

            @Override
            public void onClick(View v) {
                setTitle("select :my");
                pop.dismiss();
                open = false;
            }
        });
        View more = layout.findViewById(R.id.more);
        more.setOnClickListener(new OnClickListener() {

            @Override
            public void onClick(View v) {
                setTitle("select :more");
                pop.dismiss();
                open = false;
            }
        });
}
系统按键的处理
@Override
public boolean onKeyDown(int keyCode, KeyEvent event) {
        switch (keyCode) {
        case KeyEvent.KEYCODE_MENU://关联系统菜单键
            if (open){//已打开则关闭
                pop.dismiss();
                open = false;
            } else {//未打开则打开
                popupWindow();
                open = true;//设置标识位为已开
            }
            break;
        case KeyEvent.KEYCODE_BACK://系统返回键处理
            if (open) {//已打开则关闭
                pop.dismiss();
                open = false;
            } else {//未打开则结束程序
                finish();
            }

            break;
        default:
            break;
        }
        return false;
}


 467
467

 被折叠的 条评论
为什么被折叠?
被折叠的 条评论
为什么被折叠?
 到【灌水乐园】发言


