


今天我们根据具体的需求,进一步理解xUtils框架的使用方式:
添加Button点击按钮,点击按钮开始使用xUtils的网络模块进行apk安装包的下载,支持随时停止下载任务,成功后使用Dialog询问用户是否安装,并安装。
数据接口:http://softfile.3g.qq.com:8080/msoft/179/24659/43549/qq_hd_mini_1.4.apk
那么我们根据昨天的学习,一起来分析一下如何完成上述功能:思路:使用xUtils当中的网络框架进行下载,然后还需要显示进度条,就要用到进度条对话框,还要提示用户是否安装,还要用提示对话框,安装的过程比较简单,是跳转到指定的界面,安卓给好了指定的代码,直接使用。
分析步骤:
1.导包,导入xUtils包 复制xUtils到libs目录下,然后选中右键,点击Add As Library,添加到当前项目工程的依赖当中了。
2.使用xUtils,初始化整个框架上模块,自定义application类,在onCreate方法当中调用:x.Ext.init(this); 的方法
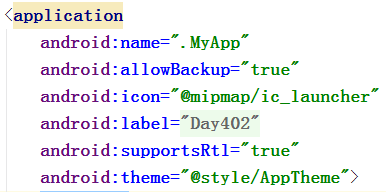
并且要对于自定义的application类在清单文件当中进行注册
3.编写逻辑代码,创建一个button控件,写好点击事件,然后在点击事件中,开启网络请求模块。
4.初始化进度条对话框,在对话框当中指明标题,内容和进度条的显示,并且设置按钮,增加随时暂停的功能。
5.在开始网络请求时,让对话框显示出来,在暂停或者停止网络请求时,让对话框消失。
6.在网络请求成功之后,就显示提示信息对话框,提示用户是否安装,如果用户同意安装就显示安装界面。
over!
按照以上步骤开始编写代码:
2.1 初始化整个框架上模块
public class MyApp extends Application{
    @Override
    public void onCreate() {
        super.onCreate();
        x.Ext.init(this); //初始化xUtils整个模块
    }
}android:name=".MyApp"
3.1 创建布局
<?xml version="1.0" encoding="utf-8"?>
<LinearLayout xmlns:android="http://schemas.android.com/apk/res/android"
    android:layout_width="match_parent"
    android:layout_height="match_parent"
    android:orientation="vertical">
    <Button
        android:id="@+id/btn_apk"
        android:layout_width="match_parent"
        android:layout_height="wrap_content"
        android:text="下载apk"/>
</LinearLayout>
3.2.开始编写逻辑代码部分:activity当中的内容
@ContentView(R.layout.activity_download_apk)
public class DownloadAPKActivity extends AppCompatActivity {
    public String url = "http://softfile.3g.qq.com:8080/msoft/179/24659/43549/qq_hd_mini_1.4.apk";
    @ViewInject(R.id.btn_apk)
    private Button btn;
    Callback.Cancelable cancelable;
    private ProgressDialog progressDialog;

    @Override
    protected void onCreate(Bundle savedInstanceState) {
        super.onCreate(savedInstanceState);
        x.view().inject(this);  //对于注解模块进行初始化
        setProgressDialog();
    }

    private void setProgressDialog() {
        progressDialog = new ProgressDialog(this);
        progressDialog.setIcon(R.mipmap.ic_launcher);
        progressDialog.setTitle("下载apk");
        progressDialog.setMessage("正在玩命下载中......");
        progressDialog.setProgressStyle(ProgressDialog.STYLE_HORIZONTAL);
        progressDialog.setButton(ProgressDialog.BUTTON_NEGATIVE, "暂停", new DialogInterface.OnClickListener() {
            @Override
            public void onClick(DialogInterface dialog, int which) {
//                暂停下载
                cancelable.cancel();
            }
        });
    }

    @Event(value = R.id.btn_apk,type = View.OnClickListener.class)
    private void buttonClick(View view){
//        执行网络请求操作
        RequestParams params = new RequestParams(url);
        params.setAutoRename(false);  //设置是否根据头信息命名文件
        params.setAutoResume(true);  //设置文件下载断点续传
        params.setExecutor(new PriorityExecutor(2,true));  //设置加载图片的线程池
        params.setCancelFast(true);  //设置是否可以立即停止
//        设置缓存的路径
        String filePath = this.getExternalCacheDir()+File.separator+"hello.apk";
        params.setSaveFilePath(filePath);
        cancelable = x.http().get(params, new Callback.ProgressCallback<File>() {
            @Override
            public void onSuccess(final File file) {
//                请求成功时,回调的方法
                AlertDialog.Builder builder = new AlertDialog.Builder(DownloadAPKActivity.this);
                builder.setTitle("提示信息").setMessage("下载成功,是否要安装apk?")
                        .setPositiveButton("确定", new DialogInterface.OnClickListener() {
                            @Override
                            public void onClick(DialogInterface dialog, int which) {
//                              执行apk安装的步骤
                                Intent intent = new Intent(Intent.ACTION_VIEW);
                                intent.setDataAndType(Uri.fromFile(file),"application/vnd.android.package-archive");
                                intent.setFlags(Intent.FLAG_ACTIVITY_NEW_TASK);
                                DownloadAPKActivity.this.startActivity(intent);
                            }
                        }).setNegativeButton("取消",null);
                builder.create().show();
            }
            @Override
            public void onError(Throwable throwable, boolean b) {
//              请求失败时,会执行的方法
            }
            @Override
            public void onCancelled(CancelledException e) {
//              请求被取消时,会执行的方法
                progressDialog.dismiss();
            }
            @Override
            public void onFinished() {
//              请求完成时,会执行的方法
                progressDialog.dismiss();
            }
            @Override
            public void onWaiting() {
            }
            @Override
            public void onStarted() {
//                开始网络请求时,会执行的方法
                progressDialog.show();
            }
            @Override
            public void onLoading(long total, long current, boolean b) {
//                  设置对话框当中的进度条
                progressDialog.setProgress((int)(current*100/total));
            }
        });
    }
}
通过分析和编写,就能够完成需求,展示内容,效果如下图所示:


 137
137

 被折叠的 条评论
为什么被折叠?
被折叠的 条评论
为什么被折叠?
 到【灌水乐园】发言


