SpringMVC4 + Spring4 + Hibernate4 框架搭建中。。。
前言
现在很多企业流行用mybatis + spring + springmvc框架,但是mybatis或ibatis编写SQL较麻烦且对于数据库的移植性不好,你觉得呢?如果你也感觉mybatis或ibatis编写SQL较麻烦,那SpringMVC+Spring+Hibernate的整合适合你,如果你觉得Strut2没有SpringMVC好用,存在漏洞,执行效率不高容易爆内存,那SpringMVC+Spring+Hibernate整合适合你,看好SpringMVC+Spring+Hibernate的搭配,此SSH非彼SSH。
总体来说:Hibernate入门门槛比Mybatis高,但个人还是偏向于Hibernate,用惯了Hibernate的都感觉Hibernate才是标准的ORM框架,而且数据库可移植性好(换数据库只需修改方言和数据库配置即可);Mybatis这种半自动化的虽然灵活,可优化SQL,但是对于数据库的移植性来说就差了,而对于Hiberante只要控制的好,功能更强大。
选择SpringMVC4+Spring4+Hibernate4的原因
仔细分析过Struts2与SpringMVC、Mybatis与Hibernate的优势与劣势之后,总想搭建出一套在表现出、持久层中整体占优势的框架。于是就决定了SpringMVC+Spring+Hibernate框架的整合搭建,为了考虑到系统以后会用到新框架的一些特性,所有就决定搭建SpringMVC4+Spring4+Hibernate4的框架。
目标:有点追求,搭建出一套属于自己的框架,慢慢维护这套框架,深入研究这套框架的新特性,封装这套框架,让它变得越来越好。。。也让自己拥有“走在架构师路上”的感觉。
准备工作
hibernate4下载地址 http://hibernate.org/orm/
SpringMVC 官网:http://projects.spring.io/spring-framework
下载地址:http://repo.spring.io/release/org/springframework/spring/4.2.2.RELEASE/
仅下载:
spring-framework-4.2.2.RELEASE-dist.zip
spring-framework-4.2.2.RELEASE-docs.zip
spring-framework-4.2.2.RELEASE-schema.zip
后续将加入Spring-Security的安全访问控制解决方案的安全框架
下载地址:http://repo.spring.io/libs-release-local/org/springframework/security/spring-security/
Spring Security开发手册:http://docs.spring.io/spring-security/site/docs/4.1.0.RELEASE/reference/htmlsingle/#ns-minimal
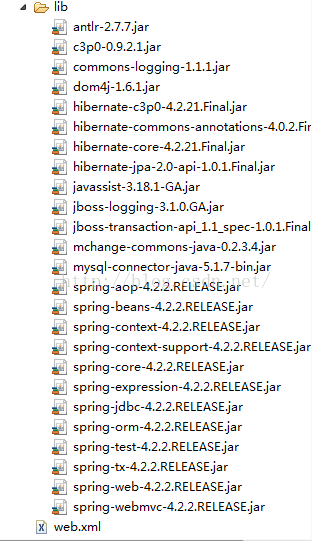
搭建需要准备jar(目前基础版本,后面会随着spring security应用以及基类封装jar会增多):
搭建环境的配置
一、web.xml中的配置文件:
- <span style="font-size:14px;"><?xml version="1.0" encoding="UTF-8"?>
- <web-app xmlns:xsi="http://www.w3.org/2001/XMLSchema-instance"
- xmlns="http://java.sun.com/xml/ns/javaee"
- xsi:schemaLocation="http://java.sun.com/xml/ns/javaee http://java.sun.com/xml/ns/javaee/web-app_2_5.xsd"
- id="WebApp_ID" version="2.5">
- <display-name>nssh</display-name>
- <welcome-file-list>
- <welcome-file>index.html</welcome-file>
- <welcome-file>index.htm</welcome-file>
- <welcome-file>index.jsp</welcome-file>
- <welcome-file>default.html</welcome-file>
- <welcome-file>default.htm</welcome-file>
- <welcome-file>default.jsp</welcome-file>
- </welcome-file-list>
-
-
- <context-param>
- <param-name>contextConfigLocation</param-name>
- <param-value>classpath:applicationContext.xml</param-value>
- </context-param>
- <listener>
- <listener-class>org.springframework.web.context.ContextLoaderListener</listener-class>
- </listener>
-
-
- <servlet>
- <servlet-name>dispatcherServlet</servlet-name>
- <servlet-class>org.springframework.web.servlet.DispatcherServlet</servlet-class>
-
- <init-param>
- <param-name>contextConfigLocation</param-name>
- <param-value>classpath:springmvc.xml</param-value>
- </init-param>
- <load-on-startup>1</load-on-startup>
- </servlet>
- <servlet-mapping>
- <servlet-name>dispatcherServlet</servlet-name>
- <url-pattern>/*</url-pattern>
- </servlet-mapping>
-
-
- <filter>
- <filter-name>characterEncodingFilter</filter-name>
- <filter-class>org.springframework.web.filter.CharacterEncodingFilter</filter-class>
- <init-param>
- <param-name>encoding</param-name>
- <param-value>UTF-8</param-value>
- </init-param>
- </filter>
- <filter-mapping>
- <filter-name>characterEncodingFilter</filter-name>
- <url-pattern>/*</url-pattern>
- </filter-mapping>
-
-
- <filter>
- <filter-name>hiddenHttpMethodFilter</filter-name>
- <filter-class>org.springframework.web.filter.HiddenHttpMethodFilter</filter-class>
- </filter>
- <filter-mapping>
- <filter-name>hiddenHttpMethodFilter</filter-name>
- <url-pattern>/*</url-pattern>
- </filter-mapping>
-
- </web-app></span><span style="font-size: 18px;">
- </span>
二、Spring的applicationContext.xml配置文件:
- <?xml version="1.0" encoding="UTF-8"?>
- <beans xmlns="http://www.springframework.org/schema/beans"
- xmlns:xsi="http://www.w3.org/2001/XMLSchema-instance" xmlns:jee="http://www.springframework.org/schema/jee"
- xmlns:tx="http://www.springframework.org/schema/tx" xmlns:context="http://www.springframework.org/schema/context"
- xsi:schemaLocation="http://www.springframework.org/schema/beans http://www.springframework.org/schema/beans/spring-beans-3.0.xsd http://www.springframework.org/schema/tx http://www.springframework.org/schema/tx/spring-tx-3.0.xsd http://www.springframework.org/schema/jee http://www.springframework.org/schema/jee/spring-jee-3.0.xsd http://www.springframework.org/schema/context http://www.springframework.org/schema/context/spring-context-3.0.xsd"
- default-lazy-init="true">
-
-
- <context:component-scan base-package="com.ywx" use-default-filters="false">
- <context:exclude-filter type="annotation" expression="org.springframework.stereotype.Controller"/>
- <context:exclude-filter type="annotation" expression="org.springframework.web.bind.annotation.ControllerAdvice"/>
- </context:component-scan>
-
-
- <context:property-placeholder location="classpath:db.properties"/>
-
-
- <bean id="dataSource" class="com.mchange.v2.c3p0.ComboPooledDataSource">
- <property name="user" value="${jdbc.user}"></property>
- <property name="password" value="${jdbc.password}"></property>
- <property name="driverClass" value="${jdbc.driverClass}"></property>
- <property name="jdbcUrl" value="${jdbc.jdbcUrl}"></property>
- </bean>
-
-
- <bean id="sessionFactory" class="org.springframework.orm.hibernate4.LocalSessionFactoryBean">
-
- <property name="dataSource" ref="dataSource"></property>
-
- <property name="namingStrategy">
- <bean class="org.hibernate.cfg.ImprovedNamingStrategy"></bean>
- </property>
- <property name="packagesToScan" value="com.ywx.entity"></property>
-
-
- <property name="hibernateProperties">
- <props>
-
- <prop key="hibernate.dialect">org.hibernate.dialect.MySQLInnoDBDialect</prop>
- <prop key="hibernate.show_sql">true</prop>
- <prop key="hibernate.format_sql">true</prop>
- <prop key="hibernate.hbm2ddl.auto">update</prop>
- </props>
- </property>
- </bean>
-
-
- <bean id="transactionManager" class="org.springframework.orm.hibernate4.HibernateTransactionManager">
- <property name="sessionFactory" ref="sessionFactory"></property>
- </bean>
-
- </beans>
三、SpringMVC中springmvc.xml文件:
- <span style="font-size:14px;"><?xml version="1.0" encoding="UTF-8"?>
- <beans xmlns="http://www.springframework.org/schema/beans"
- xmlns:xsi="http://www.w3.org/2001/XMLSchema-instance" xmlns:context="http://www.springframework.org/schema/context"
- xmlns:mvc="http://www.springframework.org/schema/mvc"
- xsi:schemaLocation="http://www.springframework.org/schema/beans http://www.springframework.org/schema/beans/spring-beans.xsd
- http://www.springframework.org/schema/context http://www.springframework.org/schema/context/spring-context-4.0.xsd
- http://www.springframework.org/schema/mvc http://www.springframework.org/schema/mvc/spring-mvc-4.0.xsd">
-
-
- <context:component-scan base-package="com.ywx" use-default-filters="false">
- <context:include-filter type="annotation" expression="org.springframework.stereotype.Controller"/>
- <context:include-filter type="annotation" expression="org.springframework.web.bind.annotation.ControllerAdvice"/>
- </context:component-scan>
-
-
- <bean
- class="org.springframework.web.servlet.view.InternalResourceViewResolver">
- <property name="prefix" value="/views/"></property>
- <property name="suffix" value=".jsp"></property>
- </bean>
-
- <!-- 配置静态资源:default-servlet-handler将在SpringMVC上下文中定义DefaultServletHttpRequestHandler,
- 它会对进入DispatcherServlet的请求进行帅选,如果发现是没有经过映射的请求,就将该请求交由WEB应用服务器默认的 Servlet处理。如果不是静态资源的请求,才由DispatcherServlet继续处理。 -->
- <mvc:default-servlet-handler />
-
- <mvc:annotation-driven/>
-
- </beans>
- </span>
四、数据库db.properties文件:
- jdbc.user=root
- jdbc.password=root
- jdbc.driverClass=com.mysql.jdbc.Driver
- jdbc.jdbcUrl=jdbc:mysql://localhost:3306/mysql
-
- #jdbc.user=ssh
- #jdbc.password=ssh
- #jdbc.driverClass=oracle.jdbc.driver.OracleDriver
- #jdbc.jdbcUrl=jdbc:oracle:thin:@localhost:1521:ORCL
测试环节
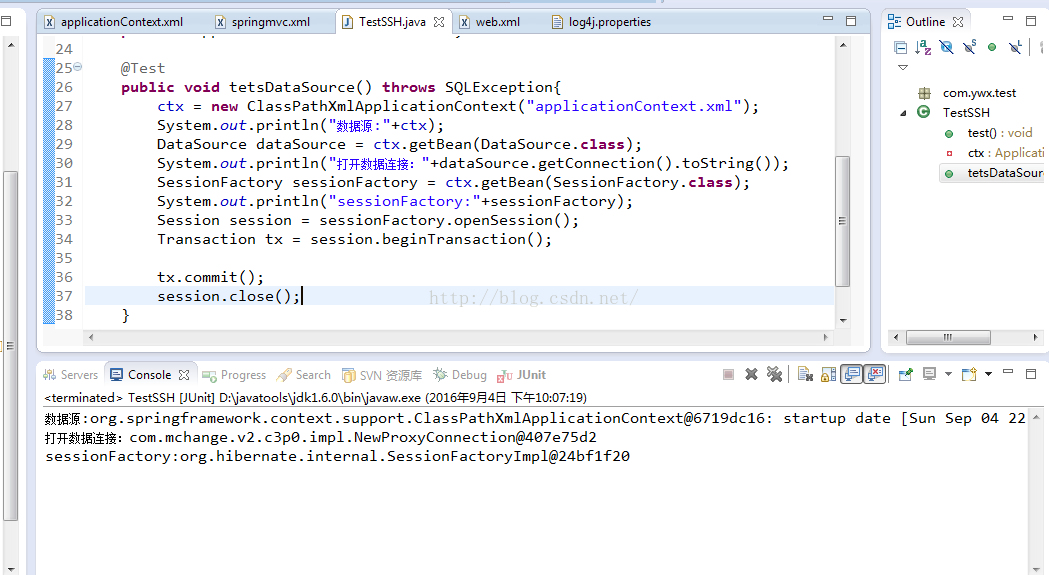
一、编写测试类:

二、测试结果:

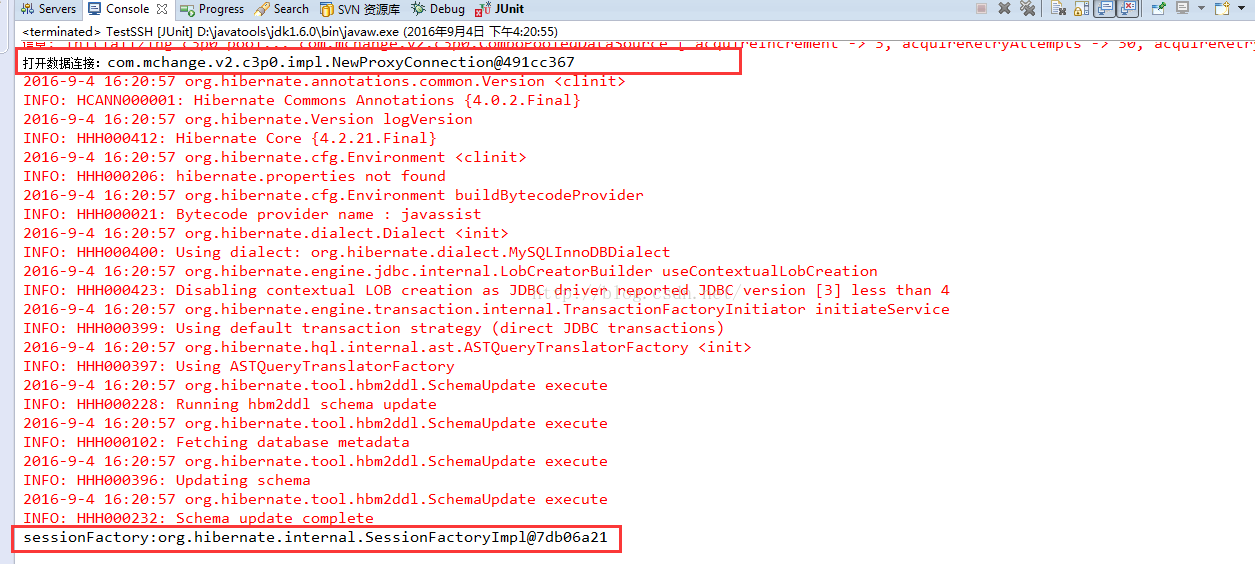
控制台出现的红色部分是因为log日子没有处理
log日子处理:
导入log4j.jar
然后修改log4j.properties文件如下(日子输出等级根据需求而设置):
- ### direct log messages to stdout ###
- log4j.appender.stdout=org.apache.log4j.ConsoleAppender
- log4j.appender.stdout.Target=System.out
- log4j.appender.stdout.layout=org.apache.log4j.PatternLayout
- log4j.appender.stdout.layout.ConversionPattern=%d{ABSOLUTE} %5p %c{1}:%L - %m%n
-
- ### direct messages to file hibernate.log ###
- #log4j.appender.file=org.apache.log4j.FileAppender
- #log4j.appender.file.File=hibernate.log
- #log4j.appender.file.layout=org.apache.log4j.PatternLayout
- #log4j.appender.file.layout.ConversionPattern=%d{ABSOLUTE} %5p %c{1}:%L - %m%n
-
- ### set log levels - for more verbose logging change 'info' to 'debug' ###
-
- log4j.rootLogger=warn, stdout
-
- #log4j.logger.org.hibernate=info
- #log4j.logger.org.hibernate=debug
- log4j.logger.com.ywx=debug
日志处理为debug后的输出为:
现在SpirngMVC+Spring+Hibernate的框架整合完成,目前还是一个空壳,其底层的DAO基类还在封装中。。。
基础代码封装遇到的问题
1、Spring4+Hibernate4整合后SessionFactory、Session及log的问题
2、mappedBy与@JoinColumn共存问题
3、Hibernate4主键生成策略问题
框架整合搭建完成,底层对Hibernate Dao的原生API封装完成,还加了一套字典、用户权限后的jar:

本套架构借鉴了公司一个大型项目底层架构的同时,在其基础上扩展了dao和service层的多态,解决了部分单继承的局限。整体来说架构的健壮性增强了,也提供了对事务一致性的控制,但其复杂度也增加了。总的来说,这套后台的架构我甚是满意 ^ _ ^,后续会提供源码。
集成Spring-Security安全访问控制框架
1、下载Spring-Security:http://repo.spring.io/libs-release-local/org/springframework/security/spring-security/
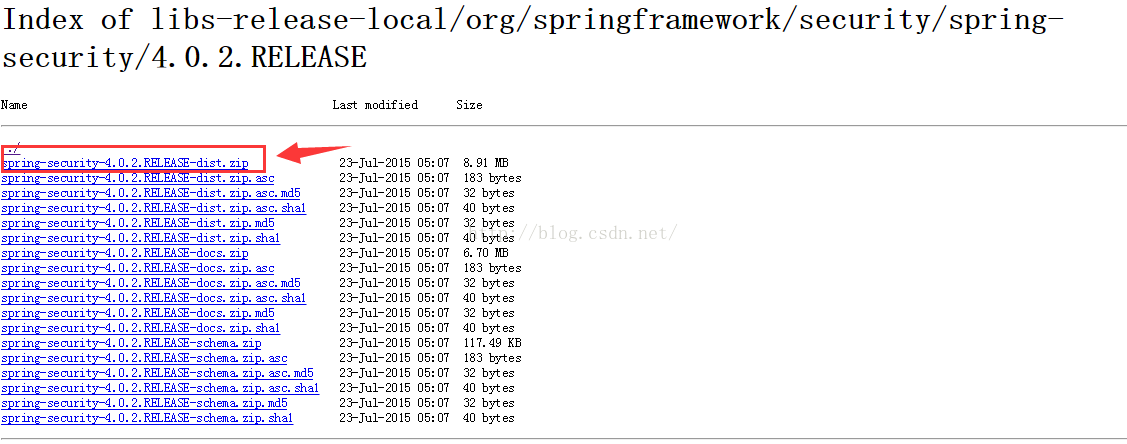
下载第一个,里面包含了所有的文件。
源码请点击:源码下载


 7万+
7万+

 被折叠的 条评论
为什么被折叠?
被折叠的 条评论
为什么被折叠?
 到【灌水乐园】发言


