


activity_main.xml
<LinearLayout
    xmlns:android="http://schemas.android.com/apk/res/android"
    android:id="@+id/main_layout"
    android:layout_width="match_parent"
    android:layout_height="match_parent" >

</LinearLayout>
button_layout.xml
<Button xmlns:android="http://schemas.android.com/apk/res/android"
    android:layout_width="wrap_content"
    android:layout_height="wrap_content"
    android:text="Button" >

</Button>
package com.example.layoutinflater;

import android.app.Activity;
import android.os.Bundle;
import android.view.LayoutInflater;
import android.view.View;
import android.widget.LinearLayout;

public class MainActivity extends Activity {

	private LinearLayout mainLayout;

	@Override
	protected void onCreate(Bundle savedInstanceState) {
		super.onCreate(savedInstanceState);
		setContentView(R.layout.activity_main);
		mainLayout = (LinearLayout) findViewById(R.id.main_layout);
		LayoutInflater layoutInflater = LayoutInflater.from(this);
		View buttonLayout = layoutInflater.inflate(R.layout.button_layout, null);

		mainLayout.addView(buttonLayout);
	}

}
LayoutInflater其实就是使用Android提供的pull解析方式来解析布局文件的,
调用了createViewFromTag()这个方法,并把节点名和参数传了进去。它是用于根据节点名来创建View对象的。确实如此,在createViewFromTag()方法的内部又会去调用createView()方法,然后使用反射的方式创建出View的实例并返回。
当然,这里只是创建出了一个根布局的实例而已,接下来会在第31行调用rInflate()方法来循环遍历这个根布局下的子元素
同样是 createViewFromTag()方法来创建View的实例,然后还会在第24行递归调用rInflate()方法来查找这个View下的子元素,每次递归完成后则将这个View添加到父布局当中。
这样的话,把整个布局文件都解析完成后就形成了一个完整的DOM结构,最终会把最顶层的根布局返回,至此inflate()过程全部结束。
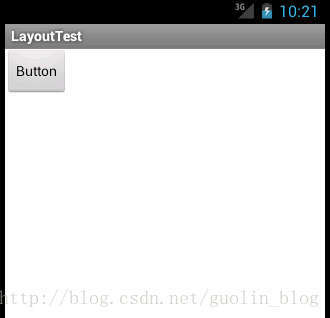
看起来有点小,想要调大一些?那简单的呀,修改button_layout.xml中的代码,如下所示:
- <Button xmlns:android="http://schemas.android.com/apk/res/android"
- android:layout_width="300dp"
- android:layout_height="80dp"
- android:text="Button" >
- </Button>
其实这里不管你将Button的layout_width和layout_height的值修改成多少,都不会有任何效果的,因为这两个值现在已经完全失去了作用。平时我们经常使用layout_width和layout_height来设置View的大小,并且一直都能正常工作,就好像这两个属性确实是用于设置View的大小的。而实际上则不然,它们其实是用于设置View在布局中的大小的,也就是说,首先View必须存在于一个布局中,之后如果将layout_width设置成match_parent表示让View的宽度填充满布局,如果设置成wrap_content表示让View的宽度刚好可以包含其内容,如果设置成具体的数值则View的宽度会变成相应的数值。这也是为什么这两个属性叫作layout_width和layout_height,而不是width和height。
修改如下:
<RelativeLayout xmlns:android="http://schemas.android.com/apk/res/android"
    android:layout_width="match_parent"
    android:layout_height="match_parent" >

    <Button
        android:layout_width="300dp"
        android:layout_height="80dp"
        android:text="Button" >
    </Button>

</RelativeLayout> 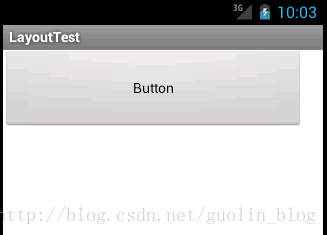
看到这里,也许有些朋友心中会有一个巨大的疑惑。不对呀!平时在Activity中指定布局文件的时候,最外层的那个布局是可以指定大小的呀,layout_width和layout_height都是有作用的。确实,这主要是因为,在setContentView()方法中,Android会自动在布局文件的最外层再嵌套一个FrameLayout,所以layout_width和layout_height属性才会有效果。


 1460
1460

 被折叠的 条评论
为什么被折叠?
被折叠的 条评论
为什么被折叠?
 到【灌水乐园】发言


