


首先,什么是spring AOP你可以去参考网上的其他文章,这边我将给您介绍用spring AOP 实现的异常捕获和日志的小demo,我也会详细解释相关配置。
首先给大家看一下我的工程目录:
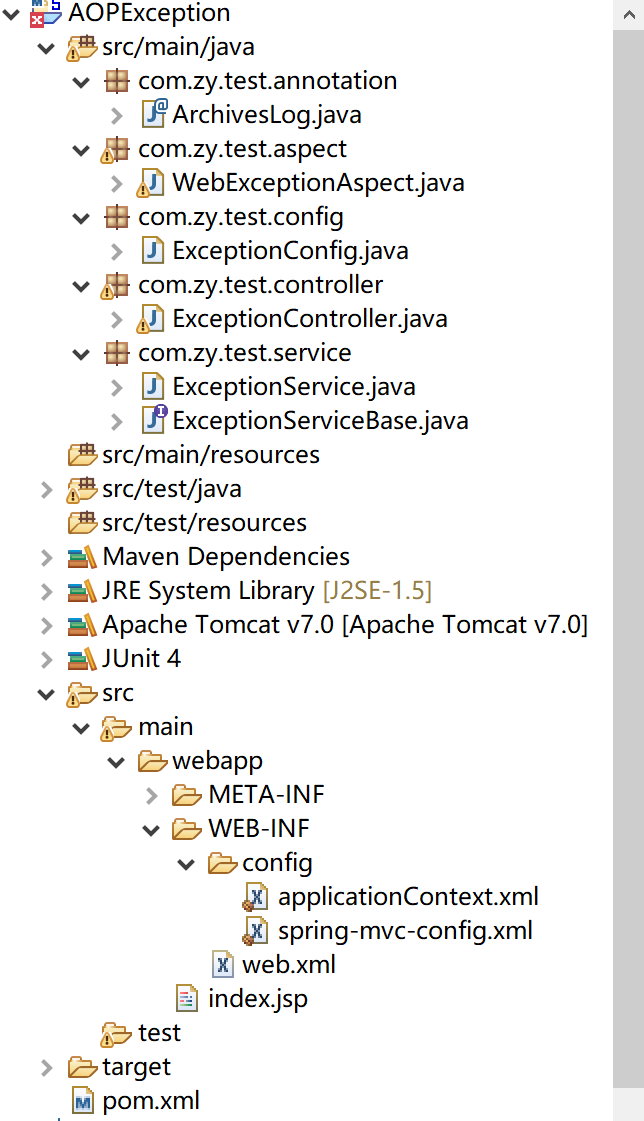
大家可以先用eclipse中新建一个maven工程,在工程中pom.xml按下面文件添加依赖:
<project xmlns="http://maven.apache.org/POM/4.0.0" xmlns:xsi="http://www.w3.org/2001/XMLSchema-instance"
  xsi:schemaLocation="http://maven.apache.org/POM/4.0.0 http://maven.apache.org/maven-v4_0_0.xsd">
  <modelVersion>4.0.0</modelVersion>
  <groupId>com.zy</groupId>
  <artifactId>AOPException</artifactId>
  <packaging>war</packaging>
  <version>0.0.1-SNAPSHOT</version>
  <name>AOPException Maven Webapp</name>
  <url>http://maven.apache.org</url>
  <dependencies>
    <dependency>
        <groupId>aspectj</groupId>
        <artifactId>aspectjrt</artifactId>
        <version>1.5.2</version>
    </dependency>
        <dependency>
        <groupId>org.springframework</groupId>
        <artifactId>spring-web</artifactId>
        <version>5.0.6.RELEASE</version>
    </dependency>
    <dependency>
        <groupId>org.springframework</groupId>
        <artifactId>spring-aop</artifactId>
        <version>5.0.4.RELEASE</version>
    </dependency>
    <dependency>
        <groupId>org.springframework</groupId>
        <artifactId>spring-context</artifactId>
        <version>5.0.5.RELEASE</version>
    </dependency>
    <dependency>
        <groupId>org.springframework</groupId>
        <artifactId>spring-core</artifactId>
        <version>5.0.6.RELEASE</version>
    </dependency>
	<dependency>
	    <groupId>org.springframework</groupId>
	    <artifactId>spring-webmvc</artifactId>
	    <version>5.0.6.RELEASE</version>
	</dependency>
    <dependency>
        <groupId>org.aspectj</groupId>
        <artifactId>aspectjweaver</artifactId>
        <version>1.8.13</version>
    </dependency>
	<dependency>
	    <groupId>com.fasterxml.jackson.core</groupId>
	    <artifactId>jackson-annotations</artifactId>
	    <version>2.9.5</version>
	</dependency>
	<dependency>
	    <groupId>com.fasterxml.jackson.core</groupId>
	    <artifactId>jackson-core</artifactId>
	    <version>2.9.5</version>
	</dependency>
	<dependency>
	    <groupId>com.fasterxml.jackson.core</groupId>
	    <artifactId>jackson-databind</artifactId>
	    <version>2.9.5</version>
	</dependency>
	<dependency>
        <groupId>com.alibaba</groupId>
        <artifactId>fastjson</artifactId>
        <version>1.2.47</version>
    </dependency>
    <dependency>
	    <groupId>org.springframework</groupId>
	    <artifactId>spring-test</artifactId>
	    <version>5.0.6.RELEASE</version>
	    <scope>test</scope>
    </dependency>
	<dependency>
	    <groupId>org.mockito</groupId>
	    <artifactId>mockito-core</artifactId>
	    <version>2.18.3</version>
	    <scope>test</scope>
	</dependency>
  </dependencies>
  <build>
    <finalName>AOPException</finalName>
  </build>
</project>
添加完依赖后,开始配置web.xml文件,如下:
<?xml version="1.0" encoding="UTF-8"?>
<web-app xmlns:xsi="http://www.w3.org/2001/XMLSchema-instance" xmlns="http://java.sun.com/xml/ns/javaee" xsi:schemaLocation="http://java.sun.com/xml/ns/javaee http://java.sun.com/xml/ns/javaee/web-app_3_0.xsd" version="3.0">
    <display-name>exception-test-web</display-name>

    <context-param>
        <param-name>contextConfigLocation</param-name>
        <param-value>//这边是加载spring的配置文件
            /WEB-INF/config/applicationContext.xml
        </param-value>
    </context-param>
    <context-param>
        <param-name>spring.profiles.default</param-name>
        <param-value>production</param-value>
    </context-param>
    <filter>
        <filter-name>encodingFilter</filter-name>
        <filter-class>org.springframework.web.filter.CharacterEncodingFilter</filter-class>
        <init-param>
            <param-name>encoding</param-name>
            <param-value>UTF-8</param-value>
        </init-param>
        <init-param>
            <param-name>forceEncoding</param-name>
            <param-value>true</param-value>
        </init-param>
    </filter>
    <filter-mapping>
        <filter-name>encodingFilter</filter-name>
        <url-pattern>/*</url-pattern>
    </filter-mapping>

    <listener>
        <listener-class>org.springframework.web.context.ContextLoaderListener</listener-class>
    </listener>

    <servlet>
        <servlet-name>springServlet</servlet-name>
        <servlet-class>org.springframework.web.servlet.DispatcherServlet</servlet-class>
        <init-param>
<param-name>contextConfigLocation</param-name>//这边是加载spring的配置文件</init-param> <load-on-startup>1</load-on-startup> </servlet> <servlet-mapping> <servlet-name>springServlet</servlet-name> <url-pattern>/</url-pattern> </servlet-mapping> <session-config> <session-timeout>20</session-timeout> </session-config></web-app>
配置完web.xml后,你可开始配置spring配置文件了,也就是applicationContext.xml文件。如下:
<?xml version="1.0" encoding="UTF-8"?>
<beans xmlns="http://www.springframework.org/schema/beans" xmlns:xsi="http://www.w3.org/2001/XMLSchema-instance"
	xmlns:context="http://www.springframework.org/schema/context" xmlns:aop="http://www.springframework.org/schema/aop"
	xmlns:tx="http://www.springframework.org/schema/tx" xmlns:jpa="http://www.springframework.org/schema/data/jpa"
	xsi:schemaLocation="http://www.springframework.org/schema/beans http://www.springframework.org/schema/beans/spring-beans-4.0.xsd
		http://www.springframework.org/schema/context http://www.springframework.org/schema/context/spring-context-4.0.xsd
		http://www.springframework.org/schema/tx http://www.springframework.org/schema/tx/spring-tx-4.0.xsd
		http://www.springframework.org/schema/data/jpa http://www.springframework.org/schema/data/jpa/spring-jpa-1.3.xsd
		http://www.springframework.org/schema/aop http://www.springframework.org/schema/aop/spring-aop-4.0.xsd"
	default-lazy-init="true">
	<description>Spring公共配置</description>

	<!-- 使用annotation 自动注册bean, 并保证@Required、@Autowired的属性被注入 -->

    <context:component-scan base-package="com.zy.test">
        <context:exclude-filter type="annotation" expression="org.springframework.stereotype.Controller" />//不扫描controller注解类
        <context:exclude-filter type="annotation" expression="org.springframework.web.bind.annotation.ControllerAdvice" />//不扫描ControllerAdvice注解类
    </context:component-scan>

</beans>
然后配置spring-mvc-config.xml文件,如下:
<?xml version="1.0" encoding="UTF-8"?>
<beans xmlns="http://www.springframework.org/schema/beans" xmlns:xsi="http://www.w3.org/2001/XMLSchema-instance"
	xmlns:context="http://www.springframework.org/schema/context" xmlns:mvc="http://www.springframework.org/schema/mvc"
	xmlns:aop="http://www.springframework.org/schema/aop"
	xsi:schemaLocation="http://www.springframework.org/schema/mvc http://www.springframework.org/schema/mvc/spring-mvc-4.0.xsd
		http://www.springframework.org/schema/beans http://www.springframework.org/schema/beans/spring-beans-4.0.xsd
		http://www.springframework.org/schema/context http://www.springframework.org/schema/context/spring-context-4.0.xsd
		http://www.springframework.org/schema/aop http://www.springframework.org/schema/aop/spring-aop-4.0.xsd ">
	<!-- 自动扫描 -->
	<context:component-scan base-package="com.zy.test" use-default-filters="false">
		<context:include-filter type="annotation" expression="org.springframework.stereotype.Controller" />//扫描COntroller注解类
		<context:include-filter type="annotation" expression="org.springframework.web.bind.annotation.ControllerAdvice" />//扫描ControllerAdvice注解类
	</context:component-scan>
	<mvc:annotation-driven>
		<mvc:message-converters register-defaults="true">
			<bean class="org.springframework.http.converter.StringHttpMessageConverter">
				<constructor-arg value="UTF-8" />
				<property name="writeAcceptCharset" value="false" />
			</bean>
			<bean class="org.springframework.http.converter.json.MappingJackson2HttpMessageConverter">
				<property name="prettyPrint" value="true" />
			</bean>
		</mvc:message-converters>
	</mvc:annotation-driven>
	<!--
	 <bean class="com.zy.test.config.ExceptionConfig"/>
	-->
       <!-- 这里的配置可以通过 com.zy.test.config.ExceptionConfig这个注解类来完成 -->
    <aop:aspectj-autoproxy proxy-target-class="true" />
    <bean class="com.zy.test.aspect.WebExceptionAspect" scope="singleton"/> //配置了单例

</beans>
上面spring容器和spring-mvc容器中扫描的类不一样,是为了区分两个容器的职责,spring-mvc负责controller控制器这块的类。因为我们的异常捕获是从controller类往外抛,所以我们对于aspect类也放在spring-mvc容器中。
下面就开始介绍我们的切面类:
package com.zy.test.aspect;

import java.lang.reflect.Method;

import org.aspectj.lang.JoinPoint;
import org.aspectj.lang.annotation.AfterReturning;
import org.aspectj.lang.annotation.AfterThrowing;
import org.aspectj.lang.annotation.Aspect;
import org.aspectj.lang.annotation.Before;
import org.aspectj.lang.annotation.Pointcut;
import org.springframework.stereotype.Component;

import com.zy.test.annotation.ArchivesLog;

/**
 * web 异常切面
 * @author user
 *
 */
@Aspect
public class WebExceptionAspect {

    @Pointcut("@annotation(org.springframework.web.bind.annotation.RequestMapping)")//连接点是@RequestMapping注解的方法
    private void webPointcut() {}

    @AfterThrowing(pointcut = "webPointcut()", throwing = "e")//切点在webpointCut()
    public void handleThrowing(JoinPoint joinPoint, Exception e) {//controller类抛出的异常在这边捕获
        String className = joinPoint.getTarget().getClass().getName();
        String methodName = joinPoint.getSignature().getName();
        Object[] args = joinPoint.getArgs();
        //开始打log
        System.out.println("异常:" + e.getMessage());
        System.out.println("异常所在类:" + className);
        System.out.println("异常所在方法:" + methodName);
        System.out.println("异常中的参数:");
        System.out.println(methodName);
        for (int i = 0; i < args.length; i++) {
            System.out.println(args[i].toString());
        }
    }


    @Before("execution(* com.zy.test.controller.*.*(..))")
    public void beforeProcess(JoinPoint joinPoint) {
        String className = joinPoint.getTarget().getClass().getName();
        String methodName = joinPoint.getSignature().getName();
        Object[] args = joinPoint.getArgs();
        //在项目中最好记录当前操作的时间和用户
        System.out.println("操作所在类:" + className);
        System.out.println("操作所在方法:" + methodName);
        System.out.println("操作中的参数:");
        for (int i = 0; i < args.length; i++) {
            System.out.println(args[i].toString());
        }
    }

    @AfterReturning(value = "execution(* com.zy.test.controller.*.*(..)))", returning = "returnVal")
    public void returnProcess(JoinPoint joinPoint, Object returnVal) {
        String className = joinPoint.getTarget().getClass().getName();
        String methodName = joinPoint.getSignature().getName();
        Object[] args = joinPoint.getArgs();
        Class targetClass = null;
        String operationName = "";
        try {
            targetClass = Class.forName(className);
        } catch (ClassNotFoundException e) {
            e.printStackTrace();
        }
        Method[] methods = targetClass.getMethods();
        for (Method method : methods) {
            if (method.getName().equals(methodName)) {
                Class[] clazzs = method.getParameterTypes();
                if (clazzs != null && clazzs.length == args.length&&
                        method.getAnnotation(ArchivesLog.class)!=null) {//这块是取出我们注解ArchiveLog中的值,一遍在日志时明确这个操作的名称
                    operationName = method.getAnnotation(ArchivesLog.class).operationName();
                    break;
                }
            }
        }
        System.out.println("操作名称:" + operationName);
        System.out.println("方法正常返回的值:" + returnVal);
    }

}
这边我们需要自定义注解:
package com.zy.test.annotation;

import java.lang.annotation.Documented;
import java.lang.annotation.Retention;
import java.lang.annotation.Target;
import java.lang.annotation.ElementType;
import java.lang.annotation.RetentionPolicy;

@Target({ElementType.PARAMETER, ElementType.METHOD})  //注解可以用于参数或者方法上
@Retention(RetentionPolicy.RUNTIME)  //保留至运行时
@Documented//被javadoc所记录
public @interface ArchivesLog {
    /**
     * 操作类型
     * @return
     */
    public String operationType() default "";

    /**
     * 操作名称
     * @return
     */
    public String operationName() default "";

}
然后定义我们的controller类:
package com.zy.test.controller;


import org.springframework.beans.factory.annotation.Autowired;
import org.springframework.stereotype.Controller;
import org.springframework.web.bind.annotation.PathVariable;
import org.springframework.web.bind.annotation.RequestMapping;
import org.springframework.web.bind.annotation.RequestMethod;
import org.springframework.web.bind.annotation.ResponseBody;

import com.alibaba.fastjson.JSONObject;
import com.zy.test.annotation.ArchivesLog;
import com.zy.test.service.ExceptionService;


@Controller
@RequestMapping("/exception")
public class ExceptionController {
    @Autowired
    private ExceptionService service;

    @RequestMapping(value = "/test/{id}", method = RequestMethod.GET, produces = "application/json;charset=UTF-8" )
    @ResponseBody
    @ArchivesLog(operationType = "测试", operationName = "测试异常或者测试返回")
    public JSONObject test(@PathVariable Integer id) throws Exception {
        JSONObject result = new JSONObject();
        result.put("zhouyu", "asdasdasdasd");
//        try {//去掉注释可以测捕获的异常,不去掉注释可以测日志处理
//            service.test();
//        } catch (Exception ex) {
//            throw new Exception("controller 层 异常");
//        }
        return result;
    }
}
service接口:
package com.zy.test.service;

public interface ExceptionServiceBase {
    void test() throws Exception;
}
service实现类:
package com.zy.test.service;

import org.springframework.stereotype.Service;

@Service
public class ExceptionService implements ExceptionServiceBase{
    public void test() throws Exception {
        boolean flag = true;
        if(flag) {
            throw new Exception("service 异常");
        }
    }
}
其中工程中的ExceptionConfig是一个配置类,用于扫描包的。但是如果你是用配置文件的化,这个文件就不用了,这边就不说了。
github上可以拉到新代码:代码在这里


 222
222


 被折叠的 条评论
为什么被折叠?
被折叠的 条评论
为什么被折叠?
 到【灌水乐园】发言


