android 夜间模式的实现

注:急速开发的人,可以直接看第三种实现方式

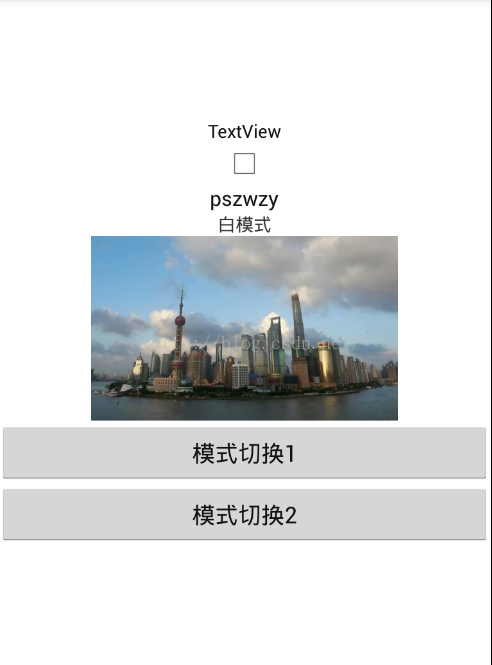
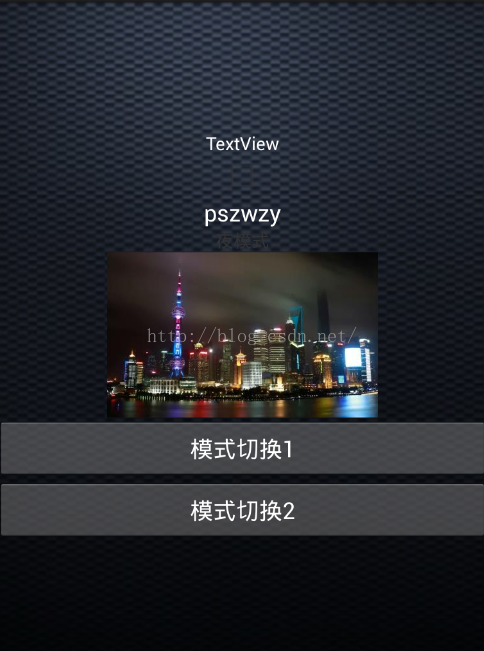
1:修改theme,重启activity(Google自家在内的很多应用都是采用此种方式实现夜间模式的)

优点:正儿八经的夜间模式,配色看着舒服

缺点:规模较大的应用,需要随theme变化的属性会很多,都需要逐一定义,有点麻烦,另外一个缺点是要使得新theme生效,一般需要restartActivity来切换UI,会导致切换主题时界面闪烁

核心思路:自定义一个颜色属性名 A,A在日间和夜间模式下都有具体的颜色代码,页面布局文件只管引用A,至于是日间还是夜间,由后台主题决定。


附上一二中方法的图

(原图) (第一种实现)(第二种实现)

好,下面来讲讲具体的实现步骤,本环节使用的开发环境是Eclipse  demo地址http://www.oschina.net/code/snippet_2702417_55892

1 首先

attrs.xml(声明属性的类型,布局xml中用) reference可以使用系统的资源ID,比如R.color.gray; color可以直接使用#ffffff颜色代码

复制代码
 <attr name="colorValue" format="color" />  
    <attr name="floatValue" format="float" />  
    <attr name="integerValue" format="integer" />  
    <attr name="booleanValue" format="boolean" />  
    <attr name="dimensionValue" format="dimension" />  
    <attr name="stringValue" format="string" />  
    <attr name="referenceValue" format="color|reference" />  
    <attr name="imageValue" format="reference"/>  
  
    <attr name="curVisibility"> 
        <!-- 相当于View的Visiblity --> 
    <enum name="show" value="0" />  
    <!-- Not displayed, but taken into account during layout (space is left for it).相当于View的unVisiblity -->  
    <enum name="inshow" value="1" />  
    <!-- Completely hidden, as if the view had not been added.相当于View的GONE -->  
    <enum name="hide" value="2" />  
    </attr> 
复制代码


colors.xml(调色板,集中管理颜色hex)遵循优秀格式规范,即调色板模式,避免使用btn1,btn2,fontTitle,fontText之类的颜色名。

复制代码
<?xml version="1.0" encoding="utf-8"?>
<resources>
   <color name="title">#101115</color>
   <color name="night_title">#FFFFFF</color> 
</resources>
复制代码

 string.xml

 <string name="app_name">dayandNight</string>
    <string name="hello_world">Hello world!</string>
    <string name="action_settings">白模式</string>
    <string name="night_action_settings">夜模式</string>


styles.xml(日间、夜间主题)

复制代码
<resources>
      <style name="AppBaseTheme" parent="android:Theme.Light">
        <!--
            Theme customizations available in newer API levels can go in
            res/values-vXX/styles.xml, while customizations related to
            backward-compatibility can go here.


        -->
    </style>

    <!-- Application theme. -->
    <style name="AppTheme" parent="AppBaseTheme">
        <!-- All customizations that are NOT specific to a particular API-level can go here. -->
    </style>
    

    <style name="DayTheme" parent="AppTheme">
        <item name="colorValue">@color/title</item>
        <item name="floatValue">0.35</item>
        <item name="integerValue">33</item>
        <item name="booleanValue">true</item>
        <item name="dimensionValue">16dp</item>
        <!-- 如果string类型不是填的引用而是直接放一个字符串,在布局文件中使用正常,但代码里获取的就有问题 -->
        <item name="stringValue">@string/action_settings</item>
        <item name="referenceValue">@drawable/bg</item>
        <item name="imageValue">@drawable/day</item>
        <item name="curVisibility">show</item>
    </style>

    <style name="NightTheme" parent="AppTheme">
        <item name="colorValue">@color/night_title</item>
        <item name="floatValue">1.44</item>
        <item name="integerValue">55</item>
        <item name="booleanValue">false</item>
        <item name="dimensionValue">18sp</item>
        <item name="stringValue">@string/night_action_settings</item>
        <item name="referenceValue">@drawable/night_bg</item>
        <item name="imageValue">@drawable/night</item>
        <item name="curVisibility">hide</item>
    </style>
</resources>
复制代码

2activity的使用

protected void onCreate(Bundle savedInstanceState) {
		super.onCreate(savedInstanceState);
		if(MyApp.isLightMode()){  
            this.setTheme(R.style.NightTheme);  
        }else{  
            this.setTheme(R.style.DayTheme);  
        }  
		setContentView(R.layout.activity_one);
	}
	
	public void onClick(View view){
		MyApp.setIslightMode(!MyApp.isLightMode());
		recreate();
	}

xml的布局:

<?xml version="1.0" encoding="utf-8"?>
<LinearLayout xmlns:android="http://schemas.android.com/apk/res/android"
    android:layout_width="match_parent"
    android:layout_height="match_parent"
    android:background="?attr/referenceValue"
    android:orientation="vertical"
    android:gravity="center" >

    <TextView
        android:id="@+id/setting_Color"
        android:layout_width="wrap_content"
        android:layout_height="wrap_content"
        android:text="TextView"
        android:textColor="?attr/colorValue" />

    <CheckBox
        android:id="@+id/setting_show_answer_switch"
        android:layout_width="wrap_content"
        android:layout_height="wrap_content"
        android:checked="?attr/booleanValue" />

    <TextView
        android:id="@+id/setting_Title"
        android:layout_width="wrap_content"
        android:layout_height="wrap_content"
        android:text="pszwzy"
        android:textColor="?attr/colorValue"
        android:textSize="?attr/dimensionValue" />

    <TextView
        android:id="@+id/setting_Text"
        android:layout_width="wrap_content"
        android:layout_height="wrap_content"
        android:text="?attr/stringValue" />

    <ImageView
        android:id="@+id/setting_Image"
        android:layout_width="wrap_content"
        android:layout_height="wrap_content"
        android:src="?attr/imageValue" />

    <View
        android:id="@+id/setting_line"
        android:layout_width="match_parent"
        android:layout_height="1dp"
        android:visibility="?attr/curVisibility" />
    <Button 
		android:onClick="onClick"
		android:layout_width="match_parent"
		android:layout_height="wrap_content"
		android:text="模式切换"
		android:textColor="?attr/colorValue"        
 		/>

</LinearLayout>
注:遇到放回activity闪屏的问题可以

(1)在BaseActivity中创建下面的方法

public static void updateTheme(Activity activity,isNight)
{
  MyApp.setNightMode(isNight);
  activity.recreate();
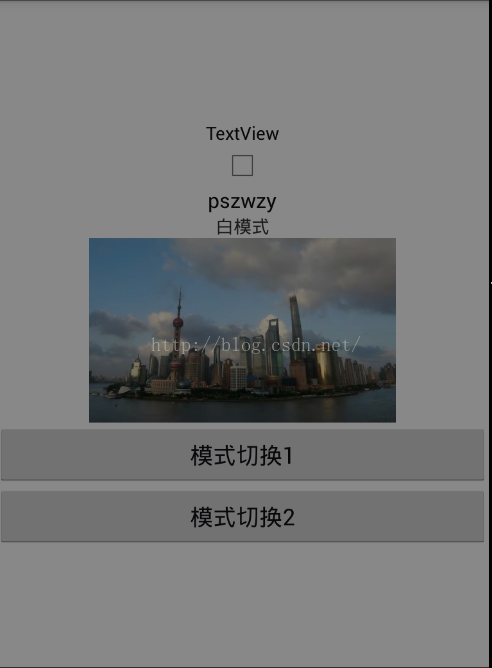
}


2:使用一个带黑色带透明度的View,盖在现有的activity上,效果类似你带上墨镜,看着太阳不刺眼。

优点:不用重启activity,不闪屏;加上透明度过渡动画,模式之间切换非常舒服,解决了1中,白底图片依旧刺眼的问题。;

缺点:配色没变化,就算带上墨镜,白天依旧是白天。

核心思路:使用WindowManager,在当前activity上,通过addView,添加一个黑色带透明度的View。

//第二中方式,只是提供一种思路,逻辑没有去实习
	public void onClickT(View view){
		LayoutParams  mNightViewParam = new LayoutParams(
	                LayoutParams.TYPE_APPLICATION,
	                LayoutParams.FLAG_NOT_TOUCHABLE | LayoutParams.FLAG_NOT_FOCUSABLE,
	                PixelFormat.TRANSPARENT);

		WindowManager   mWindowManager = (WindowManager) getSystemService(Context.WINDOW_SERVICE);
	    View   mNightView = new View(this);
	    mWindowManager.addView(mNightView, mNightViewParam);
	    mNightView.setBackgroundResource(R.color.night_mask);
}


3:通过修改Theme来切换夜间模式,不过不会出现闪屏()的情况。

和第一种方式一样需要theme的设置从上到下的代码
<?xml version="1.0" encoding="utf-8"?>
<resources>
    <attr name="gray_3_double" format="color" />
    <attr name="source_bg" format="reference" />
</resources>
</pre><pre code_snippet_id="1671755" snippet_file_name="blog_20160504_8_4007554" name="code" class="html"><?xml version="1.0" encoding="utf-8"?>
<resources xmlns:android="http://schemas.android.com/apk/res/android">
    <style name="AppTheme_Night" >
        <item name="gray_3_double">@color/gray_3_night</item>
        <item name="source_bg">@drawable/source_bg_night</item>
    </style>   
</resources>


<?xml version="1.0" encoding="utf-8"?>
<resources xmlns:android="http://schemas.android.com/apk/res/android">

    <style name="AppTheme_Light" >
         <item name="gray_3_double">@color/gray_3_light</item>
         <item name="source_bg">@drawable/source_bg_light</item>
    </style>

</resources>
先看下BaseActivity
public abstract class BaseActivity extends Activity {
protected int skin;
public Context mContext;
SharedPreferences sp;


@Override
protected void onCreate(Bundle savedInstanceState) {
<span style="white-space:pre">	</span>setThemeMode(getSkinTypeValue());
<span style="white-space:pre">	</span>super.onCreate(savedInstanceState);
<span style="white-space:pre">	</span>init();
<span style="white-space:pre">	</span>}
<span style="white-space:pre">	</span>public abstract void init();
<span style="white-space:pre">	</span>protected void setThemeMode(SkinType skinType) {
<span style="white-space:pre">	</span>  switch (skinType) {
<span style="white-space:pre">	</span>  case Light:
<span style="white-space:pre">		</span>setTheme(R.style.AppTheme_Light);
<span style="white-space:pre">	</span>  break;
<span style="white-space:pre">	</span> case Night:
<span style="white-space:pre">		</span>setTheme(R.style.AppTheme_Night);
<span style="white-space:pre">	</span> break;
<span style="white-space:pre">	</span> default:
<span style="white-space:pre">		</span>setTheme(R.style.AppTheme_Light);
<span style="white-space:pre">	</span> break;
<span style="white-space:pre">	</span>}
}
//获取用户选取的模式
protected SkinType getSkinTypeValue() {
<span style="white-space:pre">	</span>if (sp == null) {
<span style="white-space:pre">	</span>sp = getSharedPreferences("AppSkinType", Context.MODE_PRIVATE);
<span style="white-space:pre">	</span>}
<span style="white-space:pre">	</span>int i = sp.getInt("AppSkinTypeValue", 0);
<span style="white-space:pre">	</span>switch (i) {
<span style="white-space:pre">	</span> case 0:
<span style="white-space:pre">		</span>return SkinType.Light;
      case 1:
<span style="white-space:pre">		</span>return SkinType.Night;
<span style="white-space:pre">	</span> default:
<span style="white-space:pre">	</span> break;
<span style="white-space:pre">	</span>}
<span style="white-space:pre">	</span>return SkinType.Light;
}
//保存用户是选取的模式
public void saveSkinValue(int skin) {
<span style="white-space:pre">	</span>if (sp == null) {
<span style="white-space:pre">	</span>sp = getSharedPreferences("AppSkinType", Context.MODE_PRIVATE);
<span style="white-space:pre">	</span>}
<span style="white-space:pre">	</span>Editor editor = sp.edit();
<span style="white-space:pre">	</span>editor.putInt("AppSkinTypeValue", skin);
<span style="white-space:pre">	</span>editor.commit();

}

在看下第一个activity的使用的
public class MainActivity extends BaseActivity {
	private CheckBox cbSetting;
	private Button btnForward;
	private TextView tv_title;
	private View llNight;
	
	
	@Override
	public void init() {
		setContentView(R.layout.activity_main);
		llNight = findViewById(R.id.ll_night);
		tv_title = (TextView) findViewById(R.id.tv_title);
		btnForward = (Button) findViewById(R.id.forward);
		cbSetting = (CheckBox) findViewById(R.id.cb_setting);
		cbSetting.setOnCheckedChangeListener(new OnCheckedChangeListener() {
			@Override
			public void onCheckedChanged(CompoundButton buttonView, boolean isChecked) {
				if (isChecked) {
					// 夜间模式
					saveSkinValue(1);
					setTheme(R.style.AppTheme_Night);//防止getTheme()取出来的值是创建时候得值
					initView();
				} else {
					// 白天模式
					saveSkinValue(0);
					setTheme(R.style.AppTheme_Light);//防止getTheme()取出来的值是创建时候得值
					initView(); 
				}
			}
		});
		
		btnForward.setOnClickListener(new View.OnClickListener() {
			@Override
			public void onClick(View v) {
				Intent intent = new Intent(MainActivity.this,SecondActivity.class);
				startActivity(intent);
			}
		});
	}
	//改变模式后手动修改UI,不然出现闪屏
	private void initView(){
		<span style="color:#ff6666;">TypedValue typedValue = new TypedValue();
		Theme theme = getTheme();
		theme.resolveAttribute(R.attr.gray_3_double, typedValue, true);   
		btnForward.setTextColor(getResources().getColor(typedValue.resourceId));
		tv_title.setTextColor(getResources().getColor(typedValue.resourceId));
		theme.resolveAttribute(R.attr.source_bg, typedValue, true);   
		llNight.setBackgroundDrawable(getResources().getDrawable(typedValue.resourceId));</span>  
	}	
}
大体就是这样实现,附上demo链接 http://www.oschina.net/code/snippet_2702417_55886

优点:

bug少,用户体验好

缺点:

UI控件多的时候,改起来工作量不小。代码量很大

4 通过模式库changesKin

http://www.codeceo.com/article/android-changeskin-usage.html


 注:这里提到的都是资源内嵌在Apk中的方案,像qq通过下载方式实现夜间的方式可以去百度一下。

参考: http://m.oschina.net/blog/668384
  • 0
    点赞
  • 5
    收藏
    觉得还不错? 一键收藏
  • 0
    评论

“相关推荐”对你有帮助么?

  • 非常没帮助
  • 没帮助
  • 一般
  • 有帮助
  • 非常有帮助
提交
评论
添加红包

请填写红包祝福语或标题

红包个数最小为10个

红包金额最低5元

当前余额3.43前往充值 >
需支付:10.00
成就一亿技术人!
领取后你会自动成为博主和红包主的粉丝 规则
hope_wisdom
发出的红包
实付
使用余额支付
点击重新获取
扫码支付
钱包余额 0

抵扣说明:

1.余额是钱包充值的虚拟货币,按照1:1的比例进行支付金额的抵扣。
2.余额无法直接购买下载,可以购买VIP、付费专栏及课程。

余额充值