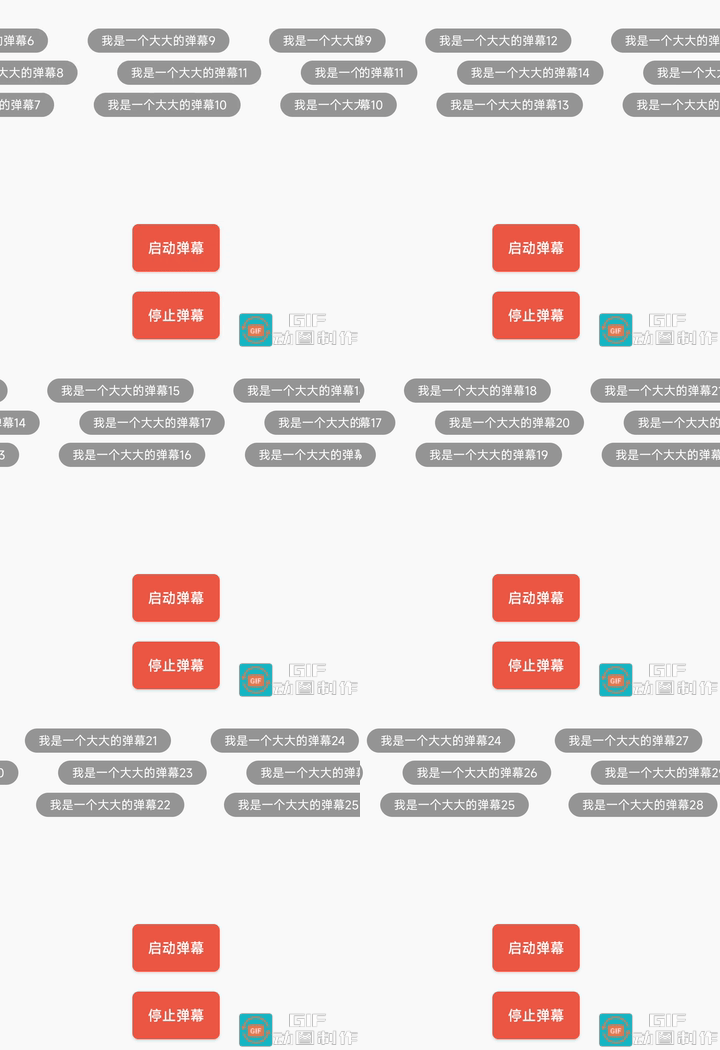
在项目开发中,弹幕是一种非常流行的效果,它能够在屏幕上动态显示大量的文本信息,如评论、消息等。开始调研了一些知名的三方弹幕库,功能很强大,但是却不适合,因为项目中只需要一个简单的弹幕效果即可,这些库有点过重了,甚至有些库还要集成so,因为需要严格要求包体积大小,所以更难以集成了。
之前做过图片瀑布流,突然想到能不能用类似的方案实现一个简单的弹幕效果。本文将介绍一种使用RecyclerView和StaggeredGridLayoutManager实现简单弹幕效果的方法。通过这种方式,可以实现弹幕的无限滚动和多行显示。
前言
弹幕效果的实现需要解决以下几个核心问题:
- 弹幕的无限滚动:确保弹幕能够连续地滚动,而不是在到达末尾时重新开始。
- 弹幕的多行显示:能够在屏幕上同时显示多行弹幕,并且每行弹幕独立滚动。
- 滚动速度的控制:能够控制弹幕的滚动速度,以实现流畅的视觉效果。
本文将通过一个示例项目来展示如何实现上述功能。
示例项目介绍
运行效果

gif图有点卡,可以自行运行一下看效果。
主要技术点
RecyclerView:用于显示弹幕的列表。StaggeredGridLayoutManager:用于实现多行弹幕的布局管理器。View.scrollBy:用于实现弹幕的无限滚动动画。
弹幕View的实现
首先,我们定义一个自定义的DanMuView,继承自ConstraintLayout:
/**
 * 弹幕View
 */
class DanMuView @JvmOverloads constructor(
    context: Context,
    attrs: AttributeSet? = null,
    defStyleAttr: Int = 0
) : ConstraintLayout(context, attrs, defStyleAttr) {

    companion object {
        private const val INTERVAL = 14L
    }

    private var mRow: Int = 1 //弹幕行数
    private var rvDanMu: RecyclerView? = null
    private val slideRunnable = object : Runnable {
        override fun run() {
            rvDanMu?.let {
                it.scrollBy(5, 0) // 这里控制滚动速度
                it.postDelayed(this, INTERVAL)
            }
        }
    }

    init {
        LayoutInflater.from(context).inflate(R.layout.layout_danmu_rv, this)
        rvDanMu = findViewById(R.id.rv_dan_mu)
        if (context is ComponentActivity) {
            context.lifecycle.addObserver(object : DefaultLifecycleObserver {
                override fun onResume(owner: LifecycleOwner) {
                    startPlay()
                }

                override fun onPause(owner: LifecycleOwner) {
                    stopPlay()
                }
            })
        }
    }

    /**
     * @param row 弹幕行数
     */
    fun setRow(row: Int) {
        this.mRow = row
    }

    /**
     * @param contentList 数据
     * @param row 设置成几行
     */
    @SuppressLint("ClickableViewAccessibility")
    fun setModels(contentList: List<String>, startFromEnd: Boolean = true) {
        if (contentList.isEmpty()) return
        val viewAdapter = BarrageAdapter(contentList, mRow, startFromEnd)
        rvDanMu?.run {
            layoutManager = StaggeredGridLayoutManager(mRow, StaggeredGridLayoutManager.HORIZONTAL)
            adapter = viewAdapter
            //屏蔽滑动
            setOnTouchListener { _, _ -> true }
        }
    }

    /**
     * 停止轮播
     */
    fun stopPlay() {
        removeCallbacks(slideRunnable)
        visibility = View.VISIBLE
    }

    /**
     * 开始轮播
     */
    fun startPlay() {
        removeCallbacks(slideRunnable)
        postDelayed(slideRunnable, INTERVAL)
        visibility = View.VISIBLE
    }

    class BarrageAdapter(
        private val dataList: List<String>,
        private val row: Int,
        private val startFromEnd: Boolean
    ) :
        RecyclerView.Adapter<BarrageAdapter.ViewDataHolder>() {

        class ViewDataHolder(view: View) : RecyclerView.ViewHolder(view) {
            val textView: TextView = view.findViewById(R.id.tvText)
        }

        override fun onCreateViewHolder(parent: ViewGroup, viewType: Int): ViewDataHolder {
            return ViewDataHolder(
                LayoutInflater.from(parent.context).inflate(R.layout.layout_danmu_1, parent, false)
            )
        }

        override fun onBindViewHolder(holder: ViewDataHolder, position: Int) {
            if (dataList.isEmpty()) return
            holder.textView.run {
                val params = layoutParams
                if (startFromEnd) {
                    //弹幕从第二屏开始滑动
                    if (position < row) {
                        //首屏空白 最大展示3行,如需展示更多行,可自行扩展
                        val screenWidth = DpUtil.getScreenSizeWidth(context)
                        when (position) {
                            1 -> params.width = screenWidth + 30.dp2px()
                            2 -> params.width = screenWidth + 10.dp2px()
                            else -> params.width = ViewGroup.LayoutParams.MATCH_PARENT
                        }
                        visibility = View.INVISIBLE
                    } else {
                        //弹幕从第二屏开始显示
                        val realIndex = if (position - row > 0) position - row else 0
                        val textStr = dataList[realIndex % dataList.size]
                        params.width = ViewGroup.LayoutParams.WRAP_CONTENT
                        visibility = if (textStr.isNotEmpty()) View.VISIBLE else View.GONE
                        text = textStr// 无限循环
                    }
                    layoutParams = params
                } else {
                    //弹幕从第一屏开始滑动
                    val textStr = dataList[position % dataList.size]
                    visibility = if (textStr.isNotEmpty()) View.VISIBLE else View.GONE
                    text = textStr// 无限循环
                }
            }
        }

        override fun getItemCount(): Int {
            return Int.MAX_VALUE // 无限循环
        }
    }
}
对应的XML文件:
1、layout_danmu_rv.xml:
<?xml version="1.0" encoding="utf-8"?>
<androidx.recyclerview.widget.RecyclerView xmlns:android="http://schemas.android.com/apk/res/android"
    android:id="@+id/rv_dan_mu"
    android:layout_width="match_parent"
    android:layout_height="wrap_content"
    android:background="@color/transparent" />
2、layout_danmu_1.xml:
<?xml version="1.0" encoding="utf-8"?>
<TextView xmlns:android="http://schemas.android.com/apk/res/android"
    xmlns:tools="http://schemas.android.com/tools"
    android:id="@+id/tvText"
    android:layout_width="wrap_content"
    android:layout_height="wrap_content"
    android:layout_marginEnd="40dp"
    android:layout_marginBottom="8dp"
    android:background="@drawable/item_danmu_bg"
    android:gravity="center"
    android:textColor="@color/white"
    android:textSize="12sp"
    tools:text="我是一个大弹幕" />
弹幕Activity的实现
接下来,我们定义一个DanMuAnimActivity,用于展示DanMuView的使用:
/**
 * 弹幕Activity
 */
class DanMuAnimActivity : BaseActivity() {

    private val mDanMuView: DanMuView by id(R.id.danMuView)
    override fun onCreate(savedInstanceState: Bundle?) {
        super.onCreate(savedInstanceState)
        setContentView(R.layout.activity_dan_mu_anim)
        initData()
    }

    private fun initData() {
        val danMuList = ArrayList<String>()
        for (i in 0..50) {
            danMuList.add("我是一个大大的弹幕$i")
        }
        mDanMuView.setRow(3) //设置行数
        mDanMuView.setModels(danMuList) //设置数据
    }

    fun startDanMu(view: View) {
        mDanMuView.startPlay()
    }

    fun stopDanMu(view: View) {
        mDanMuView.stopPlay()
    }
}
对应的XML文件:
<?xml version="1.0" encoding="utf-8"?>
<androidx.constraintlayout.widget.ConstraintLayout xmlns:android="http://schemas.android.com/apk/res/android"
    xmlns:app="http://schemas.android.com/apk/res-auto"
    android:layout_width="match_parent"
    android:layout_height="match_parent">

    <include
        android:id="@+id/toolbar"
        layout="@layout/m_toolbar" />

    <org.ninetripods.mq.study.widget.DanMuView
        android:id="@+id/danMuView"
        android:layout_width="match_parent"
        android:layout_height="wrap_content"
        android:layout_marginTop="100dp"
        app:layout_constraintEnd_toEndOf="parent"
        app:layout_constraintStart_toStartOf="parent"
        app:layout_constraintTop_toTopOf="parent" />

    <Button
        android:id="@+id/btn_start"
        style="@style/btn_style_done_new"
        android:layout_width="wrap_content"
        android:layout_height="wrap_content"
        android:layout_marginTop="100dp"
        android:onClick="startDanMu"
        android:text="启动弹幕"
        app:layout_constraintEnd_toEndOf="parent"
        app:layout_constraintStart_toStartOf="parent"
        app:layout_constraintTop_toBottomOf="@id/danMuView" />

    <Button
        android:id="@+id/btn_stop"
        style="@style/btn_style_done_new"
        android:layout_width="wrap_content"
        android:layout_height="wrap_content"
        android:layout_marginTop="20dp"
        android:onClick="stopDanMu"
        android:text="停止弹幕"
        app:layout_constraintEnd_toEndOf="parent"
        app:layout_constraintStart_toStartOf="parent"
        app:layout_constraintTop_toBottomOf="@id/btn_start" />
</androidx.constraintlayout.widget.ConstraintLayout>
嗯 ,到这里就结束了,可以看到只是使用了RecyclerView + StaggeredGridLayoutManager + scollerBy来实现的无限滚动效果,如果想实现每个Item的点击事件可按需扩展。当然,这种弹幕效果仅适用于比较简单的场景中,太复杂的场景肯定就不合适了。
总结
通过本文的介绍,我们实现了一种简单的弹幕效果。使用RecyclerView和StaggeredGridLayoutManager,不仅实现了多行弹幕的效果,还可以通过控制scrollBy方法的速度,实现弹幕的平滑滚动。这种方式非常适合在需要显示大量动态文本信息的场景中使用,例如商品评论等。如果你在项目中需要实现类似的功能,可以参考本文提供的示例代码,进行相应的修改和扩展。


 713
713

 被折叠的 条评论
为什么被折叠?


