


首先,主页面的xml文件中添加一个AutoCompleteTextView组件,简单设置属性。代码如下:
<AutoCompleteTextView
        android:id="@+id/actvId"
        android:layout_width="match_parent"
        android:layout_height="wrap_content"
        android:completionThreshold="1"
        android:inputType="text" />
为应用添加一个item组件,显示可选择的待选项,代码如下:
<?xml version="1.0" encoding="utf-8"?>
<TextView xmlns:android="http://schemas.android.com/apk/res/android"
    android:layout_width="match_parent"
    android:layout_height="match_parent"
    android:textColor="#000"
    android:padding="10dp" >

</TextView>
下来,开始写Oncreat()的函数代码:
//在全局变量中声明AutoCompleteTextView组件及要添加的数据源和对应的Adapter
private AutoCompleteTextView actv;
private List<String> datas;
private ArrayAdapter<String> adapter;
//以下代码放在Oncreat()函数中
//找到AutoCompleteTextView组件
actv = (AutoCompleteTextView) findViewById(R.id.actvId);
//填充datas数据,随机产生50个长度为10的字符串
datas = new ArrayList<>();
for (int i = 0; i < 50; i++) {
char[] chars = new char[10];
for (int j = 0; j < chars.length; j++) {
chars[j] = (char) ((int) (Math.random() * 25) + 'a');
}
datas.add(new String(chars));
}
//设置adapter
adapter=new ArrayAdapter<>(getApplicationContext(), R.layout.item_word,datas);
actv.setAdapter(adapter);
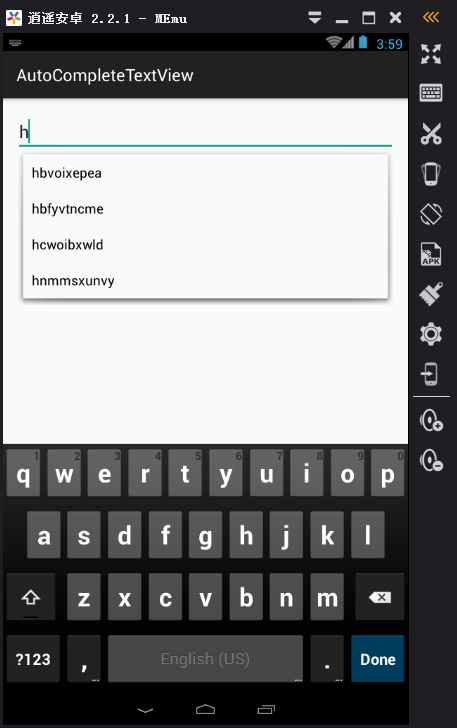
}运行界面如下:


 911
911

 被折叠的 条评论
为什么被折叠?
被折叠的 条评论
为什么被折叠?
 到【灌水乐园】发言


