


iOS Drawing-Images
内容来自[Addison.Wesley.IOS.Drawing.Sep.2014.ISBN.1502345307],记录下重要的内容
基本
创建context
CGBitmapContextCreate()创建位图图形上下文(Creates a bitmap graphics context),原型为:
CGContextRef CGBitmapContextCreate(void *data, size_t width, size_t height, size_t bitsPerComponent, size_t bytesPerRow, CGColorSpaceRef space, uint32_t bitmapInfo);参数说明:
- data-如果不为
NULL,那么它应该指向一块大小至少为bytesPerRow * height字节的内存;如果 为NULL,那么系统就会为我们自动分配和释放所需的内存,所以一般指定NULL即可 - width-图片的宽度,
size_t在iOS中被定义为unsigned long - height-图片的高度
- bitsPerComponent-像素的每个颜色分量使用的 bit 数,在 RGB 颜色空间下指定 8 即可。一个
component是指单个信道。 ARGB数据每像素使用四个component。灰度数据(grayscale)使用一个(无Alpha通道数据)或两个(带Alpha通道数据) - bytesPerRow-位图的每一行使用的字节数,大小至少为
width * bytes per pixel字节。对ARGB使用width * 4,对grayscale(non-alpha)则直接使用width - colorspace-bitmap上下文使用的颜色空间
- bitmapInfo-指定位图使用的Alpha通道的样式,
kCGImageAlphaPremultipliedFirst用于彩色图像,kCGImageAlphaNone用于grayscale
获取image数据
可以通过UIImagePNGRepresentation()来获取图片的PNG表示,或者通过UIImageJPEGRepresentation ()获取图片的JPEG表示,但是这些方法返回的数据适合把图片存储为文件格式,它们包括file header(文件头) 和 marker data(标记数据) , internal chunks(内部块) , 和 compression(压缩) 。当要处理图片时,需要从上下文中获取字节数组。
使用CGBitmapContextGetData来检索源字节。它将这些字节复制到NSData实例中,并将该实例返回给调用者
提取字节数据
#define BITS_PER_COMPONENT  8
#define ARGB_COUNT 4
NSData *BytesFromRGBImage(UIImage *sourceImage)
{
    if (!sourceImage) return nil;

    //颜色空间
    CGColorSpaceRef colorSpace = CGColorSpaceCreateDeviceRGB();
    if (colorSpace == NULL)
    {
        NSLog(@"Error creating RGB color space");
        return nil;
    }

    //创建上下文
    int width = sourceImage.size.width;
    int height = sourceImage.size.height;
    CGContextRef context = CGBitmapContextCreate(NULL, width, height, BITS_PER_COMPONENT, width * ARGB_COUNT, colorSpace, (CGBitmapInfo) kCGImageAlphaPremultipliedFirst);
    CGColorSpaceRelease(colorSpace );
    if (context == NULL)
    {
        NSLog(@"Error creating context");
        return nil;
    }

    //将源图片绘制到上下文中
    CGRect rect = (CGRect){.size = sourceImage.size};
    CGContextDrawImage(context, rect, sourceImage.CGImage);

    //bytes创建data
    NSData *data = [NSData dataWithBytes:CGBitmapContextGetData(context) length:(width * height * 4)];
    CGContextRelease(context);

    return data;
}
有了从图片获取字节数据,哪么如何用字节数据创建image呢?
这里使用的是CGBitmapContextCreate(),只是第一个参数传递bytes数据,表示使用提供的数据,而不要分配内存,如下:
把bytes转变为image
UIImage *ImageFromRGBBytes(NSData *data, CGSize targetSize)
{
    //检查data
    int width = targetSize.width;
    int height = targetSize.height;
    if (data.length < (width * height * 4))
    {
        NSLog(@"Error: Not enough RGB data provided. Got %d bytes. Expected %d bytes", data.length, width * height * 4);
        return nil;
    }

    //创建颜色空间
    CGColorSpaceRef colorSpace = CGColorSpaceCreateDeviceRGB();
    if (colorSpace == NULL)
    {
        NSLog(@"Error creating RGB colorspace");
        return nil;
    }

    //创建bitmap上下文
    Byte *bytes = (Byte *) data.bytes;
    CGContextRef context = CGBitmapContextCreate(bytes, width, height, BITS_PER_COMPONENT, width * ARGB_COUNT, colorSpace, (CGBitmapInfo) kCGImageAlphaPremultipliedFirst);
    CGColorSpaceRelease(colorSpace );
    if (context == NULL)
    {
        NSLog(@"Error. Could not create context");
        return nil;
    }

    //转为image
    CGImageRef imageRef = CGBitmapContextCreateImage(context);
    UIImage *image = [UIImage imageWithCGImage:imageRef];

    // Clean up
    CGContextRelease(context);
    CFRelease(imageRef);

    return image;
}
一些基本用法
创建自己定义的图片,如下使用自定义的颜色和大小来创建图片
UIImage *BuildSwatchWithColor(UIColor *color, CGFloat side)
{
    //创建图片context
    UIGraphicsBeginImageContextWithOptions(
                                           CGSizeMake(side, side), YES,
                                           0.0);

    [color setFill];
    UIRectFill(CGRectMake(0, 0, side, side));

    //获取图片
    UIImage *image = UIGraphicsGetImageFromCurrentImageContext();
    UIGraphicsEndImageContext();
    return image;
}
获取缩略图
缩略图使用drawInRect:方法绘制,注意比率
UIImage *BuildThumbnail(UIImage *sourceImage, CGSize targetSize, BOOL useFitting)
{
    CGRect targetRect = SizeMakeRect(targetSize);
    UIGraphicsBeginImageContextWithOptions(targetSize, NO, 0.0);

    CGRect naturalRect = (CGRect){.size = sourceImage.size};
    CGRect destinationRect = useFitting ? RectByFittingRect(naturalRect, targetRect) : RectByFillingRect(naturalRect, targetRect);
    [sourceImage drawInRect:destinationRect];

    UIImage *thumbnail = UIGraphicsGetImageFromCurrentImageContext();
    UIGraphicsEndImageContext();
    return thumbnail;
}
其它用法
提取子图像
使用CGImageRef CGImageCreateWithImageInRect(CGImageRef image, CGRect rect)方法提取子图像,该方法使用包含在现有位图图像的子区域内的数据创建位图图像。
提取子图像,介绍两张方式
第一种方式:
UIImage *ExtractRectFromImage(UIImage *sourceImage, CGRect subRect)
{
    // Extract image
    CGImageRef imageRef = CGImageCreateWithImageInRect(sourceImage.CGImage, subRect);
    if (imageRef != NULL)
    {
        UIImage *output = [UIImage imageWithCGImage:imageRef];
        CGImageRelease(imageRef);
        return output;
    }

    NSLog(@"Error: Unable to extract subimage");
    return nil;
}
第二种方式
UIImage *ExtractSubimageFromRect(UIImage *sourceImage, CGRect rect)
{
UIGraphicsBeginImageContextWithOptions(rect.size, NO, 1);
CGRect destRect = CGRectMake(-rect.origin.x, -rect.origin.y,
sourceImage.size.width, sourceImage.size.height);
[sourceImage drawInRect:destRect];
UIImage *newImage = UIGraphicsGetImageFromCurrentImageContext();
UIGraphicsEndImageContext();
return newImage;
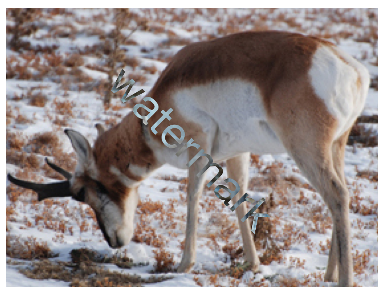
}水印
添加水印就是在图片上绘制一些其它的东西
如下的方法:
- (UIImage *) buildWatermarking: (CGSize) targetSize
{
    UIGraphicsBeginImageContextWithOptions(targetSize, NO, 0.0);
    CGContextRef context = UIGraphicsGetCurrentContext();

    //绘制原始图像到context
    CGRect targetRect = SizeMakeRect(targetSize);
    UIImage *sourceImage = [UIImage imageNamed:@"pronghorn.jpg"];
    CGRect imgRect = RectByFillingRect(SizeMakeRect(sourceImage.size), targetRect);
    [sourceImage drawInRect:imgRect];

    //创建字符串
    NSString *watermark = @"watermark";
    UIFont *font =
    [UIFont fontWithName:@"HelveticaNeue" size:48];
    CGSize size = [watermark sizeWithAttributes:@{NSFontAttributeName:font}];
    CGRect stringRect = RectCenteredInRect(SizeMakeRect(size), targetRect);

    //旋转context
    CGPoint center = RectGetCenter(targetRect);
    CGContextTranslateCTM(context, center.x, center.y);
    CGContextRotateCTM(context, M_PI_4);
    CGContextTranslateCTM(context, -center.x, -center.y);

    //绘制字符串,使用blend mode
    CGContextSetBlendMode(context, kCGBlendModeDifference);
    [watermark drawInRect:stringRect withAttributes:@{NSFontAttributeName:font, NSForegroundColorAttributeName:[UIColor whiteColor]}];

    UIImage *image = UIGraphicsGetImageFromCurrentImageContext();
    UIGraphicsEndImageContext();

    return image;
}
效果如下:


 3560
3560

 被折叠的 条评论
为什么被折叠?
被折叠的 条评论
为什么被折叠?
 到【灌水乐园】发言


