Members are used for registering and authenticating external users of an Umbraco installation (ie. forum members, intranet users and so forth). Unlike with Document Types and Media Types everything is done in the Members section both defining and creating, and editing members. This guide will explain how to define and create members in the backoffice. If you want to work with members using the service APIs, links can be found at the end of document
成员用于Umbraco安装过程中
注册和认证的外部用户(即论坛成员,内部网用户等等)。与文档类型和媒体类型不同的是,Member
成员
的定义,创建和编辑都已经预制好了。本指南将解释如何在后台
来
定义和创建成员。如果你想使用成员serverci
api
, 查看此文档末的链接
There is a default Member Type that can be used to create members. You can of course customize it to fit your needs or create your own from scratch.
已经有一个默认的成员类型,可用来创建成员。你当然也可以定制化以适合您的需求,或从头开始创建你自己的。
Go to
Members section, click the menu icon next to
Members in the member tree and select
Member. Members have a number mandatory properties. So aside from filling out the name you will need to fill out
Login,
Email and
Password on the
Properties tab before the member can be saved.
去Members 部分,在成员树中,单击Members 旁边的菜单图标 并选择Member 。成员有许多强制性的属性。所以除了填写名字,还需要在Properties选项卡中填写Login 、Email 和Password ,然后保存。
There is also a number of default properties on the Membership tab:
在Membership 默认属性选项卡中也有一些属性,如下:
- umbracoMemberComments
- umbracoMemberFailedPasswordAttempts
- umbracoMemberApproved
- umbracoMemberLockedOut
- umbracoMemberLastLockoutDate
- umbracoMemberLastLogin
- umbracoMemberLastPasswordChangeDate
Once the member is created and saved you can access it by expanding the members tree and click
All Members to get a list view (with real time search) or select the member type to filter by, by selecting it in the Members tree.
一旦成员创建并保存了,您可以通过 扩展成员树并单击
All Members来查看
列表视图(与实时搜索)或选择会员类型进行过滤 来查看成员。
Creating a Member Type
创建一个成员类型
You can create your own Member Types and add properties and tabs just as with Document Types.
Go to the Members section, click the menu icon next to Member Types and select Create. Name the new Member Type and click the Create button.
You are now taken to the Member Type editor that is used to define and edit the Memeber Type. It consists of three tabs:
Info,
Generic Properties and
Tabs.
您可以创建自己的成员类型,添加属性和标签,就和文档类型一样操作。
去Members 部分,单击Member Types 旁边的菜单图标 ,并选择Create 。命名这个新的成员类型, 然后单击Create按钮。
你现在看到的是成员类型编辑器,用于定义和编辑成员类型。它由三个选项卡:Info ,Generic Properties 和Tabs 组成。
Shows basic information about the Member Type and settings for custom properties.
显示Member 类型的基本信息,设置自定义属性。
Name: The name of the Member Type shown in the Member Type tree and when users create a new member.
Alias: Used to Reference the Member Type in code.
Icon: The icon is shown in the Members list view. If the are more than one Member Type choosing different icons will help identify members easily.
Description: The description is shown when creating a new member.
Property settings: If properties are added to the Member Type you can control frontend access to the property:
- Member can edit: A logged in member can edit this property.
- Show on profile: The property will show on the profile for member that is logged in.
Name :当用户创建一个新的成员时,显示在成员类型树中的成员类型的名称。
Alias :用于在代码中引用此成员类型。
Icon :显示在成员列表视图中的图标 。如果不同的成员类型选择不同的图标,将有助于区分成员。
Description :在创建一个新成员时改成员的描述。
Property settings:当属性被添加到成员类型中时,用来控制属性的访问权限:
- Member can edit :已经登录的会员可以编辑此属性。
- Show on profile :在这个概要文件中将显示登录的会员。
Create. edit and organize properties for this Member Type.
串讲,编辑和组织此成员类型的属性。
To add a property to the Member Type select
Click here to add new property.
要给成员类型添加一个属性,选择Click here to add new property 。
Name: The name of the property.
Alias: Used to reference the property in your templates.
Type: Selecting the type will decide the input method for this property. Ie Richtext editor, Date Picker, Image Cropper and so forth. You can edit or create new types in the Developer Section under the Data Type node.
Tab: Place the property on a tab. Additional tabs can be created on the Tabs tab. If the property is placed on the Generic Properties tab it will show on the Properties tab in the content view.
Mandatory: Making the property mandatory means the content cannot be created/saved if the property has no value.
Validation: Add a regular expression to validate the property upon save.
Description: The description will be displayed below the property name when creating/editing the member. A good description is important to the editing experience.
Name :属性的名称。
Alias :用于程序连接到template中的属性内容。
Type :type将决定这个属性的输入方法。比如Richtext editor, Date Picker, Image Cropper 等等。您可以在Developer 部分Data Type节点下创建新的类型。
Tab :标签上的属性。在Tabs 选项卡中,可以创建额外的选项卡。如果属性是放置在Generic Properties 选项卡中,将会显示在Properties选项卡。
Mandatory:不能创建/保存没有内容的属性。
Validation :添加一个正则表达式来验证保存的属性。
Description :在创建/编辑成员的时候,显示在属性名称下面的描述。良好的描述对于开发很重要。
Organizing properties
组织性质
Organize properties with drag and drop. If multiple tabs exists it is possible to drag properties between the different tabs.
组织和拖拽属性。如果存在多个选项卡可以拖拽属性之间不同的标签。
A new tab is created by entering a name into the input field and pressing the
New tab button.
通过输入名称,点击New tab 按钮, 来创建一个新的选项卡 。
Name and sort order
名称和排序顺序
Renaming a tab is done simply by changing the name in the input field and saving the Document Type. To change the order of tabs use the drag and drop handle to the left or enter a numeric value in the second input field. Tabs will be displayed from left (lowest value) to right (highest value) in the content section.
重命名一个标签很简单,在name 输入框中修改并保存即可。改变标签的顺序,拖动左边的Icon或在第二个输入框中输入一个数值。选项卡从左(最小值)到右(最大值)来显示。
Creating Member Groups
创建成员组
Member Groups defines roles for your members that can be used for role based protection. A member can be in multiple groups.
成员组定义了成员
的
角色
。一个组可以有多个成员。
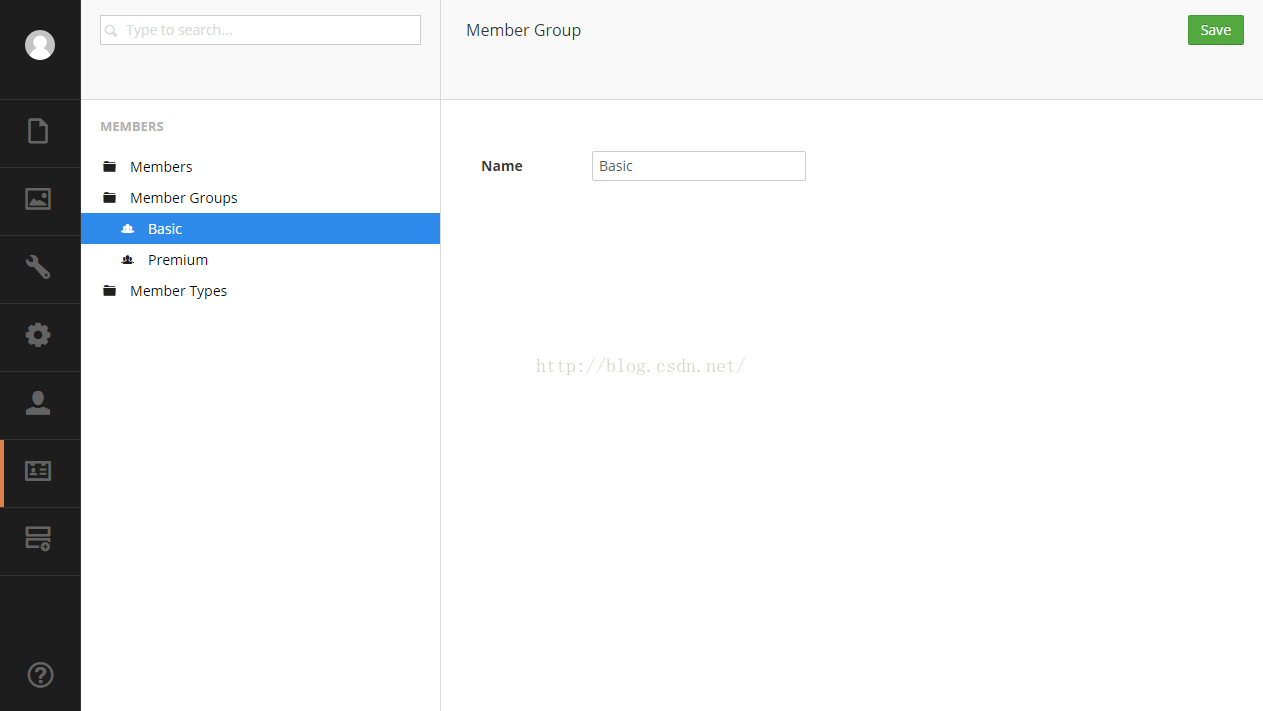
To create a new Member Group click the menu icon next
Member Groups node in the Members section. Choose
Create, name the group and save the group.
单击Members 部分的Member Groups 边上的菜单图标 ,来创建一个新的成员组。选择Create ,命名,然后保存。
Assigning a Member Group
分配小组成员
To assign a member to a specific group find the member you wish to assign and go to the
Properties tab. Under the Member Group property there are two columns:
在Properties选项卡 ,可以将成员分配到你希望的组中。Member Group 属性有两列:
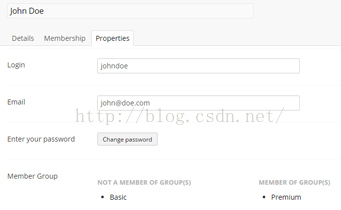
NOT A MEMBER OF GROUP(S): Lists all the groups that the member is not a part of. To assign a group to the member simply click it and it will move to the other column.
MEMBER OF GROUP(S): Lists all the groups that the member is part of. To remove the member from a group simply click it and it will move to the other column.
NOT A MEMBER OF GROUP(S) :列出了此成员不属于的所有的 Member 组。只需点击成员,它就会移动到另一列,就分配到改组了。
MEMBER OF GROUP(S) :列出了此成员属于的所有的 Member 组 。只需点击, 它就会移动到另一列,该成员就不属于该组了。
As a developer you are able to leverage your website easily when you build on the members section of Umbraco.
Although the member section is by default in the Umbraco backoffice. You will have some work to implement it on the front end of your website. The members come from a custom Asp.net membership provider. While the member groups are coming from a custom Role provider. Both are defined in the web.config. You can find out more about the services methods in the reference section of the documentation by following the links below .
作为一名开发人员,你可以利用你的网站很容易当你构建Umbraco的部分成员。
尽管Umbraco backoffice 有默认成员部分。你还需要做一些工作来让成员从前端登录你的网站。成员来自一个定制Asp.net membership provider 。而小组成员来自自定义Role provider 。都是在web . config中定义。你可以查看下面的链接 找到更多关于services methods 的参考文档。
More information
Related Services


 3677
3677

 被折叠的 条评论
为什么被折叠?
被折叠的 条评论
为什么被折叠?
 到【灌水乐园】发言


