


最近开始了解NDK方面的知识,东西非常多,目前也是刚开始学的阶段,很多东西没有深入,甚至我的这篇博客记录的知识点有些我自己也不是太懂,所以,ndk的学习任重而道远~
这里不介绍怎么创建一个ndk的项目和在现有的项目中支持ndk。这里我只会介绍一个Android Studio 下的ffmpeg的解码读帧,所以,ffmpeg的编译也请自行google。还有就是我这里只准备了armeabi平台下的so库。(实在是不好意思)
首先,需要在jniLibs的armeabi的目录下面,copy一些ffmpeg的so库。就像这样子的:
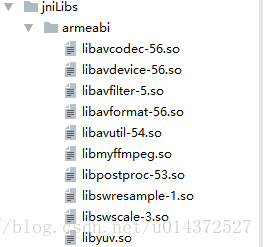
不要担心,这些我会给你提供哒~
由于,我是基于CMake的方式来编译ndk的文件的,所以,我们先在build文件里面添加如下:
externalNativeBuild {
        cmake {
            path "CMakeLists.txt"
        }
    }
defaultConfig {
ndk{
abiFilters "armeabi"
}
}cmake_minimum_required(VERSION 3.4.1)
add_library( # Sets the name of the library.
videoplayer
# Sets the library as a shared library.
SHARED
# Provides a relative path to your source file(s).
src/main/cpp/ffmpeg_player.c
)
find_library( # Sets the name of the path variable.
log-lib
# Specifies the name of the NDK library that
# you want CMake to locate.
log )
add_library(
avcodec
SHARED
IMPORTED
)
add_library(
avfilter
SHARED
IMPORTED
)
add_library(
avformat
SHARED
IMPORTED
)
add_library(
avutil
SHARED
IMPORTED
)
add_library(
swresample
SHARED
IMPORTED
)
add_library(
swscale
SHARED
IMPORTED
)
add_library(
postproc
SHARED
IMPORTED
)
add_library(
avdevice
SHARED
IMPORTED
)
add_library(
myffmpeg
SHARED
IMPORTED
)
add_library(
yuv
SHARED
IMPORTED
)
if(${ANDROID_ABI} STREQUAL "armeabi")
set_target_properties(
avcodec
PROPERTIES IMPORTED_LOCATION
${CMAKE_SOURCE_DIR}/src/main/jniLibs/armeabi/libavcodec-56.so
)
set_target_properties(
avdevice
PROPERTIES IMPORTED_LOCATION
${CMAKE_SOURCE_DIR}/src/main/jniLibs/armeabi/libavdevice-56.so
)
set_target_properties(
avfilter
PROPERTIES IMPORTED_LOCATION
${CMAKE_SOURCE_DIR}/src/main/jniLibs/armeabi/libavfilter-5.so
)
set_target_properties(
avformat
PROPERTIES IMPORTED_LOCATION
${CMAKE_SOURCE_DIR}/src/main/jniLibs/armeabi/libavformat-56.so
)
set_target_properties(
avutil
PROPERTIES IMPORTED_LOCATION
${CMAKE_SOURCE_DIR}/src/main/jniLibs/armeabi/libavutil-54.so
)
set_target_properties(
postproc
PROPERTIES IMPORTED_LOCATION
${CMAKE_SOURCE_DIR}/src/main/jniLibs/armeabi/libpostproc-53.so
)
set_target_properties(
swresample
PROPERTIES IMPORTED_LOCATION
${CMAKE_SOURCE_DIR}/src/main/jniLibs/armeabi/libswresample-1.so
)
set_target_properties(
swscale
PROPERTIES IMPORTED_LOCATION
${CMAKE_SOURCE_DIR}/src/main/jniLibs/armeabi/libswscale-3.so
)
set_target_properties(
myffmpeg
PROPERTIES IMPORTED_LOCATION
${CMAKE_SOURCE_DIR}/src/main/jniLibs/armeabi/libmyffmpeg.so
)
set_target_properties(
yuv
PROPERTIES IMPORTED_LOCATION
${CMAKE_SOURCE_DIR}/src/main/jniLibs/armeabi/libyuv.so
)
endif(${ANDROID_ABI} STREQUAL "armeabi")
target_link_libraries( # Specifies the target library.
videoplayer
avcodec
avdevice
avfilter
avformat
avutil
postproc
swresample
swscale
myffmpeg
yuv
android
# Links the target library to the log library
# included in the NDK.
${log-lib} )
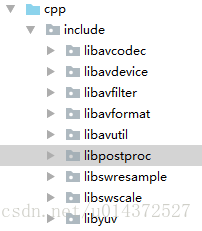
当然了,我们还需要一些文件,在cpp目录下。像这样:
咦?好像还没开始写代码哦,不要急嘛,现在开始!
我们需要新建一个类,在类里面定义一个native方法:
public native void render(String input,Surface surface); static{
System.loadLibrary("avutil-54");
System.loadLibrary("swresample-1");
System.loadLibrary("avcodec-56");
System.loadLibrary("avformat-56");
System.loadLibrary("swscale-3");
System.loadLibrary("postproc-53");
System.loadLibrary("avfilter-5");
System.loadLibrary("avdevice-56");
System.loadLibrary("myffmpeg");
}
static {
System.loadLibrary("videoplayer");
}public void mPlay(View btn){
String video = "love.mp4";
final String input = new File(Environment.getExternalStorageDirectory(),video).getAbsolutePath();
//Surface传入到Native函数中,用于绘制
final Surface surface = videoView.getHolder().getSurface();
new Thread(new Runnable() {
@Override
public void run() {
player.render(input, surface);
}
}).start();上代码之前,咱先上张图,就是一张流程图(雷神的)
这是视频编码的流程图,我们接着上代码吧。

JNIEXPORT void JNICALL Java_com_ffmpegtest_VideoUtils_render
		(JNIEnv *env, jobject jobj, jstring input_jstr, jobject surface){
	const char* input_cstr=(*env)->GetStringUTFChars(env,input_jstr,NULL);
	//1.注册组件
	av_register_all();

	//封装格式上下文
	AVFormatContext *pFormatCtx=avformat_alloc_context();

	//2.打开输入视频文件
	if(avformat_open_input(&pFormatCtx,input_cstr,NULL,NULL)!=0){
		LOGE("%s","打开输入视频文件失败");
		return;
	}
	//3.获取视频信息
	if(avformat_find_stream_info(pFormatCtx,NULL)<0){
		LOGE("%s","获取视频信息失败");
		return;
	}

	//视频解码,需要找到视频对应的AVStream所在pFormatCtx->streams的索引位置
	int video_stream_idx=-1;

	for (int i = 0; i < pFormatCtx->nb_streams; ++i) {

		if(pFormatCtx->streams[i]->codec->codec_type==AVMEDIA_TYPE_VIDEO){
			video_stream_idx=i;
			break;
		}
	}

	//4.获取视频解码器
	AVCodecContext *pCodeCtx=pFormatCtx->streams[video_stream_idx]->codec;
	AVCodec *pCodec=avcodec_find_decoder(pCodeCtx->codec_id);
	if(pCodec==NULL){
		LOGE("%s","无法解码");
		return;
	}
	//5.打开解码器
	if(avcodec_open2(pCodeCtx,pCodec,NULL)<0){
		LOGE("%s","解码器无法打开");
		return;
	}
	//编码数据
	AVPacket *packet=(AVPacket *) av_malloc(sizeof(AVPacket));

	//像素数据(解码数据)
	AVFrame *yu_frame=av_frame_alloc();
	AVFrame *rgb_frame=av_frame_alloc();

	//native绘制
	//窗体
	ANativeWindow * nativeWindow=ANativeWindow_fromSurface(env,surface);
	//绘制时的缓冲区
	ANativeWindow_Buffer outBuffer;

	int len,got_frame,framecount=0;
	//6.一阵一阵读取压缩的视频数据AVPacket
	while (av_read_frame(pFormatCtx,packet)>=0){
		//解码AVPacket->AVFrame
		len=avcodec_decode_video2(pCodeCtx,yu_frame,&got_frame,packet);

		//非0,正在解码
		if(got_frame){
			LOGI("解码%d帧",framecount++);

			//设置缓冲区的属性(宽、高、像素格式)
			ANativeWindow_setBuffersGeometry(nativeWindow,pCodeCtx->width,pCodeCtx->height,WINDOW_FORMAT_RGBA_8888);
			ANativeWindow_lock(nativeWindow,&outBuffer,NULL);

			//设置rgb_frame的属性(像素格式,宽高)和缓冲区
			//rgb_frame缓冲区与outBuffer.bits是同一块内存
			avpicture_fill((AVPicture *)rgb_frame,outBuffer.bits,PIX_FMT_RGBA,pCodeCtx->width,pCodeCtx->height);

			//YUV->RGBA_8888
			I420ToARGB(yu_frame->data[0],yu_frame->linesize[0],
					yu_frame->data[2],yu_frame->linesize[2],
					yu_frame->data[1],yu_frame->linesize[1],
			rgb_frame->data[0],rgb_frame->linesize[0],
			pCodeCtx->width,pCodeCtx->height);

			//unlock
			ANativeWindow_unlockAndPost(nativeWindow);

			usleep(1000*16);

		}
		av_free_packet(packet);
	}
	ANativeWindow_release(nativeWindow);
	av_frame_free(&yu_frame);
	avcodec_close(pCodeCtx);
	avformat_free_context(pFormatCtx);

	(*env)->ReleaseStringUTFChars(env,input_jstr,input_cstr)


 2万+
2万+

 被折叠的 条评论
为什么被折叠?
被折叠的 条评论
为什么被折叠?
 到【灌水乐园】发言


