


最近用QT做一个服务器,众所周知,QT的主线程必须保持畅通,才能刷新UI。所以,网络通信端采用新开线程的方式。
在涉及到使用子线程更新Ui上的控件时遇到了点儿麻烦。
网上提供了很多同一线程不同类间采用信号槽通信的方式,但是并不完全适合线程间的信号槽通信,这主要体现在自定义消息的传递上。
testthread.cpp文件
mainwindow.cpp
Mainwindow里面连接信号槽,并且将收到的int参数显示在界面上。
testthread.h 文件
mainwindow.cpp 文件
此时再进行编译,能够通过,但是Qt Creator会有提示
并且运行程序,不会有任何反应。
此时能够正常运行
ABFThread.cpp
mainWindow.h
首先我们看看一般的方式:
testthread.h 文件
- #ifndef TESTTHREAD_H
- #define TESTTHREAD_H
- #include <QThread>
- #include "msg.h"
- class TestThread : public QThread
- {
- Q_OBJECT
- public:
- explicit TestThread(QObject *parent = 0);
- protected:
- void run();
- signals:
- void TestSignal(int);
- private:
- Msg msg;
- };
- #endif // TESTTHREAD_H
testthread.cpp文件
- #include "testthread.h"
- TestThread::TestThread(QObject *parent) :
- QThread(parent)
- {
- }
- void TestThread::run()
- {
- //触发信号
- emit TestSignal(123);
- }
自己定义的类继承了QThread类,重写run函数,然后触发TestSignal信号。
mainwindow.h
- #ifndef MAINWINDOW_H
- #define MAINWINDOW_H
- #include <QMainWindow>
- #include "testthread.h"
- namespace Ui {
- class MainWindow;
- }
- class MainWindow : public QMainWindow
- {
- Q_OBJECT
- public:
- explicit MainWindow(QWidget *parent = 0);
- ~MainWindow();
- private slots:
- void DisplayMsg(int);
- private:
- Ui::MainWindow *ui;
- TestThread *t;
- };
- #endif // MAINWINDOW_H
mainwindow.cpp
- #include "mainwindow.h"
- #include "ui_mainwindow.h"
- MainWindow::MainWindow(QWidget *parent) :
- QMainWindow(parent),
- ui(new Ui::MainWindow)
- {
- ui->setupUi(this);
- //进行connect前必须实例化
- t = new TestThread();
- connect(t, SIGNAL(TestSignal(int)), this, SLOT(DisplayMsg(int)));
- //执行子线程
- t->start();
- }
- void MainWindow::DisplayMsg(int a)
- {
- ui->textBrowser->append(QString::number(a));
- }
- MainWindow::~MainWindow()
- {
- delete ui;
- }
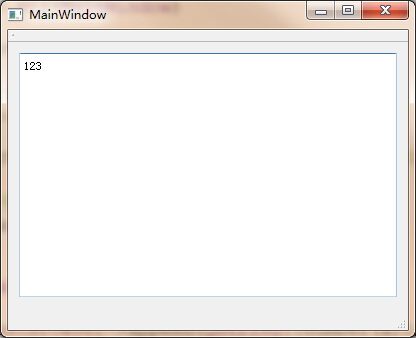
Mainwindow里面连接信号槽,并且将收到的int参数显示在界面上。
运行效果
下面我们对程序进行一些简单,修改,使得它传输我们的自定义消息。
testthread.h 文件
- #ifndef TESTTHREAD_H
- #define TESTTHREAD_H
- #include <QThread>
- #include "msg.h"
- class TestThread : public QThread
- {
- Q_OBJECT
- public:
- explicit TestThread(QObject *parent = 0);
- Msg msg;
- protected:
- void run();
- signals:
- void TestSignal(Msg); //Msg!!!
- };
- #endif // TESTTHREAD_H
testthread.h 文件
- #include "testthread.h"
- TestThread::TestThread(QObject *parent) :
- QThread(parent)
- {
- }
- void TestThread::run()
- {
- msg.int_info = 999;
- msg.str_info = "Hello Main Thread!";
- //触发信号
- emit TestSignal(msg);
- }
mainwindow.h 文件
- #ifndef MAINWINDOW_H
- #define MAINWINDOW_H
- #include <QMainWindow>
- #include "testthread.h"
- #include "msg.h"
- namespace Ui {
- class MainWindow;
- }
- class MainWindow : public QMainWindow
- {
- Q_OBJECT
- public:
- explicit MainWindow(QWidget *parent = 0);
- ~MainWindow();
- private slots:
- void DisplayMsg(Msg); //Msg!!!
- private:
- Ui::MainWindow *ui;
- TestThread *t;
- };
- #endif // MAINWINDOW_H
mainwindow.cpp 文件
- #include "mainwindow.h"
- #include "ui_mainwindow.h"
- MainWindow::MainWindow(QWidget *parent) :
- QMainWindow(parent),
- ui(new Ui::MainWindow)
- {
- ui->setupUi(this);
- //进行connect前必须实例化
- t = new TestThread();
- //Msg!!!
- connect(t, SIGNAL(TestSignal(Msg)), this, SLOT(DisplayMsg(Msg)));
- //执行子线程
- t->start();
- }
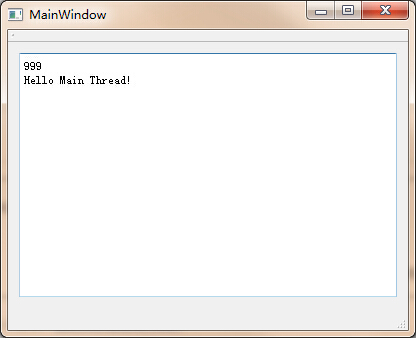
- void MainWindow::DisplayMsg(Msg msg)
- {
- ui->textBrowser->append(QString::number(msg.int_info));
- ui->textBrowser->append(msg.str_info);
- }
- MainWindow::~MainWindow()
- {
- delete ui;
- }
此时再进行编译,能够通过,但是Qt Creator会有提示
- QObject::connect: Cannot queue arguments of type 'Msg'
- (Make sure 'Msg' is registered using qRegisterMetaType().)
并且运行程序,不会有任何反应。
mainwindow.cpp文件 改动为
- ui->setupUi(this);
- qRegisterMetaType<Msg>("Msg");
此时能够正常运行
说明:
在线程间使用信号槽进行通信时,需要注意必须使用元数据类型
Qt内生的元数据类型,如int double QString 等
如果要用自己定义的数据类型,需要在connect前将其注册为元数据类型。形式见代码。
转载来自blog.csdn.net/jmy5945hh/article/details/34796359/
这个例子是主线程和子线程的,子线程与子线程之间通信呢?
connect 的 第一个参数 和第三个参数改成监听对象
connect(t, SIGNAL(TestSignal(Msg)), this, SLOT(DisplayMsg(Msg)));
以上的this就是主线程响应,把this改成要监听的另一个线程对象就好了(QT多么健壮 友好 强大)
前提是全部的线程都要在主线程里面实例化new
今天实现的一个结构提参数通过Singal传递的例子。。 那个实现是子线程与GUI子线程的参数进行传递 通过mainWindow来做中转。具体是把用户输入的数据进行复杂计算,计算交给线程做,GUI负责用户输入输出
线程头文件
ABFThread.h
public:

    struct G_ABFTableSrcUnit
    {
        int a;
        int b;
        int c;
        float d;
        float e;
        unsigned int f;
        float Gg;

        QString waveformTypel;
    };

public slots:

    void parameterPassing(abfThread::G_ABFTableSrcUnit); //线程自己调用自己的结构体。。。必须这么写不然主线程会报错的  错误是参数内容不一样
ABFThread.cpp
void abfThread::parameterPassing(abfThread::G_ABFTableSrcUnit)
{

}
GUI线程
radarControl.h
#include "abfThread"

private:
    Ui::radarControl *ui;

    abfThread::G_ABFTableSrcUnit mst_abfSrcUnit;


signals:
    void sendString(abfThread::G_ABFTableSrcUnit);
radarControl.cpp
按下按钮就发射信号
void radarControl::on_pushButton_clicked()
{
    emit sendString(mst_abfSrcUnit);
}
mainWindow.h
#include "abfThread.h"
#include "radarControl.h"
mainWindow.cpp
radarInterface = new radarControl();
m_ABFThread = new QThread();
    m_ABF = new abfThread();
    m_ABF->moveToThread(m_ABFThread);
    m_ABFThread->start();

    qRegisterMetaType<abfThread::G_ABFTableSrcUnit>("abfThread::G_ABFTableSrcUnit");
    connect(radarInterface,SIGNAL(sendString(abfThread::G_ABFTableSrcUnit)),m_ABF,SLOT(parameterPassing(abfThread::G_ABFTableSrcUnit)));
//除了注册结构体外  还要保证传递的参数写法要一样  这就是为什么 前面线程自己定义的结构体自己调用自己的原因了


 1万+
1万+


 被折叠的 条评论
为什么被折叠?
被折叠的 条评论
为什么被折叠?
 到【灌水乐园】发言


