


https://www.lfd.uci.edu/~gohlke/pythonlibs/#pygame
https://ehmatthes.github.io/pcc/
https://pypi.org/project/matplotlib/
第一部分基础知识
第1章 起步 (已看)
第2章 变量和简单数据类型 (已看)
第3章 列表简介 (已看)
第4章 操作列表 (已看)
第5章 if语句 (已看)
第6章 字典 (已看)
第7章 用户输入和while循环 (已看)
第8章 函数 (已看)
第9章 类 (已看)
第10章 文件和异常 (已看)
第11章 测试代码 (已看)
第二部分 项目
项目1 外星人入侵
第12章 武装飞船 (已看)
第13章 外星人 (已看)
第14章 记分 (已看)
项目2 数据可视化
第15章 生成数据 (已看)
第16章 下载数据 (已看)
第17章 使用API (已看)
项目3 Web应用程序
第18章 Django 入门 (已看)
第19章 用户账户 (已看)
第1章 起步
1.1 搭建编程环境
1.1.1 Python 2 和 Python 3
1.1.2 运行 Python 代码片段
1.1.3 Hello World 程序
1.2 在不同操作系统中搭建 Python 编程环境
1.2.1 在 Linux 系统中搭建 Python 编程环境
1.2.2 在OS X 系统中搭建 Python 编程环境
1.2.3 在 Windows系统中搭建Python编程环境
1.3 解决安装问题
1.4 从终端运行Python 程序
1.4.1 在Linux和OS X系统中从终端运行Python程序
1.4.2 在Windows系统中从终端运行Python程序
1.5 小结
第2章 变量和简单数据类型
2.1 运行 hello_world.py 时发生的情况
末尾的 .py 指出这是一个Python程序, 因此编辑器将使用 Python解释器 来运行它
2.2 变量
2.2.1 变量的命名和使用
就目前而言, 应使用小写的 Python 变量名
2.2.2 使用变量时避免命名错误
traceback 是一条记录, 指出了解释器尝试运行代码时, 在什么地方陷入了困境
2.3 字符串
字符串就是一系列字符
2.3.1 使用方法修改字符串的大小写
name = "ada lovelace"
print(name.title())
2.3.2 合并(拼接)字符串
firstname = "ada"
lastname = "lovelace"
print(firstname + lastname)
2.3.3 使用制表符或换行符来添加空白
空白泛指任何非打印字符, 如空格, 制表符和换行符
2.3.4 删除空白
lstrip(), rstrip(), strip()
2.3.5 使用字符串时避免语法错误
2.3.6 Python 2中的print语句
2.4 数字
2.4.1 整数
3 ** 2
2.4.2 浮点数
Python将带小数的数字都成为浮点数

2.4.3 使用函数str()避免类型错误
age = 23
message = "Happy " + str(age) + "rd Birthday"
print(message)
2.4.4 Python 2中的整数
2.5 注释
2.5.1 如何编写注释
# 向大家问好
print("Hello World")
2.5.2 该编写什么样的注释
编写注释的主要目的是阐述代码要做什么, 以及是如何做的
2.6 Python 之禅
The Zen of Python, by Tim Peters

Beautiful is better than ugly.
Explicit is better than implicit.
Simple is better than complex.
Complex is better than complicated.
Flat is better than nested.
Sparse is better than dense.
Readability counts.
Special cases aren't special enough to break the rules.
Although practicality beats purity.
Errors should never pass silently.
Unless explicitly silenced.
In the face of ambiguity, refuse the temptation to guess.
There should be one-- and preferably only one --obvious way to do it.
Although that way may not be obvious at first unless you're Dutch.
Now is better than never.
Although never is often better than *right* now.
If the implementation is hard to explain, it's a bad idea.
If the implementation is easy to explain, it may be a good idea.
Namespaces are one honking great idea -- let's do more of those!
2.7 小结
第3章 列表简介
3.1 列表是什么
列表由一系列按特定顺序排列的元素组成
bicyles = ["trek", "cannondable", "redline", "specialized"]
print(bicyles)
3.1.1 访问列表元素
bicycles[0]
3.1.2 索引从0而不是1开始
bicycles = ['1', '2', '3']
print(bicycles[-1])
3.1.3 使用列表中的各个值
3.2 修改, 添加和删除元素
3.2.1 修改列表元素
3.2.2 在列表中添加元素
bicycles.append('suzuki')
bicycles.insert(0, 'first')
3.2.3 从列表中删除元素
del bicycles[0]
bicycles.pop()
bicycles.pop(1)
bicycles.remove('suzuki')
3.3 组织列表
3.3.1 使用方法sort()对列表进行永久性排序
cars = ["c","a","b"]
cars.sort(reverse = True)
print(cars)
3.3.2 使用函数sorted()对列表进行临时排序
cars = ["c","a","b"]
print(sorted(cars))
3.3.3 倒着打印列表
cars.reverse()
3.3.4 确定列表的长度
len(cars)
3.4 使用列表时避免索引错误
3.5 小结
第4章 操作列表
4.1 遍历整个列表
cars = [1, 2, 3]
for car in cars:
    print(car)
4.1.1 深入地研究循环
4.1.2 在 for 循环中执行更多的操作
4.1.3 在 for 循环结束后执行一些操作
4.2 避免缩进错误
Python 根据缩进来判断代码行与前一个代码行的关系
4.2.1 忘记缩进
4.2.2 忘记缩进额外的代码行
4.2.3 不必要的缩进

4.2.4 循环后不必要的缩进
4.2.5 遗漏了冒号
4.3 创建数值列表
4.3.1 使用函数 range()
for value in range(1, 5):
    print(value)
4.3.2 使用 range() 创建数字列表
numbers = list(range(1,6))
print(numbers)
4.3.3 对数字列表执行简单的统计计算
digits = list(range(0, 10))
print(min(digits))
print(max(digits))
print(sum(digits))
4.3.4 列表解析
列表解析将for循环和创建新元素额代码合并成一行, 并自动附加新元素
squares = [value ** 2 for value in range(1, 11)]
print(squares)
4.4 使用列表的一部分
列表的部分元素----Python称之为切片
4.4.1 切片
players[0:3]
players[1:3]
players[:4]
players[2:]
players[-3:]
4.4.2 遍历切片
4.4.3 复制列表
m_foods = [1,2,3]
friend_foods = m_foods[:]
4.5 元组
Python将不能修改的值成为不可变的, 而不可变的列表被称为元组
4.5.1 定义元组
dimensions = (200, 50)
4.5.2 遍历元组中的所有值
4.5.3 修改元组变量
4.6 设置代码格式
4.6.1 格式设置指南
4.6.2 缩进
4.6.3 行长
4.6.4 空行
4.6.5 其他格式设置指南
4.7 小结
第5章 if语句
5.1 一个简单示例
5.2 条件测试
5.2.1 检查是否相等
5.2.2 检查是否相等时不考虑大小写
5.2.3 检查是否不相等
5.2.4 比较数字
5.2.5 检查多个条件
age0 >= 20 and age1 <= 10
age0 >=20 or age1 <= 10
5.2.6 检查特定值是否包含在列表中
ages = [ 200, 100 ]
print(200 in ages)
5.2.7 检查特定值是否不包含在列表中
ages = [ 200, 100 ]
print(200 not in ages)
5.2.8 布尔表达式
5.3 if语句
5.3.1 简单的if语句
if conditional_test:
    do something
5.3.2 if-else语句
if age >= 18:
else:
5.3.3 if-elif-else结构
if age >= 18:
elif age >= 19:
else:
5.3.4 使用多个elif代码块
5.3.5 省略else代码块
5.3.6 测试多个条件
5.4 使用if语句处理列表
5.4.1 检查特殊元素
5.4.2 确定列表不是空的
5.4.3 使用多个列表
5.5 设置if语句的格式
5.6 小结
第6章 字典
6.1 一个简单的字典
6.2 使用字典
在Python中, 字典是一系列键-值对
alien_0 = { "color": "green", "points": 5 }
6.2.1 访问字典中的值
6.2.2 添加键-值对
6.2.3 先创建一个空字典
6.2.4 修改字典中的值
6.2.5 删除键-值对
del alien_0["points"]
6.2.6 由类似对象组成的字典
6.3 遍历字典
6.3.1 遍历所有的键-值对
for key, value in user_0.items():
    print("\nKey: " + key)
    print("Value: " + value)
6.3.2 遍历字典中的所有键
for name in favorite_languages.keys():
    print(name.title())
6.3.3 按顺序遍历字典中的所有键
for name in sorted(favorite_languages.keys()):
    print(name.title())
6.3.4 遍历字典中的所有值
for language in favorite_languages.values():
    print(language.title())

for language in set(favorite_languages.values()):
    print(language.title())
6.4 嵌套
6.4.1 字典列表
6.4.2 在字典中存储列表
6.4.3 在字典中存储字典
6.5 小结
第7章 用户输入和while循环
7.1 函数input()的工作原理
message = input("Tell me something, and I will repeat it back to you: ")
print(message)
7.1.1 编写清晰的程序
7.1.2 使用 int()来获取数值输入
int(21)
7.1.3 求模运算符
7.1.4 在 Python 2.7 中获取输入
7.2 while 循环简介
7.2.1 使用while循环
current_number = 1
while current_number <= 5:
    print(current_number)
    current_number += 1
7.2.2 让用户选择何时退出
7.2.3 使用标志
7.2.4 使用 break 退出循环
7.2.5 在循环中使用 continue
7.2.6 避免无限循环
7.3 使用while循环来处理列表和字典
7.3.1 在列表之间移动元素
7.3.2 删除包含特定值的所有列表元素
7.3.3 使用用户输入来填充字典
7.4 小结
第8章 函数
8.1 定义函数
def greet_user():
    """显示简单的问候语"""
    print("Hello!")

greet_user()
文档字符串, Python使用它们来生成有关程序中函数的文档
8.1.1 向函数传递信息
8.1.2 实参和形参
8.2 传递实参
8.2.1 位置实参
8.2.2 关键字实参
describe_pet(animal_type = 'hamster', pet_name = 'harry')
8.2.3 默认值
def describe_pet(pet_name, animal_type = 'dog'):
8.2.4 等效的函数调用
8.2.5 避免实参错误
8.3 返回值
8.3.1 返回简单值
8.3.2 让实参变成可选的
8.3.3 返回字典
8.3.4 结合使用函数和while循环
8.4 传递列表
8.4.1 在函数中修改列表
8.4.2 禁止函数修改列表
function_name(list_name[:])
8.5 传递任意数量的实参
def make_pizza(*topping):
空元组
8.5.1 结合使用位置实参和任意数量实参
8.5.2 使用任意数量的关键字实参
def build_profile(first, last, **user_info):
8.6 将函数存储在模块中
将函数存储在被称为模块的独立文件中
8.6.1 导入整个模块
pizza.py

def make_pizza():

making_pizza.py

import pizza

pizza.make_pizza()

module_name.function_name()
8.6.2 导入特定的函数
from module_name import function_0, function_1, function_2
8.6.3 使用 as 给函数指定别名
from module_name import function_name as fn
8.6.4 使用 as 给模块指定别名
import module_name as mn
8.6.5 导入模块中的所有函数
8.7 函数编写指南
8.8 小结
第9章 类
9.1 创建和使用类
9.1.1 创建 Dog 类
class Dog():
    def __init__(self, name, age):
        self.name = name
        self.age = age

    def sit(self):
        print(self.name.title() + " is now sitting.")

    def roll_over(self):
        print(self.name.title() + " rolled over!")


my_dog = Dog("wille", 6)

print("My dog's name is " + my_dog.name.title() + ".")
print("My dog is " + str(my_dog.age) + " year old.")
self 必不可少
9.1.2 根据类创建实例
9.2 使用类和实例
9.2.1 Car 类
9.2.2 给属性指定默认值
9.2.3 修改属性的值
9.3 继承
9.3.1 子类的方法 __init__()
9.3.2 Python 2.7 中的继承
9.3.3 给子类定义属性和方法
9.3.4 重写父类的方法
9.3.5 将实例用作属性
class Battery():
    def __init__(self):
        print("battery")

    def method3(self):
        print("method3")

class Car():
    name = 0

    def __init__(self):
        print("car")

    def method1(self):
        print("method1")

class ElectricCar(Car):
    name = 1
    battery = Battery()

    def __init__(self):
        super().__init__()

    def method1(self):
        print("method2")
        self.battery.method3()


suzuki = Car()
tesla = ElectricCar()

print(tesla.name)
tesla.method1()
#print(tesla)
9.3.6 模拟实物
9.4 导入类
9.4.1 导入单个类
9.4.2 在一个模块中存储多个类
9.4.3 从一个模块中导入多个类
from car import Car, ElectricCar
9.4.4 导入整个模块
import car

car.Car('', '', )
9.4.5 导入模块中的所有类
9.4.6 在一个模块中导入另一个模块
9.4.7 自定义工作流程
9.5 Python 标准库
9.6 类编码风格
9.7 小结
第10章 文件和异常
10.1 从文件中读取数据
10.1.1 读取整个文件
with open("pi_digits.txt") as file_object:
    contents = file_object.read()
    print(contents)
关键字 with 在不再需要访问文件后将其关闭
10.1.2 文件路径
10.1.3 逐行读取
filename = "pi_digits.txt"

with open(filename) as file_object:
    for line in file_object:
        print(line.rstrip())
10.1.4 创建一个包含文件各行内容的列表
10.1.5 使用文件的内容
10.1.6 包含一百万位的大型文件
10.1.7 圆周率值中包含你的生日吗
10.2 写入文件
filename = "programming.txt"

with open(filename, "w") as file_object:
    file_object.write("I love programming.")
10.2.1 写入空文件
10.2.2 写入多行
10.2.3 附加到文件
10.3 异常
Python使用被称为 异常 的特殊对象来管理程序执行期间发生的错误
10.3.1 处理 ZeroDivisionError 异常

10.3.2 使用 try-except 代码块
try:
    print(5 / 0)
except ZeroDivisionError:
    print("You can't divide by zero!")
10.3.3 使用异常避免崩溃
10.3.4 else代码块
10.3.5 处理 FileNotFoundError异常
FileNotFoundError
10.3.6 分析文本
title = "Alice in Wonderland"
title.spit()
["Alice", "in", "Wonderland"]
10.3.7 使用多个文件
10.3.8 失败时一声不吭
10.3.9 决定报告哪些错误
10.4 存储数据
10.4.1 使用 json.dump()和 json.load()
import json
10.4.2 保存和读取用户生成的数据
10.4.3 重构
10.5 小结
第11章 测试代码
11.1 测试函数
name_function.py

def get_formatted_name(first, last):
    """Generate a neatly formatted full name."""
    full_name = first + " " + last
    return full_name.title()

names.py

from name_function import get_formatted_name

print("Enter 'q' at any time to quit.")
while True:
    first = input("\nPlease give me a first name: ")
    if first == "q":
        break
    last = input("Please give me a last name: ")
    if last == "q":
        break

    formatted_name = get_formatted_name(first, last)
    print("\tNeatly formatted name: " + formatted_name + ".")


test_name_function.py

import unittest
from name_function import get_formatted_name

class NamesTestCase(unittest.TestCase):
    """测试name_function.py"""
    def test_first_last_name(self):
        """能够正确地处理像Janis Joplin这样的姓名吗?"""
        formatted_name = get_formatted_name("janis", "joplin")
        self.assertEqual(formatted_name, "Janis Joplin")

unittest.main()
11.1.1 单元测试和测试用例
11.1.2 可通过的测试
11.1.3 不能通过的测试
11.1.4 测试未通过时怎么办
11.1.5 添加新测试
11.2 测试类
11.2.1 各种断言方法
11.2.2 一个要测试的类
11.2.3 测试 AnonymousSurvey 类
11.2.4 方法 setUp()
11.3 小结
第12章 武装飞船
12.1 规划项目
12.2 安装 Pygame
12.2.1 使用 pip 安装 Python 包
12.2.2 在Linux 系统中安装 Pygame
12.2.3 在 OS X 系统中安装 Pygame
12.2.4 在 Windows 系统中安装 Pygame
D:\Downloads>python -m pip install pygame-1.9.6-cp38-cp38-win32.whl
12.3 开始游戏项目
12.3.1 创建Pygame窗口以及响应用户输入
12.3.2 设置背景色
12.3.3 创建设置类
12.4 添加飞船图像
12.4.1 创建 Ship 类
12.4.2 在屏幕上绘制飞船
12.5 重构: 模块 game_functions
12.5.1 函数 check_events()
12.5.2 函数 update_screen()
12.6 驾驶飞船
12.6.1 响应按键
12.6.2 允许不断移动
12.6.3 左右移动
12.6.4 调整飞船的速度
12.6.5 限制飞船的活动范围
12.6.6 重构 check_events()
12.7 简单回顾
12.7.1 alien_invasion.py
12.7.2 settings.py
12.7.3 game_functions.py
12.7.4 ship.py
12.8 射击
12.8.1 添加子弹设置
12.8.2 创建 Bullet 类
12.8.3 将子弹存储到编组中
12.8.4 开火
12.8.5 删除已消失的子弹
12.8.6 限制子弹数量
12.8.7 创建函数 update_bullets()
12.8.8 创建函数 fire_bullet()
12.9 小结
第13章 外星人
13.1 回顾项目
13.2 创建第一个外星人
13.2.1 创建 Alien 类
13.2.2 创建 Aline 实例
13.2.3 让外星人出现在屏幕上
13.3 创建一群外星人
13.3.1 确定一行可容纳多少个外星人
13.3.2 创建多行外星人
13.3.3 创建外星人群
13.3.4 重构 create_fleet()
13.3.5 添加行
13.4 让外星人移动
13.4.1 向右移动外星人
13.4.2 创建表示外星人移动方向的设置
13.4.3 检查外星人是否撞到了屏幕边缘
13.4.4 向下移动外星人群并改变移动方向
13.5 射杀外星人
13.5.1 检测子弹与外星人的碰撞
13.5.2 为测试创建大子弹
13.5.3 生成新的外星人群
13.5.4 提高子弹的速度
13.5.5 重构 update_bullets()
13.6 结束游戏
13.6.1 检测外外星人和飞船碰撞
13.6.2 响应外星人和飞船碰撞
13.6.3 有外星人到达屏幕底端
13.6.4 游戏结束
13.7 确定应运行游戏的哪些部分
13.8 小结
第14章 记分
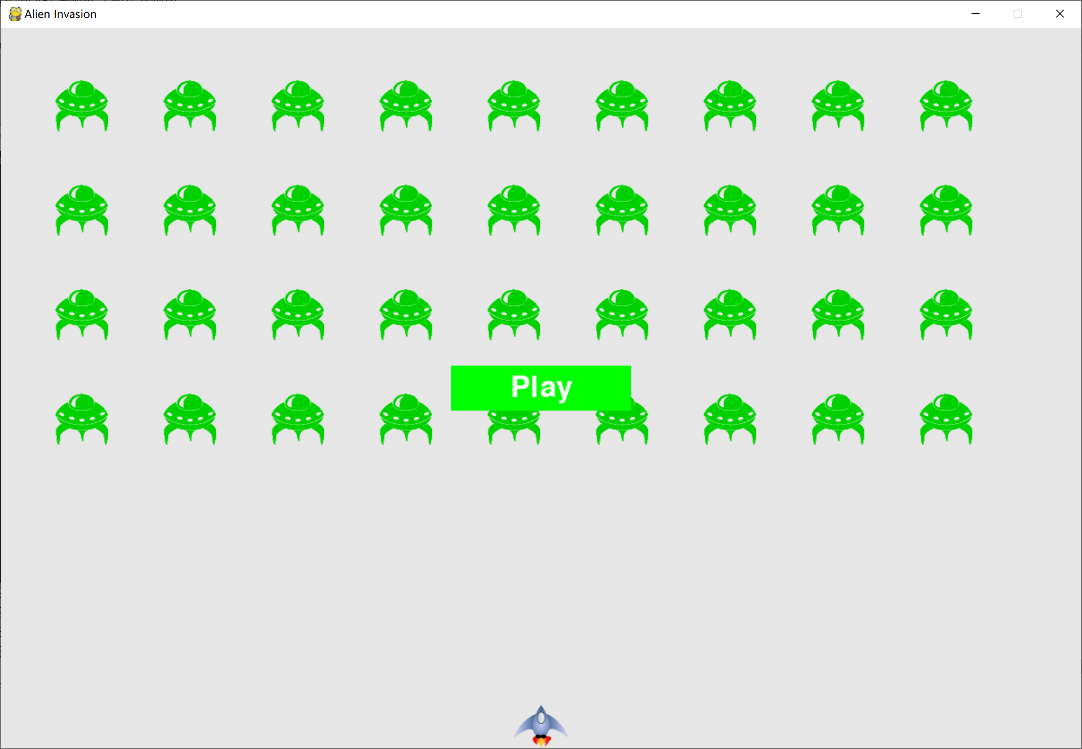
14.1 添加 Play按钮
14.1.1 创建 Button 类
14.1.2 在屏幕上绘制按钮
14.1.3 开始游戏
14.1.4 重置游戏
14.1.5 将 Play 按钮切换到非活动状态
14.1.6 隐藏光标
14.2 提高等级
14.2.1 修改速度设置
14.2.2 重置速度
14.3 记分
14.3.1 显示得分
14.3.2 创建记分牌
14.3.3 在外星人被消灭时更新得分
14.3.4 将消灭的每个外星人的点数都计入得分
14.3.5 提高点数
14.3.6 将得分圆整
14.3.7 最高得分
14.3.8 显示等级
14.3.9 显示余下的飞船数
14.4 小结


import pygame

from settings import Settings
from game_stats import GameStats
from button import Button
from ship import Ship
import game_functions as gf
from pygame.sprite import Group
from alien import Alien

def run_game():
    # 初始化游戏并创建一个屏幕对象
    pygame.init()

    ai_settings = Settings()
    screen = pygame.display.set_mode((ai_settings.screen_width, ai_settings.screen_height))

    pygame.display.set_caption("Alien Invasion")

    # 创建Play按钮
    play_button = Button(ai_settings, screen, "Play")

    # 创建一个用于存储游戏统计信息的实例
    stats = GameStats(ai_settings)

    # 创建一艘飞船
    ship = Ship(ai_settings, screen)
    # 创建一个用于存储子弹的编组
    bullets = Group()

    aliens = Group()

    # 创建外星人群
    gf.create_fleet(ai_settings, screen, ship, aliens)


    # 开始游戏的主循环
    while True:
        gf.check_events(ai_settings, screen, stats, play_button, ship, aliens, bullets)

        if stats.game_active:
            ship.update()
            gf.update_bullets(ai_settings, screen, ship, aliens, bullets)
            gf.update_aliens(ai_settings, stats, screen, ship, aliens, bullets)

        gf.update_screen(ai_settings, screen, stats, ship, aliens, bullets, play_button)

run_game()


import sys
import pygame

from bullet import Bullet
from alien import Alien
from time import sleep

def check_keydown_events(event, ai_settings, screen, ship, bullets):
    """响应按键"""
    if event.key == pygame.K_RIGHT:
        ship.moving_right = True
    elif event.key == pygame.K_LEFT:
        ship.moving_left = True
    elif event.key == pygame.K_SPACE:
        fire_bullet(ai_settings, screen, ship, bullets)
    elif event.key == pygame.K_q:
        sys.exit()

def check_keyup_events(event, ship):
    """响应松开"""
    if event.key == pygame.K_RIGHT:
        ship.moving_right = False
    elif event.key == pygame.K_LEFT:
        ship.moving_left = False

def check_events(ai_settings, screen, stats, play_button, ship, aliens, bullets):
    """响应按键和鼠标事件"""
    for event in pygame.event.get():
        if event.type == pygame.QUIT:
            sys.exit()
        elif event.type == pygame.KEYDOWN:
            check_keydown_events(event, ai_settings, screen, ship, bullets)
        elif event.type == pygame.KEYUP:
            check_keyup_events(event, ship)
        elif event.type == pygame.MOUSEBUTTONDOWN:
            mouse_x, mouse_y = pygame.mouse.get_pos()
            check_play_button(ai_settings, screen, stats, play_button, ship, aliens, bullets, mouse_x, mouse_y)

def check_play_button(ai_settings, screen, stats, play_button, ship, aliens, bullets, mouse_x, mouse_y):
    """ 在玩家单单击Play按钮时开始新游戏 """
    button_clicked = play_button.rect.collidepoint(mouse_x, mouse_y)
    if button_clicked and not stats.game_active:
        # 隐藏光标
        pygame.mouse.set_visible(False)

        # 重置游戏统计信息
        stats.reset_stats()
        stats.game_active = True

        # 清空外星人列表和子弹列表
        aliens.empty()
        bullets.empty()

        # 创建一群新的外星人, 并让飞船居中
        create_fleet(ai_settings, screen, ship, aliens)
        ship.center_ship()

def fire_bullet(ai_settings, screen, ship, bullets):
    """ 如果还没有到达限制, 就发射一颗子弹 """
    # 创建新子弹, 并将其加入到编组bullets中
    if len(bullets) < ai_settings.bullets_allowed:
        new_bullet = Bullet(ai_settings, screen, ship)
        bullets.add(new_bullet)

def update_bullets(ai_settings, screen, ship, aliens, bullets):
    """ 更新子弹的位置, 并删除已消失的子弹 """
    # 更新子弹的位置
    bullets.update()

    # 删除已消失的子弹
    for bullet in bullets.copy():
        if bullet.rect.bottom <= 0:
            bullets.remove(bullet)

    check_bullet_alien_collisions(ai_settings, screen, ship, aliens, bullets)

def check_bullet_alien_collisions(ai_settings, screen, ship, aliens, bullets):
    """ 响应子弹和外星人的碰撞 """
    # 删除发生碰撞的子弹和外星人
    collisions = pygame.sprite.groupcollide(bullets, aliens, True, True)

    if len(aliens) == 0:
        # 删除现有的所有子弹, 并创建一个新的外星人群
        bullets.empty()
        create_fleet(ai_settings, screen, ship, aliens)

def update_screen(ai_settings, screen, stats, ship, aliens, bullets, play_button):
    """更新屏幕上的图像, 并切换到新屏幕"""
    # 每次循环时都重绘屏幕
    screen.fill(ai_settings.bg_color)
    # 在飞船和外星人后面重绘所有子弹
    for bullet in bullets.sprites():
        bullet.draw_bullet()
    ship.blitme()
    aliens.draw(screen)

    # 如果游戏处于非活动状态, 就绘制Play按钮
    if not stats.game_active:
        play_button.draw_button()

    # 让最近绘制的屏幕可见
    pygame.display.flip()


def get_number_alines_x(ai_settings, alien_width):
    """ 计算每行可容纳多少个外星人 """
    available_space_x = ai_settings.screen_width - 2 * alien_width
    number_aliens_x = int(available_space_x / (2 * alien_width))
    return number_aliens_x

def get_number_rows(ai_settings, ship_height, alien_height):
    """ 计算屏幕可容纳多少行外星人 """
    available_space_y = (ai_settings.screen_height - (3 * alien_height) - ship_height)
    number_rows = int(available_space_y / (2 * alien_height))
    return number_rows

def create_alien(ai_settings, screen, aliens, alien_number, row_number):
    # 创建一个外星人并将其加入当前行
    alien = Alien(ai_settings, screen)
    alien_width = alien.rect.width
    alien.x = alien_width + 2 * alien_width * alien_number
    alien.rect.x = alien.x
    alien.rect.y = alien.rect.height + 2 * alien.rect.height * row_number
    aliens.add(alien)

def create_fleet(ai_settings, screen, ship, aliens):
    """ 创建外星人群 """
    # 创建一个外星人, 并计算一行可容纳多少个外星人
    # 外星人间距为外星人宽度
    alien = Alien(ai_settings, screen)
    number_aliens_x = get_number_alines_x(ai_settings, alien.rect.width)
    number_rows = get_number_rows(ai_settings, ship.rect.height, alien.rect.height)

    # 创建外星人群
    for row_number in range(number_rows):
        for alien_number in range(number_aliens_x):
            create_alien(ai_settings, screen, aliens, alien_number, row_number)

def check_fleet_edges(ai_settings, aliens):
    """ 有外星人到达边缘时采取相应的措施 """
    for alien in aliens.sprites():
        if alien.check_edges():
            change_fleet_direction(ai_settings, aliens)
            break

def change_fleet_direction(ai_settings, aliens):
    """ 将整群外星人下移, 并改变它们的方向 """
    for alien in aliens.sprites():
        alien.rect.y += ai_settings.fleet_drop_speed
    ai_settings.fleet_direction *= -1

def update_aliens(ai_settings, stats, screen, ship, aliens, bullets):
    """ 检查是否有外星人位于屏幕边缘, 并更新整群外星人的位置 """
    check_fleet_edges(ai_settings, aliens)
    aliens.update()

    # 检测外星人和飞船之间的碰撞
    if pygame.sprite.spritecollideany(ship, aliens):
        ship_hit(ai_settings, stats, screen, ship, aliens, bullets)

    # 检查是否有外星人到达屏幕底端
    check_aliens_bottom(ai_settings, stats, screen, ship, aliens, bullets)

def ship_hit(ai_settings, stats, screen, ship, aliens, bullets):
    """ 响应被外星人撞到的飞船 """
    if stats.ships_left > 0:
        # 将ships_left减1
        stats.ships_left -= 1

        # 清空外星人列表和子弹列表
        aliens.empty()
        bullets.empty()

        # 创建一群新的外星人, 并将飞船放到屏幕低端中央
        create_fleet(ai_settings, screen, ship, aliens)
        ship.center_ship()

        # 暂停一会儿
        sleep(0.5)
    else:
        stats.game_active = False
        pygame.mouse.set_visible(True)


def check_aliens_bottom(ai_settings, stats, screen, ship, aliens, bullets):
    """ 检查是否有外星人到达了屏幕底端 """
    screen_rect = screen.get_rect()
    for alien in aliens.sprites():
        if alien.rect.bottom >= screen_rect.bottom:
            # 像飞船被撞到一样进行处理
            ship_hit(ai_settings, stats, screen, ship, aliens, bullets)
            break


import pygame

class Ship():
    def __init__(self, ai_settings, screen):
        """初始化飞船并设置其初始位置"""
        self.screen = screen
        self.ai_settings = ai_settings

        # 加载飞船图像并获取其外接矩形
        self.image = pygame.image.load("images/ship.bmp")
        self.rect = self.image.get_rect()
        self.screen_rect = screen.get_rect()

        # 将每艘新飞船放在屏幕底部中央
        self.rect.centerx = self.screen_rect.centerx
        self.rect.bottom = self.screen_rect.bottom

        # 在飞船的属性center中存储小数值
        self.center = float(self.rect.centerx)

        # 移动标志
        self.moving_right = False
        self.moving_left = False

    def update(self):
        """根据移动标志调整飞船的位置"""
        if self.moving_right and self.rect.right < self.screen_rect.right:
            self.center += self.ai_settings.ship_speed_factor
        if self.moving_left and self.rect.left > 0:
            self.center -= self.ai_settings.ship_speed_factor

        # 根据self.center更新rect对象
        self.rect.centerx = self.center

    def blitme(self):
        """在指定位置绘制飞船"""
        self.screen.blit(self.image, self.rect)

    def center_ship(self):
        """ 让飞船在屏幕上居中 """
        self.center = self.screen_rect.centerx


class Settings():
    """存储《外星人入侵》的所有设置的类"""

    def __init__(self):
        """初始化游戏的设置"""
        # 屏幕设置
        self.screen_width = 1200
        self.screen_height = 800
        self.bg_color = (230, 230, 230)

        # 飞船的设置
        self.ship_speed_factor = 1.5
        self.ship_limit = 3

        # 子弹设置
        self.bullet_speed_factor = 3
        self.bullet_width = 300
        self.bullet_height = 15
        self.bullet_color = 60, 60, 60
        self.bullets_allowed = 3

        # 外星人设置
        self.alien_speed_factor = 1
        self.fleet_drop_speed = 10
        # fleet_direction为1表示向右移, 为-1表示向左移
        self.fleet_direction = 1


import pygame
from pygame.sprite import Sprite

class Bullet(Sprite):
    """ 一个对飞船发射的子弹进行管理的类 """

    def __init__(self, ai_settings, screen, ship):
        """ 在飞船所处的位置创建一个子弹对象 """
        super(Bullet, self).__init__()
        self.screen = screen

        # 在(0, 0)处创建一个表示子弹的矩形, 再设置正确的位置
        self.rect = pygame.Rect(0, 0, ai_settings.bullet_width, ai_settings.bullet_height)
        self.rect.centerx= ship.rect.centerx
        self.rect.top = ship.rect.top

        # 存储用小数表示的子弹位置
        self.y = float(self.rect.y)

        self.color = ai_settings.bullet_color
        self.speed_factor = ai_settings.bullet_speed_factor


    def update(self):
        """ 向上移动子弹 """
        # 更新表示子弹位置的小数值
        self.y -= self.speed_factor
        # 更新表示子弹的rect的位置
        self.rect.y = self.y

    def draw_bullet(self):
        """ 在屏幕上绘制子弹 """
        pygame.draw.rect(self.screen, self.color, self.rect)


import pygame

from pygame.sprite import Sprite

class Alien(Sprite):
    """ 表示单个外星人的类 """

    def __init__(self, ai_settings, screen):
        """ 初始化外星人并设置其起始位置 """
        super(Alien, self).__init__()
        self.screen = screen
        self.ai_settings = ai_settings

        # 加载外星人图像, 并设置其rect属性
        self.image = pygame.image.load("images/alien.bmp")
        self.rect = self.image.get_rect()

        # 每个外星人最初都在屏幕左上角附近
        self.rect.x = self.rect.width
        self.rect.y = self.rect.height

        # 存储外星人的准确位置
        self.x = float(self.rect.x)

    def blitme(self):
        """ 在指定位置绘制外星人 """
        self.screen.blit(self.image, self.rect)

    def check_edges(self):
        """ 如果外星人位于屏幕边缘, 就返回True """
        screen_rect = self.screen.get_rect()
        if self.rect.right >= screen_rect.right:
            return True
        elif self.rect.left <= 0:
            return True

    def update(self):
        """ 向左或向右移动外星人 """
        self.x += (self.ai_settings.alien_speed_factor * self.ai_settings.fleet_direction)
        self.rect.x = self.x


class GameStats():
    """ 跟踪游戏的统计信息 """

    def __init__(self, ai_settings):
        """ 初始化统计信息 """
        self.ai_settings = ai_settings
        self.reset_stats()

        # 让游戏一开始处于非活动状态
        self.game_active = False

    def reset_stats(self):
        """ 初始化在游戏运行期间可能变化的统计信息 """
        self.ships_left = self.ai_settings.ship_limit


import pygame.font

class Button():

    def __init__(self, ai_settings, screen, msg):
        """ 初始化按钮的属性 """
        self.screen = screen
        self.screen_rect = screen.get_rect()

        # 设置按钮的尺寸和其他属性
        self.width, self.height = 200, 50
        self.button_color = (0, 255, 0)
        self.text_color = (255, 255, 255)
        self.font = pygame.font.SysFont(None, 48)

        # 创建按钮的rect对象, 并使其居中
        self.rect = pygame.Rect(0, 0, self.width, self.height)
        self.rect.center = self.screen_rect.center

        # 按钮的标签只需创建一次
        self.prep_msg(msg)

    def prep_msg(self, msg):
        """ 将msg渲染为图像, 并使其在按钮上居中 """
        self.msg_image = self.font.render(msg, True, self.text_color, self.button_color)
        self.msg_image_rect = self.msg_image.get_rect()
        self.msg_image_rect.center = self.rect.center

    def draw_button(self):
        # 绘制一个用颜色填充的按钮, 再绘制文本
        self.screen.fill(self.button_color, self.rect)
        self.screen.blit(self.msg_image, self.msg_image_rect)
第15章 生成数据
15.1 安装 matplotlib
15.1.1 在 Linux系统中安装matplotlib
15.1.2 在 OS X 系统中安装 matplotlib
15.1.3 在 Windows 系统中安装 matplotlib
python -m pip install --user matplotlib-3.3.2-cp38-cp38-win32.whl
15.1.4 测试 matplotlib
15.1.5 matplotlib画廊
15.2 绘制简单的折线图
15.2.1 修改标签文字和线条粗细
15.2.2 校正图形
import matplotlib.pyplot as plt

input_values = [1,2,3,4,5]
squares = [1,4,9,16,25]
plt.plot(input_values, squares, linewidth=5)

# 设置图表标题, 并给坐标轴加上标签
plt.title("Square Numbers", fontsize = 24)
plt.xlabel("Value", fontsize = 14)
plt.ylabel("Square of Value", fontsize = 24)

# 设置刻度标记的大小
plt.tick_params(axis="both", labelsize=14)
plt.show()

15.2.3 使用 scatter() 绘制散点图并设置其样式
15.2.4 使用 scatter() 绘制一系列点
15.2.5 自动计算数据
15.2.6 删除数据点的轮廓
15.2.7 自定义颜色
15.2.8 使用颜色映射
15.2.9 自动保存图表
import matplotlib.pyplot as plt

x_values = list(range(1, 1001))
y_values = [x**2 for x in x_values]

plt.scatter(x_values, y_values, c=y_values, cmap=plt.cm.Blues, edgecolor="none", s=40)

# 设置图表标题并给坐标轴加上标签
plt.title("Square Numbers", fontsize=24)
plt.xlabel("Value", fontsize=14)
plt.ylabel("Square of Value", fontsize=24)

# 设置刻度标记的大小
plt.tick_params(axis="both", which="major", labelsize=14)

# 设置每个坐标轴的取值范围
plt.axis([0, 1100, 0, 1100000])

# plt.show()

plt.savefig("square_plot.png", bbox_inches="tight")

15.3 随机漫步
15.3.1 创建 RandomWalk() 类
15.3.2 选择方向
15.3.3 绘制随机漫步图
15.3.4 模拟多次随机漫步
15.3.5 设置随机漫步图的样式
15.3.6 给点着色
15.3.7 重新绘制起点和终点
15.3.8 隐藏坐标轴
15.3.9 增加点数
15.3.10 调整尺寸以适合屏幕


from random import choice

class RandomWalk():
    """ 一个生成随机漫步数据的类 """
    def __init__(self, num_points=5000):
        """ 初始化随机漫步的属性 """
        self.num_points = num_points

        # 所有随机漫步都始于(0, 0)
        self.x_values = [0]
        self.y_values = [0]

    def fill_walk(self):
        """ 计算随机漫步包含的所有点 """

        # 不断漫步, 直到列表达到指定的长度
        while len(self.x_values) < self.num_points:
            # 决定前进方向以及沿这个方向前进的距离
            x_direction = choice([1, -1])
            x_distance = choice([0, 1, 2, 3, 4])
            x_step = x_direction * x_distance

            y_direction = choice([1, -1])
            y_distance = choice([0, 1, 2, 3, 4])
            y_step = y_direction * y_distance

            # 拒绝原地踏步
            if x_step == 0 and y_step == 0:
                continue

            # 计算下一个点的x和y值
            next_x = self.x_values[-1] + x_step
            next_y = self.y_values[-1] + y_step

            self.x_values.append(next_x)
            self.y_values.append(next_y)


import matplotlib.pyplot as plt

from random_walk import RandomWalk


# 只要程序处于活动状态, 就不断地模拟随机漫步
while True:
    # 创建一个RandomWalk实例, 并将其包含的点都绘制出来
    rw = RandomWalk(50000)
    rw.fill_walk()

    # 设置绘图窗口的尺寸
    plt.figure(figsize=(10,6))

    point_numbers = list(range(rw.num_points))
    plt.scatter(rw.x_values, rw.y_values, c=point_numbers, cmap=plt.cm.Blues, edgecolor="none", s=1)

    # 突出起点和终点
    plt.scatter(0, 0, c="green", edgecolors="none", s=100)
    plt.scatter(rw.x_values[-1], rw.y_values[-1], c="red", edgecolor="none", s=100)

    # 隐藏坐标轴
    plt.axes().get_xaxis().set_visible(False)
    plt.axes().get_yaxis().set_visible(False)

    plt.show()

    keep_running = input("Make another walk? (y/n): ")
    if keep_running == 'n':
        break

15.4 使用 Pygal 模拟掷骰子
15.4.1 安装 Pygal
python -m pip install --user pygal
15.4.2 Pygal 画廊
15.4.3 创建 Die 类
15.4.4 掷骰子
15.4.5 分析结构
15.4.6 绘制直方图
15.4.7 通知掷两个骰子
15.4.8 同时掷两个面数不同的骰子


from random import randint

class Die():
    """ 表示一个骰子的类 """

    def __init__(self, num_sides=6):
        """ 骰子默认为6面 """
        self.num_sides = num_sides

    def roll(self):
        """ 返回一个位于1和骰子面数之间的随机值 """
        return randint(1, self.num_sides)


import pygal
from die import Die

# 创建一个D6
die = Die()

# 掷几次骰子, 并将结果存储在一个列表中
results = []
for roll_num in range(1000):
    result = die.roll()
    results.append(result)

# 分析结果
frequencies = []

for value in range(1, die.num_sides+1):
    frequency = results.count(value)
    frequencies.append(frequency)

# 对结果进行可视化
hist = pygal.Bar()

hist.title = "Results of rolling one D6 1000 times."
hist.x_labels = ["1", "2", "3", "4", "5", "6"]
hist.x_title = "Result"
hist.y_title = "Frequency of Result"

hist.add("D6", frequencies)
hist.render_to_file("die_visual.svg")
15.5 小结
第16章 下载数据
16.1 CSV 文件格式
16.1.1 分析 CSV 文件
16.1.2 打印文件头及其位置
16.1.3 提取并读取数据
16.1.4 绘制气温图表
16.1.5 模块datetime
16.1.6 在图表中添加日期
16.1.7 涵盖更长的时间
16.1.8 再绘制一个数据系列
16.1.9 给图表区域着色
16.1.10 错误检查


import csv
from datetime import datetime

from matplotlib import pyplot as plt

# 从文件中获取日期和最高温度
filename = "sitka_weather_07-2014.csv"
with open(filename) as f:
    reader = csv.reader(f)
    header_row = next(reader)

    dates, highs = [], []
    for row in reader:
        current_date = datetime.strptime(row[0], "%Y-%m-%d")
        dates.append(current_date)

        high = int(row[1])
        highs.append(high)

# 根据数据绘制图形
fig = plt.figure(dpi=128, figsize=(10, 6))
plt.plot(dates, highs, c="red")

# 设置图形的格式
plt.title("Daily high temperatures, July 2014", fontsize=24)
plt.xlabel("", fontsize=16)
fig.autofmt_xdate()
plt.ylabel("Temperature (F)", fontsize=16)
plt.tick_params(axis="both", which="major", labelsize=16)

plt.show()
16.2 制作世界人口地图: JSON格式
16.2.1 下载世界人口数据
16.2.2 提取相关的数据
16.2.3 将字符串转换为数字值
16.2.4 获取两个字母的国别码
16.2.5 制作世界地图
16.2.6 在世界地图上呈现数字数据
16.2.7 绘制完整的世界人口地图
16.2.8 根据人口数量将国家分组
16.2.9 使用 Pygal 设置世界地图的样式
16.2.10 加量颜色主题
16.3 小结


from pygal_maps_world.i18n import COUNTRIES

def get_country_code(country_name):
    """ 根据指定的国家, 返回Pygal使用的两个字母的国别码 """
    for code, name in COUNTRIES.items():
        if name == country_name:
            return code
    # 如果没有找到指定的国家, 就返回None

    return None


import json

from country_codes import get_country_code

# 将数据加载到一个列表中
filename = "population_data.json"
with open(filename) as f:
    pop_data = json.load(f)

# 打印每个国家2010年的人口数量
for pop_dict in pop_data:
    if pop_dict["Year"] == "2010":
        country_name = pop_dict["Country Name"]
        population = int(float(pop_dict["Value"]))
        code = get_country_code(country_name)
        if code:
            print(code + ":  " + str(population))
        else:
            print("ERROR - " + country_name)


import pygal_maps_world.maps

wm = pygal_maps_world.maps.World()
wm.title = "North, Central, and South America"

wm.add("North America", ["ca", "mx", "us"])
wm.add("Central America", ["bz", "cr", "gt", "hn", "ni", "pa", "sv"])
wm.add("South America", ["ar", "bo", "br", "cl", "co", "ec", "gf", "gy", "pe", "py", "sr", "uy", "ve"])

wm.render_to_file("americas.svg")
第17章 使用API
17.1 使用Web API
17.1.1 Git和GitHub
17.1.2 使用API 调用请求数据
https://api.github.com/search/repositories?q=language:python&sort=stars
17.1.3 安装 requests
17.1.4 处理 API 响应
17.1.5 处理响应字典
17.1.6 概论最受欢迎的仓库
17.1.7 监视API的速率限制
17.2 使用 Pygal 可视化仓库
17.2.1 改进 Pygal 图表
17.2.2 添加自定义工具提示
17.2.3 根据数据绘图
17.2.4 在图表中添加可单击的链接
17.3 Hacker News API
17.4 小结


import requests
import pygal
from pygal.style import LightColorizedStyle as LCS, LightenStyle as LS

# 执行API调用并存储响应
url = "https://api.github.com/search/repositories?q=language:python&sort=stars"
r = requests.get(url)
print("Status code: ", r.status_code)

# 将API响应存储在一个变量中
response_dict = r.json()
print("Total repositories:", response_dict["total_count"])

# 探索有关仓库的信息
repo_dicts = response_dict["items"]

names, stars = [], []
for repo_dict in repo_dicts:
    names.append(repo_dict["name"])
    stars.append(repo_dict["stargazers_count"])

# 可视化
my_style = LS("#333366", base_style=LCS)
my_config = pygal.Config()
my_config.x_label_rotation = 45
my_config.show_legend = False
my_config.title_font_size = 24
my_config.label_font_size = 14
my_config.major_label_font_size = 18
my_config.truncate_label = 15
my_config.show_y_guides = False
my_config.width = 1000

chart = pygal.Bar(my_config, style=my_style)
chart.title = "Most-Starred Python Projects on GitHub"
chart.x_labels = names

chart.add("", stars)
chart.render_to_file("python_repos.svg")
第18章 Django 入门
18.1 建立项目
18.1.1 制定规范
18.1.2 建立虚拟环境
learning_log$ python -m venv ll_env
18.1.3 安装 virtualenv
18.1.4 激活虚拟环境
ll_env\Scripts\activate
deactivate
18.1.5 安装 Django
18.1.6 在Django 中创建项目
18.1.7 创建数据库
18.1.8 查看项目
18.2 创建应用程序
18.2.1 定义模型
18.2.2 激活模型
18.2.3 Django 管理网站
18.2.4 定义模型 Entry
18.2.5 迁移模型 Entry
18.2.6 向管理网站注册 Entry
18.2.7 Django shell
18.3 创建网页: 学习笔记主页
18.3.1 映射URL
18.3.2 编写视图
18.3.3 编写模板
18.4 创建其他网页
18.4.1 模板继承
18.4.2 显示所有主题的页面
18.4.3 显示特定主题的页面
18.5 小结
第19章 用户账户
19.1 让用户能够输入数据
19.1.1 添加新主题
19.1.2 添加新条目
19.1.3 编辑条目
19.2 创建用户账户
19.2.1 应用程序 users
19.2.2 登录页面
19.2.3 注销
19.2.4 注册页面
19.3 让用户拥有自己的数据
19.3.1 使用@login_required 限制访问
19.3.2 将数据关联到用户
19.3.3 只允许用户访问自己的主题
19.3.4 保护用户的主题
19.3.5 保护页面edit_entry
19.3.6 将新主题关联到当前用户
19.4 小结
第20章 设置应用程序的样式并对其进行部署
20.1 设置项目 ”学习笔记" 的样式
20.1.1 应用程序 django-bootstrap3
20.1.2 使用 Bootstrap 来设置项目"学习笔记‘的样式
20.1.3 修改 base.html
20.1.4 使用 jumbotron 设置主页的样式
20.1.5 设置登录页面的样式
20.1.6 设置 new_topic 页面的样式
20.1.7 设置 topics 页面的样式
20.1.8 设置 topic 页面中条目的样式
20.2 部署 "学习笔记“
20.2.1 建立 Heroku 账户
20.2.2 安装 Heroku Toolbelt
20.2.3 安装必要的包
20.2.4 创建包含列表的文件 requirements.txt
20.2.5 指定 Python 版本
20.2.6 为部署到 Herohu 而修改 settings.py
20.2.7 创建启动进程的 Procfile
20.2.8 为部署到 Herohu 而修改 wsgi.py
20.2.9 创建用于存储静态文件的目录
20.2.10 在本地使用 gunicorn 服务器
20.2.11 使用Git 跟踪项目文件
20.2.12 推送到 Heroku
20.2.13 在Heroku 上建立数据库
20.2.14 改进 Heroku 部署
20.2.15 确保项目的安全
20.2.16 提交并推送修改
20.2.17 创建自定义错误页面
20.2.18 继续开发
20.2.19 设置 SECRET_KEY
20.2.20 将项目从 Heroku 删除
20.3 小结
附录


 446
446

 被折叠的 条评论
为什么被折叠?
被折叠的 条评论
为什么被折叠?
 到【灌水乐园】发言


