


前要
使用库:java.awt 及 javax.Swing
容器:容器是一种用于存放其他对象的对象。在 Java Swing 中,容器是一种特殊类型的组件,它可以容纳其他的 Swing 组件,比如按钮、标签、文本框等。容器本身也是一个组件,它可以对其内部的组件进行布局和管理。
在 Swing 中,常见的容器包括 JFrame、JPanel、JScrollPane 等,每种容器都含有不同功能
简单的JFrame框架窗口
一个基本的框架需要包含几个最基本的设置
以下是必须的设置(this可用具体的对象替代)
this.setTitle(String title); //设置窗口中标题栏的文字。
this.setBounds(int x, int y, int width, int height); //设置窗口位置和大小this.setDefaultCloseOpreation(EXIT_ON_CLOSE) //设置关闭窗口
this.setLayout() //设置布局管理器
this.setBackground(Color.colorName); //设置此窗口的背景颜色
this.setResizable(boolean resizable); // 设置用户是否可以改变框架大小
this.setLocation(int x, int y); //设置组件位置
this.setSize(int width, int height); //设置组件的大小
布局管理器
布局管理器有流布局(FlowLayout),边布局(BorderLayout),和网格布局(GridLayout)等
极大方便了对窗口的管理
但同时也带来了不灵活等不便,请自行选择
JFrame 类的默认布局是 BorderLayout 。 JPanel 面板类的默认布局是 FlowLayout。
流布局管理器(FlowLayout):
按照添加顺序排列,默认居中对齐,适合轻量级布局,自动换行
构造一:
this.setLayout(new FlowLayout()); this中的组件按照 FlowLayout 的规则自动水平排列,当空间不够时自动换行
构造二:
this.setLayout(new FlowLayout(intign))参数align 指定行对齐方式常见的取值是以下常量之一:
FlowLayout.LEFT, FlowLayout. RIGHT, FlowLayout.CENTER, FlowLayout.LEADING或 FlowLayout.TRAILING
构造三:
this.setLayout(new FlowLayout(int aign,inthgap, int vgap))hgap指定同一行上相邻两个组件之间的水平间隙,vgap指定相邻两行组件之间的竖直间隙
例:
import java.awt.*;

import javax.swing.*;

public class work602 {
	public static void main(String[] args) {
		new MyFlowLayout();
	}
}
class MyFlowLayout extends JFrame{
	public MyFlowLayout() {
		super("流布局示例");
		this.setBounds(100,100,300,200);
		this.setDefaultCloseOperation(EXIT_ON_CLOSE);
		this.getContentPane().setLayout(new FlowLayout());
#通常可以简化为 frame.add(button),但为了代码的清晰性和可读性,
#有时也会使用frame.getContentPane().add(button) 明确地将组件添加到内容面板上。
		this.getContentPane().add(new JButton("button1"));
		this.getContentPane().add(new JButton("button2"));
		this.getContentPane().add(new JButton("button3"));
		this.setVisible(true);
	}
}
边布局管理器(BorderLayout):
边布局管理器讲窗口分为 东 南 西 北 中间 五部分添加件时可指定放置的位置,若未指定则默认放在中间。随着容器大小的改变,东南西北四条边的长度或宽度保持不变,中间部分的长度和宽度承受容器大小而改变。
构造一:
this.setLayout(new BorderLayout())构造二:
public BorderLayout(int hgap,int vgap)hgap和 vgap分别指定组件间的水平和垂直间距(像素)
添加组件:
this.getContentPane().add(new JButton("btn_north"),"directionName")
public class work603 {
	public static void main(String[] args) {
		new MyBorderLayout();
	}
}
class MyBorderLayout extends JFrame {
	public MyBorderLayout() {
		super("边布局示例");
		this.setBounds(11,1,500,200);
		this.setDefaultCloseOperation(EXIT_ON_CLOSE);
		this.setLayout(new BorderLayout()); #可不写
		this.getContentPane().add(new JButton("按钮1"),"South"); #南
		this.getContentPane().add(new JButton("按钮2"),"Center"); #中心
		this.getContentPane().add(new JButton("按钮3"),"East"); #东
		this.getContentPane().add(new JButton("按钮4"),"North"); #北
		this.getContentPane().add(new JButton("按钮1"),"West"); #西
		this.setVisible(true);
	}
}
网格布局管理器(GridLayout):
网格布局管理器将容器划分成若干行乘若干列的网格,每格大小相同,组件就放在这些小格当中。容器调用 add(Component comp)将组件 comp 加人容器中,放置到网格中的顺序是按第一行第一个,第一行第二个,·· 第二行第,一个,..,最后一行最后一个。组件大小随容器的尺寸改变而变化。
构造一:(默认)
this.setLayout(new GridLayout());构造二:
this.setLayout(new GridLayout(rows,cols));rows 和 cols 指定网格的行数和列数
构造三:
this.setLayout(new GridLayout(rows,cols,hgap,vgap));hgap 和 vgap 分别指定组件间的水平和垂直间距
例:
public class work604 {
	public static void main(String[] args) {
		new MyGridLayout();
	}
}
class MyGridLayout extends JFrame{
	public MyGridLayout() {
		this.setBounds(100,100,300,200);
		this.getContentPane().setLayout(new GridLayout(3,1));
		this.setDefaultCloseOperation(EXIT_ON_CLOSE);
		this.getContentPane().add(new JButton("按钮1"));
		JPanel jp = new JPanel();  #嵌套一个组件
		jp.setLayout(new FlowLayout());
		jp.add(new JButton("按钮"));
		jp.add(new JButton("按钮"));
		jp.add(new JButton("按钮"));
		this.getContentPane().add(jp);
		this.getContentPane().add(new JButton("按钮2"));
		this.setVisible(true);
		}
}
JLabel标签
-
文本或图像显示: 可以用来显示文本或图像内容。当需要在界面上显示静态的文本或图像信息时,可以使用
JLabel。 -
基本属性和方法: 可以设置文本、图像、字体、颜色等属性。还可以设置对齐方式、边框、提示信息等。
-
示例用法: 通常用于标记其他组件,显示说明文本,或者显示图标和图片等。(主要用途)
常用方法:
public JLabel(Icon image)
创建具有指定图像的 JLabel 实例
public JLabel(String text)
创建具有指定文本的 JLabel 实例
public String getText()
返回该标签所显示的文本字符串
public void SetText(String text)
设置标签显示的文本
使用:
this.add(new JLabel("user")); #直接添加

JLabel label = new JLabel("str"); #指定对象:可重复引用

JLabel label;               #定义但不初始化,将对象分开使用
label = new JLabel("str");  #可以在不同方法中初始化 及 跨越方法使用对象
JTextField文本行
文本行JTextField用于显示和编辑单行文本
构造方法
public JTextField()
默认构造方法,初始字符串为null,列数为0
public JTextField(String text)
构造方法,初始字符串为text,列数为0
public JTextField(int columns)
构造方法,初始字符串为null,宽度为columns
public JTextField String text, int columns)
构造方法,指定初始字符串和宽度
public void setFont(Font f)
设置当前字体
public void SetHorizontalAlignment(int alignment)
设置文本的水平对齐方式
使用:
getText() 获取文本框内容
setText() 设置文本框内容
requestFocus() 在文本框中设置光标
#PromptSupport 类(需要额外导入 SwingX 库)
PromptSupport.setPrompt("Enter text here", textField); 自定义提示信息 (用户在该文本框中没有输入内容时,会显示灰色的提示信息,一旦开始输入文本,提示信息会自动消失。)
JTextField textField = new JTextField(20);
# 创建一个宽度为 20 个字符的文本输入框

JTextField textField;
textField = new JTextField("Hello",20);
# 分开使用
JTextArea文本区
文本区JTextArea用于显示和编辑多行文本,它允许用户输入和显示多行文本,支持滚动条以便浏览大量的文本内容
文本区本身不带滚动条,通常可将它放置在一个JScrollPane 滚动窗格中。JScrollPane为大尺寸组件提供一个可滚动的外观,它可以有选择地提供水平滚动条和垂直滚动条。
构造方法
public JTextArea()
默认构造方法,初始字符串为 null, 行、列数为0
public JTextArea(String text)
构造方法,初始字符串为 text,行,列数为0
public JTextArea(int rows, int columns)
构造方法,初始字符串为null,指定行、列数
public JTextArea (String text ,int rows,int columns)
构造方法,指定初始字符串和行、列数
public void append(String str)
将给定文本追加到文档结尾
用法:
setText(); //设置内容
getText(); //获取内容
setEditable(false); // 设置文本区域不可编辑
setLineWrap(true); // 设置自动换行
setWrapStyleWord(true); // 设置按单词换行
JScrollPane scrollPane = new JScrollPane(textArea); // 创建带滚动条的面板 frame.add(scrollPane); // 将滚动面板添加到 JFrame 或其他容器中
textArea.setFont(new Font("Arial", Font.PLAIN, 14)); // 设置字体和字体大小 textArea.setForeground(Color.BLUE); // 设置文本颜色 textArea.setBackground(Color.LIGHT_GRAY) ; // 设置背景颜色
setCaretPosition(x); 设置光标位置在x处
JTextArea textArea = new JTextArea(10, 30);    # 10行30列
JScrollPane scrollPane = new JScrollPane(textArea);
# 创建一个带有滚动条的 JTextArea
frame.add(textArea)   #添加
JPasswordField密码框
密码框 JPasswordField 允许用户在其中输人单行密码
但输入的字符会以 * 代替显示
public class work605 {
	public static void main(String[]args) {
		new TextComponents();
	}
}
class TextComponents extends JFrame{
	public TextComponents() {
		super("文本显示和文本编辑示例");
		this.setBounds(100,100,310,220);
		this.setDefaultCloseOperation(EXIT_ON_CLOSE);
		this.getContentPane().setLayout(new FlowLayout(FlowLayout.RIGHT));
		this.getContentPane().add(new JLabel("user"));
		this.getContentPane().add(new JTextField(20));
		this.getContentPane().add(new JLabel("password"));
		this.getContentPane().add(new JPasswordField(20));
		this.getContentPane().add(new JLabel("description"));
		this.getContentPane().add(new JTextArea("my information:\n",5,20));
		this.setVisible(true);
	}
}
按钮组件
组件包含的主要方法
public void addActionListener(ActionListener e)
将一个 ActionListener 添加到按钮中
public void removeActionListener(ActionListener e)
从按钮中移除一个ActionListener
public String getActionCommand()
返回此按钮的动作命令
public void setEnabled(boolean b)
启用(禁用)按钮
JButton 命令按钮
命令按钮 JButton 一般用于完成某个特定的功能。按钮被单击时,将会引发ActionEvent 事件,当组件注册 ActionListener 监听器后,可用它监听、处理该事件
public JButton()
默认构造方法,创建不带文本和图标的按钮
public JBunon(Icon icon)
构造方法,创建一个带图标的按钮
public JButton(String text)
构造方法,创建一个带文本的按钮
public JButton(String text,Icon icon)
构造方法,创建一个带文本和图标的按钮
1.创建带图标的按钮
import javax.swing.ImageIcon;

ImageIcon icon = new ImageIcon("path/to/icon.png"); // 图标文件路径
JButton iconButton = new JButton("Icon", icon);
2.设置按钮尺寸和位置
button.setSize(100, 50); // 设置按钮大小
button.setLocation(50, 50); // 设置按钮位置
3.启用/禁用按钮
button.setEnabled(false); // 禁用按钮
button.setEnabled(true); // 启用按钮
4.设置按钮文本
button.setText("Click here"); // 设置按钮文本
JCheckBox复选框
复选框JCheckBox 是一个可以被选定和取消选定的项,它将其状态显示给用户,用户可以通过单击该组件切换状态。通常情况下,复选框由一个方框和一个标签组成,复选框被选中时方框内打对钩,未被选中时方框中无对钩。
public JCheckBox()
默认构造方法,创建不带文本和图标,且最初未被选定的复选框
public JCheckBox(Icon icon)
构造方法,创建一个带图标,最初未被选定的复选框
public JCheckBox(String text)
构造方法,创建一个带文本且最被未被选定的复选框
public JCheckBox( String text, Iconicon,Boolean selected)
构造方法,创建一个带文本和图标的复选框,并指定初始是否处于选中状态
1.获取复选框状态
boolean isSelected = checkBox.isSelected(); // 检查复选框的选中状态
System.out.println("Checkbox is selected: " + isSelected);
2.监听复选框状态变化
checkBox.addItemListener(e -> {
    if (e.getStateChange() == ItemEvent.SELECTED) {
        System.out.println("Checkbox selected");
    } else {
        System.out.println("Checkbox deselected");
    }
});
3.设置默认选中状态
checkBox.setSelected(true); // 默认选中复选框
4.获取复选框的文本
String text = checkBox.getText(); // 获取复选框的文本
System.out.println("Checkbox text: " + text);
JRadioButton单选按钮
单选按钮JRadioButton的默认图标是一个小圆圈,而不是复选框JCheckBox的方框被选中时,圆圈内会有一个小圆点。
单选按钮JRadioButton 与复选框很类似,不同点在于用户可以同时选中多个复选框而在一组单选按钮中只能选择一个。也即单选按钮需要分组,各组间无联系,但组内是互斥的,选择了一个则其他都不会被选中。因此,在添加单选按钮时,还应该设计 ButtonGrour按钮组类,用于将多个单选按钮归于一组。
public JRadioButton()
默认构造方法,创建一个无初始文本,且被初始化为未选择的单选按钮
public JRadioButton(String text)
构造方法,创建一个具有指定文本的状态为未选择的单选按钮
public JRadioButton(String text,Iconicon,Boolean selected)
构造方法,指定初始文本、图标和初始选中状态
1.获取选中的单选按钮
ButtonModel selectedButton = group.getSelection(); // 获取选中的单选按钮
if (selectedButton != null) {
    System.out.println(selectedButton.getActionCommand());
}
2.监听单选按钮状态变化
radioButton1.addActionListener(e -> {
    if (radioButton1.isSelected()) {
        System.out.println("Option 1 selected");
    }
});
3.设置默认选中的单选按钮
radioButton1.setSelected(true); // 默认选中单选按钮1
4.获取单选按钮的文本
String text = radioButton1.getText(); // 获取单选按钮的文本
System.out.println("Radio button text: " + text);
使用案例
JRadioButton radioButton1 = new JRadioButton("Option 1"); // 创建单选按钮1
JRadioButton radioButton2 = new JRadioButton("Option 2"); // 创建单选按钮2

ButtonGroup group = new ButtonGroup(); // 创建按钮组,确保单选按钮只能选择一个
group.add(radioButton1); // 将单选按钮1添加到按钮组
group.add(radioButton2); // 将单选按钮2添加到按钮组

JPanel panel = new JPanel();
panel.add(radioButton1); // 将单选按钮1添加到面板
panel.add(radioButton2); // 将单选按钮2添加到面板

frame.add(panel); // 将面板添加到 JFrame 或其他容器中
列表框和组合框
当可供选择的数据项较少且数目确定时,通常采用复选框和单选按钮。而当数据项较多时,通常使用列表框JList 和组合框JComboBox.
列表框JList用于提供并显示一组数据项供用户选择。通常,用户可从列表框中选择一个或多个数据项
使用案例
JRadioButton rb[];
JCheckBox cb[];
#声明多个单选框和复选框,用数组表示

rb=new JRadioButton[length];
cb=new JCheckBox[length];
#声明化数组长度

for(int i=0;i<sex.length;i++) {
	rb[i]=new JRadioButton(sex[i]);
	bg.add(rb[i]);
	panel.add(rb[i]);
}
for(int i=0;i<hobbies.length;i++) {
	cb[i]=new JCheckBox(hobbies[i]);
	panel.add(cb[i]);
}
#分别给数组赋初值
对话框
消息对话框
1.简单的消息对话框
JOptionPane.showMessageDialog(null, "Hello, this is a message!");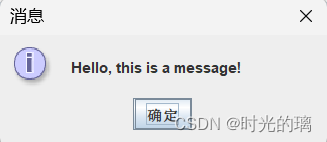
2.显示带标题的消息
JOptionPane.showMessageDialog(null, "Hello,
this is a titled message!", "Title", JOptionPane.INFORMATION_MESSAGE); 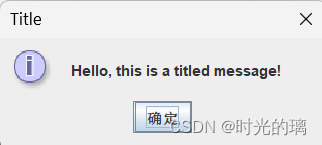
3.显示带图标的消息
JOptionPane.showMessageDialog(null, "Hello,
this is an error message!", "Error", JOptionPane.ERROR_MESSAGE); 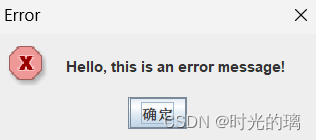
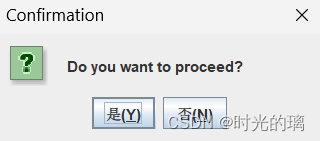
4.显示确认消息并获取用户的选择
int choice = JOptionPane.showConfirmDialog(null,
"Do you want to proceed?", "Confirmation", JOptionPane.YES_NO_OPTION);

if (choice == JOptionPane.YES_OPTION) {
    ....
} else {
    ....
} 
输入对话框
String inputText = JOptionPane.showInputDialog(null, "Enter your name:");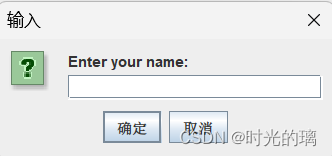
菜单组件
MenuBar菜单栏J
JFrame对象可调用 setJMenuBar (JMenuBar menubar)方法将一个菜单栏实例menubar添加到容器中,作为整个菜单树的根基。菜单栏被添加到窗口上方,不受布局管理器控制。注意,只能向窗口中添加一个菜单栏。
public JMenuBar()
默认构造方法,创建新的菜单栏
public JMenu add(IMenu c)
将指定的菜单追加到菜单栏的末尾
JMenuBar menubar=new JMenuBar();  # 创建菜单栏
this.setJMenuBar(menubar);   #添加菜单栏
JMenu菜单
菜单JMenu是若干个菜单项JMenultem 或子菜单的容器,它能被添加到JMenuBar或其他JMenu中。
public JMenu()
默认构造方法,创建没有文本的新菜单
publie JMenu(String s)
构造方法,用提供的字符串作为文本构造一个新菜单
public Component add(Component c)
将某个组件追加到此菜单的末尾
public JMenultem add(Jmenultem menultem)
将某个菜单项追加到此菜单的末尾
public void addSeparator()
将新分隔符追加到菜单的末尾
JMenu menu_file=new JMenu("文件");
JMenu menu_help=new JMenu("帮助");   #创建菜单
menubar.add(menu_file);
menubar.add(menu_help);    #添加内容
JMenuItem菜单项
菜单项JMenuItem 是组成菜单或快捷菜单的最小单位,不可分解,用于完成特定功能
public IMenultem()
默认构造方法,创建不带文本或图标的菜单项
public JMenultem(String text)
构造方法,创建带有指定文本的菜单项
public void setAccelerator(KeyStroke keystroke)
为菜单项设置快捷键
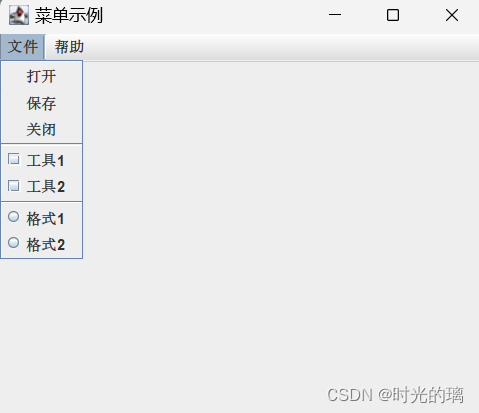
JMenuItem mi1=new JMenuItem("打开");
JMenuItem mi2=new JMenuItem("保存");
JMenuItem mi3=new JMenuItem("关闭");   #创建三个普通菜单项
JCheckBoxMenuItem mi4=new JCheckBoxMenuItem("工具1");
JCheckBoxMenuItem mi5=new JCheckBoxMenuItem("工具2");    #创建两个复选框选项
JRadioButtonMenuItem mi6=new JRadioButtonMenuItem("格式1");
JRadioButtonMenuItem mi7=new JRadioButtonMenuItem("格式2");    #创建两个单选框选项
ButtonGroup bg=new ButtonGroup();
bg.add(mi6);
bg.add(mi7);    #将mi6和mi7放在一个组内防止多选
menu_file.add(mi1);
menu_file.add(mi2);
menu_file.add(mi3);    #添加入菜单
menu_file.addSeparator();    #添加横线隔开选项
menu_file.add(mi4);
menu_file.add(mi5);
menu_file.addSeparator();
menu_file.add(mi6);
效果如图


 1万+
1万+


 被折叠的 条评论
为什么被折叠?
被折叠的 条评论
为什么被折叠?
 到【灌水乐园】发言


