


linx-cpp-多线程
并发 多线程
两个或者多个任务同时进行;一个程序同时执行多个任务。
实现多任务的方式:
- 单核:操作系统调用,任务切换(不是真正的并发,切换上下文需要时间开销)
- 多核:硬件并发(真正的并发)
- 当线程数大于核数,就会有线程的切换
每个进程自动包含一个主线程,可以有多个线程,主线程随着进程默认的启动运行。
线程是用来执行代码的,是执行代码的一条通路。
创建的线程建议不超过200个
网络通讯,网络服务器,网络方向需要
- 多进程(账号服务器,游戏逻辑服务器 进程之间的通信)
- 同一个电脑:管道、文件、消息队列、共享内存
- 不在同一个电脑:Socket
- 单进程 多线程
- 每个线程都有独立的运行路径,但是一个进程的所有线程共享地址空间(共享内存)
- 全局变量、指针、引用 都可以在线程之间传递。开销远远小雨多进程
- 数据一致性问题:加锁?
多进程和多线程之间,优先多线程。
线程 VS 进程
- 线程启动速度快,更轻量级
- 线程系统开销更小,执行速度更快(比如共享内存的通信方式比其他任何通信方式都快)
- 线程需要解决数据一致性问题
C++11标准库
以前:不能跨平台
- windows:
CreateThread()、_beginthread()、_beginthreadexe() - linux:
pthread_create()
POSIX thread(pthread)跨平台,但是配置麻烦
包含头文件:#include <thread>
创建线程:从一个函数开始执行一个线程
void myPrint() {
	using namespace std;
	cout << "myPrint" << endl;
}
**整个进程执行完毕的标志是主线程执行完毕,一般主线程执行完毕后,其他子线程还未执行完毕,操作系统会强制终止子线程。但是有例外。**目前先保持主线程的运行。
#include <thread>
void main() {
    // code here
	while (true);
    // 或者使用 线程.join()方法
}
使用thread类创建线程
void main() {
	using namespace std;
	thread mytobj(myPrint);
	mytobj.join();
	cout << " I Love China" << endl;
}
thread mytobj(myPrint);创建线程,线程执行入口是myPrint()。这个函数就开始执行了.join():阻塞主线程,让主线程等待子线程执行完毕,然后才运行。子线程执行完毕,.join()执行完毕。.detach():主线程不和子线程汇合,子线程不和主线程关联。此时这个子线程就会驻留在后台运行,被C++运行时刻接管,由运行时库负责清理该线程的资源(守护线程)。.detach()使子线程不受主线程的控制,使用了detach()就不能用join().joinable():判断是否可以使用join(),detach()。join(),detach()使用后不能再join()或者detach()
其他方式创建线程
通过可调用对象
-
用类对象
// 可调用对象
class TA {
public:
	// 不带参数 重载(,线程执行入口点
	void operator()(){
		using namespace std;
		cout << "我的线程开始执行" << endl;
	}
};
void main() {
	using namespace std;
	TA ta;
	thread mytobj(ta);
	mytobj.join();

	cout << "主线程" << endl;
}
使用
detach()可能会出现问题
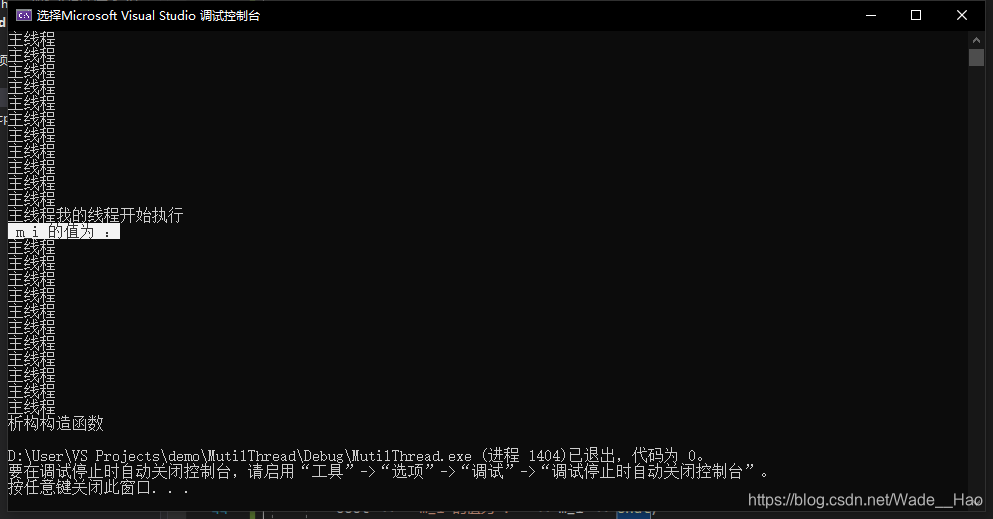
class TA {
public:
	int& m_i;
	TA(int& i) : m_i(i) {
		std::cout << "构造函数" << std::endl;
	}
	TA(const TA& ta) :m_i(ta.m_i) {
		std::cout << "拷贝构造函数" << std::endl;
	}
	~TA() {
		std::cout << "析构构造函数" << std::endl;
	}
	void operator()(){
		using namespace std;
		cout << "我的线程开始执行" << endl;
		cout << " m_i 的值为 :" << m_i << endl;
	}
};
void main() {
	using namespace std;
	int i = 10;
	TA ta(i);
	thread mytobj(ta);// 这ta对象实质上是被复制到线程中,主线程完成后,ta的复制对象依旧存在
	mytobj.detach();
}
- 由于TA类的成员变量存储的是一个引用,而main函数传入的是一个局部变量,所以main函数运行结束的时候,局部变量被回收了,所以TA对象的成员变量就没有了。
- ta对象实质上是被复制到线程中,主线程完成后,ta的复制对象依旧存在
-
用lambda表达式创建
void main() {
	using namespace std;

	auto mylambdathread = [] {
		cout << "我的子线程" << endl;
		cout << "我的子线程" << endl;
		cout << "我的子线程" << endl;
		cout << "我的子线程" << endl;
		cout << "我的子线程" << endl;
		cout << "我的子线程" << endl;
	};
	thread mytobj(mylambdathread);
	mytobj.join();
	cout << "我的主线程" << endl;
	cout << "我的主线程" << endl;
	cout << "我的主线程" << endl;
	cout << "我的主线程" << endl;
	cout << "我的主线程" << endl;
	cout << "我的主线程" << endl;
}
临时对象作为线程参数
坑1:
//void myPrint(const int& i, char* pmybuf) {
void myPrint(const int& i, const std::string& pmybuf) {
	using namespace std;
	cout << i << endl; // 分析认为,i并不是 mi的引用,实际上是值传递。此时这个i是安全的
	cout << pmybuf << endl; // 绝对不可以用指针  将 char* 改为 const sting&
}

void main() {
	using namespace std;
	int mi = 1;
	int& miy = mi;
	char buf[] = "I love china";
	//thread mythobj(myPrint, miy, buf);// buf会被编译器转出string对象,但是在buf被系统回收的时候才会被转换类型,不稳定。 自己转换
	thread mythobj(myPrint, miy, string(buf)); // 一定能保证线程中是可用的稳定的对象
	mythobj.detach(); // 很多问题都是 detach() 产生的,使用 join()不会有问题
	cout << "main thread" << endl;
}
坑2:
class A {
public:
	int m_a;
	A(int a) :m_a(a) { cout << "构造函数" << endl; }
	A(const A& a) :m_a(a.m_a) { cout << "拷贝构造函数" << endl; }
	~A() { cout << "执行析构函数" << endl; }
};
void myPrint(const int i, const A& a) {
	cout << i << endl;
	cout << a.m_a << endl;
}

void main() {
	int mi = 10;
	int mm_a = 20;
	//thread thobj(myPrint, mi, mm_a);// 会调用A类的构造方法,但是是在回收局部变量之后调用,会有问题。这种写法涉及到 类型的转换,应当手动的转换(临时构造对象),再传参。
	thread thobj(myPrint, mi, A(mm_a));
	thobj.detach();
	cout << "主线程" << endl;
}
-
传参数的时候涉及到类型的转换,应当先手动转换,再传参。不能依靠编译器给我们转换。而且这种写法会使得类型的构造是在子线程中完成的
-
但是
thread是直接执行拷贝构造复制出一份,操作很粗暴。 -
使用int型数据作为参数,建议值传递,引用可能因为编译器不同产生问题
-
传递自定义对象,避免隐式类型转换。全部都要在线程创建的时候 拷贝需要用到的对象作为参数。函数的参数用引用,否则系统还会构造一次对象,浪费资源。
-
一般不要用
detach(),除非万不得已
线程id
不同的线程id是不同的, 可以通过std:::this_thread::get_id()获取id
class A {
public:
	int m_a;
	A(int a) :m_a(a) { cout << "构造函数,线程id" << this_thread::get_id() << endl; }
	A(const A& a) :m_a(a.m_a) { cout << "拷贝构造函数" << endl; }
	~A() { cout << "执行析构函数, 线程id:" << this_thread::get_id() << endl; }
};


void myPrint(const int& i, const A& a) {
	cout << " myPrint 线程 id :" << this_thread::get_id() << endl;
	cout << &a << endl;
}
void myPrint1(const int& i, const A& a) {
	cout << "myPrint1 线程 id :" << this_thread::get_id() << endl;
	cout << &a << endl;
}
void myPrint2(const int& i, const A& a) {
	cout << "myPrint2 线程 id :" << this_thread::get_id() << endl;
	cout << &a << endl;
}

void main() {
	cout << "主线程 id" << this_thread::get_id() << endl;
	int mi = 10;
	int mm_a = 20;
	//thread thobj(myPrint, mi, mm_a);// 会调用A类的构造方法,但是是在回收局部变量之后调用,会有问题。这种写法涉及到 类型的转换,应当手动的转换(临时构造对象),再传参。
									  // 这种写法会使得类型的构造是在子线程中完成的
	thread thobj(myPrint, mi, A(mm_a));
	thread thobj1(myPrint1, mi, A(mm_a));
	thread thobj2(myPrint2, mi, A(mm_a));
	thobj.join();
	thobj1.join();
	thobj2.join();
}
子线程对数据进行修改
象进行修改不会影响主线程类的属性。
如果真要修改这些属性,就得使用std::ref()或者用 &
class A {
public:
	int m_a;
	A(int a) :m_a(a) { cout << "构造函数,线程id" << this_thread::get_id() << endl; }
	A(const A& a) :m_a(a.m_a) { cout << "拷贝构造函数" << endl; }
	~A() { cout << "执行析构函数, 线程id:" << this_thread::get_id() << endl; }
};
void myPrint(A& a) {
	cout << " myPrint 线程 id :" << this_thread::get_id() << endl;
	cout << &a << endl;
	cout << a.m_a << endl;
	a.m_a = 20;
}
void main() {
	A a(10);
	thread mythobj(myPrint, std::ref(a));
	mythobj.join();
	cout << a.m_a << endl;
}
智能指针作为线程参数
一定要用.join()
成员函数指针做线程函数
class A {
public:
	int m_a;
	A(int a) :m_a(a) { cout << "构造函数,线程id" << this_thread::get_id() << endl; }
	A(const A& a) :m_a(a.m_a) { cout << "拷贝构造函数" << endl; }
	~A() { cout << "执行析构函数, 线程id:" << this_thread::get_id() << endl; }

	void threadWork(int num) {
		cout << "子线程执行," << this << " thread_id = " << this_thread::get_id() << endl;
	}

	void operator()(int num) {
		cout << "子线程执行," << this << " thread_id = " << this_thread::get_id() << endl;
	}
};


void myPrint(A& a) {
	cout << " myPrint 线程 id :" << this_thread::get_id() << endl;
	cout << &a << endl;
	cout << a.m_a << endl;
	a.m_a = 20;
}
void main() {
	A a(10);
	//thread mythobj(&A::threadWork, a, 20);  // 传入的
	//thread mythobj(myPrint, std::ref(a)); // 这样写不会调用拷贝构造函数, .detach()函数就不安全了
	thread mythobj(a, 29);
	mythobj.join();
	//cout << a.m_a << endl;
}
创建和等待多个线程
- 多个线程执行是乱的,与系统内部的线程调度机制有关系
- 主线程是等待所有子线程运行结束
.join() - 将thread放入到容器里进行管理
void myprint(int inum) {
	cout << "线程开始执行,"<< "线程编号 = "<< inum << " 线程id = " << this_thread::get_id() << endl;
	cout << "线程执行完毕," << "线程编号 = " << inum << " 线程id = " << this_thread::get_id() << endl;
}
void main() {
	vector<thread> threads;
	for (int i = 0; i < 10; i++) {
		threads.push_back(thread(myprint, i));
	}
	for (auto it = threads.begin(); it != threads.end(); it++) {
		it->join();
	}
	cout << "I Love China" << endl;
}
数据共享问题
-
只读数据:没有问题
vector<int> g_v = { 1, 2,3 }; void myprint(int inum) { cout << "线程开始执行,"<< "线程编号 = "<< inum << " 线程id = " << this_thread::get_id() << endl; cout << "读取数据" << "g_v : {" << g_v[0] << "," << g_v[1] << "," << g_v[2] << "]" << endl; cout << "线程执行完毕," << "线程编号 = " << inum << " 线程id = " << this_thread::get_id() << endl; } void main() { vector<thread> threads; for (int i = 0; i < 10; i++) { threads.push_back(thread(myprint, i)); } for (auto it = threads.begin(); it != threads.end(); it++) { it->join(); } cout << "I Love China" << endl; } -
读写:可能会崩溃,必须: 读的时候不能写,写的时候不能读,不能同时读,不能同时写。
-
引入互斥量(
mutex),用来锁住共享数据。互斥量是一个对象,用成员函数lock()和unlock()锁住与解锁共享数据。 -
用法:
- 头文件
#include <mutex> lock()与unlock()成对使用- 尽量锁住较小的代码,代码越小效率越高
class A { public: void inMsgRecvQueue() { for (int i = 0; i < 10000; i++) { m.lock(); cout << "inMsgRecvQueue正在写数据,已经写了第 " << i << "个数据" << endl; msgRecvQueue.push(i); m.unlock(); } } void outMsgRecvQueue() { for (int i = 0; i < 10000; i++) { m.lock(); bool ep = msgRecvQueue.empty(); if (ep) { cout << "msgRecvQueue为空,无法读取数据。这是第" << i << "次读取" << endl; } else { cout << "inMsgRecvQueue正在读数据,已经写了第 " << i << "个数据" << endl; cout << "读取出来的数据是:" << msgRecvQueue.front() << endl; msgRecvQueue.pop(); } m.unlock(); } } private: queue<int> msgRecvQueue; mutex m; }; void main() { A a; thread inobj(&A::inMsgRecvQueue, &a); thread outobj(&A::outMsgRecvQueue, &a); inobj.join(); outobj.join(); cout << "主线程结束" << endl; } - 头文件
-
std::lock_guard类模板能够同时取代lock()和unlock()
std::lock_guard<mutex> lg(mutex对象);定义在作用域最开始的位置,会自动调用mutex::lock()方法,超出作用域的时候会调用析构函数,析构函数里有mutex::unlock()方法。class A { public: void inMsgRecvQueue() { for (int i = 0; i < 10000; i++) { lock_guard<mutex> lg(m); cout << "inMsgRecvQueue正在写数据,已经写了第 " << i << "个数据" << endl; msgRecvQueue.push(i); } } void outMsgRecvQueue() { for (int i = 0; i < 10000; i++) { lock_guard<mutex> lg(m); bool ep = msgRecvQueue.empty(); if (ep) { cout << "msgRecvQueue为空,无法读取数据。这是第" << i << "次读取" << endl; } else { cout << "inMsgRecvQueue正在读数据,已经写了第 " << i << "个数据" << endl; cout << "读取出来的数据是:" << msgRecvQueue.front() << endl; msgRecvQueue.pop(); } } } private: queue<int> msgRecvQueue; mutex m; }; void main() { A a; thread inobj(&A::inMsgRecvQueue, &a); thread outobj(&A::outMsgRecvQueue, &a); inobj.join(); outobj.join(); cout << "主线程结束" << endl; }
-
-
死锁的解决办法
-
用两把锁,两把锁都锁住了才算锁住
std::lock(mutex1, mutex2); // 只有两个都锁住了才会锁住,否则就会unlock(); // code here mutex1.unlock(); mutex2.unlock(); -
两把锁的另一种写法,自己不需要写
unlock()std::kock(mutex1, mutex2); std::lock_guard<std::mutex> sbguard1(mutex1, std::adopt_lock); std::lock_guard<std::mutex> sbguard2(mutex2, std::adopt_lock); // code here
-
unique_lock
unique_lock比 lock_guard更灵活。一般lock_guard足够使用。
unique_lock占用内存更多,效率差一点。
unique_lock是一个类模板。
-
unique_lock取代lock_guard -
第二个参数
std::adopt_lock- 表示这个互斥量已经被lock,否则会有异常。通知
lock_guard和unique_lock不需要在构造函数中lock()这个互斥量。 - 前提是先要
lock()
- 表示这个互斥量已经被lock,否则会有异常。通知
-
第二个可选参数:
std::try_to_lock()
有问题的代码:class A { public: void inMsgRecvQueue() { for (int i = 0; i < 10000; i++) { // 加锁 std::lock(m1, m2); std::unique_lock<mutex> lockGuard1(m1, std::adopt_lock); std::unique_lock<mutex> lockGuard2(m2, std::adopt_lock); // 线程休息 5 m std::chrono::milliseconds dura(5000); cout << "thread_id = " << this_thread::get_id() << " 休息 5 秒钟" << endl; this_thread::sleep_for(dura); cout << "存入的数据是 i = " << i << ", thread_id = " << this_thread::get_id() << endl; msgRecvQueue.push(i); } } void outMsgRecvQueue() { for (int i = 0; i < 10000; i++) { // lock_guard<mutex> lockGuard(m1); std::lock(m1, m2); std::unique_lock<mutex> lockGuard1(m1, std::adopt_lock); std::unique_lock<mutex> lockGuard2(m2, std::adopt_lock); cout << "i = " << i; if (msgRecvQueue.empty()) { cout << ", msgRecvQueue is empty, thread_id = " << this_thread::get_id() << endl; } else { cout << ", msgRecvQueue 的命令是 " << msgRecvQueue.front() << "thread_id = " << this_thread::get_id() << endl; msgRecvQueue.pop(); } } } private: queue<int> msgRecvQueue; mutex m1; mutex m2; };- 尝试用mutex去lock()这个mutex,如果没有成功则立即返回,不会阻塞
- 使用的前提是不能自己先lock。否则相当于同一个mutex两次lock,程序卡死
.own_lock():true表示拿到了锁
// 改正后的代码 class A { public: void inMsgRecvQueue() { for (int i = 0; i < 10000; i++) { // 加锁 std::unique_lock<mutex> uniqueLock(m, std::try_to_lock); // 线程休息 5 m if(uniqueLock.owns_lock()) { std::chrono::milliseconds dura(5000); cout << "thread_id = " << this_thread::get_id() << " 休息 5 秒钟" << endl; this_thread::sleep_for(dura); cout << "存入的数据是 i = " << i << ", thread_id = " << this_thread::get_id() << endl; msgRecvQueue.push(i); } else { cout << "没有拿到锁,做一些其他的事情" << endl; } } } void outMsgRecvQueue() { for (int i = 0; i < 10000; i++) { cout << "i = " << i; std::unique_lock<mutex> uniqueLock(m, std::try_to_lock); if (uniqueLock.owns_lock()) { cout << "thread_id = " << this_thread::get_id() << " 休息 2 秒钟" << endl; this_thread::sleep_for(chrono::milliseconds(2000)); if (msgRecvQueue.empty()) { cout << ", msgRecvQueue is empty, thread_id = " << this_thread::get_id() << endl; } else { cout << ", msgRecvQueue 的命令是 " << msgRecvQueue.front() << "thread_id = " << this_thread::get_id() << endl; msgRecvQueue.pop(); } } else { cout << "没有拿到锁,做一些其他的事情" << endl; } } } private: queue<int> msgRecvQueue; mutex m; }; -
可选参数
defer_lock()- 并不会给mutex加锁,初始化一个没有加锁的lock
- 前提:不能先
lock() unique_lock的成员函数:.lock()加锁.unlock()解锁- 析构函数中有
unlock() try_lock():就是std::try_to_lock的成员函数版本release():返回管理的mutex对象指针(例如pmx),并释放所有权,pmx有责任去lock和unlock,不然程序会崩溃。即unique_lock与mutex不再有联系了。
单例设计模式共享数据分析与解决,std::call_once
c++的单利设计模式代码
class Solo{
private:
    static Solo* m_instance;
    Solo() {};
public:
    static Solo* getInstance() {
        if (m_instance == NULL) {
            m_instance = new Solo();
        }
        return m_instance;
    }
    static void destoryInstance() {
        if (m_instance != NULL) {
            m_instance = NULL;
        }
    }
};
测试代码
// 初始化这个solo_instance
Solo* Solo::m_instance = NULL;
void testSingleton() {
    Solo* ps1 = Solo::getInstance();
    Solo* ps2 = Solo::getInstance();
    bool b = ps1 == ps2;    // 测试是不是同一个地址(对象)
    cout  << b << endl; // true
}
高性能的代理模式写法
class Solo{
private:
    static Solo* m_instance;
    Solo() {};
public:
    static Solo* getInstance() {
        // 高效率 线程安全的 双重if
        if (m_instance == NULL) {
            unique_lock<mutex> ul(mt);
            if (m_instance == NULL) {
                m_instance = new Solo();
            }
        }
        return m_instance;
    }
    static void destoryInstance() {
        if (m_instance != NULL) {
            m_instance = NULL;
        }
    }
    void func() {
        cout << "Solo::func() >> hello" << endl;
    }
};
std::call_once:C++11引入的函数,函数的第二个参数是一个函数名,保证函数只被调用一次。具备互斥量的能力,消耗更小。all_once需要与一个标记std::once_flag结合使用;这个标记是一个结构体。
用 call_once写的单利模式
class Solo{
private:
    static Solo* m_instance;
    Solo() {};
public:
    static void createInstance() {
        cout << "createInstance 只会被执行一次" << endl;
        if (m_instance == NULL) {
            m_instance = new Solo();
        }
    }
    static Solo* getInstance() {
        // 高效率 线程安全的 双重if
        std::call_once(g_flag, createInstance);
        return m_instance;
    }
    static void destoryInstance() {
        if (m_instance != NULL) {
            m_instance = NULL;
        }
    }
    void func() {
        cout << "Solo::func() >> hello" << endl;
    }
};
条件变量
std::condition_variable:是一个类
wait()
notify_one()
notify_all()
example1
class MsgController{
private:
    queue<int> msgRecvQueue;
    mutex mx;
    condition_variable cond;
public:
    void outMsgRecvQueue() {
        while (true) {
            std::unique_lock<std::mutex> sbguard(mx);
            cond.wait(sbguard, [this] { // 第二个参数返回true,wait()函数将直接返回;如果第二个参数返回false,那么wait()将解锁,阻塞到本行。如果没有第二个参数,相当于返回faslse,wait直接阻塞。
                if(!msgRecvQueue.empty()) // 当这个线程被阻塞,其他的线程调用notify_one()函数唤醒这个线程,这个线程尝试获取锁,并且加锁,然后继续往下执行
                    return true;
                return false;
            });
            cout << "thread_id = " << this_thread::get_id() << ", outMsgRecvQueue : pop_date = " << msgRecvQueue.front() << endl;
            msgRecvQueue.pop();
        }

    }
    void inMsgRecvQueue() {
        for (int i = 0; i < 10000; i++) {
            std::unique_lock<std::mutex> sbguard(mx);
            cout << "thread_id = " << this_thread::get_id() << ",i = " <<  i  << endl;
            msgRecvQueue.push(i);
            cond.notify_one(); // 唤醒cond.wait()
        }
    }

};
example2 生产者消费者模型
class ProController{
private:
    queue<int> productQueue;
    mutex mx;
    condition_variable producerCond;
    condition_variable consumerCond;
public:
    // consume 和 produce 可能有死锁
    void consume() {
        while (true) {
            std::unique_lock<std::mutex> guard(mx);
            consumerCond.wait(guard, [this] {
                if(productQueue.empty()) {
                    producerCond.notify_one();
                    return false;
                }
                return true;
            });
            cout << "thread_id = " << this_thread::get_id() << ", productQueue : consume_date = " << productQueue.front() << endl;
            productQueue.pop();
        }
    }
    void produce() {
        while (true) {
            std::unique_lock<std::mutex> guard(mx);
            producerCond.wait(guard, [this] {
                if (!productQueue.empty()) {
                    consumerCond.notify_one(); // notify_one 唤醒一个线程
                    return false;
                }
                return true;
            });
            int pro = rand() % 100;
            productQueue.push(pro);
            cout << "thread_id = " << this_thread::get_id() << ", productQueue : produce_date = " << pro << ", queue_size = " << productQueue.size() << endl;
        }
    }
};
std::async std::future
希望线程能够返回一个结果
std::async:函数模板,用来启动一个异步任务,启动之后,返回一个std::future类模板对象
启动异步任务:自动创建一个线程并且开始执行对应的 线程入口函数,返回一个std::future对象,这个对象里含有线程入口函数所返回的结果。通过future的成员函数get获取这个结果。
exampe1
int async_thread() {
    this_thread::sleep_for(std::chrono::milliseconds(5000));
    cout << "async_thread thread_id = " << this_thread::get_id() << endl;
    return 100;
}
void testAsyncThread() {
    cout << "testAsyncThread thread_id = " << this_thread::get_id() << endl;
    std::future<int> result = std::async(async_thread);
    cout << "continue .. " << endl;
    cout << " result = " << result.get() << endl;// 通过get()函数等待 async_thread 执行完毕.只能调用一次
    cout << " testAsyncThread over!" << endl;

}
// 运行结果
/*
testAsyncThread thread_id = 140586250331968
continue ..
 result = async_thread thread_id = 140586250327808
100
 testAsyncThread over!
*/
result.wait():等待线程返回,不返回结果。类似.join()
如果不调用get()和set(),主线程也会等待子线程执行完毕,感觉不太安全?
向std::async()额外传递一个参数,才是的类型是std::launch::deferred:表示线程入口函数调用会延迟到std::future的wait()或者get()函数调用时才执行。
如果用了deferred这个标记 并且 没有调用get()方法,那么这个线程没有执行。**其实这个线程都没有创建。**调用get()方法发现线程id是一样的,是在主线程创建线程入口函数,没有创建新的线程。
class TestAsync{
public:
    int async_thread(int num) {
        this_thread::sleep_for(std::chrono::milliseconds(5000));
        cout << "async_thread thread_id = " << this_thread::get_id() << ", num = " << num << endl;
        return 100;
    }

};
void testAsyncThread() {
    TestAsync t;
    int num = 10;
    cout << "testAsyncThread thread_id = " << this_thread::get_id() << endl;
    std::future<int> result = std::async(std::launch::deferred, &TestAsync::async_thread, &t, num);
    cout << "continue .. " << endl;
    // cout << " result = " << result.get() << endl; // 通过get()函数等待 async_thread 执行完毕.只能调用一次
    cout << " testAsyncThread over!" << endl;
}
如果用的是std::launch::async这个标记,不需要等到get()函数,子线程就被创建和执行了。
- 异步:创建新线程
- 同步:不创建新线程
-
std::thread和std::async的区别- 如果系统资源紧张,
std::thread可能会创建线程失败。 std::async不是创建线程,而是创建一个异步任务。两者最大的区别在于,async不一定会创建新线程。std::async拿到现场函数的返回值相对容器- 创建线程(任务)太多,
srd::thread容易导致系统崩溃。 std::async默认参数下就不会创建新线程,而是后续谁来请求结果(get),异步任务就运行在谁上。
- 如果系统资源紧张,
-
std::async参数详情std::launch::deferred:延迟调用,并不会创建一个新线程。延迟到future对象调用get或wait函数时才执行线程入口函数std::launch::async:强制这个异步任务在新线程上执行,这意味着系统必须创建新的线程来运行线程入口函数std::launch::async | std::launch::deferred:系统自己选择,两者情况都可能。- 默认参数:
std::launch::async | std::launch::deferred
-
系统如何决定异步和同步
看系统资源是否紧张,这时候
std::async()使用默认参数 -
std::async不确定性问题的解决判断是创建线程 还是 延迟调用
std::package_task 未完成
打包任务。 类模板,把各种可调用对象包装起来,方便作为线程入口函数。
int packaged_task_thread(int num) {
    this_thread::sleep_for(std::chrono::milliseconds(5000));
    cout << "async_thread thread_id = " << this_thread::get_id() << ", num = " << num << endl;
    return 100;
}
void test_packaged_task_thread() {
    cout << "test_packaged_task_thread thread_id = " << this_thread::get_id() << endl;
    std::packaged_task<int(int)> mypt(packaged_task_thread);
    std::thread t1(std::ref(mypt), 1);
    t1.join();
    std::future<int> res = mypt.get_future();
    cout << res.get() << endl;
}
如果包装的不是函数,而是lambda表达式,则不会创建子线程。
std::promise 未完成
C++11 并发指南四( 详解一 std::promise 介绍) - Haippy - 博客园 (cnblogs.com)
std::future 的其他成员函数
wait_for(std::chrono::xxx):返回一个枚举类型std::future_status,表示线程的状态。
class TestAsync{
public:
    int async_thread(int num) {
        this_thread::sleep_for(std::chrono::milliseconds(5000));
        cout << "async_thread thread_id = " << this_thread::get_id() << ", num = " << num << endl;
        return 100;
    }
};
void test_future() {
    TestAsync t;
    int num = 10;
    cout << "testAsyncThread thread_id = " << this_thread::get_id() << endl;
    std::future<int> result = std::async(&TestAsync::async_thread, &t, num);
    std::future_status status = result.wait_for(std::chrono::seconds(4));
    if (status == std::future_status::timeout) {
        cout << "future_status: timeout , thread not be completed!" << endl; // 超时,主线程4秒,子线程5秒,我必须等待你一秒,结果你没有返回
    }
    if (status == std::future_status::ready) {
        cout << "future_status: ready!" << endl; // 表示线程执行完毕
    }
    if (status == std::future_status::deferred) {
        cout << "future_status: deferred" << endl; // 表示线程延迟执行
    }
    cout << "continue .. " << endl;
    cout << " result = " << result.get() << endl; // 通过get()函数等待 async_thread 执行完毕.只能调用一次
    cout << " testAsyncThread over!" << endl;
}
std::shared_future
一般的future的get方法只能调用一次,shared_future的get``方法能够多次get()```。
future的get函数是转移数据,shared_future的get函数是复制数据。
std::shared_future<T> eleName (std::future<T>.shared());
std::shared_future<T> eleName (std::future<T>.get_future());
std::shared_future<T> eleName(std::move(preEleName));
.valid():判断future里面是否有值
std::atomic
原子性操作的封装变量的类模板。 使用这个比互斥量效率高
std::atomic<int> g_count; // 可以原子操作的变量。可以不需要多线程对原子操作进行加锁解锁
void problemFunc() {
    for (int i = 0; i < 1000000; i++) {
        g_count++;
    }
}

void testProblemFunc() {
    thread th1(problemFunc);
    thread th2(problemFunc);
    th1.join();
    th2.join();
    cout << "count = " << g_count << endl;
}
注意:并不是所有的运算符都支持原子性操作,对于操作符++,--, += ,-=,|=,^=支持,其他操作符一般都不支持。
一般读取一个原子变量的值不是源自操作,想要变成原子操作,就用.load()方法。
.store(val)以原子方式写入变量val到一个原子变量。
还有很多用法,找资料研究。
windows临界区
多次进入临界区
自动析构技术
构造函数中进入临界区,析构函数中释放临界区。有些资料上称为(Resource Acquisition Is Initialization),例如智能指针,容器类等。
其他互斥量
c++11中不允许多次lock同一个互斥量;同理也不允许多次lock_guard同一个互斥量。
recursive_mutex:可以多次lock一个互斥量。
timed_mutex:
try_lock_for():参数是一段时间,等待一段时间。如果拿到了锁,或者等待超过时间没有拿到锁,就走下来。try_lock_unti():参数是一个未来时间点,在这个未来时间没有到的时间内,如果拿到了锁,线程流程就走下去。时间到了没有拿到锁,线程流程也走下来
recursive_timed_mutex:
补充知识
虚假唤醒:当一个读线程被唤醒的时候,队列中没有数据。
条件变量wait中要有第二个参数(lambda)并且这个lambda中要正确处理公共数据。
wait、notify_one、notify_all
线程池
场景:服务器程序用来等待客户端进行远程连接,来一个client就创建一个新线程。
代码稳定性:程序突然创建一个线程,就会有不稳定因素。
线程池:把一堆线程弄到一起,统一管理 调度,循环利用线程的方式。
创建线程的数量:
- 2000个线程是一个程序的极限。遵 照专业的建议创建线程,确保程序高效执行。
- 也要考虑业务的需求。
ad th2(problemFunc);
th1.join();
th2.join();
cout << "count = " << g_count << endl;
}
**注意:并不是所有的运算符都支持原子性操作**,对于操作符```++,--, += ,-=,|=,^=```支持,其他操作符一般都不支持。

一般读取一个原子变量的值不是源自操作,想要变成原子操作,就用```.load()```方法。

```.store(val)```以原子方式写入变量val到一个原子变量。

还有很多用法,找资料研究。

## windows临界区

## 多次进入临界区


## 自动析构技术

构造函数中进入临界区,析构函数中释放临界区。有些资料上称为(Resource Acquisition Is Initialization),例如智能指针,容器类等。

## 其他互斥量

c++11中不允许多次lock同一个互斥量;同理也不允许多次lock_guard同一个互斥量。

```recursive_mutex```:可以多次lock一个互斥量。

```timed_mutex```:

- ```try_lock_for()```:参数是一段时间,等待一段时间。如果拿到了锁,或者等待超过时间没有拿到锁,就走下来。
- ```try_lock_unti()```:参数是一个未来时间点,在这个未来时间没有到的时间内,如果拿到了锁,线程流程就走下去。时间到了没有拿到锁,线程流程也走下来

```recursive_timed_mutex```:

## 补充知识

虚假唤醒:当一个读线程被唤醒的时候,队列中没有数据。

条件变量wait中要有第二个参数(lambda)并且这个lambda中要正确处理公共数据。

wait、notify_one、notify_all

## 线程池

场景:服务器程序用来等待客户端进行远程连接,来一个client就创建一个新线程。

代码稳定性:程序突然创建一个线程,就会有不稳定因素。

线程池:把一堆线程弄到一起,统一管理 调度,循环利用线程的方式。

创建线程的数量:

- 2000个线程是一个程序的极限。遵 照专业的建议创建线程,确保程序高效执行。
- 也要考虑业务的需求。

## 总结


 1107
1107


 被折叠的 条评论
为什么被折叠?
被折叠的 条评论
为什么被折叠?
 到【灌水乐园】发言


