


在上一篇文章(https://blog.csdn.net/walchina2017/article/details/130334374)中,我介绍了什么是实时学习,并且开源了一个我做出来的作品。
接下来,我会手把手教你如何把它做出来。
首先,你得先下载Pycharm(https://www.jetbrains.com/pycharm/download/)和Python(有镜像),并知道如何在Pycharm中新建一个Project。
然后,新建一个Project,选择Virualvenv,然后点击创建: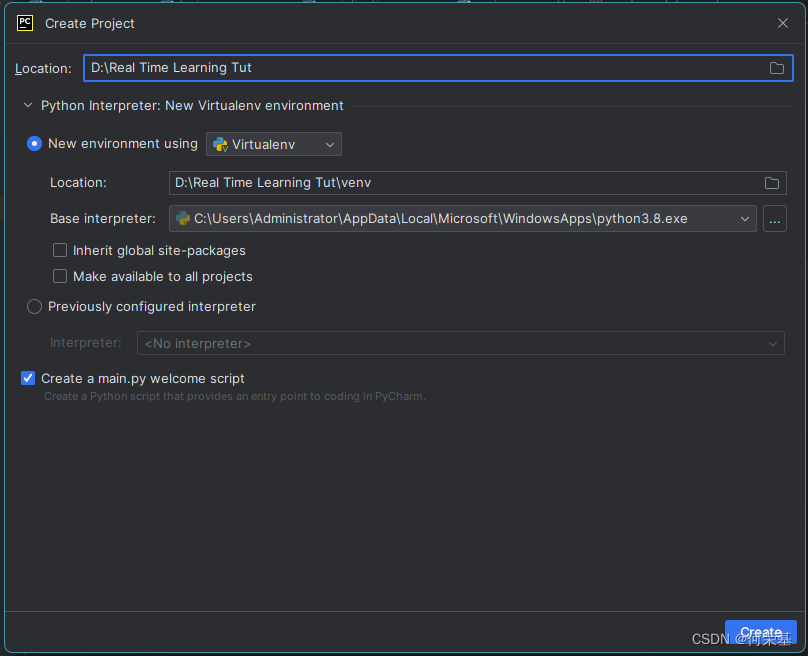
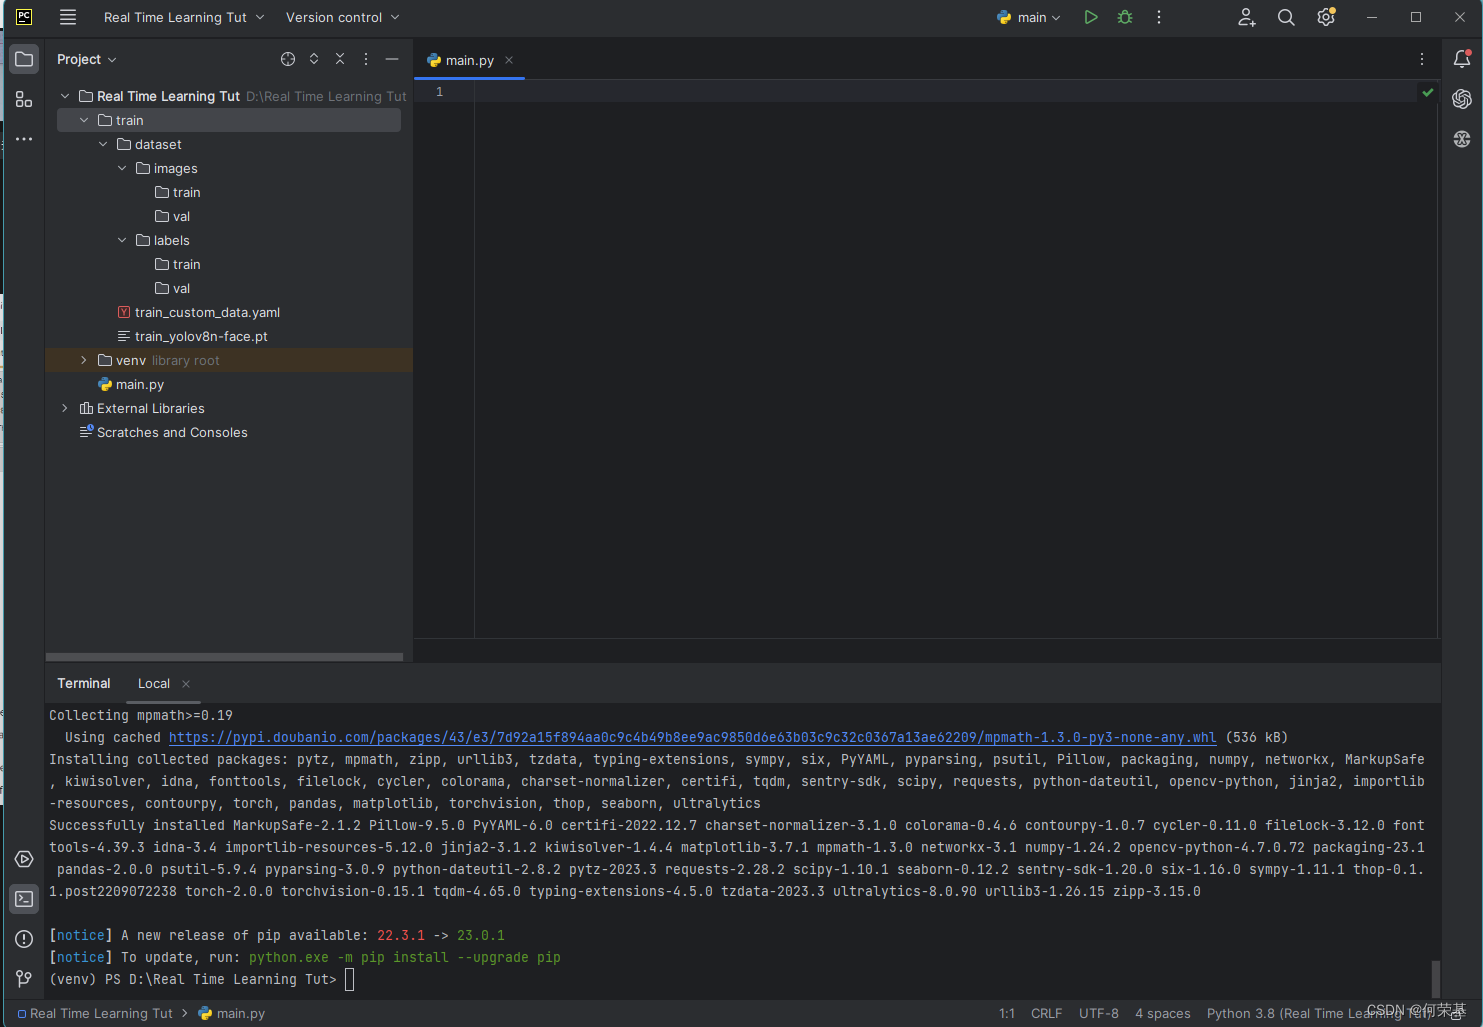
等Pycharm创建完虚拟环境(Virtualvenv)后,会出现这个界面。
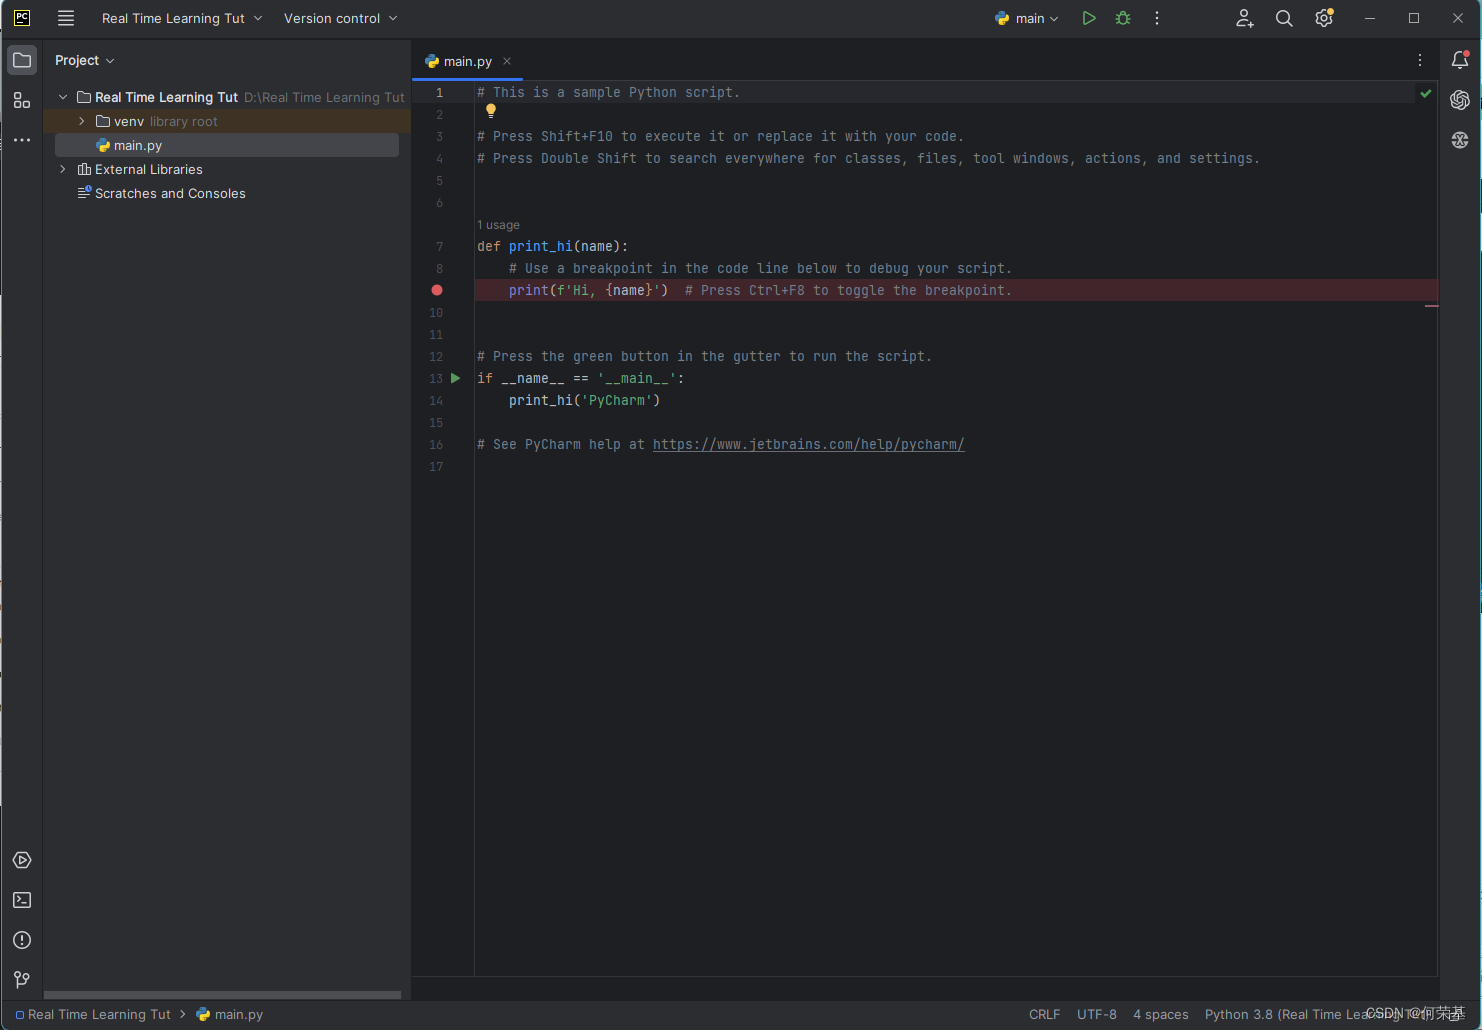
接下来,点击画红圈的地方来打开Terminal。

接着,在Terminal中输入:pip install ultralytics -i https://pypi.douban.com/simple --trusted-host pypi.douban.com,然后点击回车键来安装所需要的Python库:

接着,在你的文件浏览器中找到你的项目的文件夹,并打开它。根据下图所显示的列表新建这些文件夹:
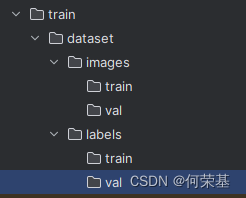
注:在dataset一下的所有文件夹都必须是和上图列表一样的,否则无法训练模型。
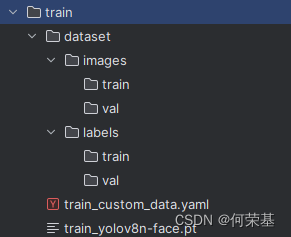
接着,把在train · main · 何荣基 / Real Time Learning Yolov8 · GitCode中的yolov8n-face.pt 和 costum_data.yaml 下载到train文件夹内,文件列表应该是这样的:
接下来,进入右边的编辑器里,删掉所有的代码,我们要开始编写我们自己的代码了:
1. 导入所需要的库:
import cv2
from threading import Thread
import numpy as np
from ultralytics import YOLO
cv2: opencv-python的简称,可以帮助我们打开摄像头,并获取实时图像。
threading(Python自带): 可以让多个代码同时运行
numpy:可以进行复杂的矩阵乘法,还可以把tensor类型转换成numpy。
ultralytics:Yolo的官方PythonAPI,可以在代码中实现训练,而不需要CLI。
2. 做一个简单的用cv2打开摄像头的程序:
import cv2
from threading import Thread
import numpy as np
from ultralytics import YOLO

cap = cv2.VideoCapture(0)

while True:
    ret, frame = cap.read()

    cv2.imshow('returned', frame)
    if cv2.waitKey(1) & 0xFF == ord('q'):
        break

cap.release()

cv2.destroyAllWindows()
cap = cv2.VideoCapture(0):将cap设为摄像头
ret, frame = cap.read():读取摄像头的画面
cv2.imshow('returned', frame):显示摄像头看到的东西,并将打开的窗口的名字设为return.
if cv2.waitKey(1) & 0xFF == ord('q'):检测q键是否按下, 如果是的话,就强制推出while循环。
cap.release():关闭摄像头
cv2.destroyAllWindows():把所有窗口都关闭。
我们来试一试效果:

接下来,我们就得实现检测到人脸,并且画出来位置:
1.
import cv2
from threading import Thread
import numpy as np
from ultralytics import YOLO

model = YOLO('train/train_yolov8n-face.pt')

cap = cv2.VideoCapture(0)

while True:
    ret, frame = cap.read()
    results = model.predict(frame)
    annotated = results[0].plot()
    cv2.imshow('returned', annotated)
    if cv2.waitKey(1) & 0xFF == ord('q'):
        break

cap.release()

cv2.destroyAllWindows()
model = YOLOY('train/train_yolov8n-face.pt'):把要运算的模型设为YOLO模型,位置在相对路径 train/yolov8n-face.pt(注意:应为yolov8n-face.pt是从gitee上下载下来的,名字会改成train_yolov8n-face.pt)
results = model.predict(frame):检测人脸
results[0].plot():把人脸的位置画出来。
cv2.imshow('returned', annotated):把画出来的位置显示出来(注意,第二个参数已经换成了annotated,而不是frame)
让我们俩看一看效果:

然后,我们需要把‘问题’和‘回答’记录下来:
import cv2
from threading import Thread
import numpy as np
from ultralytics import YOLO

model = YOLO('train/train_yolov8n-face.pt')

cap = cv2.VideoCapture(0)

while True:
    ret, frame = cap.read()
    results = model.predict(frame)
    boxes = result[0].boxes
    if bool(boxes.numpy()):
        if face_count < 300:
            face_count += 1
        else:
            face_count = 0
        # 获取人脸位置信息


        # 保存人脸图像和位置信息到文件
        if face_count >= 0 and face_count < 100:
            # 记录到验证集
            filepath = f'train/dataset/images/val/{face_count}.png'
            labelspath = f'train/dataset/labels/val/{face_count}.txt'
        else:
            # 记录到训练集
            filepath = f'train/dataset/images/train/{face_count}.png'
            labelspath = f'train/dataset/labels/train/{face_count}.txt'

        # 保存人脸图像
        cv2.imwrite(filepath, frame)

        # 保存位置信息到文件
        with open(labelspath, 'w') as file:
            for bboxes in boxes:
                for xywh in bboxes.xywh:
                    xywh = xywh * np.array([1/frame.shape[1], 1/frame.shape[0], 1/frame.shape[1], 1/frame.shape[0]])
                    file.write(f'0 {xywh[0]} {xywh[1]} {xywh[2]} {xywh[3]}\n')
            file.close()


    annotated = results[0].plot()

    cv2.imshow('returned', annotated)
    if cv2.waitKey(1) & 0xFF == ord('q'):
        break

cap.release()

cv2.destroyAllWindows()
夸嚓一下多了这么多行代码,是不是有点蒙?没事,我会慢慢帮你讲解。
第一部分:
boxes = result[0].boxes
if bool(boxes.numpy()):
    if face_count < 300:
        face_count += 1
    else:
        face_count = 0
if bool(boxes.numpy()) 使用后来检测有咩有检测到人脸,这样就可以预防没有人脸的照片被录入训练文件夹。
这个是用来数有多少数据被收集了,如果超过300,就会归零。
第二部分:
    # 保存人脸图像和位置信息到文件
    if face_count >= 0 and face_count < 100:
        # 记录到验证集
        filepath = f'train/dataset/images/val/{face_count}.png'
        labelspath = f'train/dataset/labels/val/{face_count}.txt'
    else:
        # 记录到训练集
        filepath = f'train/dataset/images/train/{face_count}.png'
        labelspath = f'train/dataset/labels/train/{face_count}.txt'
首先,我们需要知道Yolov8在被训练的时候是需要train数据集和val数据集的,所以,我们决定把1/3的数据给val数据集,然后把剩下的2/3给train数据集。
第三部分:
    # 保存人脸图像
    cv2.imwrite(filepath, frame)

    # 保存位置信息到文件
    with open(labelspath, 'w') as file:
        for bboxes in boxes:
            for xywh in bboxes.xywh:
                xywh = xywh * np.array([1/frame.shape[1], 1/frame.shape[0], 1/frame.shape[1], 1/frame.shape[0]])
                file.write(f'0 {xywh[0]} {xywh[1]} {xywh[2]} {xywh[3]}\n')
    file.close()
我们会用cv2.imwrite把没有标记的图片记录下来(我们记录下来的的图片是frame,也就是摄像头实时读取的数据)。
接着,就到了把标记的参数记录下来。我们知道 yolo_label 的格式是这样的:
0 x_center/width_of_image y_center/img_heighy width/img_width height/img_height在上一部分里有一个变量叫boxes,它被设为result[0].boxes。在result[0].boxes中有很多格式选项,但是只有result[0].boxes.xywh符合我们的要求。x在xywh中的意思就是bbox的x轴中心点,y在xywh中的意思就是bbox的y轴中心点,w在xywh中的意思就是bbox的宽度,而h在xywh中的意思就是bbox的高度。
我们只需要把数据乘以 [1/frame.shape[1](frame的宽度), 1/frame.shape[0] (frame的高度), 1/frame.shape[1](frame的宽度), 1/frame.shape[0] (frame的高度)]就可以了。
但是,bboxes.xywh的输出格式是tensor格式(tensor([x,xx,xxx,xxxx])),所以我们还要把它乘以一个numpy格式的列表才能同化tensor格式的列表。
最后就是把数据写到指定的文件夹中的一个.txt格式中。
最后,我们要实现训练模型。
先打开在train中的train_custom_data.yaml。
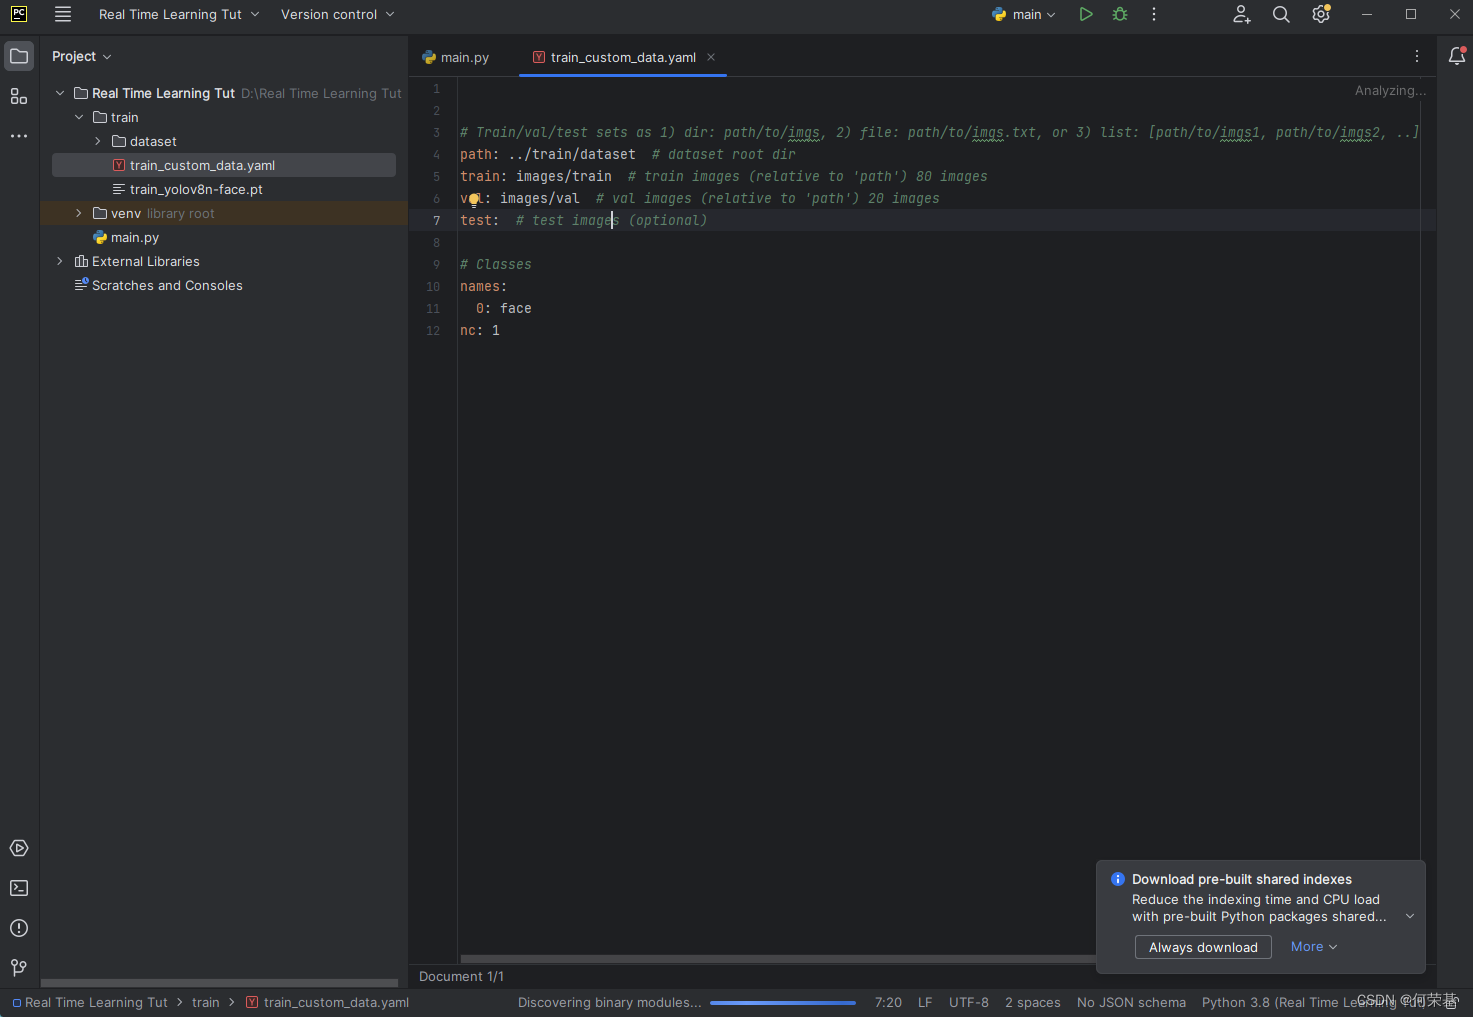
可以看到train和val数据集已经被设置好。
接下来就开始先训练模块了:
import cv2
from threading import Thread
import numpy as np
from ultralytics import YOLO

def train_it():
    global model, training
    def do():
        global model, training

        # 训练模型
        model.train(data='train/custom_data.yaml', epochs=epochs)

         # 将在训练设为 False(不在训练)
        training = False
    Thread(target=do).start()


model = YOLO('train/train_yolov8n-face.pt')


training = False

cap = cv2.VideoCapture(0)

while True:
    ret, frame = cap.read()
    results = model.predict(frame)
    boxes = result[0].boxes
    if not training:
        if bool(boxes.numpy):
            # 检测是否需要继续记录人脸
            if face_count < 300:
                face_count += 1
            else:
                # 开始训练新模型
                train_it()

                # 将在训练设为 True(在训练)
                training = True

                # 重置人脸录取次数
                face_count = 0

            # 获取人脸位置信息

            # 保存人脸图像和位置信息到文件
            if face_count >= 0 and face_count < 100:
                # 记录到验证集
                filepath = f'train/dataset/images/val/{face_count}.png'
                labelspath = f'train/dataset/labels/val/{face_count}.txt'
            else:
                # 记录到训练集
                filepath = f'train/dataset/images/train/{face_count}.png'
                labelspath = f'train/dataset/labels/train/{face_count}.txt'

            # 保存人脸图像
            cv2.imwrite(filepath, frame)

            # 保存位置信息到文件
            with open(labelspath, 'w') as file:
                for bboxes in boxes:
                    for xywh in bboxes.xywh:
                        xywh = xywh * np.array([1/frame.shape[1], 1/frame.shape[0], 1/frame.shape[1], 1/frame.shape[0]])
                        file.write(f'0 {xywh[0]} {xywh[1]} {xywh[2]} {xywh[3]}\n')
                file.close()

    annotated = results[0].plot()

    cv2.imshow('returned', annotated)
    if cv2.waitKey(1) & 0xFF == ord('q'):
        break

cap.release()

cv2.destroyAllWindows()
天哪!
还是老样子,我们拆分一下新增的程序:
第一部分:
def train_it():
    global model, training
    def do():
        global model, training

        # 训练模型
        model.train(data='train/train_custom_data.yaml', epochs=epochs)

         # 将在训练设为 False(不在训练)
        training = False
    Thread(target=do).start()

training = False
我们新加了一个函数,来训练新的模型,所以要global model。
我们新加training是应为我们不想要AI在学习的时候数据会改变,所以在学习的时候就会停止录取数据。
为了实现这个,我们在需要在负责记录的模块前面加一个if语句,这样的话,只有training是False(没有在训练)的时候才会记录数据。
第二部分:
if not training:
    if bool(boxes.numpy()):
        # 检测是否需要继续记录人脸
        if face_count < 300:
            face_count += 1
        else:
            # 开始训练新模型
            train_it()

            # 将在训练设为 True(在训练)
            training = True

            # 重置人脸录取次数
            face_count = 0
现在我们可以看到else下面加了一些代码,这些是用来启动训练程序的。
train_it():这个是启动训练模型的。我们把train_it函数设为thread,这可以让训练和检测同时进行。
当启动完成后,training就会被设为True(在训练),这样就可防止AI在训练的时候还在记录数据,导致数据变化。
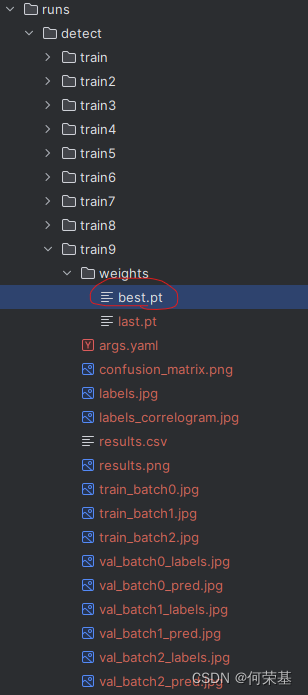
每次训练的结果都能在runs/detect/trainx/weights中找到(x是第几个被训练的模型)。比如说,我想要第七次被训练的模型,就得进入这个文件路径:runs/detect/train9/weights/best.pt。
最后,让我们测试一下(这里的epochs是2,有可能比较慢,所以我就快进一下):
看到视频里的进度条了吗?这个进度条就是训练完成了多少。虽然只是2个epochs,但是还是用了10分钟(没有加速的原始视频),如果电脑的配置高一点会更快。
但这不是重点,重点是训练和检测可以同步执行,并且新的模型和旧的模型可以无缝衔接!
OK!这个教程到这里就结束啦!最后,整理一下代码:
# 导入需要的库
import cv2
from threading import Thread
import numpy as np
from ultralytics import YOLO


# 初始化变量
def init_variables():


    # 导入人脸检测模型
    model = YOLO("train/train_yolov8n-face.pt")

    # 初始化同步运行训练模块
    #train_new_yolo = Thread(target=train_it)

    # 初始化人脸录取数变量
    face_count = 0

    # 初始化是否在训练中变量
    training = False

    # 初始化 epochs
    epochs = 5

    # 初始化摄像头
    cap = cv2.VideoCapture(0)

    MAX_FACE_COUNT = 600

    VALIDATION_SPLIT_COUNT = 200

    return model, face_count, training, epochs, cap, MAX_FACE_COUNT, VALIDATION_SPLIT_COUNT


# 记录人脸函数
def record_faces(frame, result):
    global face_count, training, model
    # 训练函数
    def train_it():
        global model, training
        def do():
            global model, training

            # 训练模型
            model.train(data='train/train_custom_data.yaml', epochs=epochs)

            # 将在训练设为 False(不在训练)
            training = False
        Thread(target=do).start()
    # 检测是否在训练
    if not training:
        boxes = result[0].boxes
        if bool(boxes.numpy()):
            #检测是否需要继续记录人脸

            if face_count < MAX_FACE_COUNT:
                face_count += 1
            else:
                # 开始训练新模型
                train_it()

                # 将在训练设为 True(在训练)
                training = True

                # 重置人脸录取次数
                face_count = 0

            # 获取人脸位置信息
            boxes = result[0].boxes

            # 保存人脸图像和位置信息到文件
            if face_count >= 0 and face_count < VALIDATION_SPLIT_COUNT:
                # 记录到验证集
                filepath = f'train/dataset/images/val/{face_count}.png'
                labelspath = f'train/dataset/labels/val/{face_count}.txt'
            else:
                # 记录到训练集
                filepath = f'train/dataset/images/train/{face_count}.png'
                labelspath = f'train/dataset/labels/train/{face_count}.txt'

            # 保存人脸图像
            cv2.imwrite(filepath, frame)

            # 保存位置信息到文件
            with open(labelspath, 'w') as file:
                for bboxes in boxes:
                    for xywh in bboxes.xywh:
                        xywh = xywh * np.array(
                            [1 / frame.shape[1], 1 / frame.shape[0], 1 / frame.shape[1], 1 / frame.shape[0]])
                        file.write(f'0 {xywh[0]} {xywh[1]} {xywh[2]} {xywh[3]}\n')
                file.close()
model,face_count, training, epochs, cap, MAX_FACE_COUNT, VALIDATION_SPLIT_COUNT = init_variables()

while True:
    # 读取实时图像
    ret, frame = cap.read()

    # 获取检测的结果
    results = model.predict(frame, show=False)

    # 记录人脸
    record_faces(frame, results)

    # 在图像上绘制检测结果
    annotated = results[0].plot()

    # 显示画出来的效果
    cv2.imshow('returned', annotated)

    # 检测是否要退出
    if cv2.waitKey(1) & 0xFF == ord('q'):
        break

# 释放摄像头并关闭窗口
cap.release()
cv2.destroyAllWindows()
最后,来看一下我搞出来的结果:
原始模型:

实时训练3次,epochs=5, MAX_FACE_COUNT=600,VALIDATION_SPLIT_COUNT=200:

可以看到无论是P,还是R,还是mAP50,或是mAP50-95都有显著的提升,mAP50-95更是从71%提到了95%。


 660
660


 被折叠的 条评论
为什么被折叠?
被折叠的 条评论
为什么被折叠?
 到【灌水乐园】发言


