


一、maven简述
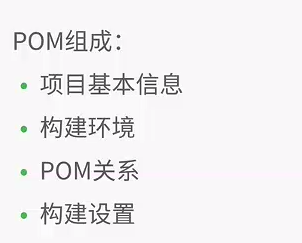
maven是通过POM(项目对象模型 Project Object Model)来管理maven项目的。项目的属性、依赖、构建信息全都被抽象到POM中。
maven架构

二、maven配置
优先级: 用户settings.xml > 系统settings.xml > pom.xml
一般安装好maven后,我们对系统默认settings.xml不做修改
拷贝一份出来用户setting.xml,添加下面配置
<localRepository>/path/to/local/repo</localRepository>
<server>
<id>maven-releases</id>
<username>admin</username>
<password>admin123</password>
</server>
<server>
<id>maven-snapshots</id>
<username>admin</username>
<password>admin123</password>
</server>
<mirror>
<id>nexus</id>
<mirrorOf>*</mirrorOf>
<name>Nexus Mirror</name>
<url>http://localhost:8081/repository/maven-public/</url>
</mirror>
项目部署,需要在pom.xml中配置
<distributionManagement>
    <repository>
        <id>maven-releases</id>
        <name>Nexus Release Repository</name>
        <url>http://127.0.0.1:8081/repository/maven-releases/</url>
    </repository>
    <snapshotRepository>
        <id>maven-snapshots</id>
        <name>Nexus Snapshot Repository</name>
        <url>http://127.0.0.1:8081/repository/maven-snapshots/</url>
    </snapshotRepository>
</distributionManagement>
插件配置
<build>
    <finalName>shiro</finalName>
    <resources>
        <resource>
            <directory>src/main/resources</directory>
        </resource>
        <resource>
            <directory>src/main/conf/${profiles.active}</directory>
        </resource>
    </resources>
    <plugins>
        <plugin>
            <groupId>org.apache.maven.plugins</groupId>
            <artifactId>maven-compiler-plugin</artifactId>
            <version>2.3.2</version>
            <configuration>
                <source>${jdk.version}</source>
                <target>${jdk.version}</target>
                <encoding>${project.build.sourceEncoding}</encoding>
            </configuration>
        </plugin>
        <!-- jetty:run 添加jetty插件以便启动 -->
        <plugin>
            <groupId>org.eclipse.jetty</groupId>
            <artifactId>jetty-maven-plugin</artifactId>
            <version>9.3.10.v20160621</version>
            <configuration>
                <stopPort>9966</stopPort>
                <stopKey>stop</stopKey>
                <scanIntervalSeconds>10</scanIntervalSeconds>
                <webApp>
                    <contextPath>/</contextPath>
                </webApp>
            </configuration>
        </plugin>
        <!-- tomcat7:run -->
        <plugin>
            <groupId>org.apache.tomcat.maven</groupId>
            <artifactId>tomcat7-maven-plugin</artifactId>
            <version>2.2</version>
            <configuration>
                <path>/</path>
                <uriEncoding>UTF-8</uriEncoding>
                <server>tomcat7</server>
            </configuration>
        </plugin>
    </plugins>
</build>属性文件配置
<profiles>
    <!-- 默认激活 dev 开发环境 -->
    <!-- 线上使用 mvn 打包添加 -Pproduction 变量 -->
    <profile>
        <!-- 本地开发环境 -->
        <id>development</id>
        <properties>
            <profiles.active>dev</profiles.active>
        </properties>
        <activation>
            <activeByDefault>true</activeByDefault>
        </activation>
        <dependencies>
            <!-- 本地使用 velocity 作为代码生成器,兼容idea -->
            <dependency>
                <groupId>org.apache.velocity</groupId>
                <artifactId>velocity</artifactId>
                <version>1.7</version>
            </dependency>
        </dependencies>
    </profile>
    <profile>
        <!-- 生产环境 -->
        <id>production</id>
        <properties>
            <profiles.active>production</profiles.active>
        </properties>
    </profile>
</profiles>默认spring依赖处理
<!-- spring-framework-bom -->
<dependencyManagement>
    <dependencies>
        <dependency>
            <groupId>org.springframework</groupId>
            <artifactId>spring-framework-bom</artifactId>
            <version>${spring.version}</version>
            <type>pom</type>
            <scope>import</scope>
        </dependency>
    </dependencies>
</dependencyManagement>三、1.安装jar包到本地仓库mvn install:install-file -DgroupId=com.test -DartifactId=service-api -Dversion=${version} -Dpackaging=jar -Dfile=service-api-${version}.jar2.部署Jar包到远程Maven仓库
在本地maven的settings.xml中配置如下内容:
<server>
  <id>snapshots</id>
  <username>用户名</username>
  <password>密码</password>
</server>
 <server>
  <id>releases</id>
  <username>用户名</username>
  <password>密码</password>
</server>
mvn deploy:deploy-file -DgroupId=com.test -DartifactId=service-api -Dversion=1.0.0-SNAPSHOT -Dpackaging=jar -Dfile=service-api-1.0.0-SNAPSHOT.jar -DrepositoryId=maven-snapshots -Durl=http://localhost:9100/repository/maven-snapshots/


 748
748

 被折叠的 条评论
为什么被折叠?
被折叠的 条评论
为什么被折叠?
 到【灌水乐园】发言


