


使用主控为esp32,驱动库为tft_espi,使用平台为vscode+platform。简单记录下自己的第一版简易小时钟。
下面为画面效果:
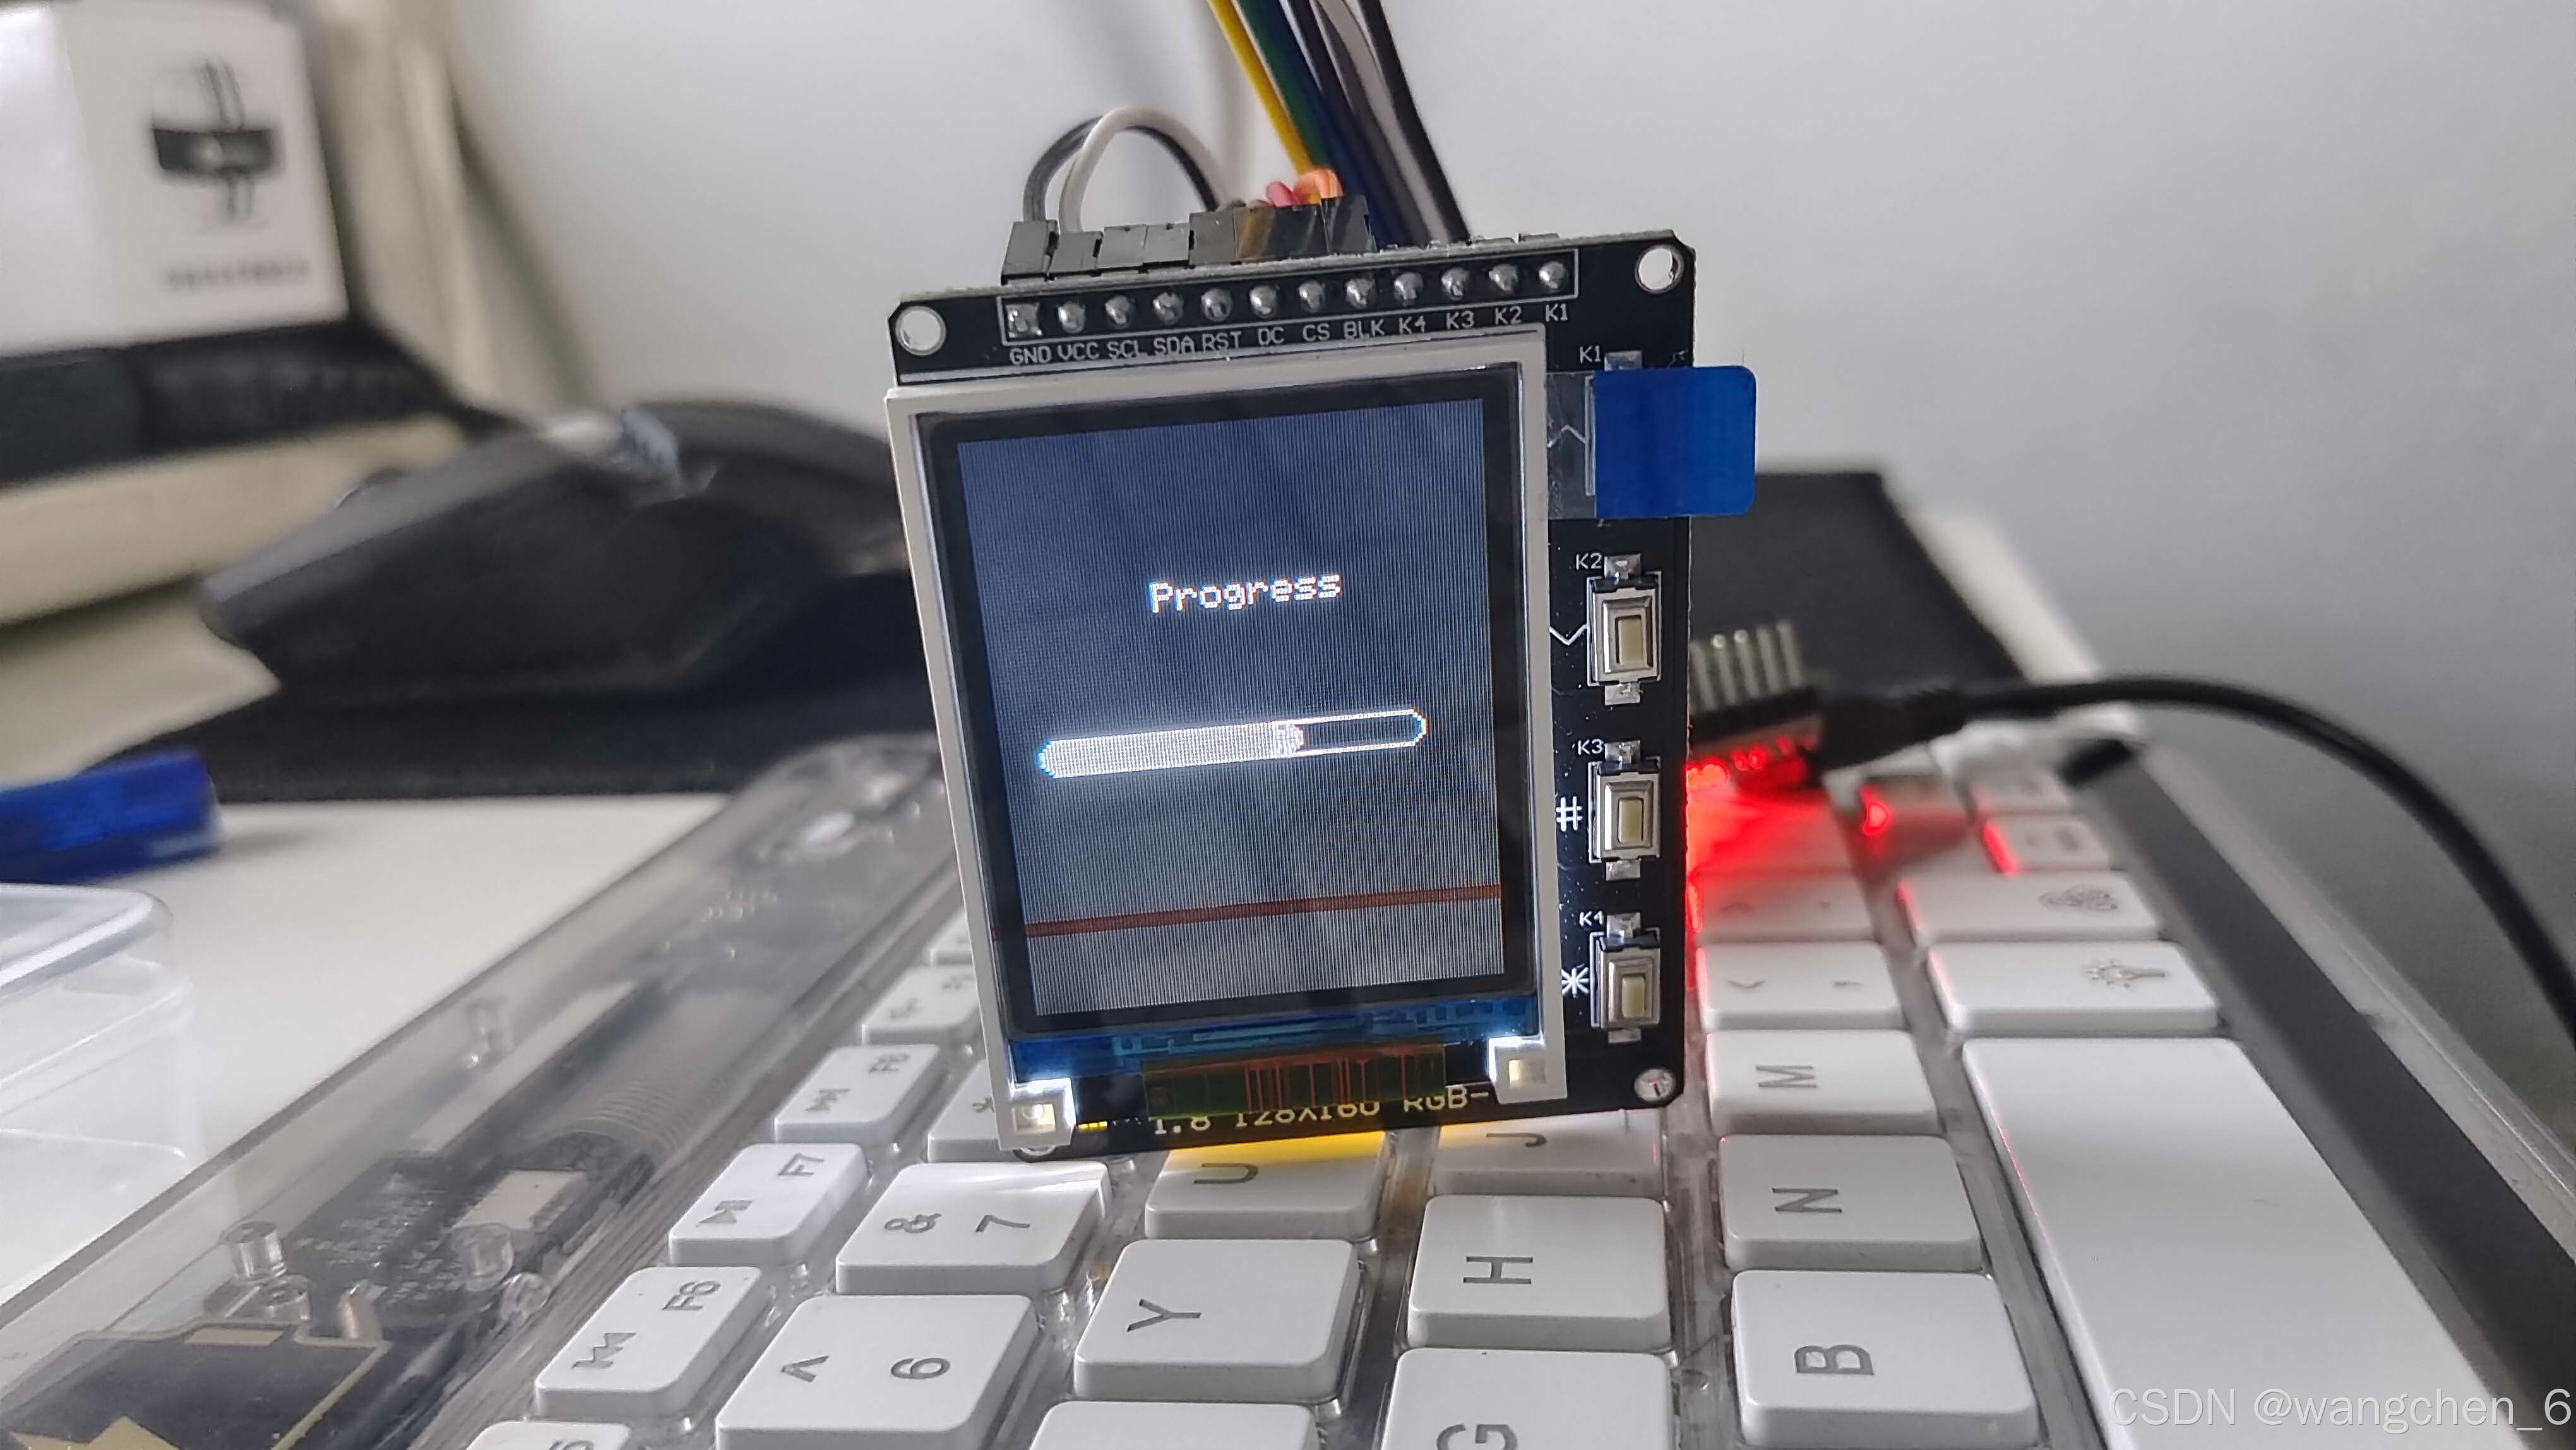
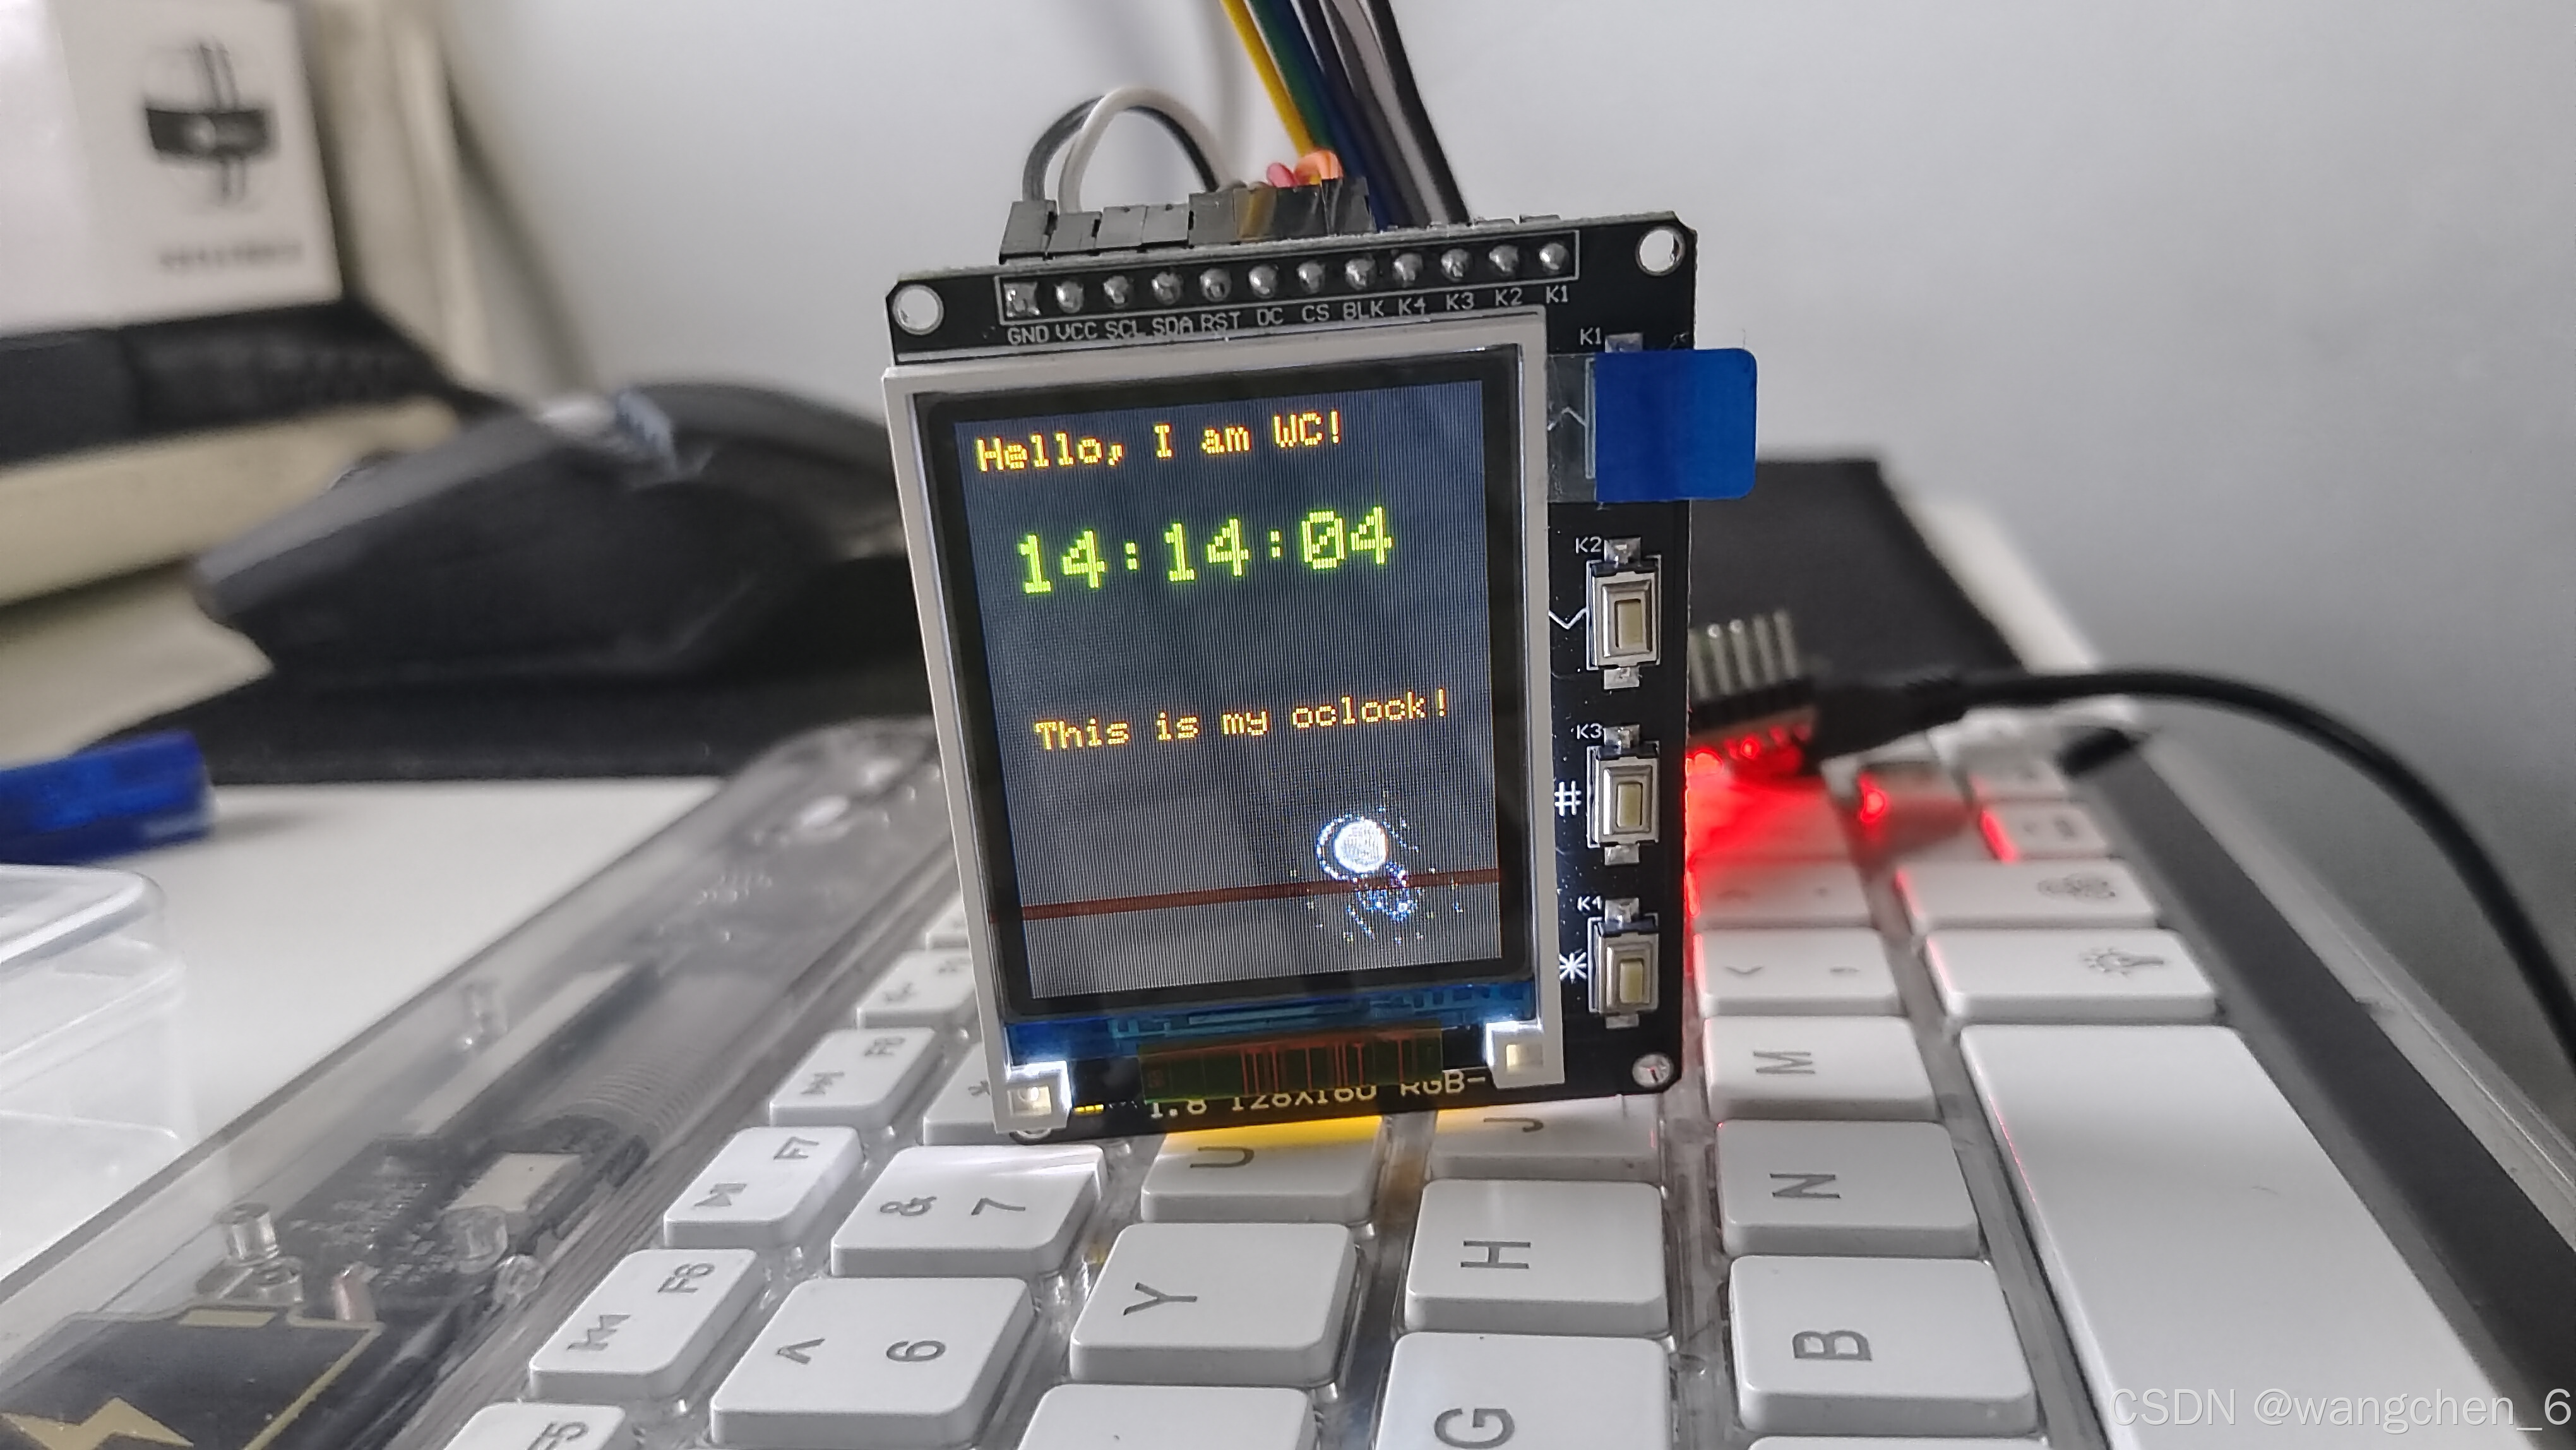
小时钟
代码:
#include <SPI.h>
#include <Adafruit_I2CDevice.h>
#include <TFT_eSPI.h>
#include "gImage.h"
#include <WiFi.h>
#include <Update.h>
#include <WiFiManager.h>
#include <NTPClient.h>
#include <WiFiUdp.h>
#include <SPI.h>
#include <qrcode.h>

const char* ssid = "ssid_IP"; // 替换为你的WiFi SSID
const char* password = "password"; // 替换为你的WiFi密码

WiFiUDP ntpUDP;
NTPClient timeClient(ntpUDP, "pool.ntp.org");
TFT_eSPI tft = TFT_eSPI();
/******显示太空人函数********* */
void displayGIF(void)
{
    #define DELAY_TIME 100 // 延迟时间,单位为毫秒
    const int imageCount = 12;
    const int x = 65;
    const int y = 95;
    const int width = 64;
    const int height = 64;
    int8_t i=0;
    for( i =0; i < imageCount; i++) {
        tft.pushImage(x, y, width, height, gImageArray[i]);
        delay(DELAY_TIME);
        }
}
// void GUIstart(){


// }

void showProgressBar(int progress, int total) {
    float ratio = static_cast<float>(progress) / total; // 计算进度百分比
    int barWidth = tft.width() - 28; // 进度条宽度
    int barHeight = 10; // 进度条高度
    int cornerRadius = 5; // 圆角半径

    int filledWidth = static_cast<int>(ratio * barWidth); // 计算填充的宽度

    tft.fillRoundRect(10, 80, filledWidth, barHeight, cornerRadius,TFT_WHITE); // 绘制填充区域
    tft.drawRoundRect(10, 80, barWidth, barHeight, cornerRadius,TFT_WHITE); // 绘制进度条边框

    tft.setTextSize(1); // 设置字体大小
    tft.setTextColor(TFT_WHITE); // 设置字体颜色
    tft.setCursor(43, 40); // 设置字体位置
    tft.print("Progress"); // 显示连接WiFi的提示信息
}

void setup() {

    tft.init();
    tft.setRotation(0);  // 设置旋转角度
    tft.fillScreen(TFT_BLACK);  // 清屏
    tft.setTextSize(1); // 设置字体大小
    tft.setTextColor(TFT_WHITE); // 设置字体颜色
    tft.setCursor(10, 40); // 设置字体位置
    Serial.begin(115200);
    WiFi.begin(ssid, password);

    while (WiFi.status() != WL_CONNECTED) {
        delay(1000);
        //Serial.println("Connecting to WiFi...");
        tft.println("Connecting to WiFi");
    }
     delay(2000);
    tft.fillScreen(TFT_BLACK);
    timeClient.begin();
    timeClient.setTimeOffset(28800); // 设置时区偏移量,这里设置为北京时间(UTC+8)
    int total = 100; // 总进度值
    for (int i = 0; i <= total; ++i) {
        showProgressBar(i, total); // 更新进度条
        delay(100); // 暂停100毫秒
    }
    tft.fillScreen(TFT_BLACK);  // 清屏
     tft.setTextSize(1); // 设置字体大小
    tft.setTextColor(TFT_GOLD); // 设置字体颜色
    tft.setCursor(5, 5);
    tft.println("Hello, I am WC!");
    tft.setCursor(10, 80);
    tft.println("This is my oclock!");
}

void loop() {
    timeClient.update();
    tft.fillSmoothRoundRect(10, 30, 100, 15, 5, TFT_BLACK); // 绘制填充区域
    tft.setTextSize(2); // 设置字体大小
    tft.setTextColor(TFT_GREENYELLOW); // 设置字体颜色
    tft.setCursor(10, 30); // 设置字体位置
    tft.println(timeClient.getFormattedTime()); // 显示时间
    delay(10);
    displayGIF();


}


 1858
1858

 被折叠的 条评论
为什么被折叠?
被折叠的 条评论
为什么被折叠?
 到【灌水乐园】发言


