一、简介
1.1、什么是JNI
JNI的全称是Java Native Interface:Java本地开发接口,它提供了若干的API实现了Java和其他语言的通信(主要是C和C++),目的就是Java可以调用C或C++开发的函数,C或C++也能调用Java的方法。这样有很多有点,其一就是效率,C/C++是本地语言,比java更高效;其二就是可以复用已经存在的C/C++代码;其三是Java反编译比C语言容易,一般加密算法都是用C语言编写,不容易被反编译。
1.2、什么是NDK和CMake
NDK全称是Native Development Kit,NDK提供了一系列的工具,帮助开发者快速开发C(或C++)的动态库,并能自动将so和Java应用一起打包成apk。NDK集成了交叉编译器,并提供了相应的mk文件隔离CPU、平台、ABI等差异,开发人员只需要简单修改mk文件(指出“哪些文件需要编译”、“编译特性要求”等),就可以创建出so。
CMake是一个比make更高级的编译配置工具,它可以根据不同平台、不同的编译器,生成相应的Makefile或者vcproj项目。
通过编写CMakeLists.txt,可以控制生成的Makefile,从而控制编译过程。CMake自动生成的Makefile不仅可以通过make命令构建项目生成目标文件,还支持安装(make install)、测试安装的程序是否能正确执行(make test,或者ctest)、生成当前平台的安装包(make package)、生成源码包(make package_source)、产生Dashboard显示数据并上传等高级功能,只要在CMakeLists.txt中简单配置,就可以完成很多复杂的功能,包括写测试用例。如果有嵌套目录,子目录下可以有自己的CMakeLists.txt。
二、工具安装配置
目前Android开发都是用的Android Studio,并且CMake是Android Studio 2.2以后才支持的工具,所以简要介绍一下在IDE中的安装步骤。
首先打开Tools->Android->SDK Manager,如下图。
在弹出来的窗口中,选择 SDK Tools,然后将CMake、LLDB和NDK,LLDB是用来Debug C/C++代码的,建议一起安装上,如下。
然后下载安装即可。
安装完之后,就会在我们的SDK目录发现多了 ndk-bundle 和 lldb目录,因为我们最常用的就是 ndk-bundle目录下的ndk-build.cmd命令,所以建议将ndk-bundle目录配置到系统环境变量Path下面。
三、项目实例
3.1、类型介绍
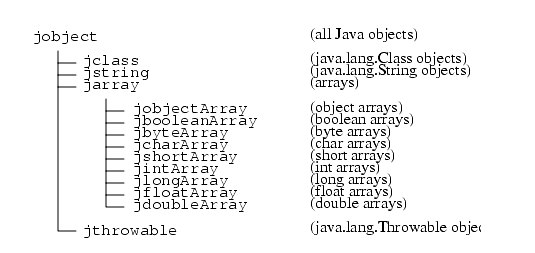
编程最基础的就是数据类型了,所以这里先简单介绍一下常用的JNI中数据类型和Java数据类型以及C数据类型对应关系。


3.2、创建项目
创建一个Android项目,创建JNI项目和普通项目的区别就是JNI项目要勾选上 Include C++ support,然后就一直下一步下一步。等待项目初始化,完成之后会发现和普通的Android项目相比,src下面会多个cpp源码目录,app模块下面会多一个CMakeLists.txt,build.gradle也有点不一样,这些都是IDE方便我们JNI开发帮我们生成的。
创建项目的时候,C++的例子已经自动生成了;由于小弟只有一些C的记忆了,所以就重写了一个C函数。同样放在src/main/cpp下面。
#include "jni.h"

jstring Java_com_nan_jnidemo_MainActivity_getNameFromC(JNIEnv *env, jobject this) {
    char *name = "This is c name";
    return (*env)->NewStringUTF(env, name);
}
然后在我们的java类中生命native方法,并调用,本例中我采用一个按钮点击调用C函数。
package com.nan.jnidemo;

import android.os.Bundle;
import android.support.v7.app.AppCompatActivity;
import android.view.View;
import android.widget.TextView;
import android.widget.Toast;

public class MainActivity extends AppCompatActivity {

    // Used to load the 'native-lib' library on application startup.
    static {
        System.loadLibrary("native-lib");
    }

    @Override
    protected void onCreate(Bundle savedInstanceState) {
        super.onCreate(savedInstanceState);
        setContentView(R.layout.activity_main);

        // Example of a call to a native method
        TextView tv = (TextView) findViewById(R.id.sample_text);
        tv.setText(stringFromJNI());
    }

    /**
     * 调用C函数按钮触发方法
     */
    public void onClick(View view) {
        Toast.makeText(this, getNameFromC(), Toast.LENGTH_SHORT).show();
    }

    /**
     * A native method that is implemented by the 'native-lib' native library,
     * which is packaged with this application.
     */
    public native String stringFromJNI();

    public native String getNameFromC();
}# For more information about using CMake with Android Studio, read the
# documentation: https://d.android.com/studio/projects/add-native-code.html
# Sets the minimum version of CMake required to build the native library.
cmake_minimum_required(VERSION 3.4.1)
# Creates and names a library, sets it as either STATIC
# or SHARED, and provides the relative paths to its source code.
# You can define multiple libraries, and CMake builds them for you.
# Gradle automatically packages shared libraries with your APK.
add_library( # Sets the name of the library.
native-lib
# Sets the library as a shared library.
SHARED
# Provides a relative path to your source file(s).
src/main/cpp/native-lib.cpp
src/main/cpp/hello.c)
# Searches for a specified prebuilt library and stores the path as a
# variable. Because CMake includes system libraries in the search path by
# default, you only need to specify the name of the public NDK library
# you want to add. CMake verifies that the library exists before
# completing its build.
find_library( # Sets the name of the path variable.
log-lib
# Specifies the name of the NDK library that
# you want CMake to locate.
log )
# Specifies libraries CMake should link to your target library. You
# can link multiple libraries, such as libraries you define in this
# build script, prebuilt third-party libraries, or system libraries.
target_link_libraries( # Specifies the target library.
native-lib
# Links the target library to the log library
# included in the NDK.
${log-lib} )然后项目layout配置xml加上按钮,绑定上我们写的点击方法启动即可。启动项目,可以方向默认的C++函数调用成功,然后点击按钮,可以看到我们写的C函数也调用成功。
去app目录下面,也可以发现IDE帮我们编译了很多平台的库,是不是比以前NDK步骤简单多了。
四、CMake配置文件解析
4.1、add_library
这个函数是用来配置创建和命名库的,比如我们配置的native-lib,就是将我们编写的库,命名成native-lib,这个是自定义的,和NDK一样用法;SHARED是指动态库,另一个就是STATIC,指静态库;最下面就是提供源码的位置,另外一种情况是我们使用别人预编译好的库,直接写IMPORTED,比如经常用到ffmpeg的项目就是这么写的。
add_library( avutil-55
             SHARED
             IMPORTED )
4.2、find_library
这个函数是用来使用NDK提供的库,因为NDK中的API都已经是编译好的,而且CMake会自动去NDK目录中查找这些我们需要使用的库,所以这里只需要提供库的名称就可以了,项目中的例子是加载NDK中的log库,因为我们在NDK开发中,总是少不了要打印日志的,只需要定义一个名称,然后指明NDK的库,名称会在下一个函数中用到。
4.3、target_link_libraries
这个函数就是将上面2个方法的添加的库链接到我们的目标库中,包括我们自己编写的、预编译的或者NDK提供的。


 4万+
4万+

 被折叠的 条评论
为什么被折叠?


