PullToRefresh上拉刷新和下拉刷新

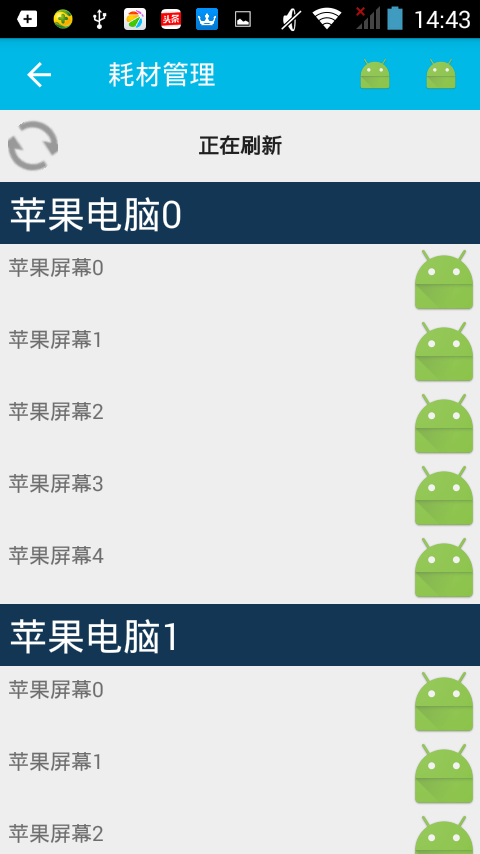
项目很多时候都需要做ListView交互,我现在也在做,本想着按着效果图来做就可以了,因为刚到公司不久,业务不是很熟悉,做出来之后,跟效果图一样,拿给产品看,结果他说他忘记考虑大数据的情况下要分页加载,我心中默默的问候了。。。。。。经过一天的考虑,他定下是可以同时上拉刷新和下拉刷新,我在网上各种百度资料,找到支持上拉刷新和下拉刷新源码https://github.com/chrisbanes/Android-PullToRefresh,如果是只要上拉刷新就好实现了,只需要实现AbsListView.OnScrollListener监听滑动事件就可以请求数据分页了,

下载下来之后就将资源,类导入,编译通过之后(其实这个耗费的时间比较长,要剔除多余的代码),看布局代码

`<com.widget.pullreflush.PullToRefreshListView
        android:id="@+id/applies_listview"
        android:layout_width="match_parent"
        android:layout_height="match_parent">
    </com.widget.pullreflush.PullToRefreshListView>`

初始化view

 mAppliesListView = (PullToRefreshListView) this.findViewById(R.id.applies_listview);
        mAppliesListView.getRefreshableView().setDivider(null);
        mAppliesListView.getRefreshableView().setSelector(android.R.color.transparent);
        mAppliesListView.setOnRefreshListener(this);//注册监听器

        mAppliesListView.getLoadingLayoutProxy(true, false).setLastUpdatedLabel("下拉刷新");
        mAppliesListView.getLoadingLayoutProxy(true, false).setPullLabel("");
        mAppliesListView.getLoadingLayoutProxy(true, false).setRefreshingLabel("正在刷新");
        mAppliesListView.getLoadingLayoutProxy(true, false).setReleaseLabel("放开以刷新");
         //上拉加载更多时的提示文本设置
        mAppliesListView.getLoadingLayoutProxy(false, true).setLastUpdatedLabel("上拉加载");
        mAppliesListView.getLoadingLayoutProxy(false, true).setPullLabel("");
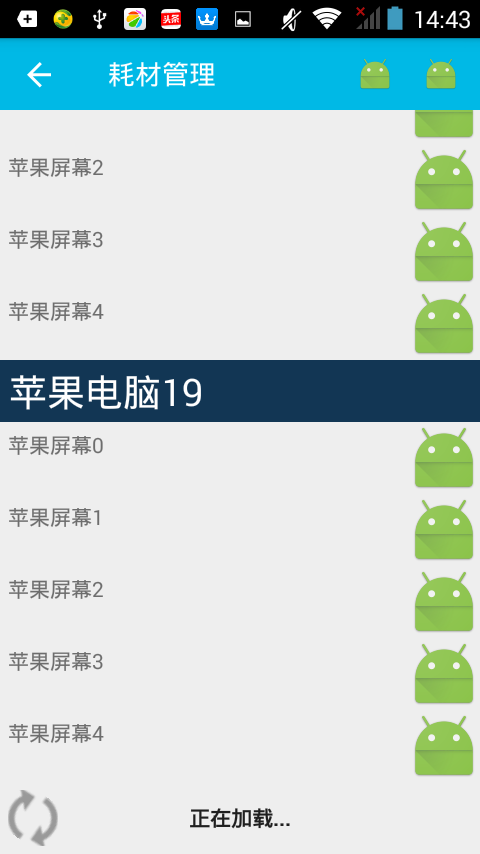
        mAppliesListView.getLoadingLayoutProxy(false, true).setRefreshingLabel("正在加载...");
        mAppliesListView.getLoadingLayoutProxy(false, true).setReleaseLabel("放开以加载");
        mAppliesListView.setMode(PullToRefreshBase.Mode.BOTH);//加上这个是同时支持上拉下拉刷新

在注册监听器之后就可以实现上拉或者下拉刷新该执行的方法

  @Override
    public void onRefresh(PullToRefreshBase refreshView) {
        Log.e("supplies","刷新========================================");
        if( mAppliesListView.isRefreshing()){
            if(mAppliesListView.isHeaderShown()){//
                Log.e("supplies", "下拉刷新========================================");

            }else {
                Log.e("supplies","上拉刷新========================================");
            }

            mAppliesListView.onRefreshComplete();
        }else {


        }

    }

PullToRefreshAdapterViewBase.java这个类,加入两个新接口就可以知道是上拉还是下拉了:

public boolean isHeaderShown() {  
    return getHeaderLayout().isShown();  
}  

public boolean isFooterShown() {  
    return getFooterLayout().isShown();  
}  

这里写图片描述

这里写图片描述

  • 2
    点赞
  • 0
    收藏
    觉得还不错? 一键收藏
  • 0
    评论
以下是 Android Studio 上使用第三方库实现透明的上拉加载和下拉刷新动画的代码示例: 1. 添加依赖库 在 app 的 build.gradle 文件中添加以下依赖: ``` dependencies { implementation 'com.github.yalantis:pull-to-refresh-attacher:1.0.3' } ``` 2. 添加布局文件 在布局文件中添加 PullToRefreshLayout 控件,例如: ``` <?xml version="1.0" encoding="utf-8"?> <com.yalantis.pulltorefresh.library.PullToRefreshLayout android:id="@+id/refresh_layout" android:layout_width="match_parent" android:layout_height="match_parent" app:ptr_header_layout="@layout/ptr_transparent_header" app:ptr_footer_layout="@layout/ptr_transparent_footer"> <androidx.recyclerview.widget.RecyclerView android:id="@+id/recycler_view" android:layout_width="match_parent" android:layout_height="match_parent" android:background="@android:color/transparent" /> </com.yalantis.pulltorefresh.library.PullToRefreshLayout> ``` 其中,`ptr_header_layout` 和 `ptr_footer_layout` 分别指定了上拉加载和下拉刷新的布局文件。在本例中,我们使用了自定义的透明布局文件 `ptr_transparent_header.xml` 和 `ptr_transparent_footer.xml`。 3. 自定义布局文件 在 res/layout 目录下创建 `ptr_transparent_header.xml` 和 `ptr_transparent_footer.xml` 文件,分别用于实现上拉加载和下拉刷新的动画效果。以下是示例代码: ptr_transparent_header.xml: ``` <?xml version="1.0" encoding="utf-8"?> <FrameLayout xmlns:android="http://schemas.android.com/apk/res/android" android:layout_width="match_parent" android:layout_height="wrap_content" android:background="@android:color/transparent"> <ProgressBar android:id="@+id/progress_bar" android:layout_width="wrap_content" android:layout_height="wrap_content" android:layout_gravity="center" android:visibility="gone" /> <ImageView android:id="@+id/arrow" android:layout_width="wrap_content" android:layout_height="wrap_content" android:layout_gravity="center" android:src="@drawable/ptr_arrow" /> <TextView android:id="@+id/text" android:layout_width="wrap_content" android:layout_height="wrap_content" android:layout_gravity="center" android:textColor="@android:color/white" android:textSize="14sp" android:text="@string/ptr_pull_to_refresh" /> </FrameLayout> ``` ptr_transparent_footer.xml: ``` <?xml version="1.0" encoding="utf-8"?> <FrameLayout xmlns:android="http://schemas.android.com/apk/res/android" android:layout_width="match_parent" android:layout_height="wrap_content" android:background="@android:color/transparent"> <ProgressBar android:id="@+id/progress_bar" android:layout_width="wrap_content" android:layout_height="wrap_content" android:layout_gravity="center" android:visibility="gone" /> <ImageView android:id="@+id/arrow" android:layout_width="wrap_content" android:layout_height="wrap_content" android:layout_gravity="center" android:src="@drawable/ptr_arrow" /> <TextView android:id="@+id/text" android:layout_width="wrap_content" android:layout_height="wrap_content" android:layout_gravity="center" android:textColor="@android:color/white" android:textSize="14sp" android:text="@string/ptr_pull_to_load" /> </FrameLayout> ``` 在布局文件中,我们使用了一个透明的 FrameLayout 作为容器,并在其中添加了一个 ProgressBar、一个箭头图标和一个文本框。ProgressBar 控件用于显示加载中的动画,箭头图标和文本框用于显示不同状态下的提示信息。 4. 初始化控件 在 Activity 或 Fragment 中初始化 PullToRefreshLayout 控件,并设置上拉加载和下拉刷新的监听器,例如: ``` public class MainActivity extends AppCompatActivity { private PullToRefreshLayout refreshLayout; private RecyclerView recyclerView; private MyAdapter adapter; @Override protected void onCreate(Bundle savedInstanceState) { super.onCreate(savedInstanceState); setContentView(R.layout.activity_main); refreshLayout = findViewById(R.id.refresh_layout); recyclerView = findViewById(R.id.recycler_view); recyclerView.setLayoutManager(new LinearLayoutManager(this)); adapter = new MyAdapter(this); recyclerView.setAdapter(adapter); refreshLayout.setOnRefreshListener(new PullToRefreshLayout.OnRefreshListener() { @Override public void onRefresh() { // 下拉刷新操作 // 在这里执行数据加载操作,加载完成后调用 refreshLayout.setRefreshComplete() } @Override public void onLoadMore() { // 上拉加载操作 // 在这里执行数据加载操作,加载完成后调用 refreshLayout.setRefreshComplete() } }); } } ``` 在设置监听器时,我们使用PullToRefreshLayout.OnRefreshListener 接口,其中的 onRefresh() 和 onLoadMore() 方法分别用于处理下拉刷新上拉加载的操作。在数据加载完成后,我们需要调用 refreshLayout.setRefreshComplete() 方法来结束相应的操作。 以上就是使用 PullToRefreshAttacher 库实现透明的上拉加载和下拉刷新动画的代码示例。

“相关推荐”对你有帮助么?

  • 非常没帮助
  • 没帮助
  • 一般
  • 有帮助
  • 非常有帮助
提交
评论
添加红包

请填写红包祝福语或标题

红包个数最小为10个

红包金额最低5元

当前余额3.43前往充值 >
需支付:10.00
成就一亿技术人!
领取后你会自动成为博主和红包主的粉丝 规则
hope_wisdom
发出的红包
实付
使用余额支付
点击重新获取
扫码支付
钱包余额 0

抵扣说明:

1.余额是钱包充值的虚拟货币,按照1:1的比例进行支付金额的抵扣。
2.余额无法直接购买下载,可以购买VIP、付费专栏及课程。

余额充值