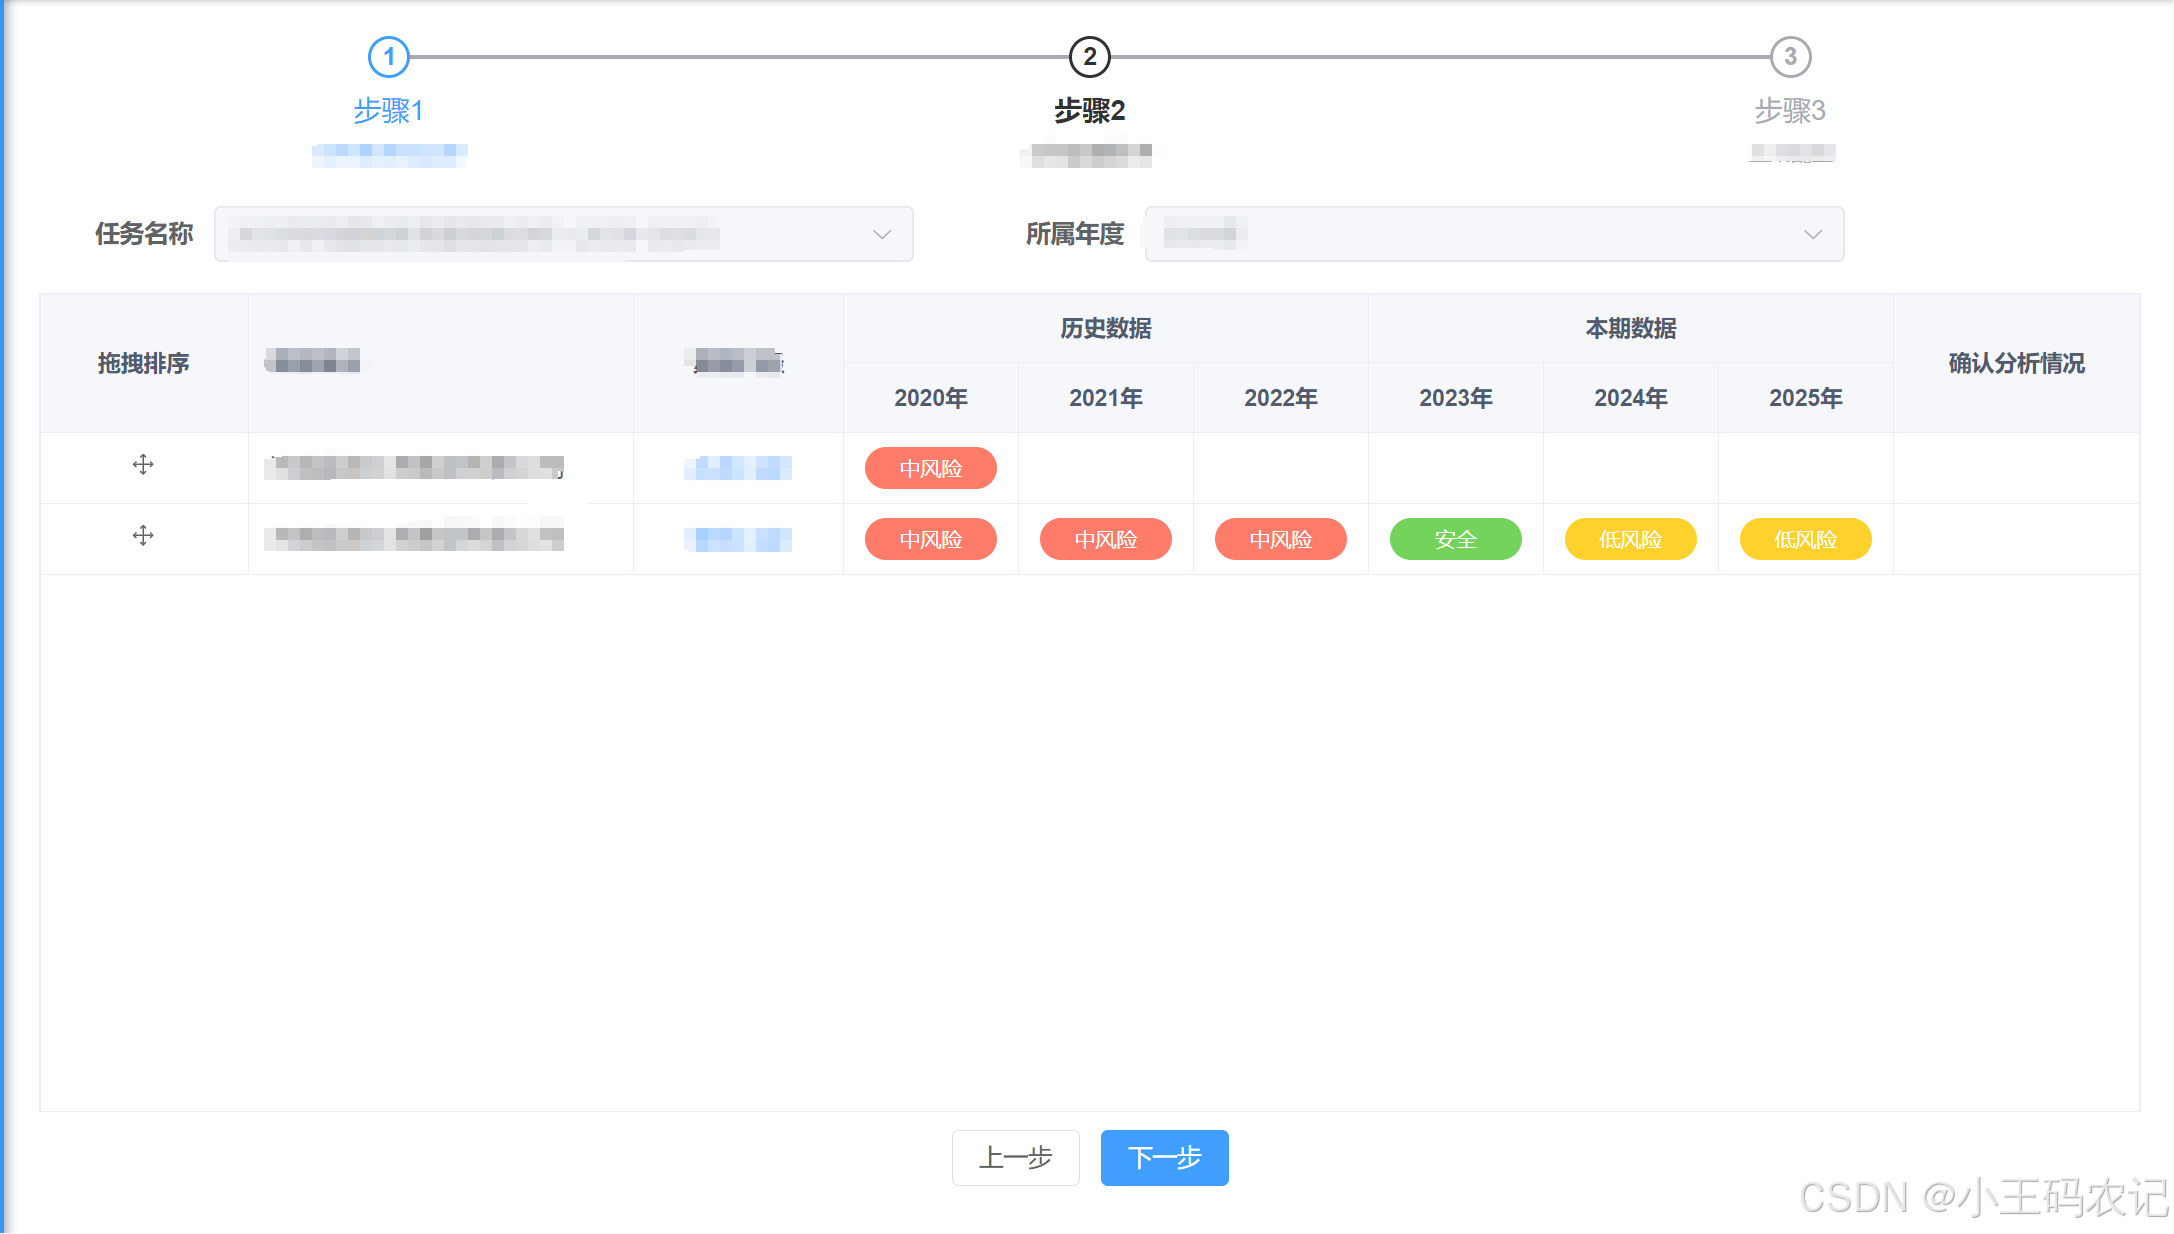
实现效果
实现步骤
- 先
安装sortable.js库 - 使用的vue文件中
引入 import Sortablejs from ‘sortablejs’ - 在进入页面后创建sortable
实例 - 在提交后端时可获取到
排序后的最新table列表数据
sortable.js文档
拖拽排序功能的完整代码
<template>
<div style="height: 100%">
<!-- ...省略其他代码... -->
<div class="table-box" style="height: 100%;">
<el-table class="sort-el-table" row-key="id" v-loading="loading" :data="tableList"
style="flex: 1;margin-bottom: 20px;" height="100%">
<!-- table中拖拽排序列 -->
<el-table-column label="拖拽排序" fixed width="120px" align="center">
<template
<el-icon class="sort-icon" style="cursor: pointer">
<Rank/>
</el-icon>
</template>
</el-table-column>
<el-table-column
label="XXX"
align="left"
prop="deptName"
width="220"
show-overflow-tooltip
fixed
>
</el-table-column>
<el-table-column
label="XXX"
align="center"
prop="dataAperture"
width="120"
fixed
>
<template
<el-link type="primary" @click="handleDetail(scope.row)">
<dict-tag :options="task_data_aperture" :value="scope.row.dataAperture"/>
</el-link>
</template>
</el-table-column>
<!-- 合并表头的效果 -->
<el-table-column label="历史数据" align="center">
<el-table-column
v-for="(item, index) in historyRiskResultVOList"
:key="index"
:prop="'dataYear'"
:label="item"
align="center"
width="100"
>
<template
<span>{{ item }}</span>
</template>
<template
<dict-tag
:canClick="false"
:options="risk_model_result_level"
:value="getTableColumnData(scope.row, index)"
/>
</template>
</el-table-column>
</el-table-column>
<el-table-column label="本期数据" align="center">
<el-table-column
v-for="(item, index) in forecastRiskResultVOList"
:key="index"
:prop="'dataYear'"
:label="item"
align="center"
width="100"
>
<template
<span>{{ item }}</span>
</template>
<template
<dict-tag
:canClick="false"
:options="risk_model_result_level"
:value="getTableColumnData2(scope.row, index)"
/>
</template>
</el-table-column>
</el-table-column>
<el-table-column
label="确认分析情况"
align="center"
prop="confirmDesc"
show-overflow-tooltip
/>
</el-table>
</div>
<div class="foot-btn">
<el-button @click="backTo">上一步</el-button>
<el-button type="primary" @click="nextStep">下一步</el-button>
</div>
</div>
</template>
<script setup>
import Sortablejs from 'sortablejs' //使用前先安装库
const {proxy} = getCurrentInstance();
const {task_data_aperture, risk_model_result_level} =
proxy.useDict("task_data_aperture", "risk_model_result_level"); // 字典项
const emit = defineEmits(["backTo", "nextStep"]);
const historyRiskResultVOList = ref([])
const forecastRiskResultVOList = ref([])
const props = defineProps({
taskObj: {
type: Object,
default: () => {
return {}
}
},
// 判断是否是编辑
flag: {
type: Boolean,
default: false
}
})
const loading = ref(false);
const tableList = ref([])
watch(() => props.taskObj, (v) => {
// ...省略其他代码...
nextTick(() => {
// 进入页面后就开启表格拖拽排序
const el = document.querySelector('.sort-el-table .el-table__body-wrapper table tbody'); // querySelector 方法选取页面上指定的元素。这里的选择器 '.sort-el-table .el-table__body-wrapper table tbody' 定位到一个表格的 tbody 部分
// 创建了一个 Sortable.js 实例,将 el 作为容器,用于拖拽排序
Sortablejs.create(el, {
animation: 150,
ghostClass: 'blue-background-class',
handle: '.sort-icon', // 指定了拖拽手柄的类名,如果需要点击某个图标拖拽的话需要吧那个图标的class写在这里
onEnd: function (evt) { // 拖拽动作结束时触发
let newIndex = evt.newIndex // 排序后的索引位置
let oldIndex = evt.oldIndex // 排序前的索引位置
if (newIndex !== oldIndex) { // 如果 newIndex 和 oldIndex 不相等,说明元素的位置发生了变化
let currRow = tableList.value.splice(oldIndex, 1)[0]; // 从数组中移除原来位置的元素,并返回被移除的元素obj
console.log("currRow:", currRow);
tableList.value.splice(newIndex, 0, currRow); // 将被移除的该元素插入到新的位置
}
}
})
})
}, {immediate: true})
// 提交表格数据(根据表格顺序加index属性)
function nextStep() {
tableList.value.forEach((item, index) => {
item.index = index
})
console.log("当前的tableList:", tableList.value);
return;
emit('sortVal', tableList.value)
}
</script>


 854
854


 被折叠的 条评论
为什么被折叠?
被折叠的 条评论
为什么被折叠?
 到【灌水乐园】发言


