


/**
* 动画可以添加微妙的视觉线索,通知用户在你的应用程序中发生了什么,并改善你的应用程序的界面的心理模型。当屏幕改变状态时,动画是特别有用的,记住,这种过度使用动画或利用他们在错误的时间可以是有害的,如当他们造成延误。实现一些常见的类型的动画,可以增加可用性,而不会打扰您的用户。
* 动画可以添加微妙的视觉线索,通知用户在你的应用程序中发生了什么,并改善你的应用程序的界面的心理模型。当屏幕改变状态时,动画是特别有用的,记住,这种过度使用动画或利用他们在错误的时间可以是有害的,如当他们造成延误。实现一些常见的类型的动画,可以增加可用性,而不会打扰您的用户。
*/
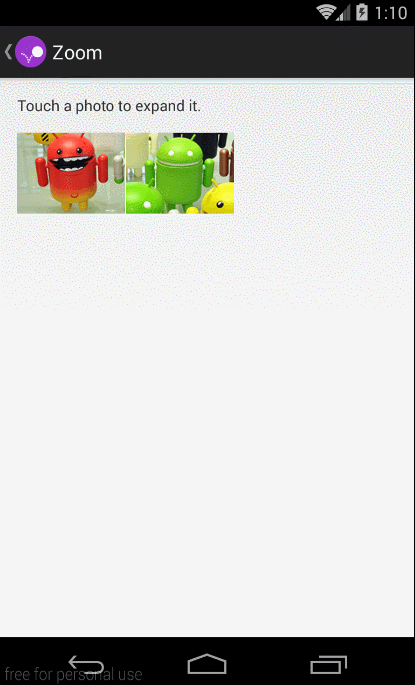
官方效果如下:
xml布局:
        <LinearLayout
            android:layout_width="wrap_content"
            android:layout_height="wrap_content"
            android:layout_marginTop="16dp"
            android:orientation="horizontal">

            <!-- These buttons don't have any decorations (3D bevel, etc.), but it's still
                 important to show feedback on touch or focus. The custom
                 "ToughHighlightImageButton" ImageButton subclass helps achieve this by drawing
                 the standard system "pressed" and "focused" overlay upon user interaction. -->

            <com.example.android.animationsdemo.TouchHighlightImageButton
                android:id="@+id/thumb_button_1"
                android:layout_width="100dp"
                android:layout_height="75dp"
                android:layout_marginRight="1dp"
                android:src="@drawable/thumb1"
                android:scaleType="centerCrop"
                android:contentDescription="@string/description_image_1" />

            <com.example.android.animationsdemo.TouchHighlightImageButton
                android:id="@+id/thumb_button_2"
                android:layout_width="100dp"
                android:layout_height="75dp"
                android:src="@drawable/thumb2"
                android:scaleType="centerCrop"
                android:contentDescription="@string/description_image_2" />

        </LinearLayout>

    </LinearLayout>

    <!-- This initially-hidden ImageView will hold the expanded/zoomed version of the
         images above. Without transformations applied, it takes up the entire screen.
         To achieve the "zoom" animation, this view's bounds are animated from the
         bounds of the thumbnail buttons above, to its final laid-out bounds. The implementation
         of this animation is in the ZoomActivity class. -->
    <ImageView
        android:id="@+id/expanded_image"
        android:layout_width="match_parent"
        android:layout_height="match_parent"
        android:visibility="invisible"
android:contentDescription="@string/description_zoom_touch_close" />通过点击可以看到在ImageView上面会有一个阴影的效果,设置如下:
1、得到该点击背景的Drawable
        // 从这当前的主题为这个drawable资源标志android.R.attr.selectableItemBackground主题属性
        TypedArray a = getContext()
                .obtainStyledAttributes(new int[]{android.R.attr.selectableItemBackground});
        mForegroundDrawable = a.getDrawable(0);
        mForegroundDrawable.setCallback(this);//绑定一个回调给这个Drawable,将会去请求动画
a.recycle(); @Override
protected void drawableStateChanged() {
super.drawableStateChanged();
//为这个高亮的图片更新这个状态,
if (mForegroundDrawable.isStateful()) {//指示是否这个drawable将会改变它的外观,可以根据这个来判断是否可以通过setState来改变它的状态
mForegroundDrawable.setState(getDrawableState());
}
// 重绘
invalidate();
} // 首先先绘制图片
super.onDraw(canvas);
// 绘制完图片之后,绘制高亮图层在它的上面,如果这个Button既不focus也不按压,这个drawable将会透明
mForegroundDrawable.setBounds(mCachedBounds);
mForegroundDrawable.draw(canvas);1、计算缩略图的坐标(本地)
        //计算开始和结束这个放大图片的边界,这一步执行了大量的数学公式
        final Rect startBounds = new Rect();
        final Rect finalBounds = new Rect();
        final Point globalOffset = new Point();
        //这个开始边界是全局可见缩略图的矩形,和最终边界是全局可见容器视图矩形
        //也将容器视图的偏移作为边界的原点,因为这是定位动画属性(X,Y)的原点。
        thumbView.getGlobalVisibleRect(startBounds);
        findViewById(R.id.container).getGlobalVisibleRect(finalBounds, globalOffset);
        //在getGlobalVisibleRect的注释也说到调用offset方法就是将全局的坐标转化为本地的坐标
        startBounds.offset(-globalOffset.x, -globalOffset.y);
finalBounds.offset(-globalOffset.x, -globalOffset.y);2、调整开始的边界
        //调整开始边界,使用Center crop
        //这样可以防止在动画过程中不受欢迎的拉伸
        float startScale;
        if ((float) finalBounds.width() / finalBounds.height()
                > (float) startBounds.width() / startBounds.height()) {//最终宽高比上开始的宽高以最大的进行缩放
            //开始水平扩展
            startScale = (float) startBounds.height() / finalBounds.height();
            float startWidth = startScale * finalBounds.width();
            float deltaWidth = (startWidth - startBounds.width()) / 2;
            startBounds.left -= deltaWidth;
            startBounds.right += deltaWidth;
        } else {
            //开始竖直扩展
            startScale = (float) startBounds.width() / finalBounds.width();
            float startHeight = startScale * finalBounds.height();
            float deltaHeight = (startHeight - startBounds.height()) / 2;
            startBounds.top -= deltaHeight;
            startBounds.bottom += deltaHeight;
}startBounds.top -= deltaHeight;
startBounds.bottom += deltaHeight;
根据上图为了让效果更加流畅应该将图片的bounds设置为ImageView的bounds。
3、设置放大ImageView的原点
        //隐藏这个缩略图和显示放大View,当动画开始放大视图的位置在缩略图的位置
        thumbView.setAlpha(0f);
        expandedImageView.setVisibility(View.VISIBLE);

        //为放大View设置缩放X、Y的原点为左上角(默认情况下为View的中心点)
        expandedImageView.setPivotX(0f);
expandedImageView.setPivotY(0f); //构造和运行水平动画的四个平移和缩放属性
// (X, Y, SCALE_X, and SCALE_Y).
AnimatorSet set = new AnimatorSet();
set
.play(ObjectAnimator.ofFloat(expandedImageView, View.X, startBounds.left,
finalBounds.left))
.with(ObjectAnimator.ofFloat(expandedImageView, View.Y, startBounds.top,
finalBounds.top))
.with(ObjectAnimator.ofFloat(expandedImageView, View.SCALE_X, startScale, 1f))
.with(ObjectAnimator.ofFloat(expandedImageView, View.SCALE_Y, startScale, 1f));
set.setDuration(2000);
set.setInterpolator(new DecelerateInterpolator());
set.addListener(new AnimatorListenerAdapter() {
@Override
public void onAnimationEnd(Animator animation) {
mCurrentAnimator = null;//当动画消失时将当前的动画置为Null
}
@Override
public void onAnimationCancel(Animator animation) {
mCurrentAnimator = null;
}
});
set.start();
mCurrentAnimator = set; //点击放大图片,它将缩小到原始的图片和显示缩略图替代放大图
final float startScaleFinal = startScale;
expandedImageView.setOnClickListener(new View.OnClickListener() {
@Override
public void onClick(View view) {
if (mCurrentAnimator != null) {
mCurrentAnimator.cancel();
}
//回退到原始的属性
AnimatorSet set = new AnimatorSet();
set
.play(ObjectAnimator.ofFloat(expandedImageView, View.X, startBounds.left))
.with(ObjectAnimator.ofFloat(expandedImageView, View.Y, startBounds.top))
.with(ObjectAnimator
.ofFloat(expandedImageView, View.SCALE_X, startScaleFinal))
.with(ObjectAnimator
.ofFloat(expandedImageView, View.SCALE_Y, startScaleFinal));
set.setDuration(2000);
set.setInterpolator(new DecelerateInterpolator());
set.addListener(new AnimatorListenerAdapter() {
@Override
public void onAnimationEnd(Animator animation) {
thumbView.setAlpha(1f);
expandedImageView.setVisibility(View.GONE);
mCurrentAnimator = null;
}
@Override
public void onAnimationCancel(Animator animation) {
thumbView.setAlpha(1f);
expandedImageView.setVisibility(View.GONE);
mCurrentAnimator = null;
}
});
set.start();
mCurrentAnimator = set;
}
});


 170
170

 被折叠的 条评论
为什么被折叠?
被折叠的 条评论
为什么被折叠?
 到【灌水乐园】发言


