


If you are a beginner or intermediate iOS developer, dealing with Network calls and handling JSON data can be a daunting task. Thanks to Alamofire Software Foundation and SwiftyJSON for these two awesome libraries.
如果您是iOS的初学者或中级开发人员,那么处理网络调用和处理JSON数据可能是一项艰巨的任务。 感谢Alamofire软件基金会和SwiftyJSON提供了这两个很棒的库。
Alamofire is a library to elegantly handle HTTP connections, and SwiftyJSON is a library to elegantly serialize JSON into Swift objects. You don’t need SwiftyJSON to serialize JSON in swift, but it can get ugly having to deal with optionals.
Alamofire是一个用于优雅处理HTTP连接的库,而SwiftyJSON是一个用于优雅地将JSON序列化为Swift对象的库。 您不需要SwiftyJSON即可快速将JSON序列化,但必须处理可选参数会很丑陋。
In this tutorial we are going to build a small iOS Contacts App, using a contacts API from our friends at Android Hive https://api.androidhive.info/contacts/.
在本教程中,我们将使用Android Hive https://api.androidhive.info/contacts/上我们朋友的联系人API来构建一个小型iOS Contacts App。
What we are going to LEARN: How to use Alamofire with SwiftyJSON to hit an API and fetch results, parse them, and show the results in an UITableViewController. We will also learn how to segue to the next view controller and set variables from the previous view controller.
我们将要学习的内容 :如何将Alamofire与SwiftyJSON结合使用以命中API并获取结果,对其进行解析,并在UITableViewController中显示结果。 我们还将学习如何选择下一个视图控制器以及如何从上一个视图控制器设置变量。
Without further ado, let’s dive into it: let's create a new single view app XCode Project and install CocoaPods or Pods(these words are used interchangeably): To install Pods in your project, navigate to your root project directory using terminal and run the following commands in order.
事不宜迟,让我们开始深入研究:创建一个新的单视图应用XCode Project并安装CocoaPods或Pods(这些单词可以互换使用):要在您的项目中安装Pods,请使用终端导航到您的根项目目录并运行以下命令命令顺序。
pod initThe above command will initialize the Podfile, Once you have initialized the Podfile, you need to open the file using the following command
上面的命令将初始化Podfile,一旦初始化Podfile,您需要使用以下命令打开文件
open PodfileThe above command will open the Podfile, Add these pods on the podfile, right below #Pods for [Your Project Name]
上面的命令将打开Podfile,将这些Pod添加到Podfile上,在[您的项目名称]的#Pods的正下方
pod 'SwiftyJSON'
pod 'Alamofire', '~> 4.5'
Use the following command to install the above pods.
使用以下命令安装上述容器。
pod install
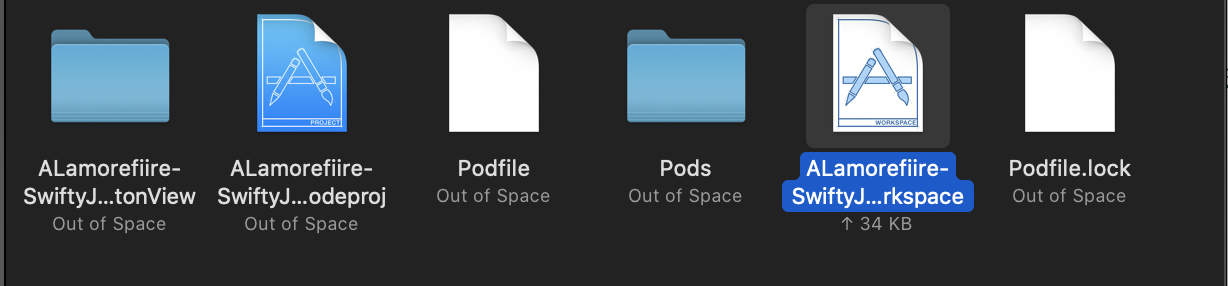
Once you have managed to add Alamofire and SwiftyJSON pods into your project, you may close the current project XCode environment and open it using the newly created workspace file in the project folder.
一旦成功将Alamofire和SwiftyJSON容器添加到项目中,就可以关闭当前项目XCode环境,并使用项目文件夹中新创建的工作区文件将其打开。
Let's go to the main storyboard file and add Navigation Controller onto our main view controller called contactsViewController. We will also add a table view on the contactsViewController storyboard file and add zero constraints on the contactsTableView for it to fill the whole contactsViewController.
让我们转到主故事板文件,然后将“导航控制器”添加到名为“ contactsViewController”的主视图控制器中。 我们还将在contactsViewController故事板文件上添加一个表视图,并在contactsTableView上添加零约束,以填充整个contactsViewController。

At the point, I assume you have created two storyboards view controllers, one that houses the contacts in a table view, the contactsViewController, and the other one that houses the contacts details which we will name contacts Details ViewController as depicted in the image above. Let’s get out hands dirty with code, let's create Utils.swift. Swift file that houses our base URL and contacts endpoint and also a completion handler.
至此,我假设您已经创建了两个情节提要视图控制器,一个在表格视图中包含联系人,一个是contactsViewController,另一个在其中包含联系人详细信息,我们将其命名为联系人详细信息ViewController,如上图所示。 让我们摆脱代码的麻烦,让我们创建Utils.swift。 包含我们的基本URL和联系端点以及完成处理程序的Swift文件。
import Foundationlet API_BASEURL = "http://api.androidhive.info/"let API_CONTACTS = API_BASEURL+"contacts/"typealias DownloadComplete = () ->()Let’s create our contacts model, I have named it Contacts.swift, this section is opinionated. You would notice that I have imported SwiftyJSON into contacts model and created a class that houses contacts private variables and initialization methods.
让我们创建我们的联系人模型,我将其命名为Contacts.swift,这部分内容有待商opinion。 您会注意到,我已将SwiftyJSON导入联系人模型,并创建了一个包含联系人私有变量和初始化方法的类。
import Foundation
import SwiftyJSONclass Contacts {

    private var _id:String!
    private var _name: String!
    private var _email: String!
    private var _address: String!
    private var _gender:String!
    private var _mobile:String!


    var id:String {
        if _id == nil {
            _id = ""
        }

        return _id
    }

    var name:String! {
        if _name == nil {
            _name = ""
        }

        return _name
    }

    var email:String {
        if _email == nil {
            _email = ""
        }

        return _email
    }
    var address:String {
        if _address == nil {
            _address = ""
        }

        return _address
    }

    var gender:String {
        if _gender == nil {
            _gender = ""
        }

        return _gender
    }

    var mobile:String{
        if _mobile == nil{
            _mobile = ""
        }

        return _mobile
    }

    init(contactDict: JSON) {
        self._id = contactDict["id"].stringValue
        self._name = contactDict["name"].stringValue
        self._address = contactDict["address"].stringValue
        self._email = contactDict["email"].stringValue
        self._mobile = contactDict["phone"]["mobile"].stringValue
        self._gender = contactDict["gender"].string
    }

}
Let’s go on and create the ContactsViewController.swift and create a contacts array of the type Contacts Model, We will append contacts data coming from API into this array and use it to populate our table view stubs.
让我们继续创建ContactsViewController.swift并创建类型为Contacts Model的contacts数组。我们将来自API的联系人数据附加到此数组中,并使用它来填充表视图存根。
Let’s jump straight and talk about the ContactsAPICalling function a little bit, You can notice that this function has a completion handler that will help us to know when the contacts data has been fully downloaded so that we can reload the table view.
让我们直接讨论一下ContactsAPICalling函数,您会注意到该函数具有完成处理程序,该处理程序将帮助我们知道何时完全下载了联系人数据,以便我们重新加载表视图。
We then fired a GET request to our contacts endpoint without headers and got the responseJson as contact response and then assigned the response result into the result variable. The line below shows how to grab all contact data from the “contacts” array of the contacts endpoint.
然后,我们向不带标题的联系人端点发送GET请求,并获得responseJson作为联系人响应,然后将响应结果分配给结果变量。 下面的行显示了如何从联系人端点的“联系人”数组中获取所有联系人数据。
let contactsJSON = JSON(result.value!)["contacts"]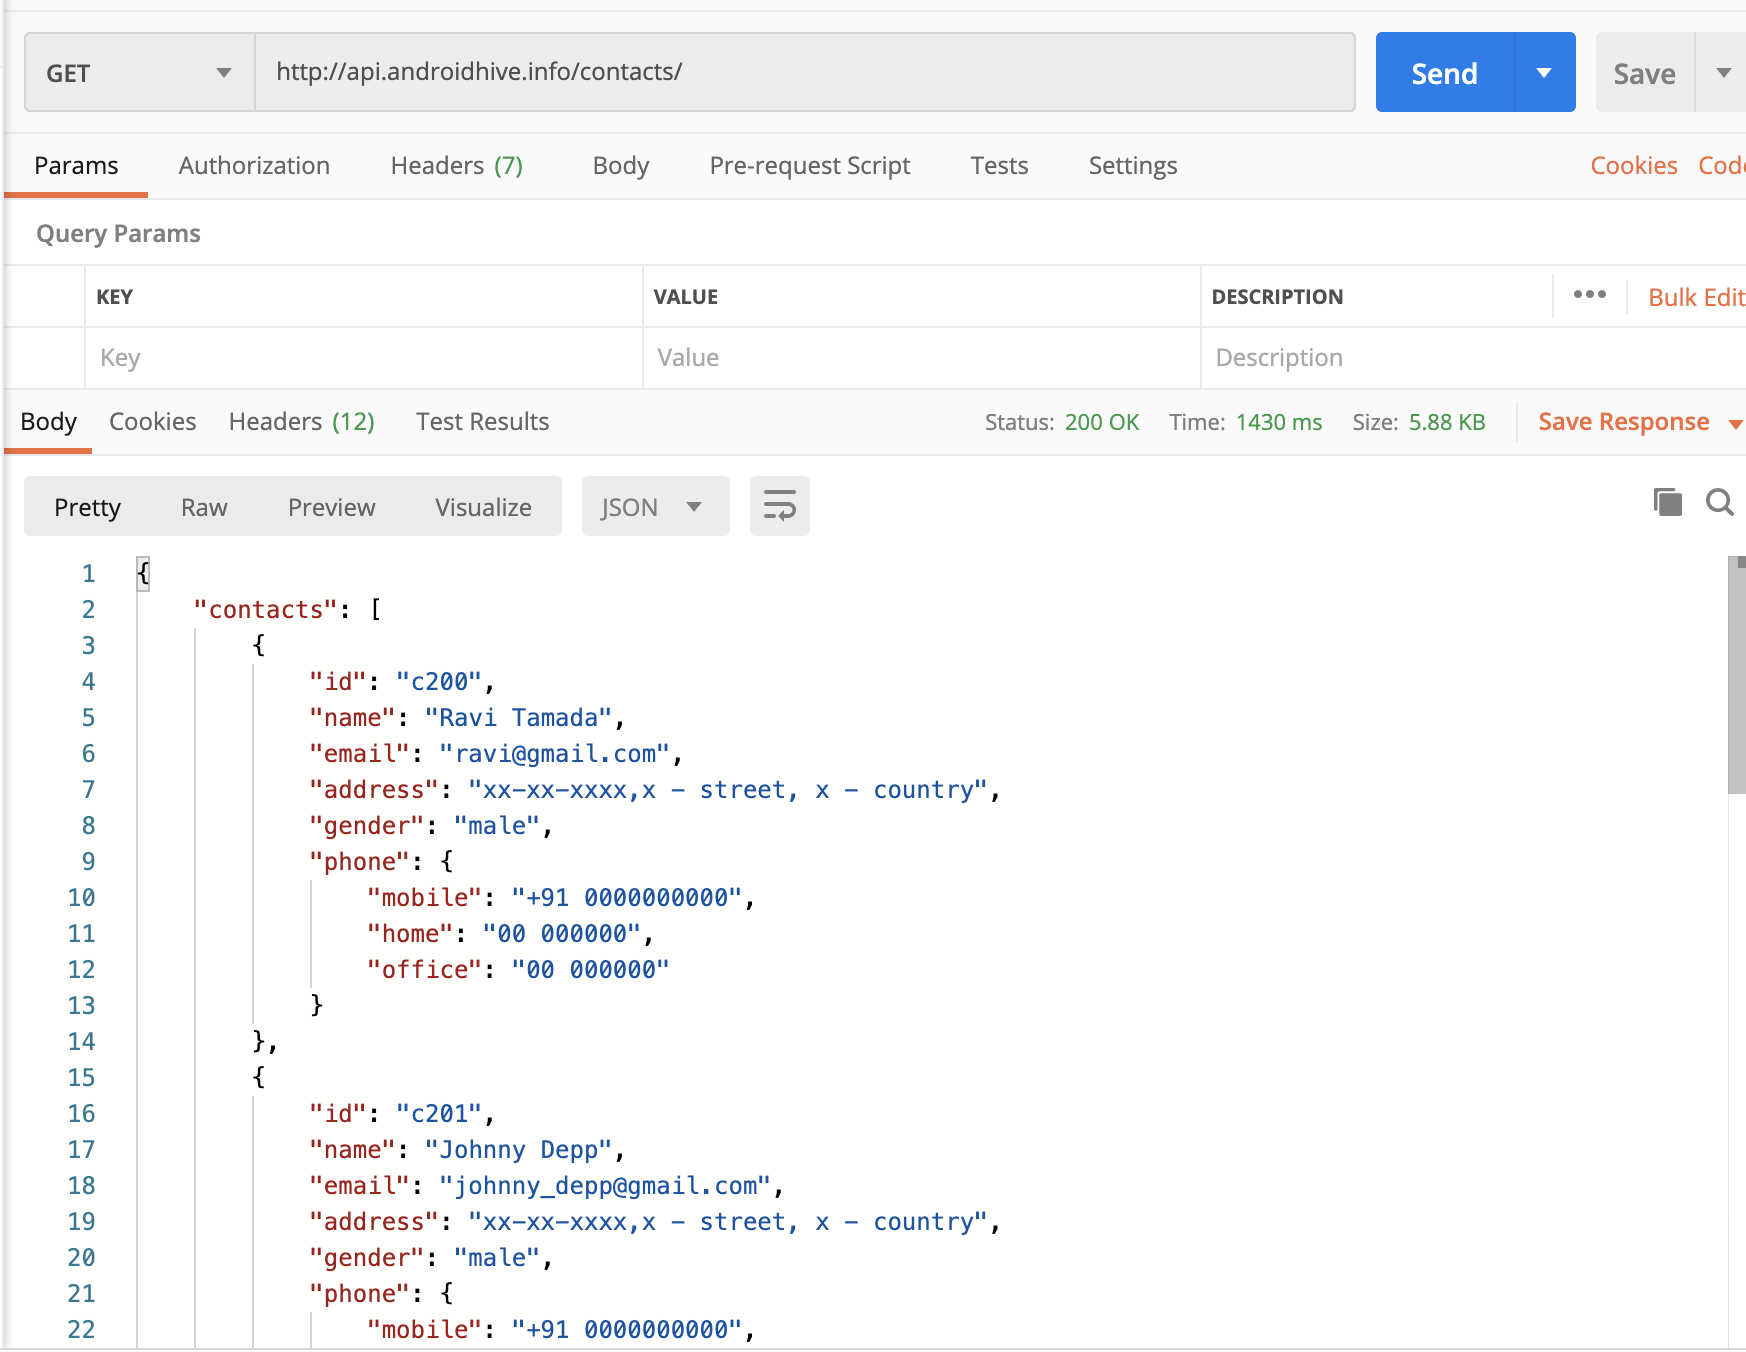
import UIKit
import Alamofire
import SwiftyJSONclass ContactsViewController: UIViewController {

    var contacts = [Contacts]()

    @IBOutlet weak var contactsTableView: UITableView!

    override func viewDidLoad() {
        super.viewDidLoad()

        contactsTableView.dataSource = self
        contactsTableView.delegate = self


        self.ContactsAPICalling {
            print("Contacts Downloaded")
            self.contactsTableView.reloadData()
        }
    }

    func ContactsAPICalling(completed: @escaping DownloadComplete){

        Alamofire.request(API_CONTACTS, method: .get, encoding:   JSONEncoding.default, headers: nil).responseJSON { (contactsResponse) in

            let result = contactsResponse.result
            let contactsJSON = JSON(result.value!)["contacts"]

            print(contactsJSON)

            for i in 0..<contactsJSON.count {

                let allContacts = Contacts(contactDict: contactsJSON[i])

                self.contacts.append(allContacts)
            }

            completed()

        }

    }}
Let’s create an extension of ContactViewController to handle the contacts data and interaction of the table view through UITableViewDataSource and UITableViewDelegate. The “contacts.count” will populate the number of contacts on the number of rows in the section table view stub.
让我们创建一个ContactViewController的扩展,以通过UITableViewDataSource和UITableViewDelegate处理联系人数据和表视图的交互。 “ contacts.count”将在节表视图存根中的行数上填充联系人数。
We will then use the CellForRowAt table view function to registers our table view cell, you will notice that we did not create a custom cell rather we used the inbuilt UITableViewCell style subtitle with the reusable identifier “contactscell”. From this point, it becomes easier to populate our cell two labels as seen below.
然后,我们将使用CellForRowAt表视图功能注册我们的表视图单元格,您会注意到我们没有创建自定义单元格,而是使用内置的UITableViewCell样式字幕和可重复使用的标识符“ contactscell”。 从这一点来看,填充我们的单元格两个标签变得更加容易,如下所示。
On the didSelectRowAt, we will then perform a segue to navigate to our contactsDetailsViewController through a segue identifier “toContactsView”. From this point, we will need to pass the contacts variable onto our destination View Controller to able to populate the selected row contact details on the next view controller.
然后,在didSelectRowAt上,我们将执行segue,以通过segue标识符“ toContactsView”导航到contactsDetailsViewController。 从这一点出发,我们将需要将contacts变量传递到目标View Controller上,以便能够在下一个View Controller上填充选定的行联系人详细信息。
extension ContactsViewController: UITableViewDataSource,UITableViewDelegate {

    func tableView(_ tableView: UITableView, numberOfRowsInSection section: Int) -> Int {
       return contacts.count
    }


func tableView(_ tableView: UITableView, cellForRowAt indexPath: IndexPath) -> UITableViewCell {

 contactsTableView.register(UITableViewCell.self, forCellReuseIdentifier: "contactscell")

 var cell = contactsTableView.dequeueReusableCell(withIdentifier: "contactscell")

        if cell == nil {
            cell = UITableViewCell(style: .subtitle, reuseIdentifier: "contactscell")
        }

        cell?.textLabel?.text = contacts[indexPath.row].name
        cell?.detailTextLabel?.text = contacts[indexPath.row].email

        return cell!

    }

func tableView(_ tableView: UITableView, didSelectRowAt indexPath:   IndexPath) {
        performSegue(withIdentifier: "toContactsView", sender: self)
    }

override func prepare(for segue: UIStoryboardSegue, sender: Any?) {
        if let destinationVC = segue.destination as? ContactDetailsViewController {

destinationVC.contactDetails = contacts[(contactsTableView.indexPathForSelectedRow?.row)!]
            contactsTableView.deselectRow(at: contactsTableView.indexPathForSelectedRow!, animated: true)

        }
    }

}
Let’s finish up the last part of the projects by segueing to ContactDetailsViewController which houses contact details IBOutlets. We will use the contactDetails variable to populate the contact outlets in viewDidLoad function.
让我们选择到ContactDetailsViewController来完成项目的最后一部分,其中包含联系方式IBOutlets。 我们将使用contactDetails变量在viewDidLoad函数中填充触点插座。
import UIKitclass ContactDetailsViewController: UIViewController {

    var contactDetails:Contacts!

    @IBOutlet weak var FullNameLbl: UILabel!
    @IBOutlet weak var MobileNumberLbl: UILabel!
    @IBOutlet weak var AddressLbl: UILabel!
    @IBOutlet weak var EmailLbl: UILabel!
    @IBOutlet weak var GenderLbl: UILabel!

    override func viewDidLoad() {
        super.viewDidLoad()// Do any additional setup after loading the view.

        FullNameLbl.text = contactDetails.name
        MobileNumberLbl.text = contactDetails.mobile
        AddressLbl.text = contactDetails.address
        EmailLbl.text = contactDetails.email
        GenderLbl.text = contactDetails.gender
    }}
Here is the Github Repository Link to the project https://github.com/TheDoer/Alamofire-SwiftyJSON-Tutorial
这是项目的Github存储库链接https://github.com/TheDoer/Alamofire-SwiftyJSON-Tutorial
翻译自: https://medium.com/@TheDoer_/getting-to-know-alamofire-swiftjson-ios-swift-in-xcode-11-6659946b512f


 1万+
1万+

 被折叠的 条评论
为什么被折叠?
被折叠的 条评论
为什么被折叠?
 到【灌水乐园】发言


