


mvvm控制流程
I’ve recently been looking at the creation of a multi-screen onboarding flow for my next app and challenging myself to use SwiftUI completely. As with all mutli-screen data entry flows, they often represent an interesting problem of how to separate out data, view and navigation logic. I thought SwiftUI’s declarative nature and lean towards ViewModels would be a great opportunity but navigation does have it’s challenges in SwiftUI as we’ll see.
最近,我一直在为下一个应用程序创建多屏入职流程,并挑战自己完全使用SwiftUI。 与所有多屏数据输入流一样,它们通常表示一个有趣的问题,即如何分离数据,视图和导航逻辑。 我认为SwiftUI的声明性和倾向于ViewModels将会是一个很好的机会,但是正如我们将看到的那样,导航确实在SwiftUI中存在挑战。
Before we start let’s ask the question: What make’s a great multi-screen data entry flow? Here’s what I came up with. For want of a less grand term, I’ll call it my “screen flow manifesto”:
在开始之前,我们先问一个问题:什么使多屏数据录入流很棒? 这是我想出的。 不用那么盛大的术语,我称它为我的 “屏幕流宣言” :
Screens should have no “parent” knowledge nor be responsible for navigating in or out.
屏幕应该没有“父母”知识,也不应该负责导航。
Individual ViewModels for every screen.
每个屏幕都有单独的ViewModel。
Overall flow control logic is separate to UI implementation and is testable without UI.
总体流控制逻辑与UI实现是分开的,并且可以在没有UI的情况下进行测试。
Flexible and allow for branching to different screens in the flow.
灵活,允许分支到流程中的不同屏幕。
As simple as possible but scalable.
尽可能简单但可扩展。
SwiftUI’s ObservableObject and @ObservedObject pair seem to work well for ViewModels giving us the 2-way binding that has previously been missing in UIKit. There are a lot of approaches to ViewModels but I like to think of them as a pure data interface to the view which avoids any direct view access.
SwiftUI的ObservableObject和@ObservedObject对似乎对ViewModels很好用,从而为我们提供了UIKit以前缺少的2向绑定。 ViewModels有很多方法,但是我想将它们视为视图的纯数据接口,从而避免了任何直接的视图访问。
But ViewModel implementation will be discussed in part 2. In part 1 we will looking at setting up the main navigation flow.
但是ViewModel实现将在第2部分中讨论 。 在第1部分中,我们将研究设置主导航流程。
第1部分-导航 (Part 1 — Navigation)
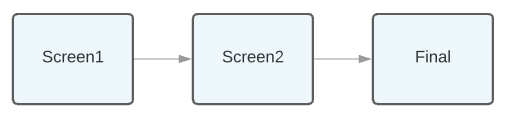
So an on-boarding may be simple, perhaps 2 or 3 screens asking the user some simple personal information. A “next” button would move the user forward in the flow.
因此,登机可能很简单,可能需要2到3个屏幕,向用户询问一些简单的个人信息。 “下一个”按钮将使用户在流程中向前移动。
However, whats usually more typical is a more complex flow with branching. Maybe the user isn’t ready to share all those details yet or perhaps the more details on needed depending on previous responses. So maybe this is more representative:
但是,通常更典型的是带有分支的更复杂的流程。 也许用户还没有准备好共享所有这些详细信息,或者可能需要根据先前的响应来共享所需的更多详细信息。 因此,这可能更具代表性:

Obviously any solution would need to be handle any combination of the above and, as per manifesto point 1 to do so outside of the the screens themselves. It should also be noted that we probably want to do some data look up at the end of each screen’s entry so we don’t want the view itself to control navigation (manifesto point 3)
显然,任何解决方案都需要处理上述内容的任何组合,并且按照清单1的要求,在屏幕本身之外进行处理。 还应该注意,我们可能希望在每个屏幕条目的末尾查找一些数据,因此我们不希望视图本身控制导航( 清单点3 )。
As we are in the world of SwiftUI, I propose using the power of @ViewBuilder. This is the “meat” inside the SwiftUI view’s body . ViewBuilders are a powerful way of generating complex generic types — which is what is behind the declarative nature of SwiftUI (but is beyond the scope of this article).
就像我们在SwiftUI中一样,我建议使用@ViewBuilder 。 这是SwiftUI视图body内的“肉”。 ViewBuilders是生成复杂泛型类型的强大方法-这是SwiftUI声明式本质的背后(但超出了本文的范围)。
So what could that look like? Well a good start is SwiftUI’s equivalent of UINavigationController which is NavigationView. Into this we add a ViewBuilder equivalent of a tree structure to represent the navigation nodes and edges:
那会是什么样子? 很好的开始是SwiftUI等效于UINavigationController ,即NavigationView 。 为此,我们添加一个等效于树结构的ViewBuilder来表示导航节点和边缘:
var body: some View {
    NavigationView {
        Screen1()
        Flow {
            Screen2()
            Flow {
                Screen3()
                Flow {
                    FinalScreen()
                }
                Flow {
                    Screen4()
                    Flow {
                        FinalScreen()
                    }
                }
            }
        }
    }
}
OK, so this really is pseudo code. Full disclosure — it ain’t that simple 😀.
好的,所以这确实是伪代码。 全面披露-不是那么简单。
But let’s try and get close. Using the imbedded types we can create a good declarative definition of the branching flow diagram from above. It satisfies manifesto point 1, point 2, and perhaps point 5. So let’s see if we can implement something like this.
但是,让我们尝试接近。 使用嵌入的类型,我们可以从上方为分支流程图创建良好的声明性定义。 它满足宣言点1 , 点2甚至点5的要求 。 因此,让我们看看是否可以实现这样的功能。
NavigationView pairs with NavigationLink to give us the ability to do “traditional” push navigation. There are a few variations of use, but I honed into the fully-programmatic variation:
NavigationView与NavigationLink ,使我们能够进行“传统”推式导航。 有一些用法的变体,但我将其磨练为完全编程的变体:
NavigationLink(destination: Destination, isActive: Binding<Bool>) { Label }After some experimentation here (and frustration with lack of documentation), here are a list considerations of using NavigationLink:
经过此处的一些试验(并因缺乏文档而感到沮丧),下面列出了使用NavigationLink注意事项:
Needs to be embedded in a grouping such as a
VStack.需要嵌入到诸如
VStack的分组中。The
Labelis typicallyTextif we want a simple active link to control navigation. However, in our case do not want the view in direct control of navigation so we useEmptyView.如果我们想要一个简单的活动链接来控制导航,则
Label通常是Text。 但是,在本例中,我们不希望视图直接控制导航,因此我们使用EmptyView。You can easily go wrong with the binding. If you want external control of navigation (and we do), using
@Statedoes not work as@Stateis often disconnected to its backing store when used externally.ObservableObjectlooks promising but after experimentation best controlled by use of oneObservableObjectperNavigtaionLink. I had initially tried to use oneObservableObjectfor all links but this failed miserably.绑定很容易出错。 如果您想要外部控制导航(并且我们愿意),则使用
@State无效,因为@State在外部使用时通常会与其后备存储断开连接。ObservableObject看起来很有希望,但经过实验后,最好通过每个NavigtaionLink使用一个ObservableObject进行最佳控制。 我最初尝试对所有链接使用一个ObservableObject,但这不幸失败了。- I disliked the order. To me the trigger for navigation reads better if it’s before the destination. 我不喜欢这个命令。 对我来说,如果在目的地之前,导航触发器会更好看。
The resulted an improved encapsulation of NavigationLink:
结果是改进了NavigationLink封装:
class FlowState: ObservableObject {
    @Published var next: Bool = false}struct Flow<Content>: View where Content: View {
    @ObservedObject var state: FlowState
    var content: Content
    var body: some View {
        NavigationLink(
            destination: VStack() { content },
            isActive: $state.next
        ) {
            EmptyView()
        }
    }    init(state: FlowState, @ViewBuilder content: () -> Content) {
        self.state = state
        self.content = content()
    }
}
This encapsulates some of the complexity of NavigationLink usage. We can pass in a FlowState to allow us to externally control navigation. The plumbing work of needing to use VStack and EmptyView is done for us. It also makes use of @ViewBuilder to make a variation of NavigationLink that reads better.
这封装了NavigationLink使用的一些复杂性。 我们可以传入FlowState以允许我们从外部控制导航。 需要使用VStack和EmptyView的管道工作已为我们完成。 它还使用@ViewBuilder来使NavigationLink的变体更好看。
Let’s see it in action in for a simple 2 screen flow.
让我们看一下它的运行情况,以了解一个简单的2屏幕流程。
private let navigateTo2 = FlowState()private let navigateTo3 = FlowState()var body: some View {
    NavigationView {
        VStack() {
            Text("Screen 1")
            Button(
                action: { self.navigateTo2.next = true },
                label: { Text("Next") }
            )
            Flow(state: navigateTo2) {
                Text("Screen 2")
                Button(
                    action: { self.navigateTo3.next = true },
                    label: { Text("Next") }
                )
                Flow(state: navigateTo3) {
                    Text("Screen 3")
                }
            }
        }
    }
}
Screens 1 and 2 both contain 3 types: AText to display screen name, the Button for the next action and a Flow for the navigation. We store the flow state for each navigation and internal functions perform the actual navigation (didTapNext1 etc).
屏幕1和2都包含3种类型:用于显示屏幕名称的Text ,用于下一个动作的Button和用于导航的Flow 。 我们存储每个导航的流程状态,内部函数执行实际的导航( didTapNext1等)。
This works but perhaps is overkill if the next buttons themselves directly do the navigation. Other forms of NavigationLink can fill that role just as well perhaps. However, as part of manifesto part 3 we want our navigation to be controlled externally from views. Typically a “next” button press in an on-boarding flow will require a backend call to validate or save data in each step. To model this out, we could think in terms of a FlowController being in control of the navigation flow which has no knowledge of the views themselves.
这行得通,但如果下一个按钮直接直接进行导航,则可能会过大。 NavigationLink其他形式也许也可以担任该角色。 但是,作为宣言第3部分的一部分,我们希望从视图的外部控制导航。 通常,在入职流程中按下“下一个”按钮将需要在每个步骤中进行后端调用以验证或保存数据。 为了对此建模,我们可以考虑使用FlowController来控制导航流,而导航流本身并不了解视图本身。

It makes sense to have the FlowController own the FlowView and use delegation to event “next requests” back up. We can then wire up the next button taps from the screen views to the delegate functions. So a typical screen view may look something like this:
让FlowController拥有FlowView并使用委派来备份“下一个请求”事件是很有意义的。 然后,我们可以将下一个按钮的点击从屏幕视图连接到委托功能。 因此,典型的屏幕视图可能如下所示:
struct Screen: View {
    let title: String
    let didTapNext: () -> ()    var body: some View {
        VStack() {
            Text(title)
            Button(
                action: { self.didTapNext() },
                label: { Text("Next") }
            )
        }
    }
}
And implemented something like this:
并实现了这样的事情:
Screen(
    title: "Screen 1",
    didTapNext: { self.modelDelegate.didTapNext(request: .screen2) }
)
Let’s see how that looks in totality with the additionally adding in our 5 screen branched flow. You’ll notice there is a separate NavigateTo case paired with a flow state observable for each every navigation edge. (For readability the Screen instantiation has been shortened — please see the repo for full code).
让我们看看在5个屏幕分支流中额外添加的总体效果。 您会注意到有一个单独的NavigateTo案例,并且每个导航边缘都可以观察到流状态。 (出于可读性考虑, Screen实例化已经缩短了,请参见回购中的完整代码)。
protocol FlowControllerViewDelegate: class {
    func didTapNext(request: NavigateTo)
}class FlowController {
    var view: FlowControllerView?
    init() {
        self.view = FlowControllerView(delegate: self)
    }
}extension FlowController: FlowControllerViewDelegate {
    func didTapNext(request: NavigateTo) {
        // In the real world, would do a switch here on NavigateTo,
        // followed by potentially some network calls
        // before finally...
        view?.navigate(to: request)
    }
}enum NavigateTo {
    case screen1
    case screen2
    case screen3
    case screen4
    case finalFrom3
    case finalFrom4
}struct FlowControllerView: View {
    weak var delegate: FlowControllerViewDelegate!
    private let navigateTo2 = FlowState()
    private let navigateTo3 = FlowState()
    private let navigateTo4 = FlowState()
    private let navigateToFinalFrom3 = FlowState()
    private let navigateToFinalFrom4 = FlowState()    init(delegate: FlowControllerViewDelegate) {
        self.delegate = delegate
    }    func navigate(to navigateTo: NavigateTo) {
        switch navigateTo {
        case .screen1: break
        case .screen2: navigateTo2.next = true
        case .screen3: navigateTo3.next = true
        case .screen4: navigateTo4.next = true
        case .finalFrom3: navigateToFinalFrom3 .next = true
        case .finalFrom4: navigateToFinalFrom4.next = true
        }
    }    var body: some View {
        NavigationView {
            VStack() {
                Screen(title: "Screen 1", ...)
                Flow(state: navigateTo2) {
                    Screen(title: "Screen 2", ...)
                    Flow(state: navigateTo3) {
                        BranchedScreen(title: "Screen 3", ...)
                        Flow(state: navigateTo4) {
                            Screen(title: "Screen 4", ...)
                            Flow(state: navigateToFinalFrom4) {
                                FinalScreen()
                            }
                        }
                        Flow(state: navigateToFinalFrom3) {
                            FinalScreen()
                        }
                    }
                }
            }
        }
    }
}struct Screen: View {
    let title: String
    let didTapNext: () -> ()    var body: some View {
        VStack() {
            Text(title)
            Button(
                action: { self.didTapNext() },
                label: { Text("Next") }
            )
        }
    }
}struct BranchedScreen: View {
    let title: String
    let didTapNextA: () -> ()
    let didTapNextB: () -> ()    var body: some View {
        VStack(alignment: .center) {
            Text(title)
            Button(
                action: { self.didTapNextA() },
                label: { Text("Next-A") }
            )
            Button(
                action: { self.didTapNextB() },
                label: { Text("Next-B") }
            )
        }
    }
}struct FinalScreen: View {
    var body: some View {
        VStack(alignment: .center) {
            Text("Final")
        }
    }
}
In part 2 to follow we look at adding in screen-based ViewModels and completing all our manifesto goals.
在接下来的第2部分中 ,我们将介绍添加基于屏幕的ViewModel并完成我们的所有宣言目标。
Full code can be found: https://github.com/nickm01/NavigationFlow
可以找到完整的代码: https : //github.com/nickm01/NavigationFlow
翻译自: https://medium.com/swlh/flow-with-swiftui-and-mvvm-7cc394440ab8
mvvm控制流程


 603
603


 被折叠的 条评论
为什么被折叠?
被折叠的 条评论
为什么被折叠?
 到【灌水乐园】发言


