


swift 自定义滑动视图
This is a quick tutorial on how to create a slide-up menu view in iOS
这是有关如何在iOS中创建向上滑动菜单视图的快速教程
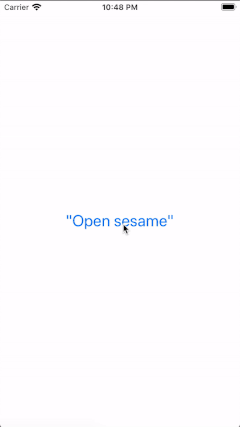
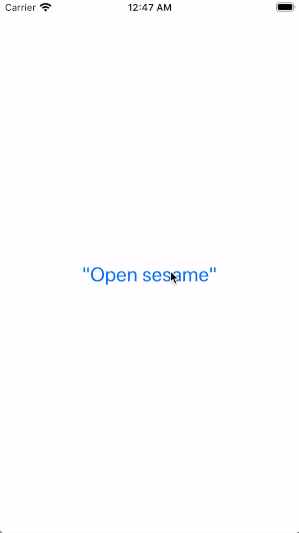
We’ll start from scratch with a button and its IBAction.Our goal: tapping on the button will display a splendid view sliding up from the bottom and displaying menu options.
我们将从一个按钮及其IBAction开始,我们的目标是:点击该按钮将显示一个出色的视图,该视图从底部向上滑动并显示菜单选项。
1.创建容器视图 (1. Create the container view)
Our slide-up view will need a container.
我们的向上滑动视图将需要一个容器。
// Create the container view
var containerView = UIView()
Inside our buttonTapped() we’ll set up the container view.
在buttonTapped()内部,我们将设置容器视图。
@IBAction func buttonTapped(_ sender: UIButton) {
  let window = UIApplication.shared.keyWindow
  containerView.backgroundColor = UIColor.
                                  black.withAlphaComponent(0.9)
  containerView.frame = self.view.frame

  window?.addSubview(containerView)
}
Since this view will be closed on tapping, we’ll also add a gesture recognizer
由于点击后该视图将关闭,因此我们还将添加一个手势识别器
@IBAction func buttonTapped(_ sender: UIButton) {
  ...
  let tapGesture = UITapGestureRecognizer(target: self,
                    action: #selector(slideUpViewTapped))
  containerView.addGestureRecognizer(tapGesture)
}@objc func slideUpViewTapped() {
}
So far so good, let’s add some animation to it for spice up the experience.We’ll animate the view with spring damping using animate(withDuration:)
到目前为止,到目前为止,让我们添加一些动画以丰富体验。我们将使用animate(withDuration :)使用弹簧阻尼对视图进行动画处理。
// On opening
@IBAction func buttonTapped(_ sender: UIButton) {
...
containerView.alpha = 0
UIView.animate(withDuration: 0.5,
delay: 0, usingSpringWithDamping: 1.0,
initialSpringVelocity: 1.0,
options: .curveEaseInOut, animations: {
self.containerView.alpha = 0.8
}, completion: nil)
}// On closing
@objc func slideUpViewTapped() {
let screenSize = UIScreen.main.bounds.size
UIView.animate(withDuration: 0.5,
delay: 0, usingSpringWithDamping: 1.0,
initialSpringVelocity: 1.0,
options: .curveEaseInOut, animations: {
self.containerView.alpha = 0
}, completion: nil)
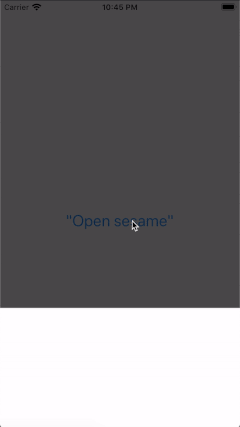
}The result:
结果:
2.创建向上滑动视图 (2. Create the slide-up View)
Now, we’ll deal with the main part of our view: the slide-up View.For this tutorial, we’ll be using a Table View to display 4 menu items.
现在,我们将处理视图的主要部分:滑动视图。在本教程中,我们将使用表视图显示4个菜单项。
var slideUpView = UITableView()
let slideUpViewHeight: CGFloat = 200
Again, inside our buttonTapped() we’ll set up the slide-up view. The view will be on the bottom, as wide as the screen’s width, and as high as needed to contain 4 menu items (we’ll start with 200).
同样,在我们的buttonTapped()内部,我们将设置向上滑动视图。 该视图将在底部,与屏幕的宽度相同,并根据需要包含四个菜单项(我们将从200开始)的高度。
@IBAction func buttonTapped(_ sender: UIButton) {
  ...
  let screenSize = UIScreen.main.bounds.size
  slideUpView.frame = CGRect(x: 0, y: screenSize.height, width: screenSize.width, height: slideUpViewHeight)
  slideUpView.separatorStyle = .none  window?.addSubview(slideUpView)
}
Update the animations on opening and closing
在打开和关闭时更新动画
// On opening
@IBAction func buttonTapped(_ sender: UIButton) {
  ...
  UIView.animate(withDuration: 0.5,
                 delay: 0, usingSpringWithDamping: 1.0,
                 initialSpringVelocity: 1.0,
                 options: .curveEaseInOut, animations: {
    self.containerView.alpha = 0.8
    self.slideUpView.frame = CGRect(x: 0, y: screenSize.height - self.slideUpViewHeight, width: screenSize.width, height: self.slideUpViewHeight)
  }, completion: nil)
}// On closing
@objc func slideUpViewTapped() {
  ...
  let screenSize = UIScreen.main.bounds.size
  UIView.animate(withDuration: 0.5,
                 delay: 0, usingSpringWithDamping: 1.0,
                 initialSpringVelocity: 1.0,
                 options: .curveEaseInOut, animations: {
    self.containerView.alpha = 0
    self.slideUpView.frame = CGRect(x: 0, y: screenSize.height, width: screenSize.width, height: self.slideUpViewHeight)
  }, completion: nil)
}
The Result:
结果:
3.创建菜单项(表格单元格) (3. Create menu items (Table cells))
We’ll first need a custom table cell
我们首先需要一个自定义表格单元
class SlideUpViewCell: UITableViewCell {
  lazy var backView: UIView = {
    let view = UIView(frame: CGRect(x: 0, y: 0,
                             width: self.frame.width, height: 50))
    return view
}()  lazy var iconView: UIImageView = {
    let view = UIImageView(frame: CGRect(x: 15, y: 10, width: 30,
                                  height: 30))
    return view
}()  lazy var labelView: UILabel = {
    let view = UILabel(frame: CGRect(x: 60, y: 10,
                          width: self.frame.width - 75, height: 30))
    return view
}()  override func awakeFromNib() {
    super.awakeFromNib()
  }  override func setSelected(_ selected: Bool, animated: Bool) {
    super.setSelected(selected, animated: animated)
    addSubview(backView)
    backView.addSubview(iconView)
    backView.addSubview(labelView)
    // Configure the view for the selected state
  }
}
Back to the View Controller, we’ll add a simple data source and configure our slideUpView(I added some icon images to the project, for the purpose of this tutorial)
回到视图控制器,我们将添加一个简单的数据源并配置我们的slideUpView (出于本教程的目的,我在项目中添加了一些图标图像)
// our simple data source
let slideUpViewDataSource: [Int: (UIImage?, String)] = [
  0: (UIImage(named: "star"), "Save this tutorial"),
  1: (UIImage(named: "share"), "Share it"),
  2: (UIImage(named: "copy"), "Make a copy"),
  3: (UIImage(named: "applaud"), "Applaud it")
]override func viewDidLoad() {
  ...
  slideUpView.isScrollEnabled = true
  slideUpView.delegate = self
  slideUpView.dataSource = self
  slideUpView.register(SlideUpViewCell.self,
                       forCellReuseIdentifier: "SlideUpViewCell")
}
Conforming to the UITableViewDelegate and UITableViewDataSource
符合UITableViewDelegate和UITableViewDataSource
extension ViewController: UITableViewDelegate, UITableViewDataSource {
  func tableView(_ tableView: UITableView, numberOfRowsInSection
         section: Int) -> Int {
    slideUpViewDataSource.count
  }  func tableView(_ tableView: UITableView, cellForRowAt indexPath:
         IndexPath) -> UITableViewCell {
    guard let cell = tableView
      .dequeueReusableCell(withIdentifier: "SlideUpViewCell",
      for: indexPath) as? SlideUpViewCell
    else { fatalError("unable to deque SlideUpViewCell") }

  cell.iconView.image = slideUpViewDataSource[indexPath.row]?.0
  cell.labelView.text = slideUpViewDataSource[indexPath.row]?.1
  return cell
}  func tableView(_ tableView: UITableView, heightForRowAt
         indexPath: IndexPath) -> CGFloat {
    return 50
  }
}
Tada!
多田
We have successfully created a slide-up menu view. I’ll leave the rest for your creativity to shine ✨ ✨ and hope you enjoyed this quick tutorial.
我们已经成功创建了一个向上滑动菜单视图。 我会把剩下的一切留给您发挥创意,shine✨希望您喜欢本快速教程。
翻译自: https://medium.com/swlh/create-a-slide-up-menu-view-in-swift-programmatically-4ec1297c2f56
swift 自定义滑动视图


 666
666


 被折叠的 条评论
为什么被折叠?
被折叠的 条评论
为什么被折叠?
 到【灌水乐园】发言


