


vapor 开发登录接口
Hello Friends 🖐, Here I’m with another article which helps you to become a Full Stack Mobile developer, Most of the mobile developers have a fantasy that they can also develop backend code (like RESTful APIs, Socket, Authentication). But mostly they have a question, “How can I learn Server Environment or Backend?”
您好朋友🖐,这里还有另一篇文章,可以帮助您成为Full Stack Mobile开发人员。大多数移动开发人员都幻想他们也可以开发后端代码(如RESTful API,Socket,Authentication)。 但是大多数情况下,他们有一个问题:“我如何学习服务器环境或后端?”
So Don’t Worry I’m are here to remove this hurdle If you know Vapor (Server-side Swift) and Flutter (iOS + Android) then it’s great or you can take the below reference for prerequisites. 🧐
因此,别担心,我在这里消除了这一障碍。如果您了解Vapor(服务器端Swift)和Flutter(iOS + Android),那就太好了,或者您可以参考以下参考资料作为前提条件。 🧐
- Vapor (Server-side Swift) 蒸气(服务器端Swift)
2. Flutter
2.颤振
Ok So Let’s start our journey, We will take one example to complete understanding of this process, We’ll create backend API to get the data, and then we’ll create Covid-19 Application for Web and Flutter.
好的,让我们开始我们的旅程,我们将以一个例子来完全理解这一过程,我们将创建后端API来获取数据,然后我们将为Web和Flutter创建Covid-19应用程序。
Part — 1: Covid-19 Case API (Vapor)
第1部分:Covid-19 Case API(蒸气)
Part- 2: Web(HTML + Leaf) & Mobile app (Flutter)
第2部分:Web(HTML + Leaf)和移动应用程序(Flutter)

Note: we will use https://api.covid19india.org/ API, Which is open-source for use to create our application.
注意:我们将使用https://api.covid19india.org/ API,该API是开源的,可用于创建我们的应用程序。

1.创建API (1. Create API)
If you want to learn how to create a new project and project structure in Vapor please have a look in below link
如果您想学习如何在Vapor中创建新项目和项目结构,请在下面的链接中查看
https://docs.vapor.codes/3.0/getting-started/hello-world/#new-project
https://docs.vapor.codes/3.0/getting-started/hello-world/#new-project
Now you can see multiple files will automatically be created, These files are basic parts of Vapor application. You can see basic directory architecture below:
现在您将看到将自动创建多个文件,这些文件是Vapor应用程序的基本部分。 您可以在下面看到基本的目录架构:
├── Public
├── Sources
│   ├── App
│   │   ├── Controllers
│   │   ├── Models
│   │   ├── boot.swift
│   │   ├── configure.swift
│   │   └── routes.swift
│   └── Run
│       └── main.swift
├── Tests
│   └── AppTests
└── Package.swift
Now open Package.swift file, By default you can see the Vapor package, But we have to add extra Leaf (View Render) and SwiftyJSON (JSON data helper) package as below and run vapor update command to effect the change.
现在打开Package.swift文件,默认情况下,您可以看到Vapor程序包,但是我们必须如下添加额外的Leaf (View Render)和SwiftyJSON (JSON data helper)程序包,并运行vapor update命令来实现更改。
Leaf is a powerful templating language with Swift syntax, We will use this package to make our web app.
Leaf是一种具有Swift语法的强大模板语言,我们将使用此包制作我们的Web应用程序。
We have added Package, but yet we have to register the particular package service for use. So we are doing this by using configure.swift file.
我们已经添加了Package,但是还必须注册特定的Package Service才能使用。 因此,我们通过使用configure.swift文件来执行此操作。
Register LeafProvider service in configure.swift as like below.
如下所示在configure.swift中注册LeafProvider服务。
Now its time to move to file where we will actually create our API, You can find routes.swift file under the Sources/App directory.
现在该移动到我们将实际创建我们的API的文件了,您可以在Sources / App目录下找到route.swift文件。
routes.swift file contains one global function routes(_ router: Router), which manage all the GET, POST, PUT, etc. request inside it. When you open routes.swift file you can see one default route is already created for example purpose as like below
route.swift文件包含一个全局函数route(_ router:Router) ,它管理其中的所有GET,POST,PUT等请求。 当打开routes.swift文件时,您可以看到已经创建了一个默认路由,例如,如下所示
Now run the server by pressing (command ⌘ + R) keys. You will see the log in the console indicating that Server starting on http://localhost:8080, which means your localhost server is located at 8080 port.
现在,通过按(命令⌘+ R)键运行服务器。 您将在控制台中看到日志,指示服务器从 http:// localhost:8080开始 ,这意味着您的localhost服务器位于8080端口。
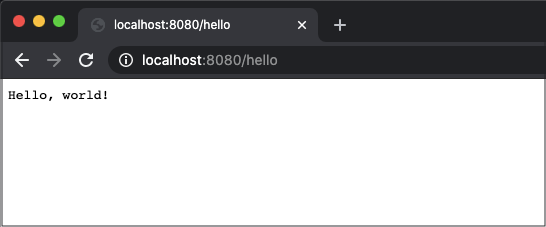
Now open a browser and type http://localhost:8080/hello URL, it will show Hello, world! in the browser.
现在打开浏览器并输入http:// localhost:8080 / hello URL,它将显示Hello,world! 在浏览器中。
Now it’s time to Create our custom API which will provide Covid-19 case data as per State wise.
现在是时候创建我们的自定义API了,它将根据State明智地提供Covid-19案例数据。
But before that, we need one model to represent our API data in a proper format. For that, we will create HealthResponse.swift file under Models directory
但是在此之前,我们需要一个模型以适当的格式表示API数据。 为此,我们将在Models目录下创建HealthResponse.swift文件。
code represents response code, data represent our API data and message is for custom notation
代码代表响应代码, 数据代表我们的API数据, 消息用于自定义符号
So now we are adding one more route /api/covid19 in routes.swift, Which also a GET request, We will use this api in our Flutter mobile app in the next part of the article.
因此,现在我们在route.swift中添加了另一个route / api / covid19 ,这也是一个GET请求,我们将在本文的下一部分中在Flutter移动应用中使用此api。
To understand the above code, we will breakdown the code in steps
为了理解上面的代码,我们将逐步分解代码
At first, the router forwards the request to at path “api/covid19”. req is our request variable, we will get Covid-19 case data on the same request by using req.client().
首先,路由器将请求转发到路径“ api / covid19”。 req是我们的请求变量,我们将通过使用req.client()获得同一请求的Covid-19案例数据。
Now data from third-party api https://api.covid19india.org/data.json is available, so we will convert data to JSON by using SwiftyJSON. Also, we can use a custom model to parse the nested data
现在可以使用来自第三方api https://api.covid19india.org/data.json的数据,因此我们将使用SwiftyJSON将数据转换为JSON。 另外,我们可以使用自定义模型来解析嵌套数据
3. Now pack all the details in HealthResponse model and return it
3.现在,将所有详细信息打包到HealthResponse模型中并返回
That’s it. We are done with our API, We can check this API in postman or other REST api tool.
而已。 我们的API已经完成,我们可以在邮递员或其他REST API工具中检查此API。
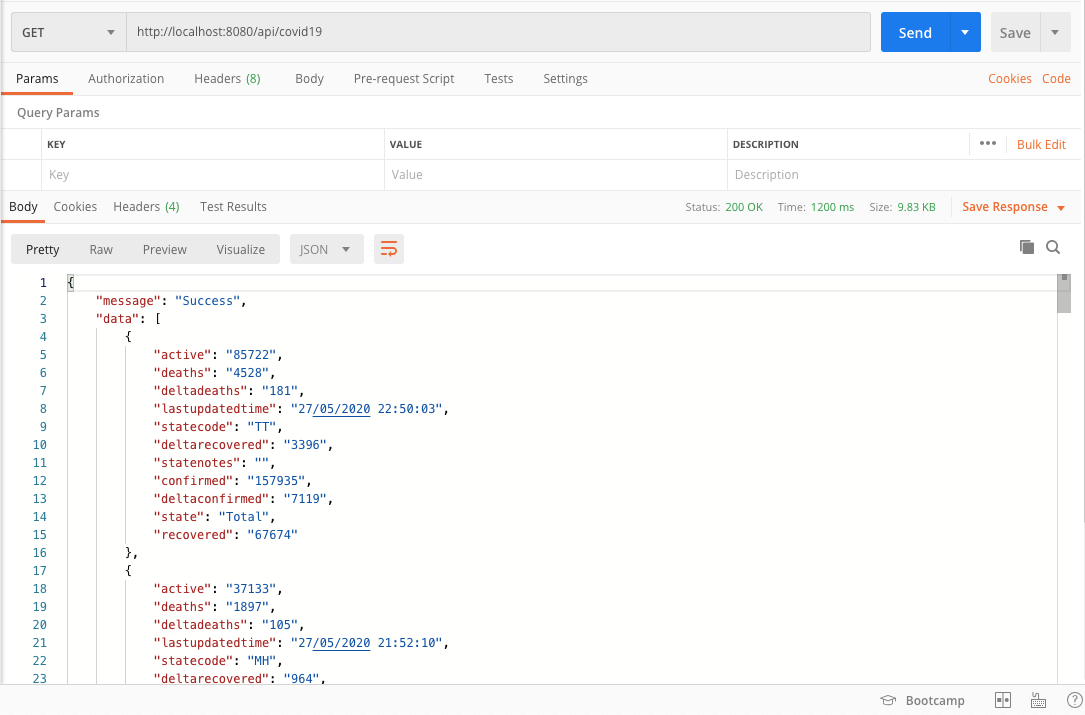
Hurray we have successfully run our API request 🎉
欢呼,我们已经成功运行了我们的API请求🎉

Now we will create one more route to display the data in the web page, For that, we need a model to pass the data in Leaf Renderer
现在,我们将再创建一条路由以在网页中显示数据,为此,我们需要一个模型来在Leaf Renderer中传递数据
Next, we add “covid19” route to our route, and it returns View to display data in a web page, So basically we can access our webpage by /covid19 path
接下来,我们将“ covid19”路由添加到我们的路由,然后返回“ 视图”以在网页中显示数据,因此基本上我们可以通过/ covid19路径访问我们的网页
Let’s breakdown the process again.
让我们再次细分该过程。
When we get the data from third-party API, first we will decode data into our model, here response contains “statewise” key with array value, So we will prepare [StateWiseData]
当我们从第三方API获取数据时,首先我们将数据解码到我们的模型中,此处响应包含带有数组值的“ statewise”键,因此我们将准备[StateWiseData]
The first element contains total India’s Covid-19 patient count, So we will make it separate, So now stateWiseData array only contains state data.
第一个元素包含印度的Covid-19患者总数,因此我们将其分开,所以现在stateWiseData数组仅包含州数据。
Next, we will create a temporary model PageData to prepare the data context for the view render.
接下来,我们将创建一个临时模型PageData来为视图渲染准备数据上下文。
- Pass totalCase and stateData into a parameter 将totalCase和stateData传递给参数
- Finally, we can call our Web Page renderer and pass the data into context. 最后,我们可以调用我们的网页渲染器,并将数据传递到上下文中。
Note: Here you will find “healthData” (which actually a healthData.leaf file), this one is our webpage file which contains HTML, CSS, and leaf script code, we will design this web page in our next part of an article.
注意:在这里您将找到“ healthData” (实际上是一个healthData.leaf文件),这是我们的网页文件,其中包含HTML,CSS和叶子脚本代码,我们将在本文的下一部分中设计此网页。
In the next part, we will Create our Web Page and Flutter app to display this data in a very beautiful format.
在下一部分中,我们将创建“网页和Flutter”应用程序,以非常漂亮的格式显示此数据。
If you like this article, then do more and more and more claps 👏. If you have any query please leave a comment.
如果您喜欢这篇文章,请做越来越多的鼓掌。 如果您有任何疑问,请发表评论。
vapor 开发登录接口


 4219
4219


 被折叠的 条评论
为什么被折叠?
被折叠的 条评论
为什么被折叠?
 到【灌水乐园】发言


