


原子 数据
Before I even begin this article, let me just say that I love iPython Notebooks, and Atom is not an alternative to Jupyter in any way. Notebooks provide me an interface where I have to think of “Coding one code block at a time,” as I like to call it, and it helps me to think more clearly while helping me make my code more modular.
在开始撰写本文之前,我只想说我爱iPython笔记本,而且Atom在任何方面都不是Jupyter的替代品。 笔记本电脑给我提供一个界面,我不得不考虑“ 编码一次在一个代码块 ,”因为我喜欢叫它的,它帮助我更清晰地思考,而帮助我让我的代码更加模块化。
Yet, Jupyter is not suitable for some tasks in its present form. And the most prominent is when I have to work with .py files. And one will need to work with .py files whenever they want to push your code to production or change other people’s code. So, until now, I used sublime text to edit Python files, and I found it excellent. But recently, when I looked at the Atom editor, my loyalties seemed to shift when I saw the multiple out of the box options provided by it.
但是,Jupyter不适合以当前形式进行某些任务 。 最突出的是当我必须使用.py文件时。 每当有人希望将您的代码推送到生产环境或更改其他人的代码时,就需要使用.py文件。 因此,直到现在,我都使用崇高的文本来编辑Python文件,并且发现它很棒。 但是最近,当我查看Atom编辑器时,当我看到它提供的多个可用选项时,我的忠诚度似乎发生了变化。
Now, the real power to Atom comes from the various packages you can install. In this post, I will talk about the packages that help make Atom just the most hackable and wholesome development environment ever.
现在,Atom的真正强大之处在于可以安装的各种软件包。 在本文中,我将讨论有助于使Atom成为有史以来最易破解,最有益健康的开发环境的软件包。
安装Atom和一些开始的调整 (Installing Atom and Some Starting Tweaks)
Before we even begin, we need to install Atom. You can do it from the main website here. The installation process is pretty simple, whatever your platform is. For Linux, I just downloaded the .deb file and double-clicked it. Once you have installed Atom, You can look at doing some tweaks:
在开始之前,我们需要安装Atom。 您可以从主网站做这里 。 无论您的平台是什么,安装过程都非常简单。 对于Linux,我只是下载了.deb文件并双击了它。 安装Atom之后,您可以进行一些调整:
Open Core settings in Atom using
Ctrl+Shift+Pand typing settings therein. ThisCtrl+Shift+Pcommand is going to be one of the most important commands in Atom as it lets you navigate and run a lot of commands.使用
Ctrl+Shift+P在Atom中打开Core设置,然后在其中键入设置。 此Ctrl+Shift+P命令将成为Atom中最重要的命令之一,因为它使您可以导航和运行许多命令。

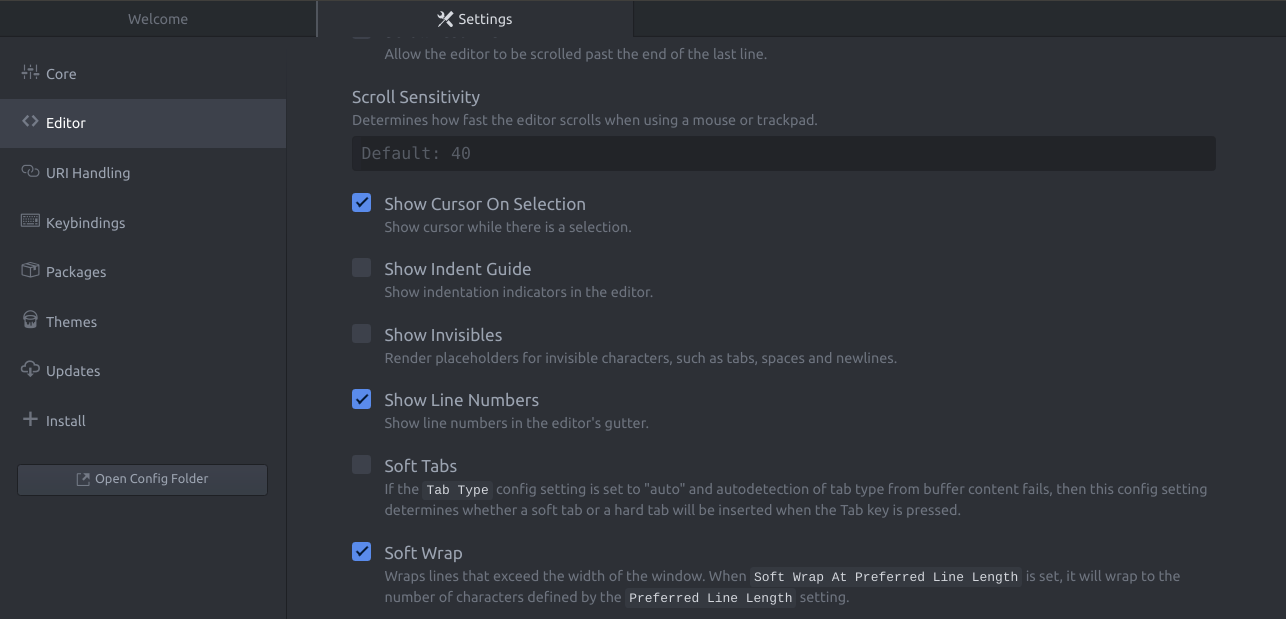
Now go to the
Editormenu and Uncheck “Soft Tabs”. This is done so thatTABkey registers as aTABand not two spaces. If you want you can also activate “Soft Wrap” which wraps the text if the text exceeds the window width.现在转到“
Editor菜单,然后取消选中“Soft Tabs”。 这样做是为了使TAB密钥注册为TAB而不是两个空格。 如果需要,您还可以激活“Soft Wrap”,如果文本超过窗口宽度,它将包裹文本。
Now, as we have Atom installed, we can look at some of the most awesome packages it provides. And the most important of them is GitHub.
现在,当我们安装了Atom时,我们可以查看它提供的一些最出色的软件包。 其中最重要的是GitHub。
1.无需离开编辑器即可提交到Github (1. Commit to Github without leaving Editor)
Are you fed up with leaving your text editor to use terminal every time you push a commit to Github? If your answer is yes, Atom solves this very problem by letting you push commits without you ever leaving the text editor window.
您是否厌倦了每次将提交推送到Github时都让文本编辑器使用终端? 如果您的回答是肯定的,则Atom通过让您无需离开文本编辑器窗口就可以进行提交来解决此问题。
This is one of the main features that pushed me towards Atom from Sublime Text. I like how this functionality comes preloaded with Atom and it doesn’t take much time to set it up.
这是将我从Sublime Text推向Atom的主要功能之一。 我喜欢Atom预装此功能的方式,并且不需要花费很多时间进行设置。
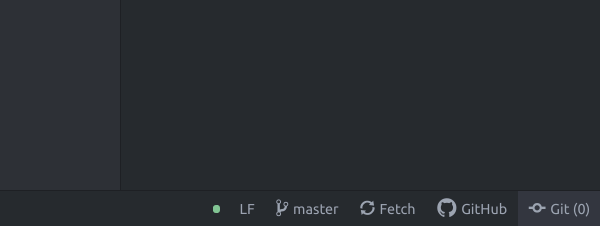
To start using it, click on the GitHub link in the right bottom of the Atom screen, and the Atom screen will prompt you to log in to your Github to provide access. It is a one-time setup, and once you log in and give the token generated to Atom, you will be able to push your commits from the Atom screen itself without navigating to the terminal window.
要开始使用它,请单击Atom屏幕右下方的GitHub链接,Atom屏幕将提示您登录Github以提供访问权限。 这是一次性设置,一旦登录并将生成的令牌提供给Atom,您就可以从Atom屏幕本身推送提交,而无需导航到终端窗口。

The process to push a commit is:
推送提交的过程是:
- Change any file or multiple files. 更改任何文件或多个文件。
- Click on Git on the bottom right corner. 单击右下角的Git。
- Stage the Changes 进行变更
- Write a commit message. 编写提交消息。
- Click on Push in the bottom right corner. 单击右下角的“推送”。
- And we are done:) 至此我们完成了:)
Below, I am pushing a very simple commit to Github, where I add a title to my Markdown file. Its a GIF file, so it might take some time to load.
在下面,我将对Github进行非常简单的提交,在其中将标题添加到Markdown文件中。 它是GIF文件,因此加载可能需要一些时间。
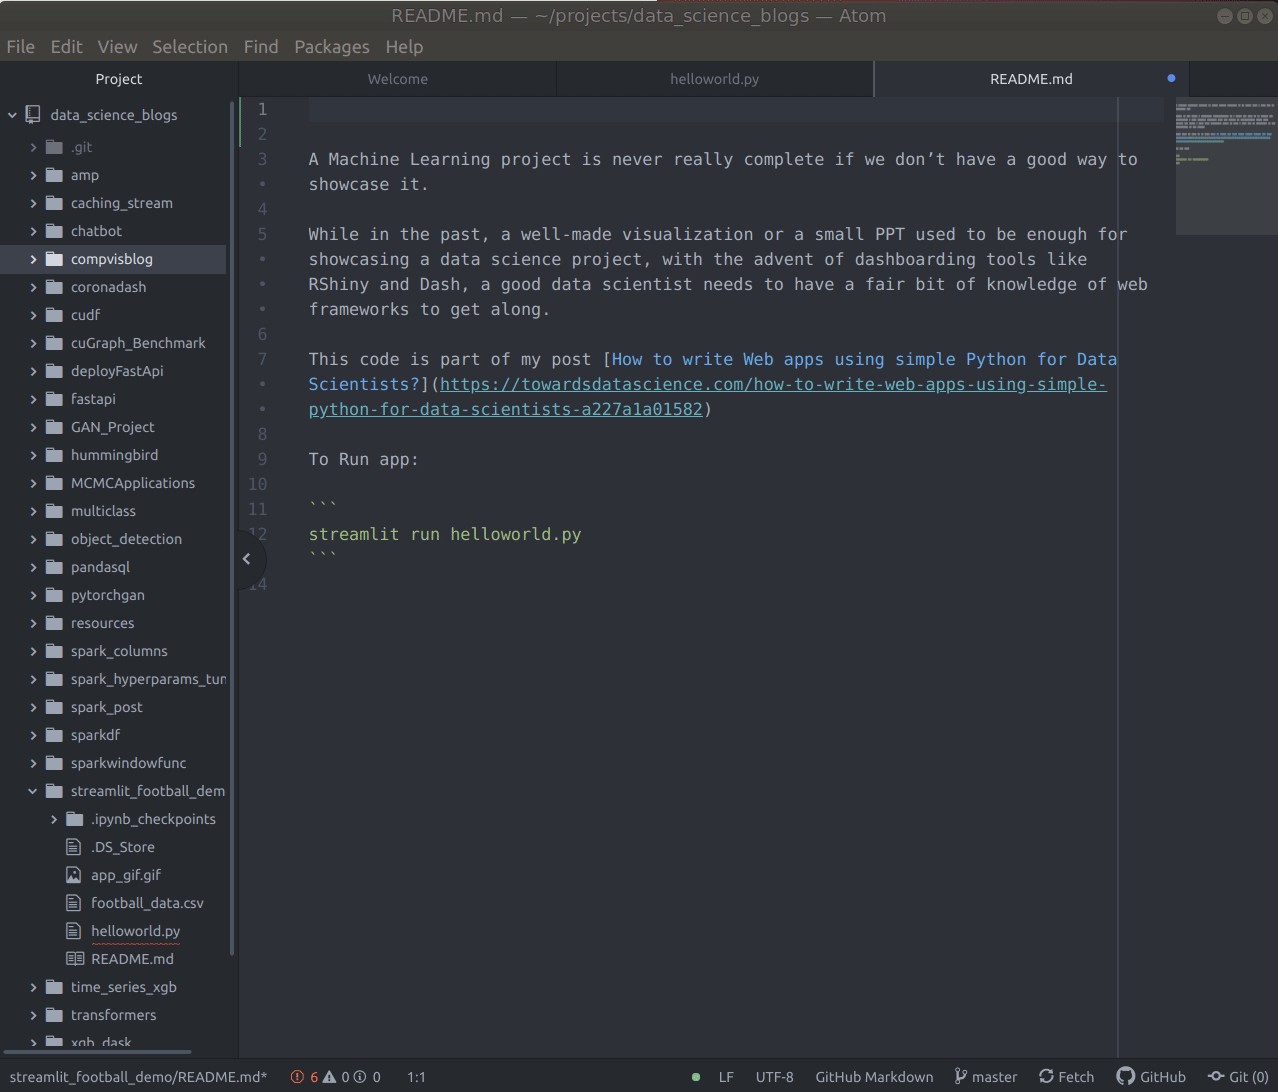
2.使用实时预览编写Markdown (2. Write Markdown with real-time preview)
I am always torn between the medium editor vs. Markdown whenever I write blog posts for my site. For one, I prefer using Markdown when I have to use Math symbols for my post or have to use custom HTML. But, I also like the Medium editor as it is WYSIWYG(What You See Is What You Get). And with Atom, I have finally found the perfect markdown editor for me, which provides me with Markdown as well as WYSIWYG. And it has now become a default option for me to create any README.md files for GitHub.
每当我为自己的网站撰写博客帖子时,我总是会在中型编辑和Markdown之间感到困惑。 例如,当我必须在帖子中使用数学符号或必须使用自定义HTML时,我更喜欢使用Markdown。 但是,我也喜欢Medium编辑器,因为它是WYSIWYG(所见即所得)。 有了Atom,我终于找到了理想的markdown编辑器,它为我提供了Markdown以及所见即所得的功能。 现在,它已成为我为GitHub创建任何README.md文件的默认选项。
Using Markdown in Atom is again a piece of cake and is activated by default. To see a live preview with Markdown in Atom:
在Atom中使用Markdown也是小菜一碟,默认情况下已激活。 要在Atom中使用Markdown观看实时预览:
Use
Ctrl+Shift+Mto open Markdown Preview Pane.使用
Ctrl+Shift+M打开Markdown预览窗格。- Whatever changes you do in the document will reflect near real-time in the preview window. 您在文档中所做的任何更改都会在预览窗口中实时显示。
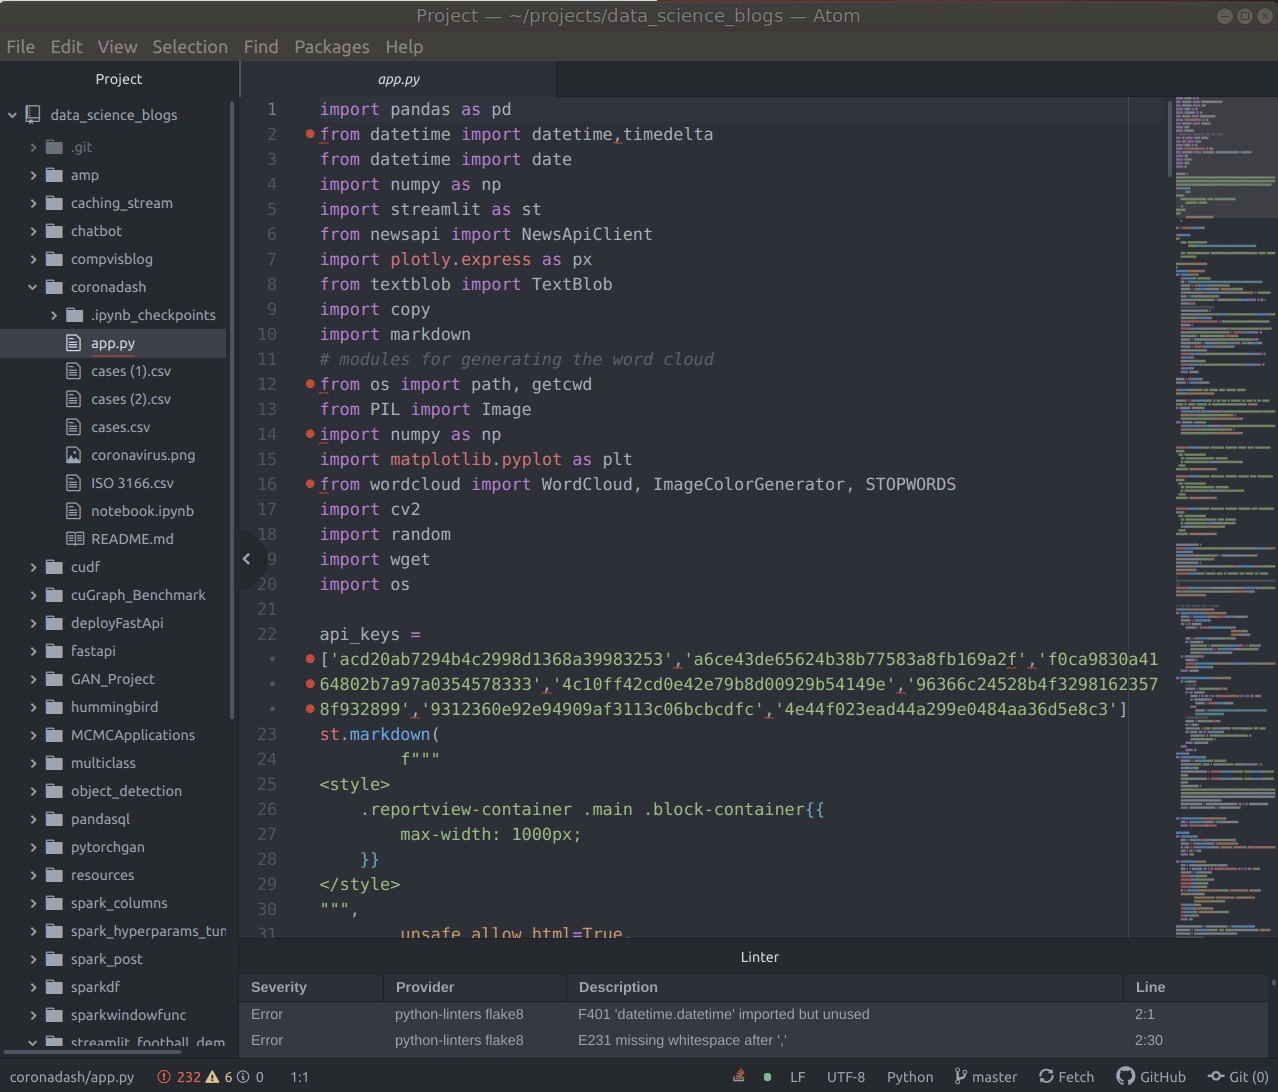
3. Minimap —大型代码文件的导航图 (3. Minimap — A navigation map for Large code files)
Till now, we haven’t installed any new package to Atom, so let’s install an elementary package as our first package. This package is called minimap, and it is something that I like to have from my Sublime Text days. It lets you have a side panel where you can click and reach any part of the code. Pretty useful for large files.
到目前为止,我们尚未向Atom安装任何新软件包,因此让我们安装基本软件包作为我们的第一个软件包。 这个程序包称为minimap ,这是我在Sublime Text时代想拥有的东西。 它使您可以在侧面板上单击并访问代码的任何部分。 对于大文件非常有用。
To install a package, you can go to settings and click on Install Packages. Ctrl_Shift+P > Settings > + Install > Minimap> Install
要安装软件包,可以转到设置,然后单击“安装软件包”。 Ctrl_Shift+P > Settings > + Install > Minimap> Install
Once you install the package, you can see the minimap on the side of your screen.
安装软件包后,您可以在屏幕侧面看到小地图。
4. Python自动完成功能和文本编辑器中的函数定义 (4. Python Autocomplete with function definitions in Text Editor)
An editor is never really complete until it provides you with some autocomplete options for your favorite language. Atom integrates well with Kite, which tries to integrate AI and autocomplete.
除非它为您提供一些您喜欢的语言的自动完成选项,否则它永远不会真正完成。 Atom与Kite很好地集成,后者试图集成AI和自动完成功能。
So, to enable autocomplete with Kite, we can use the package named autocomplete-python in Atom. The install steps remain the same as before. i.e. Ctrl+Shift+P > Settings > + Install > autocomplete-python> Install. You will also see the option of using Kite along with it. I usually end up using Kite instead of Jedi(Another autocomplete option). This is how it looks when you work on a Python document with Kite autocompletion.
因此,要启用Kite的自动完成功能,我们可以在Atom中使用名为autocomplete-python的包。 安装步骤与之前相同。 即Ctrl+Shift+P > Settings > + Install > autocomplete-python> Install 。 您还将看到与它一起使用Kite的选项。 我通常最终使用风筝代替绝地(另一个自动完成选项)。 这是使用Kite自动补全功能处理Python文档时的外观。
5.氢气-在Jupyter环境中运行Python代码 (5. Hydrogen — Run Python code in Jupyter environment)
Want to run Python also in your Atom Editor with any Jupyter Kernel? There is a way for that too. We just need to install “Hydrogen” using the same method as before. Once Hydrogen is installed you can use it by:
是否想使用任何Jupyter内核在Atom编辑器中运行Python? 也有办法。 我们只需要使用与以前相同的方法安装“ Hydrogen ”即可。 安装氢气后,您可以通过以下方式使用它:
Run the command on which your cursor is on using
Ctrl+Enter.使用
Ctrl+Enter运行光标所在的命令。Select any Kernel from the Kernel Selection Screen. I select
pytkernel from the list.从“内核选择”屏幕中选择任何内核。 我从列表中选择
pyt内核。Now I can continue working in
pytkernel.现在,我可以继续在
pyt内核中工作。
Sometimes it might happen that you don’t see an environment/kernel in Atom. In such cases, you can install ipykernel to make that kernel visible to Jupyter as well as Atom.
有时,您可能会在Atom中看不到环境/内核。 在这种情况下,您可以安装ipykernel,以使Jupyter和Atom都可以看到该内核。
Here is how to make a new kernel and make it visible in Jupyter/Atom:
这是制作新内核并使之在Jupyter / Atom中可见的方法:
conda create -n exampleenv python=3.7
conda activate exampleenv
conda install -c anaconda ipykernel
python -m ipykernel install --user --name=exampleenv
Once you run these commands, your kernel will be installed. You can now update the Atom’s kernel list by using:
一旦运行了这些命令,就将安装内核。 现在,您可以使用以下命令更新Atom的内核列表:
Ctrl+Shift+P >Hydrogen: Update Kernels
Ctrl+Shift+P >Hydrogen: Update Kernels
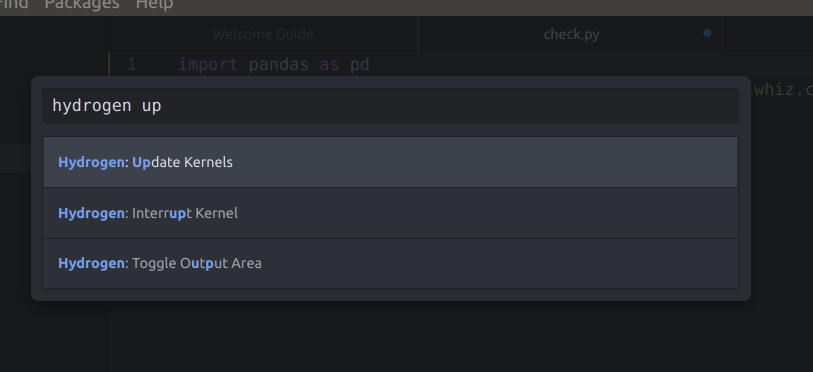
And your kernel should now be available in your Atom editor.
并且您的内核现在应该在Atom编辑器中可用。
6.从文本编辑器搜索堆栈溢出 (6. Search Stack Overflow from your Text Editor)
Stack Overflow is an integral part of any developer’s life. But you know what the hassle is? To leave the coding environment and go to Chrome to search for every simple thing you need to do. And we end up doing it back and forth throughout the day. So, what if we can access Stack Overflow from Atom? You can do precisely that through the “ask-stack” package, which lets one search for questions on SO. We can access it using Ctrl+Alt+A
堆栈溢出是任何开发人员生活中不可或缺的一部分。 但是你知道麻烦是什么吗? 要离开编码环境并转到Chrome,以搜索您需要做的每件事。 我们最终要一整天来回进行。 那么,如果我们可以从Atom访问Stack Overflow,该怎么办? 您可以通过“ ask-stack ”软件包来精确地做到这一点,该软件包使人们可以搜索SO上的问题。 我们可以使用Ctrl+Alt+A来访问它
Some other honorable mentions of packages you could use are:
您可以使用的软件包的其他一些荣誉提及是:
Teletype: Do Pair Coding.
电传打字 :进行配对编码。
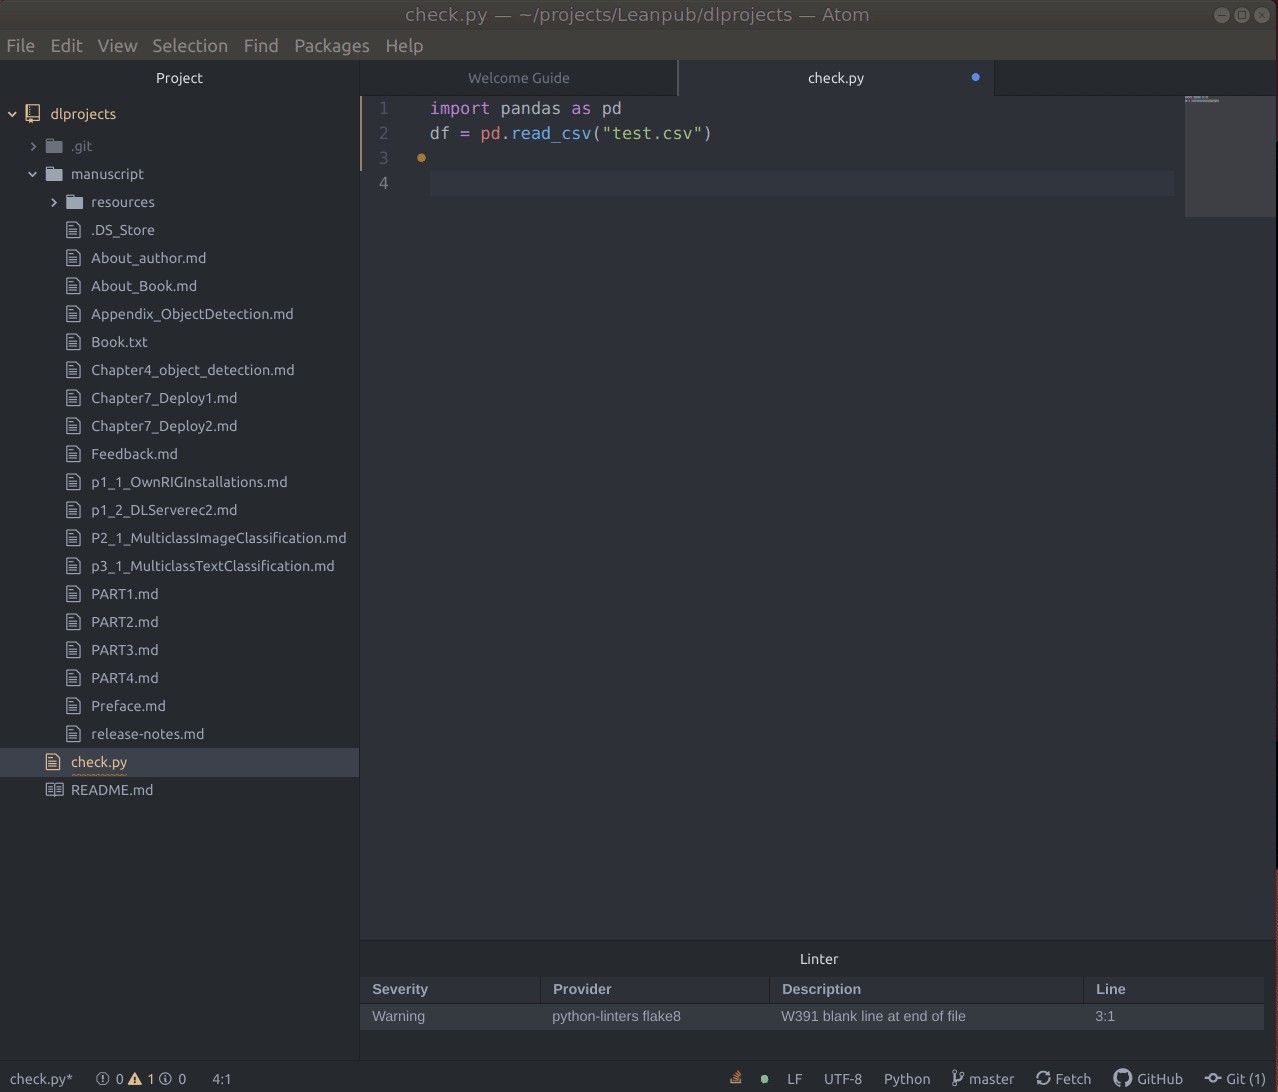
Linter: Checks code for Stylistic and Programmatic errors. To enable linting in Python, You can use “linter” and “python-linters”.
Linter:检查代码是否存在风格和程序错误。 要在Python中启用linting,可以使用“ linter ”和“ python-linters ”。
Highlight Selected: Highlight all occurrences of a text by double-clicking or selecting the text with a cursor.
加亮选中 :通过双击或用光标选择文本来突出显示所有出现的文本。
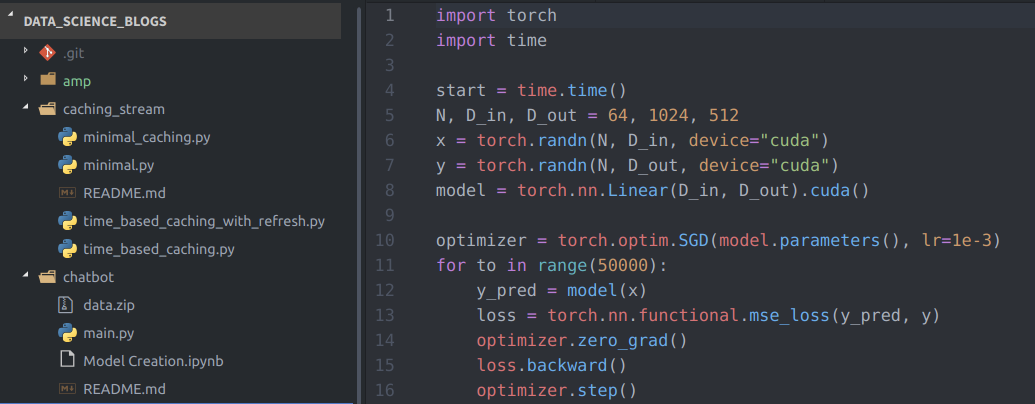
Atom-File-Icons: Provides you with file icons in the left side tree view. Looks much better than before, right?
Atom-File-Icons :在左侧树视图中为您提供文件图标。 看起来比以前好很多,对吧?
结论 (Conclusion)
In this post, I talked about how I use Atom in my Python Development flow.
在本文中,我讨论了如何在Python开发流程中使用Atom。
There are a plethora of other packages in Atom which you may like, and you can look at them to make your environment even more customizable. Or one can even write their own packages as well as Atom is called as the “Most Hackable Editor”.
您可能会喜欢Atom中的许多其他软件包 ,您可以查看它们以使您的环境更加可定制。 或者甚至可以编写自己的软件包,而Atom被称为“最容易破解的编辑器” 。
If you want to learn about Python and not exactly a Python editor, I would like to call out an excellent course on Learn Intermediate level Python from the University of Michigan. Do check it out. Also, here are my course recommendations to become a Data Scientist in 2020.
如果您想了解Python而不是完全了解Python编辑器,我想在密歇根大学(University of Michigan)上学习一门优秀的学习中级Python的课程。 请检查一下。 另外,这是我的课程建议,以成为2020年的数据科学家。
I am going to be writing more beginner-friendly posts in the future too. Follow me up at Medium or Subscribe to my blog to be informed about them. As always, I welcome feedback and constructive criticism and can be reached on Twitter @mlwhiz.
我将来也会写更多对初学者友好的文章。 在Medium上关注我,或订阅我的博客以了解有关它们的信息。 与往常一样,我欢迎您提供反馈和建设性的批评,可以在Twitter @mlwhiz上与我们联系 。
Also, a small disclaimer — There might be some affiliate links in this post to relevant resources, as sharing knowledge is never a bad idea.
另外,这是一个小的免责声明-由于共享知识从来都不是一个坏主意,因此本文中可能会有一些与相关资源相关的会员链接。
原子 数据


 2036
2036

 被折叠的 条评论
为什么被折叠?
被折叠的 条评论
为什么被折叠?
 到【灌水乐园】发言


