


tvos技术服务
Whether you are using legacy build settings in XCode and unable to utilize XCFramework bundles, or Cocoapods for something like security; here is how I went about integrating Firebase Crashlytics for tvOS.
无论您是在XCode中使用旧版构建设置,还是无法利用XCFramework捆绑包或Cocoapods来实现诸如安全性之类的功能; 这就是我为tvOS集成Firebase Crashlytics的方式。
问题 (Problem)
If you are in the same boat as I, you may have come across the following issues on the Firebase Github:
如果您与我同在一条船上,则可能在Firebase Github上遇到以下问题:
Integrate FirebaseCrashlytic sdk without CocoaPods and without.xcFramework #5394
There is also the following SO post:
还有以下SO帖子:
Although not provided, it gave me the lead to the solution, “I could not integrate Frameworks. So the solution I followed is adding of Source files provided in https://github.com/firebase/firebase-ios-sdk”. ~ Gangadhar
尽管没有提供,但它带给了我解决方案的线索,“我无法集成框架。 因此,我遵循的解决方案是添加https://github.com/firebase/firebase-ios-sdk中提供的源文件。 〜Gangadhar
解 (Solution)
There are two ways to accomplish this. You can either clone the Firebase iOS SDK repo found here, and the repos for all other required dependencies. Or, a simpler option is to use Cocoapods to get the required dependencies in a sample project, and move over the source files. I will be demonstrating the latter. Cocoapod source files only include those used, instead of the entire library.
有两种方法可以完成此操作。 您可以克隆在此处找到的Firebase iOS SDK存储库,以及所有其他必需依赖项的存储库。 或者,一个更简单的选择是使用Cocoapods在示例项目中获取所需的依赖项,然后移至源文件。 我将演示后者。 Cocoapod源文件仅包含使用的文件 ,而不包括整个库。
To get started, create a sample tvOS application and give it a pod file with your required dependencies. My Podfile looked like this:
首先,创建一个示例tvOS应用程序,并为其提供一个包含所需依赖项的pod文件。 我的Podfile看起来像这样:
platform :tvos, '10.0'target 'TestProject' do
  use_frameworks!
  pod 'Firebase/Crashlytics'
end
After running pod install in the project directory, you can then view the Podfile.lock to view all the dependencies and versions. This can be useful as to know dependency version requirements should you go the source from repo approach.
在项目目录中运行pod install之后,您可以查看Podfile.lock以查看所有依赖项和版本。 如果您从回购方法中获取源代码,这对于了解依赖版本要求可能会很有用。
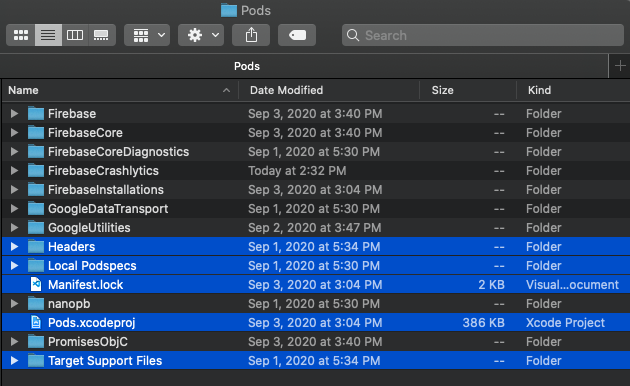
Open up your sample app’s Pods folder, remove the Cocoapod generated files and directories, rename the folder as you wish (ex: “Libraries”), and copy, move, or rename the folder, and add it to your project directory and target.
打开示例应用程序的Pods文件夹,删除Cocoapod生成的文件和目录,根据需要重命名该文件夹(例如:“ Libraries”),然后复制,移动或重命名该文件夹,然后将其添加到项目目录和目标中。
Note: If your project is generated via CMake or some other build system and/or you would like this process automated, refer to the ruby script using xcodeproj at the end of this article. You can than skip this section.
注意:如果您的项目是通过CMake或其他构建系统生成的,并且/或者您希望该过程自动化, 请在本文末尾使用xcodeproj 引用ruby脚本 。 您可以跳过此部分。

Once linked, you will have all the source files added to Build Phases -> Compile Sources . If you went the repo route (which contains all library files, regardless if used), you will have the file GULSwizzledObject . This file will throw an error regarding ARC should you have it globally enabled. You must pass the compiler flag of -fno-objc-arc to resolve this. It is reflected in the attached xcodeproj Ruby script.
链接后,您将所有源文件添加到Build Phases -> Compile Sources 。 如果您走了回购路径(包含所有库文件,无论是否使用了它),您将拥有文件GULSwizzledObject 。 如果您全局启用该文件,将引发有关ARC的错误。 您必须传递-fno-objc-arc的编译器标志才能解决此问题。 它反映在随附的xcodeproj Ruby脚本中。
Next, you will need to set the preprocessor macros. Without these you will get compilation errors. You can just look at the Cocoapods framework bundles to see the macros for each framework. Open your .xcworkspace generated by the pod install and view the framework targets. On each one search for Preprocessor Macros or find it under BuildSettings -> Apple Clang — Preprocessing . Copy these into your project target, or use the below script.
接下来,您将需要设置预处理器宏。 没有这些,您将得到编译错误。 您可以只查看Cocoapods框架捆绑包,以查看每个框架的宏。 打开由pod安装生成的.xcworkspace并查看框架目标。 在每一个上搜索Preprocessor Macros或在BuildSettings -> Apple Clang — Preprocessing下找到它。 将它们复制到您的项目目标中,或使用以下脚本。

Now you need to specify where these library header files can be found. Update your Header Search Paths accordingly. I made this recursive and just specified my Libraries folder.
现在,您需要指定可以在哪里找到这些库头文件。 相应地更新Header Search Paths 。 我进行了递归操作,并只指定了我的Libraries文件夹。
Lastly, for build settings, set Enable Modules (C and Objective-C) to YES.
最后,对于构建设置,将Enable Modules (C and Objective-C)为YES 。
Firebase设定 (Firebase Setup)
For the rest of the setup, basically just follow Firebase’s instructions on adding your GoogleService-Info.plist , adding your shell script build phase, script and input files, and you should be good to go! All of this is reflect in the script below.
对于其余的设置,基本上只需遵循Firebase的说明添加您的GoogleService-Info.plist ,添加您的Shell脚本构建阶段,脚本和输入文件,就可以了! 所有这些都反映在下面的脚本中。
Ruby脚本 (Ruby Script)
This Ruby script can be easily altered to your needs and project structure. Change you target, paths, and deployment target as needed. This was made to work with some proprietary software so some assumptions are made. You can find the docs for xcodeproj here. The script can be found here:
该Ruby脚本可以轻松地更改为您的需求和项目结构。 根据需要更改目标,路径和部署目标。 这样做是为了与某些专有软件一起使用,因此要进行一些假设。 您可以找到xcodeproj的文档 在这里 。 脚本可以在这里找到:
https://github.com/JavanPoirier/tvos-crashlytics-testproj/blob/master/xcodeproj.rb
https://github.com/JavanPoirier/tvos-crashlytics-testproj/blob/master/xcodeproj.rb
建造 (Building)
When building you may encounter some import errors or more specifically a “Lexical or Preprocessor Issue” errors. Fix these by changing the imports accordingly. Example, I did have to change line 22 of:
在构建时,您可能会遇到一些导入错误,或更具体地说是“词汇或预处理程序问题”错误。 通过相应地更改导入来解决这些问题。 例如,我确实必须更改第22行:
FirebaseCore/GoogleUtilities/Logger/Private/GULLogger.h
FirebaseCore/GoogleUtilities/Logger/Private/GULLogger.h

测试中 (Testing)
You can test your Firebase Crashlytics the exact same way as mentioned in the Firebase documentation. I simply added assert(NO) into my app delegate’s applicationWillResignActive lifecycle method to crash it simply by pressing the Siri button. Note: I did have trouble getting a release build to crash with assert(NO) , not sure why, but @throw/NSInternalInconsistencyException; aslo did the trick. More Obj-C options here.
您可以按照与Firebase文档中所述完全相同的方式测试Firebase Crashlytics。 我只是将assert(NO)添加到我的应用程序委托的applicationWillResignActive生命周期方法中,只需按Siri按钮即可使其崩溃。 注意:我确实很难通过assert(NO)使发行版本崩溃,但不确定为什么,但是@throw/NSInternalInconsistencyException; 阿斯洛做到了。 这里有更多Obj-C选项。
Once deployed, remember to detach the XCode debugger. Otherwise crashes will not be sent to the Firebase Console.
部署后,请记住分离XCode调试器 。 否则,崩溃将不会发送到Firebase控制台。

Run and crash the app. Vigorously refresh your Firebase Console under Crashlytics… et voila!
运行并崩溃该应用程序。 在Crashlytics下大力刷新您的Firebase控制台……瞧!

The TestProject used for this example is available here:
此示例使用的TestProject在此处可用:
https://github.com/JavanPoirier/tvos-crashlytics-testproj
https://github.com/JavanPoirier/tvos-crashlytics-testproj
If you have questions or feedback I am all ears. If anyone knows of a better way to do this, hit me up. I hope this helps!
如果您有任何疑问或反馈,我会很高兴。 如果有人知道更好的方法,请打我。 我希望这有帮助!
tvos技术服务


 3420
3420

 被折叠的 条评论
为什么被折叠?
被折叠的 条评论
为什么被折叠?
 到【灌水乐园】发言


