


0阶张量和1阶张量转换
In the previous article, we learned the theoretical concepts of Generative Adversarial Networks. Please check out this blog on “Scratching the surface of Generative Adversarial Network”.
在上一篇文章中,我们学习了生成对抗网络的理论概念。 请查看此博客“刮擦创生对抗网络的表面”。
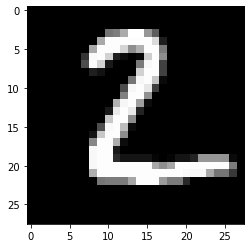
In this article, we’ll understand how to implement Generative Adversarial Networks in Tensorflow 2.0 using the MNIST dataset of digits. Our model should be able to accurately create images similar to MNIST dataset images. Image from MNIST dataset looks like this:
在本文中,我们将了解如何使用MNIST数字数据集在Tensorflow 2.0中实现生成对抗网络。 我们的模型应该能够准确地创建类似于MNIST数据集图像的图像。 来自MNIST数据集的图像如下所示:
先决条件 (Prerequisites)
Before moving ahead please make sure you are updated with the following requirements:
在继续进行之前,请确保您具有以下要求的更新:
- Basic understanding of Tensorflow 2.0 对Tensorflow 2.0的基本了解
- Basic understanding of GANs 对GAN的基本了解
- Tensorflow 2.0 library with Python 3.6 使用Python 3.6的Tensorflow 2.0库
让我们直接跳入代码 (Let’s jump into code directly)
For implementing the network, we need to follow the following steps.
为了实现网络,我们需要遵循以下步骤。
步骤1:导入库 (Step 1: Import Libraries)
We will need to import these libraries.
我们将需要导入这些库。
import tensorflow as tf
import matplotlib.pyplot as plt
import numpy as np
import os
from tensorflow.keras import layers
import time


from IPython import display
步骤2:加载和准备数据 (Step 2: Load and Prepare data)
(train_images, train_labels), (test_images, test_labels) = tf.keras.datasets.mnist.load_data()
train_images = train_images.reshape(train_images.shape[0], 28, 28, 1).astype('float32')
train_images = (train_images - 127.5) / 127.5
train_dataset = tf.data.Dataset.from_tensor_slices(train_images).shuffle(60000).batch(256)
In this piece of code, we imported data and reshaped it. Images are represented in the values between 0 to 255. So these image vectors are converted into values between [-1, 1]. Then these vectors are shuffled and converted to batches of 256 images.
在这段代码中,我们导入了数据并对其进行了整形。 图像以0到255之间的值表示。因此,这些图像矢量被转换为[-1,1]之间的值。 然后将这些向量混洗并转换为256张图像的批处理。
步骤3:建立模型 (Step 3: Create Models)
The generator model will take vector of 100 pixels as input and convert that vector into an image of 26 * 26 using the Conv2DTranspose layer. As we are using convolutions, this model will be a DCGAN i.e. Deep Convolutional Generative Adversarial Network.
生成器模型将采用100像素的矢量作为输入,并使用Conv2DTranspose图层将该矢量转换为26 * 26的图像。 当我们使用卷积时,该模型将是DCGAN,即深度卷积生成对抗网络。
BatchNormalization layer is used for normalizing the generated image to reduce noise that image. The activation function of “ReLU” is added as another layer in the model.
BatchNormalization层用于标准化生成的图像,以减少该图像的噪声。 “ ReLU”的激活功能被添加为模型中的另一层。
def create_generator():
    model = tf.keras.Sequential()

    # creating Dense layer with units 7*7*256(batch_size) and input_shape of (100,)
    model.add(layers.Dense(7*7*256, use_bias=False, input_shape=(100,)))
    model.add(layers.BatchNormalization())
    model.add(layers.LeakyReLU())


    model.add(layers.Reshape((7, 7, 256)))


    model.add(layers.Conv2DTranspose(128, (5, 5), strides=(1, 1), padding='same', use_bias=False))
    model.add(layers.BatchNormalization())
    model.add(layers.LeakyReLU())


    model.add(layers.Conv2DTranspose(64, (5, 5), strides=(2, 2), padding='same', use_bias=False))
    model.add(layers.BatchNormalization())
    model.add(layers.LeakyReLU())


    model.add(layers.Conv2DTranspose(1, (5, 5), strides=(2, 2), padding='same', use_bias=False, activation='tanh'))


    return model
Discriminator will do the exact opposite of a generator and convert image into scalar probabilities of whether the image is fake or real. It will use the Conv2D layer for this purpose. Along with the convolutional layer, it will have layer of an activation function “ReLU” and the Dropout layer.
鉴别器将执行与生成器完全相反的操作,并将图像转换为图像是伪造还是真实的标量概率。 为此,它将使用Conv2D层。 与卷积层一起,它将具有激活函数“ ReLU”层和Dropout层。
def create_discriminator():
    model = tf.keras.Sequential()
    model.add(layers.Conv2D(64, (5, 5), strides=(2, 2), padding='same', input_shape=[28, 28, 1]))
    model.add(layers.LeakyReLU())
    model.add(layers.Dropout(0.3))


    model.add(layers.Conv2D(128, (5, 5), strides=(2, 2), padding='same'))
    model.add(layers.LeakyReLU())
    model.add(layers.Dropout(0.3))


    model.add(layers.Flatten())
    model.add(layers.Dense(1))


    return model
After both the models are created, we’ll move to the next steps.
在创建两个模型之后,我们将继续进行下一步。
步骤4:定义损失和优化器 (Step 4: Define Loss and Optimizers)
Here, we’re using BinaryCrossentropy from tf.keras.losses API. Using this cross_entropy loss, we’ll make loss functions for discriminator and generator.
在这里,我们使用来自tf.keras.losses API的BinaryCrossentropy。 使用这种cross_entropy损失,我们将为鉴别器和生成器建立损失函数。
cross_entropy = tf.keras.losses.BinaryCrossentropy(from_logits=True)


def D_loss(real_output, fake_output):
    real_loss = cross_entropy(tf.ones_like(real_output), real_output)
    fake_loss = cross_entropy(tf.zeros_like(fake_output), fake_output)
    total_loss = real_loss + fake_loss
    return total_loss

def G_loss(fake_output):
    return cross_entropy(tf.ones_like(fake_output), fake_output)
Now, we’ll create optimizers for generator and discriminator using Adam optimizer from tf.keras.optimizers API with a learning rate of 1e-4.
现在,我们将使用tf.keras.optimizers API中的Adam优化器为生成器和鉴别器创建优化器,学习速率为1e-4。
generator_optimizer = tf.keras.optimizers.Adam(1e-4)
discriminator_optimizer = tf.keras.optimizers.Adam(1e-4)
步骤5:定义培训功能 (Step 5: Define Training functions)
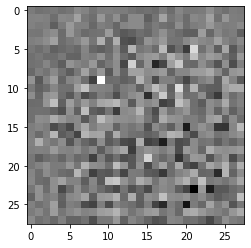
Initially, the generator will generate an image with only random pixels and as time passes, it will make images that are almost similar to the training images. Image from the generator before training looks like the following:
最初,生成器将生成仅具有随机像素的图像,并且随着时间的流逝,它将生成与训练图像几乎相似的图像。 训练之前来自生成器的图像如下所示:
noise_dim = 100
num_of_generated_examples = 16


seed = tf.random.normal([num_of_generated_examples, noise_dim])
First, we need to create noise data for passing into the generator model. Then create a function to learn through iterations using the concept of Eager Execution. Please refer to this for understanding what is Eager Execution as it is out of scope for this tutorial.
首先,我们需要创建噪声数据以传递到生成器模型中。 然后创建一个函数,使用“渴望执行”的概念通过迭代学习。 请参阅此内容以了解什么是急切执行,因为它超出了本教程的范围。
generator = create_generator()
discriminator = create_discriminator()


@tf.function
def train_step(images):
    noise = tf.random.normal([BATCH_SIZE, noise_dim])


    with tf.GradientTape() as gen_tape, tf.GradientTape() as disc_tape:
      generated_images = generator(noise, training=True)


      real_output = discriminator(images, training=True)
      fake_output = discriminator(generated_images, training=True)


      gen_loss = G_loss(fake_output)
      disc_loss = D_loss(real_output, fake_output)


    gradients_of_generator = gen_tape.gradient(gen_loss, generator.trainable_variables)
    gradients_of_discriminator = disc_tape.gradient(disc_loss, discriminator.trainable_variables)


    generator_optimizer.apply_gradients(zip(gradients_of_generator, generator.trainable_variables))
    discriminator_optimizer.apply_gradients(zip(gradients_of_discriminator, discriminator.trainable_variables))
GradientTape above is used for creating gradients as we go further and these gradients are applied to optimizers for decreasing the loss function.
上面的GradientTape用于创建渐进的梯度,并将这些梯度应用于优化器以减少损失函数。
def train_GAN(dataset, epochs):
  for epoch in range(epochs):
    start = time.time()


    for image_batch in dataset:
      train_step(image_batch)

     print ('Time for epoch {} is {} sec'.format(epoch + 1, time.time()-start))
This is the final function to call the train_step function for each batch in the dataset.
这是为数据集中的每个批次调用train_step函数的最终函数。
Finally, we’ll call our train_GAN function to start training on the image dataset with 500 epochs.
最后,我们将调用train_GAN函数以对具有500个历元的图像数据集进行训练。
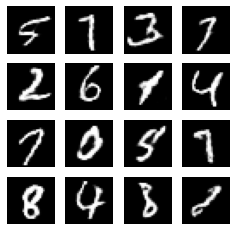
train_GAN(train_dataset, 500)After going through all the epochs, the generated image looks like this:
经过所有时期后,生成的图像如下所示:
看到结果 (Seeing the results)
Let’s look at the results in the form of GIF.
让我们以GIF的形式查看结果。
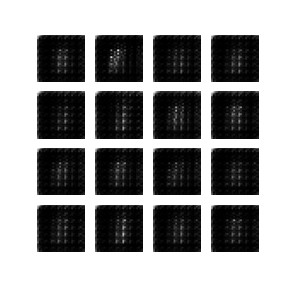
It could be seen how our neural networks learn to write integers like a child. We can use the same algorithm for multiple image generators because we only need to change the training images and train again.
可以看出我们的神经网络如何学习像孩子一样写整数。 我们可以对多个图像生成器使用相同的算法,因为我们只需要更改训练图像并再次训练即可。
下一步是什么? (What’s next?)
GANs could be used for many more domains other than images with the same concept of Generator and Discriminator. Check out this article for learning what are different types of GANs.
GAN可以用于除具有相同生成器和鉴别器概念的图像以外的其他更多域。 看看这个文章,学习什么是不同类型的甘斯的。
For more about programming, follow me and Aubergine Solutions, so you’ll get notified when we write new posts.
有关编程的更多信息,请关注 我 和 Aubergine Solutions ,因此我们在撰写新文章时会通知您。
翻译自: https://medium.com/aubergine-solutions/implementing-gan-using-tensorflow-2-0-9d03e29692cf
0阶张量和1阶张量转换


 3383
3383


 被折叠的 条评论
为什么被折叠?
被折叠的 条评论
为什么被折叠?
 到【灌水乐园】发言


