


创建react应用程序
Create a Spotify App with OAuth Authentication
使用OAuth身份验证创建Spotify应用
介绍(Introduction)
In this article, you will create a Fully Responsive Spotify Music Search App using Spotify Music API.
在本文中,您将使用Spotify音乐API创建全响应式Spotify音乐搜索应用程序。
By creating this App, you will learn
通过创建此应用,您将学到
1. How to use Spotify API to provide OAuth authentication2. How to search for the Albums, Artists and Playlists 3. Display the details with a beautiful UI4. Play the songs directly from the list 5. How to add load more functionality to the app6. How to add and maintain separate load more functionality for Albums, Artists and Playlists
1.如何使用Spotify API提供OAuth身份验证2。 如何搜索专辑,艺术家和播放列表3.使用精美的UI4显示详细信息。 直接从列表中播放歌曲。5.如何向app6添加加载更多功能。 如何为专辑,艺术家和播放列表添加和维护单独的加载更多功能
and much more.
以及更多。
You can see the live demo of the final working application in the video below
您可以在下面的视频中观看最终工作应用程序的实时演示。
初始设置 (Initial Setup)
Create a new project using create-react-app
使用create-react-app创建一个新项目
create-react-app spotify-music-search-appOnce the project is created, delete all files from the src folder and create index.js and styles.css files inside the src folder. Also, create actions, components, images , reducers, router, store and utils folders inside the src folder.
一旦项目被创建,从src文件夹中删除所有文件,并创建index.js和styles.css内部文件src文件夹。 另外,在src文件夹内创建actions , components , images , reducers , router , store和utils文件夹。
Install the necessary dependencies:
安装必要的依赖项:
yarn add axios@0.19.2 bootstrap@4.5.2 lodash@4.17.19 prop-types@15.7.2 react-bootstrap@1.3.0 redux@4.0.5 react-redux@7.2.1 react-router-dom@5.2.0 redux-thunk@2.3.0Open styles.css and add the contents from here inside it.
打开styles.css然后从此处添加内容。
创建初始页面 (Creating Initial Pages)
Create a new file Header.js inside the components folder with the following content:
在components文件夹内创建一个新文件Header.js ,内容如下:
import React from 'react';
const Header = () => {
  return <h1 className="main-heading">Spotify Music Search</h1>;
};
export default Header;
Create a new file RedirectPage.js inside the components folder with the following content:
在components文件夹中创建一个具有以下内容的新文件RedirectPage.js :
import React from 'react';
const RedirectPage = () => {
 return <div>Redirect Page</div>;
};
export default RedirectPage;
Create a new file Dashboard.js inside the components folder with the following content:
在components文件夹中使用以下内容创建一个新文件Dashboard.js :
import React from 'react';
const Dashboard = () => {
 return <div>Dashboard Page</div>;
};
export default Dashboard;
Create a new file Home.js inside the components folder with the following content:
在components文件夹中创建一个具有以下内容的新文件Home.js :
import React from 'react';
import { connect } from 'react-redux';
import { Button } from 'react-bootstrap';
import Header from './Header';
const Home = (props) => {
  return (
    <div className="login">
      <Header />
      <Button variant="info" type="submit">
        Login to spotify
      </Button>
    </div>
  );
};
export default connect()(Home);
Create a new file NotFoundPage.js inside the components folder with the following content:
在components文件夹内创建一个具有以下内容的新文件NotFoundPage.js :
import React from 'react';
import { Link } from 'react-router-dom';
import Header from './Header';
const NotFoundPage = () => {
  return (
    <React.Fragment>
      <Header />
      Page not found. Goto <Link to="/dashboard">Home Page</Link>
    </React.Fragment>
  );
};
export default NotFoundPage;
Create a new file AppRouter.js inside the router folder with the following content:
在router文件夹中创建一个新文件AppRouter.js ,其内容如下:
import React from 'react';
import { BrowserRouter, Route, Switch } from 'react-router-dom';
import Home from '../components/Home';
import RedirectPage from '../components/RedirectPage';
import Dashboard from '../components/Dashboard';
import NotFoundPage from '../components/NotFoundPage';
class AppRouter extends React.Component {
  render() {
    return (
      <BrowserRouter>
        <div className="main">
          <Switch>
            <Route path="/" component={Home} exact={true} />
            <Route path="/redirect" component={RedirectPage} />
            <Route path="/dashboard" component={Dashboard} />
            <Route component={NotFoundPage} />
          </Switch>
        </div>
      </BrowserRouter>
    );
  }
}
export default AppRouter;
Here, we have set up routing for various pages like Home Page, Dashboard Page, Not Found Page and Redirect Page using react-router-dom library.
在这里,我们使用react-router-dom库为首页,仪表板页面,未找到页面和重定向页面等各种页面设置了路由。
Create a new file albums.js inside the reducers folder with the following content:
在reducers文件夹中使用以下内容创建一个新文件albums.js :
const albumsReducer = (state = {}, action) => {
  switch (action.type) {
    default:
      return state;
  }
};
export default albumsReducer;
Create a new file artists.js inside the reducers folder with the following content:
在reducers文件夹中创建一个新文件artists.js ,其内容如下:
const artistsReducer = (state = {}, action) => {
  switch (action.type) {
    default:
      return state;
  }
};
export default artistsReducer;
Create a new file playlist.js inside the reducers folder with the following content:
在reducers文件夹中创建一个新文件playlist.js ,其内容如下:
const playlistReducer = (state = {}, action) => {
  switch (action.type) {
    default:
      return state;
  }
};
export default playlistReducer;
In all the above reducers, we have setup reducers with default state. We will be adding more switch cases as we progress through the app.
在以上所有的reducer中,我们都设置了带有默认状态的reducer。 随着应用程序的进展,我们将添加更多的开关盒。
Create a new file store.js inside the store folder with the following content:
在store文件夹中创建一个新文件store.js ,其内容如下:
import { createStore, combineReducers, applyMiddleware, compose } from 'redux';
import thunk from 'redux-thunk';
import albumsReducer from '../reducers/albums';
import artistsReducer from '../reducers/artists';
import playlistReducer from '../reducers/playlist';
const composeEnhancers = window.__REDUX_DEVTOOLS_EXTENSION_COMPOSE__ || compose;const store = createStore(
  combineReducers({
    albums: albumsReducer,
    artists: artistsReducer,
    playlist: playlistReducer
  }),
  composeEnhancers(applyMiddleware(thunk))
);export default store;
Here, we have created a redux store with all the reducers combined together so we can access store data from any component defined in the AppRouter.js file.
在这里,我们创建了一个Redux存储,其中所有的reducer都组合在一起,因此我们可以从AppRouter.js文件中定义的任何组件访问存储数据。
Now, open src/index.js file and add the following contents inside it:
现在,打开src/index.js文件,并在其中添加以下内容:
import React from 'react';
import ReactDOM from 'react-dom';
import { Provider } from 'react-redux';
import store from './store/store';
import AppRouter from './router/AppRouter';
import 'bootstrap/dist/css/bootstrap.min.css';
import './styles.css';ReactDOM.render(
  <Provider store={store}>
    <AppRouter />
  </Provider>,
  document.getElementById('root')
);
Here, we have added a Provider component which will pass the redux store to all the Routes declared in the AppRouter component.
在这里,我们添加了一个Provider组件,该组件会将redux存储传递给AppRouter组件中声明的所有Routes。
Now, start the React App by running the following command from the terminal:
现在,通过从终端运行以下命令来启动React App:
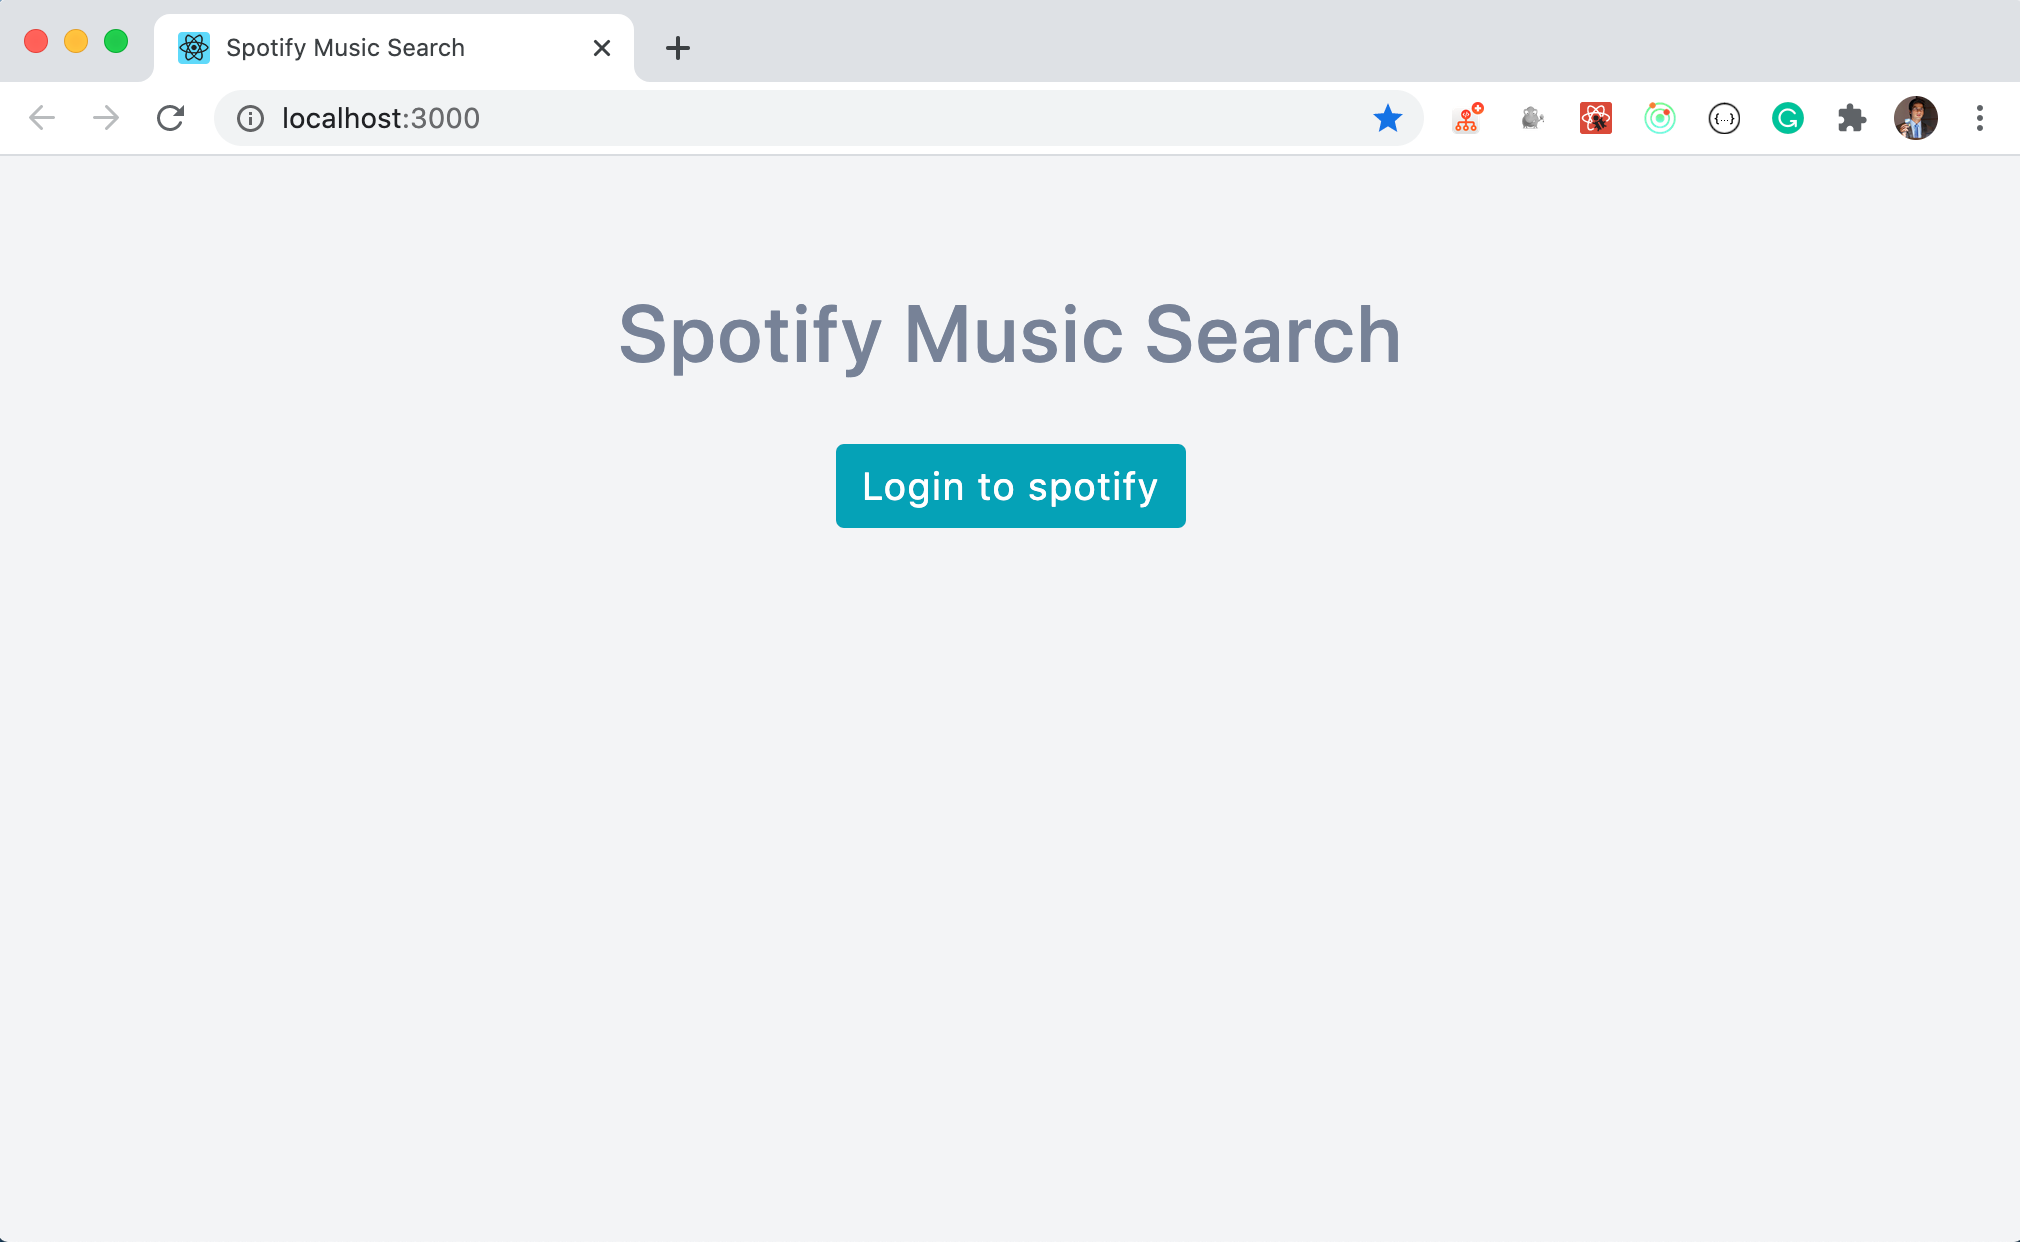
yarn startYou will see the following screen when you access the application at http://localhost:3000/
当您通过http:// localhost:3000 /访问应用程序时,将看到以下屏幕。
添加登录身份验证功能(Adding login authentication functionality)
Now, let’s add the login functionality. To login to the Spotify account using App, you will need three things: client_id, authorize_url and redirect_url.
现在,让我们添加登录功能。 要使用App登录到Spotify帐户,您将需要三件事: client_id , authorize_url和redirect_url 。
To get that navigate here and log in to the Spotify developer account(sign up if you don’t have an account).
为此,请在此处导航并登录到Spotify开发人员帐户(如果您没有帐户,请注册)。
After login, you will a see page similar to the below screen to create an application.
登录后,您将看到一个类似于以下屏幕的查看页面,用于创建应用程序。

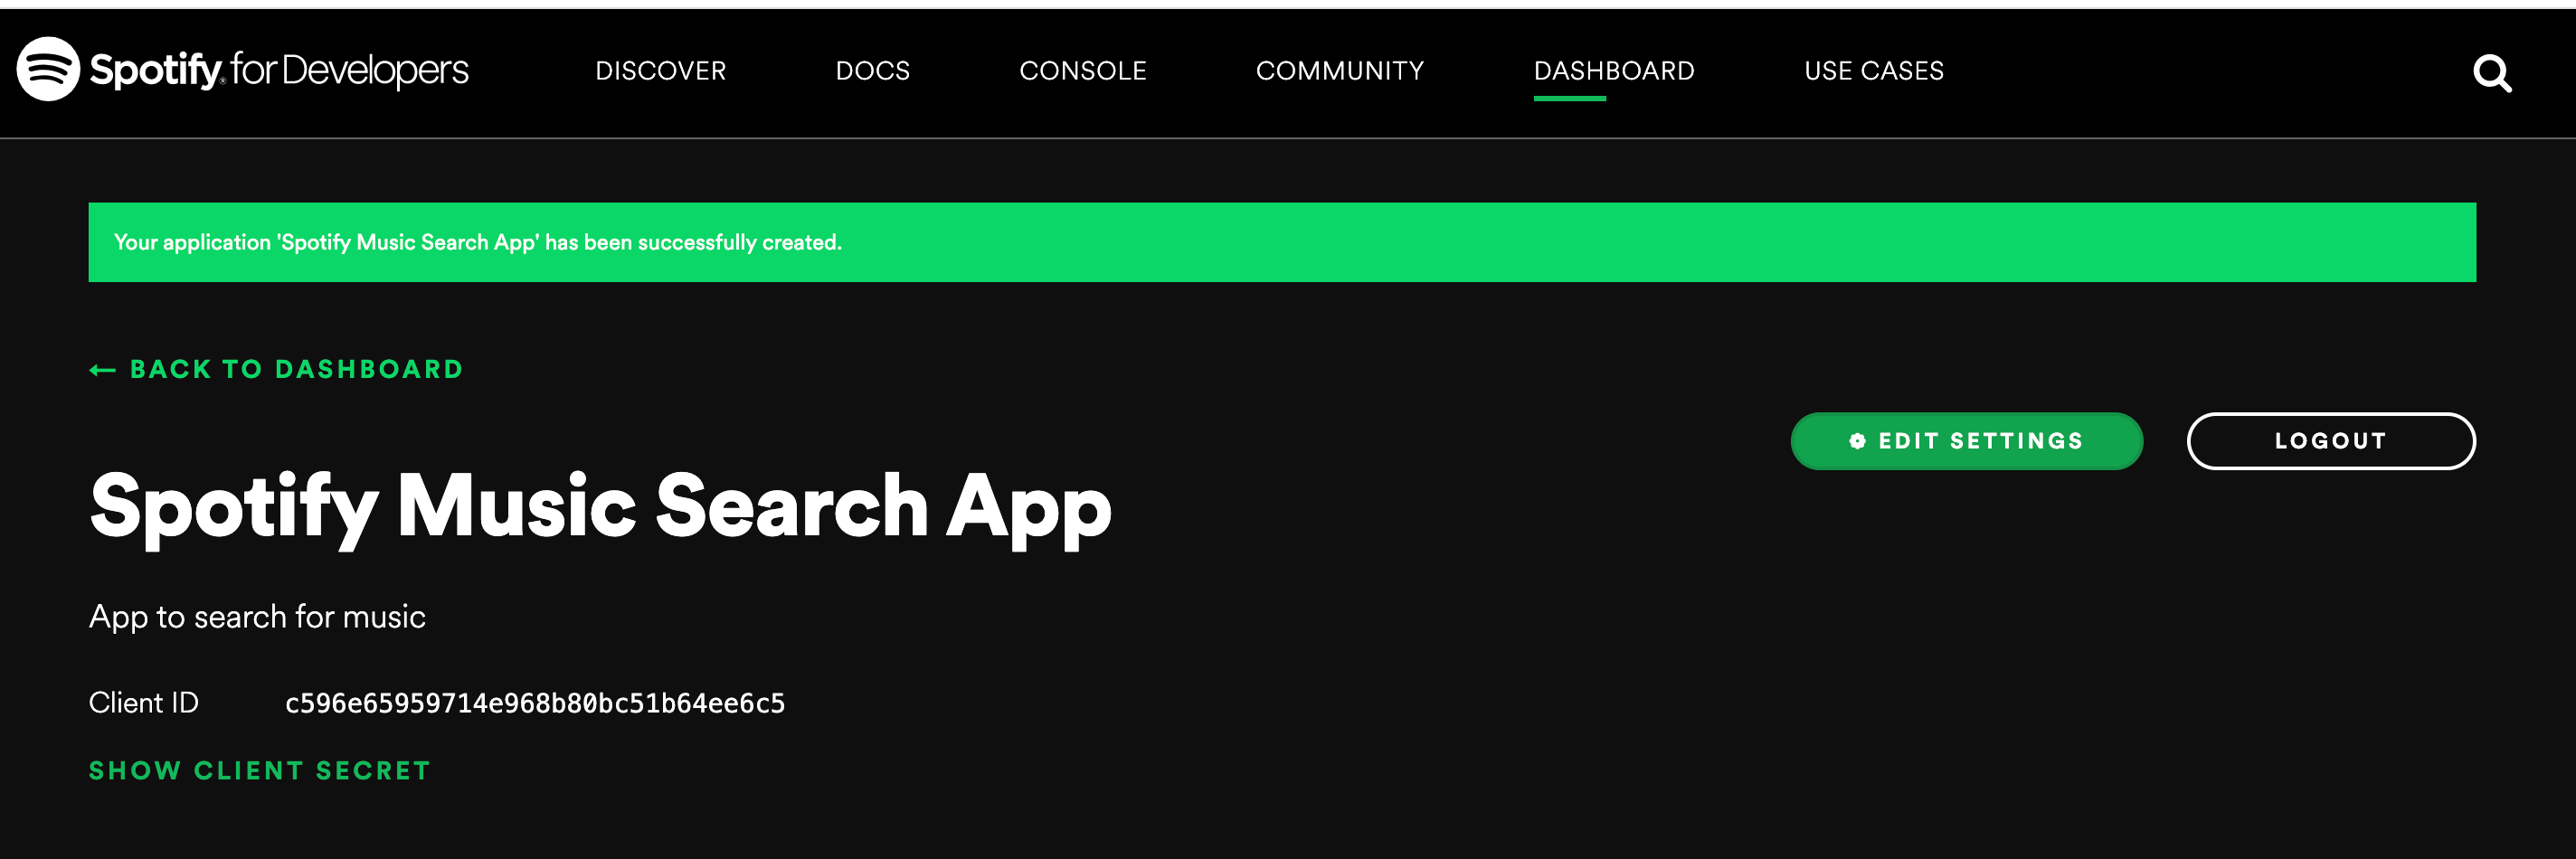
Click on CREATE AN APP green button and Enter the app name and description and then click on the CREATE button.
单击CREATE AN APP应用CREATE AN APP绿色按钮,然后输入应用程序名称和描述,然后单击CREATE按钮。

Take a note of the generated Client ID.
记下生成的客户端ID。
and then click the EDIT SETTINGS button. Enter http://localhost:3000/redirect as the value for Redirect URIs and click on the ADD button and then click on the SAVE button by scrolling a bit.
然后单击“ EDIT SETTINGS按钮。 输入http:// localhost:3000 / redirect作为“ Redirect URIs的值,然后单击“ ADD按钮,然后通过滚动一点来单击“ SAVE按钮。

Now, create a new file with the name .env in the root of your project and add the following details inside it.
现在,在项目的根目录中创建一个名为.env的新文件,并在其中添加以下详细信息。
REACT_APP_CLIENT_ID=your_client_id
REACT_APP_AUTHORIZE_URL=https://accounts.spotify.com/authorize
REACT_APP_REDIRECT_URL=http://localhost:3000/redirect
Here,
这里,
REACT_APP_AUTHORIZE_URLwill be used to show authorize popup to access your Spotify account from your app.REACT_APP_AUTHORIZE_URL将用于显示授权弹出窗口以从您的应用访问您的Spotify帐户。REACT_APP_REDIRECT_URLwill be the URL where you want the user to be redirected once the user is authorized successfully.成功授权用户后,
REACT_APP_REDIRECT_URL将是您希望用户重定向到的URL。Each variable starts with
REACT_APP_soCreate React Appwill automatically add those variables inprocess.envobject to make it accessible in the application.每个变量都以
REACT_APP_开头,因此Create React App将自动在process.env对象中添加这些变量,以使其在应用程序中可访问。
Make sure to add
.envfile inside the.gitignorefile so it will be not be added to git as it contains private information which should not be public确保在
.gitignore文件中添加.env文件,以免将其添加到git中,因为它包含不应公开的私人信息
Note that, the value of the REACT_APP_REDIRECT_URL variable must match the value entered for the Redirect URIs in the Edit settings screenshot shown above otherwise the application will not work.
请注意, REACT_APP_REDIRECT_URL变量的值必须与在上面显示的“ Edit settings屏幕快照中为“ Redirect URIs输入的值匹配,否则该应用程序将无法运行。
Now, open src/components/Home.js and add the onClick handler to the login button
现在,打开src/components/Home.js并将onClick处理程序添加到登录按钮
<Button variant="info" type="submit" onClick={handleLogin}>
  Login to spotify
</Button>
And add the handleLogin function
并添加handleLogin函数
const {
  REACT_APP_CLIENT_ID,
  REACT_APP_AUTHORIZE_URL,
  REACT_APP_REDIRECT_URL
} = process.env;const handleLogin = () => {
  window.location = `${REACT_APP_AUTHORIZE_URL}?client_id=${REACT_APP_CLIENT_ID}&redirect_uri=${REACT_APP_REDIRECT_URL}&response_type=token&show_dialog=true`;
};
Your updated Home.js file will look like this:
更新后的Home.js文件将如下所示:
import React from 'react';
import { connect } from 'react-redux';
import { Button } from 'react-bootstrap';
import Header from './Header';const Home = (props) => {
  const {
    REACT_APP_CLIENT_ID,
    REACT_APP_AUTHORIZE_URL,
    REACT_APP_REDIRECT_URL
  } = process.env;  const handleLogin = () => {
    window.location = `${REACT_APP_AUTHORIZE_URL}?client_id=${REACT_APP_CLIENT_ID}&redirect_uri=${REACT_APP_REDIRECT_URL}&response_type=token&show_dialog=true`;
  };
  return (
    <div className="login">
      <Header />
      <Button variant="info" type="submit" onClick={handleLogin}>
        Login to spotify
      </Button>
    </div>
  );
};export default connect()(Home);
Now, start your app by running yarn start command from the terminal and verify the login functionality
现在,通过从终端运行yarn start命令启动您的应用程序,并验证登录功能
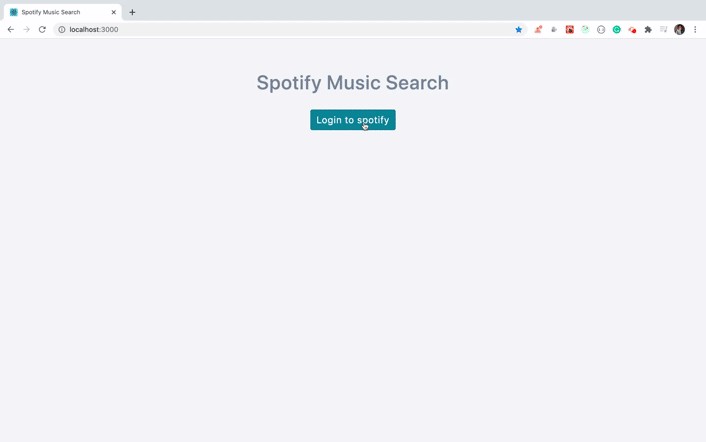
As you can see, once we click on the AGREE button, we’re redirected to the RedirectPage component and Spotify will automatically add the access_token, token_type and expires_in to our redirect URL as shown below
如您所见,一旦单击“ AGREE按钮,我们将被重定向到RedirectPage组件,Spotify将自动将access_token , token_type和expires_in到我们的重定向URL中,如下所示
http://localhost:3000/redirect#access_token=BQA4Y-o2kMSWjpRMD5y55f0nXLgt51kl4UAEbjNip3lIpz80uWJQJPoKPyD-CG2jjIdCjhfZKwfX5X6K7sssvoe20GJhhE7bHPaW1tictiMlkdzkWe2Pw3AnmojCy-NzVSOCj-aNtQ8ztTBYrCzRiBFGPtAn-I5g35An10&token_type=Bearer&expires_in=3600access_tokenis a Bearer token which you will be adding to every request made to the Spotify API later.access_token是无记名令牌,稍后您将添加到对Spotify API的每个请求中。expires_inspecifies the token expiration time which is3600seconds i.e in 1 hour by default. After that, you need to log in again.expires_in指定令牌的过期时间,该时间为3600秒,即默认情况下为1小时。 之后,您需要再次登录。
添加搜索功能 (Adding search functionality)
Now, we have access to the token, we need to store it somewhere so we can use it for every API request.
现在,我们可以访问令牌,我们需要将其存储在某个位置,以便可以将其用于每个API请求。
Create a new file with a name functions.js inside src/utils folder with the following content:
在src/utils文件夹中创建一个名称为functions.js的新文件,其内容如下:
import axios from 'axios';
export const getParamValues = (url) => {
  return url
    .slice(1)
    .split('&')
    .reduce((prev, curr) => {
      const [title, value] = curr.split('=');
      prev[title] = value;
      return prev;
    }, {});
};
export const setAuthHeader = () => {
  try {
    const params = JSON.parse(localStorage.getItem('params'));
    if (params) {
      axios.defaults.headers.common[
        'Authorization'
      ] = `Bearer ${params.access_token}`;
    }
  } catch (error) {
    console.log('Error setting auth', error);
  }
};
Here, we have added,
在这里,我们添加了
getParamValuesfunction that will store theaccess_token,token_typeandexpires_invalues in an object which will look like this:getParamValues函数,它将access_token,token_type和expires_in值存储在一个对象中,该对象如下所示:
{
 access_token: some_value,
 token_type: some_value,
 expires_in: some_value
}setAuthHeaderfunction that will add theaccess_tokento everyaxiosAPI requestsetAuthHeader函数,它将向每个axiosAPI请求添加access_token
Open RedirectPage.js file and replace it with the following contents:
打开RedirectPage.js文件,并将其替换为以下内容:
import React from 'react';
import _ from 'lodash';
import { getParamValues } from '../utils/functions';
export default class RedirectPage extends React.Component {
  componentDidMount() {
    const { setExpiryTime, history, location } = this.props;
    try {
      if (_.isEmpty(location.hash)) {
        return history.push('/dashboard');
      }
      const access_token = getParamValues(location.hash);
      const expiryTime = new Date().getTime() + access_token.expires_in * 1000;
      localStorage.setItem('params', JSON.stringify(access_token));
      localStorage.setItem('expiry_time', expiryTime);
      history.push('/dashboard');
    } catch (error) {
      history.push('/');
    }
  }
  render() {
    return null;
  }
}
Here, we have added a componentDidMount lifecycle method to access the URL parameters and store them in local storage. We’re calling the getParamValues function by passing the URL values available in location.hash.
在这里,我们添加了componentDidMount生命周期方法来访问URL参数并将其存储在本地存储中。 我们通过传递location.hash可用的URL值来调用getParamValues函数。
The expires_in value is in seconds (&expires_in=3600) so we’re converting it to milliseconds by multiplying it by 1000 and then adding it to the milliseconds at the current time
expires_in值以秒为单位( &expires_in=3600 ),因此我们将其乘以1000 ,然后将其加到当前时间的毫秒数,将其转换为毫秒
const expiryTime = new Date().getTime() + access_token.expires_in * 1000;So the expiryTime will contain the milliseconds of the time one hour after the token generation time (as expires_in is 3600).
因此, expiryTime将包含令牌生成时间后一小时的时间的毫秒数(因为expires_in为3600)。
Create a new file constants.js inside utils folder with the following content:
在utils文件夹中创建一个新文件constants.js ,其内容如下:
export const SET_ALBUMS = 'SET_ALBUMS';
export const ADD_ALBUMS = 'ADD_ALBUMS';
export const SET_ARTISTS = 'SET_ARTISTS';
export const ADD_ARTISTS = 'ADD_ARTISTS';
export const SET_PLAYLIST = 'SET_PLAYLIST';
export const ADD_PLAYLIST = 'ADD_PLAYLIST';
Create a new file result.js inside the actions folder with the following content:
在actions文件夹中创建一个新文件result.js ,其内容如下:
import {
  SET_ALBUMS,
  ADD_ALBUMS,
  SET_ARTISTS,
  ADD_ARTISTS,
  SET_PLAYLIST,
  ADD_PLAYLIST
} from '../utils/constants';
import { get } from '../utils/api';
export const setAlbums = (albums) => ({
  type: SET_ALBUMS,
  albums
});
export const addAlbums = (albums) => ({
  type: ADD_ALBUMS,
  albums
});
export const setArtists = (artists) => ({
  type: SET_ARTISTS,
  artists
});
export const addArtists = (artists) => ({
  type: ADD_ARTISTS,
  artists
});
export const setPlayList = (playlists) => ({
  type: SET_PLAYLIST,
  playlists
});
export const addPlaylist = (playlists) => ({
  type: ADD_PLAYLIST,
  playlists
});
export const initiateGetResult = (searchTerm) => {
  return async (dispatch) => {
    try {
      const API_URL = `https://api.spotify.com/v1/search?query=${encodeURIComponent(
        searchTerm
      )}&type=album,playlist,artist`;
      const result = await get(API_URL);
      console.log(result);
      const { albums, artists, playlists } = result;
      dispatch(setAlbums(albums));
      dispatch(setArtists(artists));
      return dispatch(setPlayList(playlists));
    } catch (error) {
      console.log('error', error);
    }
  };
};
Create a new file api.js inside the utils folder with the following content:
在utils文件夹中创建一个新文件api.js ,其内容如下:
import axios from 'axios';
import { setAuthHeader } from './functions';export const get = async (url, params) => {
  setAuthHeader();
  const result = await axios.get(url, params);
  return result.data;
};export const post = async (url, params) => {
  setAuthHeader();
  const result = await axios.post(url, params);
  return result.data;
};
In this file, we’re making API calls using axios but before that, we’re adding the access_token in the Authorization Header by calling setAuthHeader function.
在此文件中,我们使用axios进行API调用,但在此之前,我们通过调用setAuthHeader函数在Authorization标题中添加了access_token。
Create a new file Loader.js inside the components folder with the following content:
在components文件夹内创建一个具有以下内容的新文件Loader.js :
import { useState, useEffect } from 'react';
import ReactDOM from 'react-dom';
const Loader = (props) => {
  const [node] = useState(document.createElement('div'));
  const loader = document.querySelector('#loader');  useEffect(() => {
    loader.appendChild(node).classList.add('message');
  }, [loader, node]);  useEffect(() => {
    if (props.show) {
      loader.classList.remove('hide');
      document.body.classList.add('loader-open');
    } else {
      loader.classList.add('hide');
      document.body.classList.remove('loader-open');
    }
  }, [loader, props.show]);  return ReactDOM.createPortal(props.children, node);
};
export default Loader;
In this file, we have created a loader component that will display a loading message with the background overlay. We have used ReactDOM.createPortal method to create the loader.
在此文件中,我们创建了一个加载器组件,该组件将显示带有背景覆盖的加载消息。 我们已经使用ReactDOM.createPortal方法来创建加载器。
To add the loader to the page, open public/index.html file and add the loader div after div with an id of root
要将加载程序添加到页面中,请打开public/index.html文件,并在div之后添加ID为root的加载程序div。
Your index.html page body will look like this now:
您的index.html页面正文现在看起来像这样:
<body>
  <noscript>You need to enable JavaScript to run this app.</noscript>
  <div id="root"></div>
  <div id="loader" class="hide"></div>
  <!--
    This HTML file is a template.
    If you open it directly in the browser, you will see an empty page.
    You can add webfonts, meta tags, or analytics to this file.
    The build step will place the bundled scripts into the <body> tag.
    To begin the development, run `npm start` or `yarn start`.
    To create a production bundle, use `npm run build` or `yarn build`.
  -->
</body>
By default, the loader will be hidden, so we have added the hide class and while showing the loader we will be removing the hide class.
默认情况下,加载器将被隐藏,因此我们添加了hide类,并在显示加载器时将移除hide类。
Create a new file SearchForm.js inside the components folder with the following content:
在components文件夹中创建一个新文件SearchForm.js ,其内容如下:
import React, { useState } from 'react';
import { Form, Button } from 'react-bootstrap';
const SearchForm = (props) => {
const [searchTerm, setSearchTerm] = useState('');
const [errorMsg, setErrorMsg] = useState('');
const handleInputChange = (event) => {
const searchTerm = event.target.value;
setSearchTerm(searchTerm);
};
const handleSearch = (event) => {
event.preventDefault();
if (searchTerm.trim() !== '') {
setErrorMsg('');
props.handleSearch(searchTerm);
} else {
setErrorMsg('Please enter a search term.');
}
};
return (
<div>
<Form onSubmit={handleSearch}>
{errorMsg && <p className="errorMsg">{errorMsg}</p>}
<Form.Group controlId="formBasicEmail">
<Form.Label>Enter search term</Form.Label>
<Form.Control
type="search"
name="searchTerm"
value={searchTerm}
placeholder="Search for album, artist or playlist"
onChange={handleInputChange}
autoComplete="off"
/>
</Form.Group>
<Button variant="info" type="submit">
Search
</Button>
</Form>
</div>
);
};
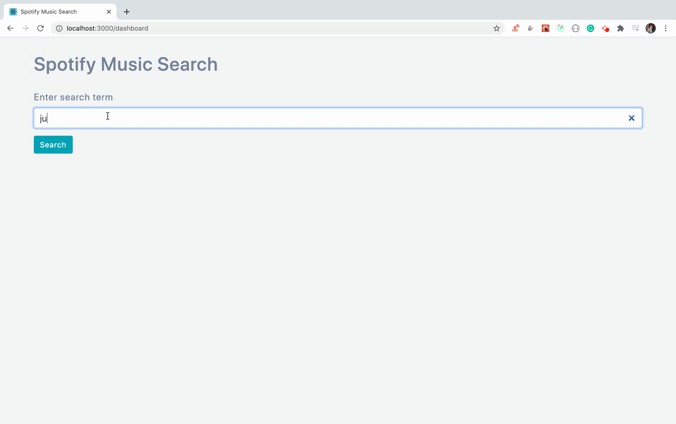
export default SearchForm;In this file, we’ve added a search box and based on the input value we’re updating the state of the component.
在此文件中,我们添加了一个搜索框,并根据输入值更新组件的状态。
Create a new file SearchResult.js inside the components folder with the following content:
在components文件夹中创建一个新文件SearchResult.js ,其内容如下:
import React from 'react';
import _ from 'lodash';
import AlbumsList from './AlbumsList';
const SearchResult = (props) => {
  const { result, setCategory, selectedCategory } = props;
  const { albums, artists, playlist } = result;
  return (
    <React.Fragment>
      <div className="search-buttons">
        {!_.isEmpty(albums.items) && (
          <button
            className={`${
              selectedCategory === 'albums' ? 'btn active' : 'btn'
            }`}
            onClick={() => setCategory('albums')}
          >
            Albums
          </button>
        )}
        {!_.isEmpty(artists.items) && (
          <button
            className={`${
              selectedCategory === 'artists' ? 'btn active' : 'btn'
            }`}
            onClick={() => setCategory('artists')}
          >
            Artists
          </button>
        )}
        {!_.isEmpty(playlist.items) && (
          <button
            className={`${
              selectedCategory === 'playlist' ? 'btn active' : 'btn'
            }`}
            onClick={() => setCategory('playlist')}
          >
            PlayLists
          </button>
        )}
      </div>
      <div className={`${selectedCategory === 'albums' ? '' : 'hide'}`}>
        {albums && <AlbumsList albums={albums} />}
      </div>
    </React.Fragment>
  );
};
export default SearchResult;
Inside images folder add the image from here with the name music.jpeg
在images文件夹内,从此处添加名称为music.jpeg的图像
We will be using this image as the default image if the image for any album, artist or playlist does not exist.
如果任何专辑,艺术家或播放列表的图像都不存在,我们将使用该图像作为默认图像。
Create a new file AlbumsList.js inside the components folder with the following content:
在components文件夹中创建一个具有以下内容的新文件AlbumsList.js :
import React from 'react';
import { Card } from 'react-bootstrap';
import _ from 'lodash';
import music from '../images/music.jpeg';
const AlbumsList = ({ albums }) => {
  return (
    <React.Fragment>
      {Object.keys(albums).length > 0 && (
        <div className="albums">
          {albums.items.map((album, index) => {
            return (
              <React.Fragment key={index}>
                <Card style={{ width: '18rem' }}>
                  <a
                    target="_blank"
                    href={album.external_urls.spotify}
                    rel="noopener noreferrer"
                    className="card-image-link"
                  >
                    {!_.isEmpty(album.images) ? (
                      <Card.Img
                        variant="top"
                        src={album.images[0].url}
                        alt=""
                      />
                    ) : (
                      <img src={music} alt="" />
                    )}
                  </a>
                  <Card.Body>
                    <Card.Title>{album.name}</Card.Title>
                    <Card.Text>
                      <small>
                        {album.artists.map((artist) => artist.name).join(', ')}
                      </small>
                    </Card.Text>
                  </Card.Body>
                </Card>
              </React.Fragment>
            );
          })}
        </div>
      )}
    </React.Fragment>
  );
};
export default AlbumsList;
Now, start the app by running yarn start command
现在,通过运行yarn start命令启动应用程序
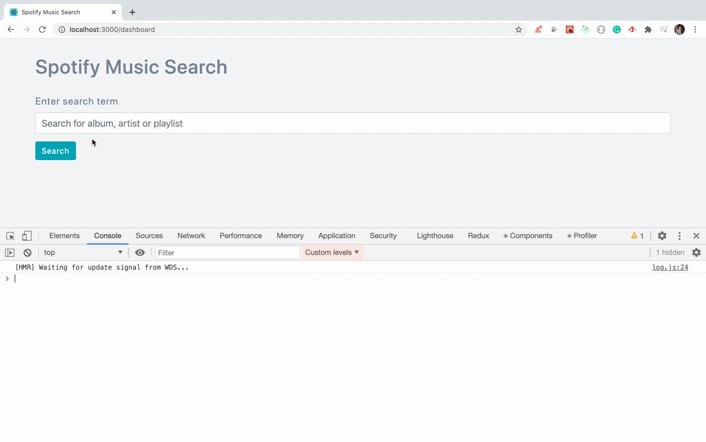
As you can see, when we search for anything, the response from the Spotify API is displayed in the console. So we’re successfully able to access the music data from Spotify.
如您所见,当我们搜索任何内容时,Spotify API的响应将显示在控制台中。 因此,我们可以成功地从Spotify访问音乐数据。
在UI上显示相册 (Displaying the albums on the UI)
Now, we will add the response in the redux store so we can display it on the UI.
现在,我们将响应添加到redux存储中,以便将其显示在UI上。
Open src/reducers/albums.js file and replace it with the following contents:
打开src/reducers/albums.js文件,并将其替换为以下内容:
import { SET_ALBUMS, ADD_ALBUMS } from '../utils/constants';
const albumsReducer = (state = {}, action) => {
  const { albums } = action;
  switch (action.type) {
    case SET_ALBUMS:
      return albums;
    case ADD_ALBUMS:
      return {
        ...state,
        next: albums.next,
        items: [...state.items, ...albums.items]
      };
    default:
      return state;
  }
};export default albumsReducer;
Now, run the yarn start command again and check the application
现在,再次运行yarn start命令并检查应用程序
As you can see, when we search, the redux store is updated and the result is displayed on the UI. Let’s understand the code for this functionality.
如您所见,当我们搜索时,redux存储被更新,结果显示在UI上。 让我们了解此功能的代码。
In the Dashboard.js file, we’re calling the initiateGetResult inside the handleSearch function which is triggered when the user clicks on the search button.
在Dashboard.js文件,我们调用了initiateGetResult内部handleSearch其被触发时的搜索按钮,用户点击功能。
If you check the initiateGetResult function from actions/result.js file, we’re making an API call to the https://api.spotify.com/v1/search URL by passing the search text as a query parameter
如果您从actions/result.js文件中检查initiateGetResult函数,我们将通过将搜索文本作为查询参数传递给https://api.spotify.com/v1/search URL的API调用
export const initiateGetResult = (searchTerm) => {
  return async (dispatch) => {
    try {
      const API_URL = `https://api.spotify.com/v1/search?query=${encodeURIComponent(
        searchTerm
      )}&type=album,playlist,artist`;
      const result = await get(API_URL);
      console.log(result);
      const { albums, artists, playlists } = result;
      dispatch(setAlbums(albums));
      dispatch(setArtists(artists));
      return dispatch(setPlayList(playlists));
    } catch (error) {
      console.log('error', error);
    }
  };
};
and once we get the result, we’re calling the setAlbums action generator function by taking the albums from the result.
一旦得到结果,就通过从结果中取出专辑来调用setAlbums动作生成器函数。
dispatch(setAlbums(albums));the setAlbums function looks like this:
setAlbums函数如下所示:
export const setAlbums = (albums) => ({
  type: SET_ALBUMS,
  albums
});
Here, we’re returning the action with the type of SET_ALBUMS. So once the action is dispatched, the albumsReducer from reducers/albums.js file gets called where for the matching SET_ALBUMS switch case, we’re returning the passed albums from the reducer so the redux store will get updated with the albums data.
在这里,我们将返回类型为SET_ALBUMS 。 因此,一旦调度了该动作, albumsReducer从reducers/albums.js文件中调用reducers/albums.js来匹配SET_ALBUMS开关案例,我们将从reducer返回传递的相册,以便redux存储将使用相册数据进行更新。
case SET_ALBUMS:
   return albums;
As we’ve connected the Dashboard component(Dashboard.js ) to the redux store using connect method, the component gets the updated redux store data using the mapStateToProps method and that result we’re passing to the SearchResult component
当我们使用connect方法将Dashboard组件( Dashboard.js ) connect到redux存储时,该组件使用mapStateToProps方法获取了更新的redux存储数据,并将该结果传递给SearchResult组件
const { albums, artists, playlist } = props;
const result = { albums, artists, playlist };
<SearchResult
  result={result}
  setCategory={setCategory}
  selectedCategory={selectedCategory}
/>
From the SearchResult component, the data is passed as a prop to the AlbumsList component
从SearchResult组件,将数据作为道具传递给AlbumsList组件
<div className={`${selectedCategory === 'albums' ? '' : 'hide'}`}>
  {albums && <AlbumsList albums={albums} />}
</div>
and inside the AlbumsList component, we’re iterating through each album using Array map method and displaying the data on the UI.
在AlbumsList组件内部,我们使用Array map方法遍历每个专辑并在UI上显示数据。
在界面上显示艺术家和播放列表 (Displaying the artists and playlists on the UI)
Create a new file ArtistsList.js inside the components folder with the following content:
在components文件夹中创建一个新文件ArtistsList.js ,其内容如下:
import React from 'react';
import { Card } from 'react-bootstrap';
import _ from 'lodash';
import music from '../images/music.jpeg';
const ArtistsList = ({ artists }) => {
  return (
    <React.Fragment>
      {Object.keys(artists).length > 0 && (
        <div className="artists">
          {artists.items.map((artist, index) => {
            return (
              <React.Fragment key={index}>
                <Card style={{ width: '18rem' }}>
                  <a
                    target="_blank"
                    href={artist.external_urls.spotify}
                    rel="noopener noreferrer"
                    className="card-image-link"
                  >
                    {!_.isEmpty(artist.images) ? (
                      <Card.Img
                        variant="top"
                        src={artist.images[0].url}
                        alt=""
                      />
                    ) : (
                      <img src={music} alt="" />
                    )}
                  </a>
                  <Card.Body>
                    <Card.Title>{artist.name}</Card.Title>
                  </Card.Body>
                </Card>
              </React.Fragment>
            );
          })}
        </div>
      )}
    </React.Fragment>
  );
};
export default ArtistsList;
Create a new file PlayList.js inside the components folder with the following content:
在components文件夹中创建一个具有以下内容的新文件PlayList.js :
import React from 'react';
import { Card } from 'react-bootstrap';
import _ from 'lodash';
import music from '../images/music.jpeg';
const PlayList = ({ playlist }) => {
  return (
    <div>
      {Object.keys(playlist).length > 0 && (
        <div className="playlist">
          {playlist.items.map((item, index) => {
            return (
              <React.Fragment key={index}>
                <Card style={{ width: '18rem' }}>
                  <a
                    target="_blank"
                    href={item.external_urls.spotify}
                    rel="noopener noreferrer"
                    className="card-image-link"
                  >
                    {!_.isEmpty(item.images) ? (
                      <Card.Img variant="top" src={item.images[0].url} alt="" />
                    ) : (
                      <img src={music} alt="" />
                    )}
                  </a>
                  <Card.Body>
                    <Card.Title>{item.name}</Card.Title>
                    <Card.Text>
                      <small>By {item.owner.display_name}</small>
                    </Card.Text>
                  </Card.Body>
                </Card>
              </React.Fragment>
            );
          })}
        </div>
      )}
    </div>
  );
};
export default PlayList;
Now, open SearchResult.js file and alongside the AlbumsList, add the ArtistsList and PlayList components
现在,打开SearchResult.js文件,并在AlbumsList旁边,添加ArtistsList和PlayList组件
<div className={`${selectedCategory === 'albums' ? '' : 'hide'}`}>
  {albums && <AlbumsList albums={albums} />}
</div>
<div className={`${selectedCategory === 'artists' ? '' : 'hide'}`}>
  {artists && <ArtistsList artists={artists} />}
</div>
<div className={`${selectedCategory === 'playlist' ? '' : 'hide'}`}>
  {playlist && <PlayList playlist={playlist} />}
</div>
Also, import the components at the top of the file
另外,在文件顶部导入组件
import ArtistsList from './ArtistsList';
import PlayList from './PlayList';
Open src/reducers/artists.js file and replace it with the following contents:
打开src/reducers/artists.js文件,并将其替换为以下内容:
import { SET_ARTISTS, ADD_ARTISTS } from '../utils/constants';
const artistsReducer = (state = {}, action) => {
  const { artists } = action;
  switch (action.type) {
    case SET_ARTISTS:
      return artists;
    case ADD_ARTISTS:
      return {
        ...state,
        next: artists.next,
        items: [...state.items, ...artists.items]
      };
    default:
      return state;
  }
};
export default artistsReducer;
Open src/reducers/playlist.js file and replace it with the following contents:
打开src/reducers/playlist.js文件,并将其替换为以下内容:
import { SET_PLAYLIST, ADD_PLAYLIST } from '../utils/constants';
const playlistReducer = (state = {}, action) => {
  const { playlists } = action;
  switch (action.type) {
    case SET_PLAYLIST:
      return playlists;
    case ADD_PLAYLIST:
      return {
        ...state,
        next: playlists.next,
        items: [...state.items, ...playlists.items]
      };
    default:
      return state;
  }
};
export default playlistReducer;
Now, run the yarn start command again and check the application
现在,再次运行yarn start命令并检查应用程序
As you can see, the artists and playlists are also populated with the data.
如您所见,艺术家和播放列表中也填充了数据。
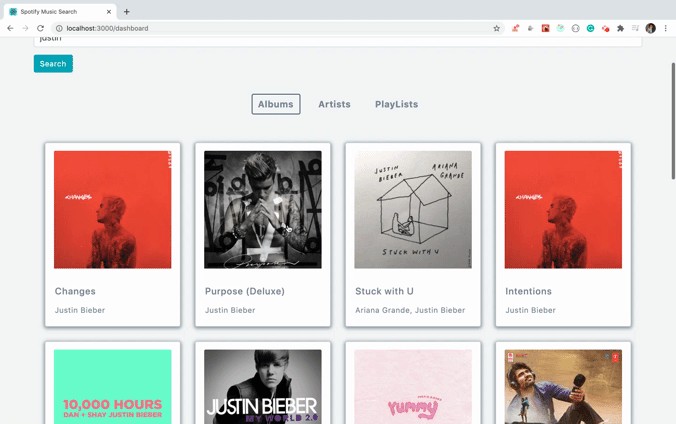
Also, If you click on any of the images, you can play the music from the album, artist or playlist as shown above.
另外,如果单击任何图像,则可以播放专辑,艺术家或播放列表中的音乐,如上所示。
添加更多负载功能 (Adding load more functionality)
Now, let’s add a load more button to load more data for albums, artists and playlists.
现在,让我们添加一个“加载更多”按钮,为专辑,艺术家和播放列表加载更多数据。
Open SearchResult.js file and add the load more button just before the ending </React.Fragment> tag
打开SearchResult.js文件,并在</React.Fragment>标记结尾之前添加更多加载按钮
{!_.isEmpty(result[selectedCategory]) &&
 !_.isEmpty(result[selectedCategory].next) && (
  <div className="load-more" onClick={() => loadMore(selectedCategory)}>
    <Button variant="info" type="button">
      Load More
    </Button>
  </div>
)}
Destructure the loadMore function from props and import the Button from react-bootstrap
从props解loadMore函数,并从react-bootstrap导入Button
import { Button } from 'react-bootstrap';
const SearchResult = (props) => {
const { loadMore, result, setCategory, selectedCategory } = props;
Open Dashboard.js file and add the loadMore function
打开Dashboard.js文件并添加loadMore函数
const loadMore = async (type) => {
  const { dispatch, albums, artists, playlist } = props;
  setIsLoading(true);
  switch (type) {
    case 'albums':
      await dispatch(initiateLoadMoreAlbums(albums.next));
      break;
    case 'artists':
      await dispatch(initiateLoadMoreArtists(artists.next));
      break;
    case 'playlist':
      await dispatch(initiateLoadMorePlaylist(playlist.next));
      break;
    default:
  }
  setIsLoading(false);
};
and pass the loadMore function as a prop to the SearchResult component
并将loadMore函数作为prop传递给SearchResult组件
return (
  <React.Fragment>
    <Header />
    <SearchForm handleSearch={handleSearch} />
    <Loader show={isLoading}>Loading...</Loader>
    <SearchResult
      result={result}
      loadMore={loadMore}
      setCategory={setCategory}
      selectedCategory={selectedCategory}
    />
  </React.Fragment>
);
Open actions/result.js file and add the following functions at the end of the file
打开actions/result.js文件,并在文件末尾添加以下功能
export const initiateLoadMoreAlbums = (url) => {
  return async (dispatch) => {
    try {
      console.log('url', url);
      const result = await get(url);
      console.log('categoriess', result);
      return dispatch(addAlbums(result.albums));
    } catch (error) {
      console.log('error', error);
    }
  };
};
export const initiateLoadMoreArtists = (url) => {
  return async (dispatch) => {
    try {
      console.log('url', url);
      const result = await get(url);
      console.log('categoriess', result);
      return dispatch(addArtists(result.artists));
    } catch (error) {
      console.log('error', error);
    }
  };
};
export const initiateLoadMorePlaylist = (url) => {
  return async (dispatch) => {
    try {
      console.log('url', url);
      const result = await get(url);
      console.log('categoriess', result);
      return dispatch(addPlaylist(result.playlists));
    } catch (error) {
      console.log('error', error);
    }
  };
};
and import these functions inside the Dashboard.js file at the top
并将这些函数导入顶部的Dashboard.js文件中
import {
  initiateGetResult,
  initiateLoadMoreAlbums,
  initiateLoadMorePlaylist,
  initiateLoadMoreArtists
} from '../actions/result';
Now, run the yarn start command and check the load more functionality
现在,运行yarn start命令并检查load more功能
You can find code until this point in this branch
您可以在此分支中找到此代码
会话超时时重定向到登录页面(Redirect to the login page on session timeout)
Now, we’re done with the functionality of the app. Let’s add the code to automatically redirect to the login page and show the message of the session expired when the access token is expired. This is because, if the session is expired then the API call will fail but the user will not know about it until the user opens the devtool console to see the error.
现在,我们已经完成了应用程序的功能。 让我们添加代码以自动重定向到登录页面,并显示访问令牌过期时会话消息已过期。 这是因为,如果会话到期,则API调用将失败,但用户将不知道它,直到用户打开devtool控制台以查看错误。
If you recollect, in the RedirectPage.js file, we have added expiry_time in the local storage with the following code
如果您回想一下,在RedirectPage.js文件中,我们使用以下代码在本地存储中添加了expiry_time
const expiryTime = new Date().getTime() + access_token.expires_in * 1000;
localStorage.setItem('expiry_time', expiryTime);
Now, let’s use this to identify when to redirect to the login page.
现在,让我们用它来确定何时重定向到登录页面。
Open AppRouter.js file and replace it with the following contents:
打开AppRouter.js文件,并将其替换为以下内容:
import React from 'react';
import { BrowserRouter, Route, Switch } from 'react-router-dom';
import Home from '../components/Home';
import RedirectPage from '../components/RedirectPage';
import Dashboard from '../components/Dashboard';
import NotFoundPage from '../components/NotFoundPage';
class AppRouter extends React.Component {
  state = {
    expiryTime: '0'
  };
  componentDidMount() {
    let expiryTime;
    try {
      expiryTime = JSON.parse(localStorage.getItem('expiry_time'));
    } catch (error) {
      expiryTime = '0';
    }
    this.setState({ expiryTime });
  }
  setExpiryTime = (expiryTime) => {
    this.setState({ expiryTime });
  };
  isValidSession = () => {
    const currentTime = new Date().getTime();
    const expiryTime = this.state.expiryTime;
    const isSessionValid = currentTime < expiryTime;    return isSessionValid;
  };
  render() {
    return (
      <BrowserRouter>
        <div className="main">
          <Switch>
            <Route path="/" component={Home} exact={true} />
            <Route path="/redirect" component={RedirectPage} />
            <Route path="/dashboard" component={Dashboard} />
            <Route component={NotFoundPage} />
          </Switch>
        </div>
      </BrowserRouter>
    );
  }
}
export default AppRouter;
In this file, we have added a state variable expiryTime initialized to 0 by default and in the componentDidMount method, we’re reading the expiry_time value from the local storage and assigning it to the state.
在此文件中,我们添加了状态变量expiryTime (默认情况下初始化为0 ,并且在componentDidMount方法中,我们从本地存储读取expiry_time值并将其分配给状态。
We also added a setExpiryTime and isValidSession functions so we can use it in other components.
我们还添加了setExpiryTime和isValidSession函数,以便可以在其他组件中使用它。
Now, open RedirectPage.js file and before calling history.push('/dashboard'); add the following line of code
现在,打开RedirectPage.js文件,并在调用history.push('/dashboard'); 添加以下代码行
setExpiryTime(expiryTime);But to call this function, we need to pass it as a prop to the RedirectPage component.
但是要调用此函数,我们需要将它作为道具传递给RedirectPage组件。
If you check the render method of the AppRouter component, it looks like this:
如果检查AppRouter组件的render方法,则如下所示:
render() {
  return (
    <BrowserRouter>
      <div className="main">
        <Switch>
          <Route path="/" component={Home} exact={true} />
          <Route path="/redirect" component={RedirectPage} />
          <Route path="/dashboard" component={Dashboard} />
          <Route component={NotFoundPage} />
        </Switch>
      </div>
    </BrowserRouter>
  );
}
So to pass the setExpiryTime function as a prop to the RedirectPage component, we need to convert it to the render prop pattern.
因此,要将setExpiryTime函数作为道具传递给RedirectPage组件,我们需要将其转换为呈现道具模式。
Therefore, change the below line of code
因此,更改下面的代码行
<Route path="/redirect" component={RedirectPage} />to this code:
此代码:
<Route
  path="/redirect"
  render={(props) => (
    <RedirectPage
      isValidSession={this.isValidSession}
      setExpiryTime={this.setExpiryTime}
      {...props}
    />
  )}
/>
Here, we’re passing the setExpiryTime , isValidSession function as a prop and also spreading out the props which are automatically passed to the Route like location, history.
在这里,我们将setExpiryTime和isValidSession函数作为道具传递,并且还展开了像location , history一样自动传递给Route的道具。
Now, open the Dashboard.js file and destructure the props and change the handleSearch function to this:
现在,打开Dashboard.js文件并解构道具并将handleSearch函数更改为:
const { isValidSession, history } = props;
const handleSearch = (searchTerm) => {
  if (isValidSession()) {
    setIsLoading(true);
    props.dispatch(initiateGetResult(searchTerm)).then(() => {
      setIsLoading(false);
      setSelectedCategory('albums');
    });
  } else {
    history.push({
      pathname: '/',
      state: {
        session_expired: true
      }
    });
  }
};
Also, change the loadMore function to this:
另外,将loadMore函数更改为此:
const loadMore = async (type) => {
  if (isValidSession()) {
    const { dispatch, albums, artists, playlist } = props;
    setIsLoading(true);
    switch (type) {
      case 'albums':
        await dispatch(initiateLoadMoreAlbums(albums.next));
        break;
      case 'artists':
        await dispatch(initiateLoadMoreArtists(artists.next));
        break;
      case 'playlist':
        await dispatch(initiateLoadMorePlaylist(playlist.next));
        break;
      default:
    }
    setIsLoading(false);
  } else {
    history.push({
      pathname: '/',
      state: {
        session_expired: true
      }
    });
  }
};
Change the returned JSX from the Dashboard component to this:
将返回的JSX从Dashboard组件更改为此:
return (
  <React.Fragment>
    {isValidSession() ? (
      <div>
        <Header />
        <SearchForm handleSearch={handleSearch} />
        <Loader show={isLoading}>Loading...</Loader>
        <SearchResult
          result={result}
          loadMore={loadMore}
          setCategory={setCategory}
          selectedCategory={selectedCategory}
          isValidSession={isValidSession}
        />
      </div>
    ) : (
      <Redirect
        to={{
          pathname: '/',
          state: {
            session_expired: true
          }
        }}
      />
    )}
  </React.Fragment>
);
Also, import the Redirect component at the top:
另外,在顶部导入Redirect组件:
import { Redirect } from 'react-router-dom';Open SearchResult.js file and before returning the JSX, add the following code:
打开SearchResult.js文件,并在返回JSX之前,添加以下代码:
if (!isValidSession()) {
  return (
    <Redirect
      to={{
        pathname: '/',
        state: {
          session_expired: true
        }
      }}
    />
  );
}
Also, destructure the isValidSession from props and add the Redirect component from the react-router-dom.
另外,从props解构isValidSession ,并从react-router-dom添加Redirect组件。
Now, open the Home.js file and replace it with the following contents:
现在,打开Home.js文件,并将其替换为以下内容:
import React from 'react';
import { Alert } from 'react-bootstrap';
import { connect } from 'react-redux';
import { Button } from 'react-bootstrap';
import Header from './Header';
import { Redirect } from 'react-router-dom';
const Home = (props) => {
const {
REACT_APP_CLIENT_ID,
REACT_APP_AUTHORIZE_URL,
REACT_APP_REDIRECT_URL
} = process.env;
const handleLogin = () => {
window.location = `${REACT_APP_AUTHORIZE_URL}?client_id=${REACT_APP_CLIENT_ID}&redirect_uri=${REACT_APP_REDIRECT_URL}&response_type=token&show_dialog=true`;
};
const { isValidSession, location } = props;
const { state } = location;
const sessionExpired = state && state.session_expired; return (
<React.Fragment>
{isValidSession() ? (
<Redirect to="/dashboard" />
) : (
<div className="login">
<Header />
{sessionExpired && (
<Alert variant="info">Session expired. Please login again.</Alert>
)}
<Button variant="info" type="submit" onClick={handleLogin}>
Login to spotify
</Button>
</div>
)}
</React.Fragment>
);
};
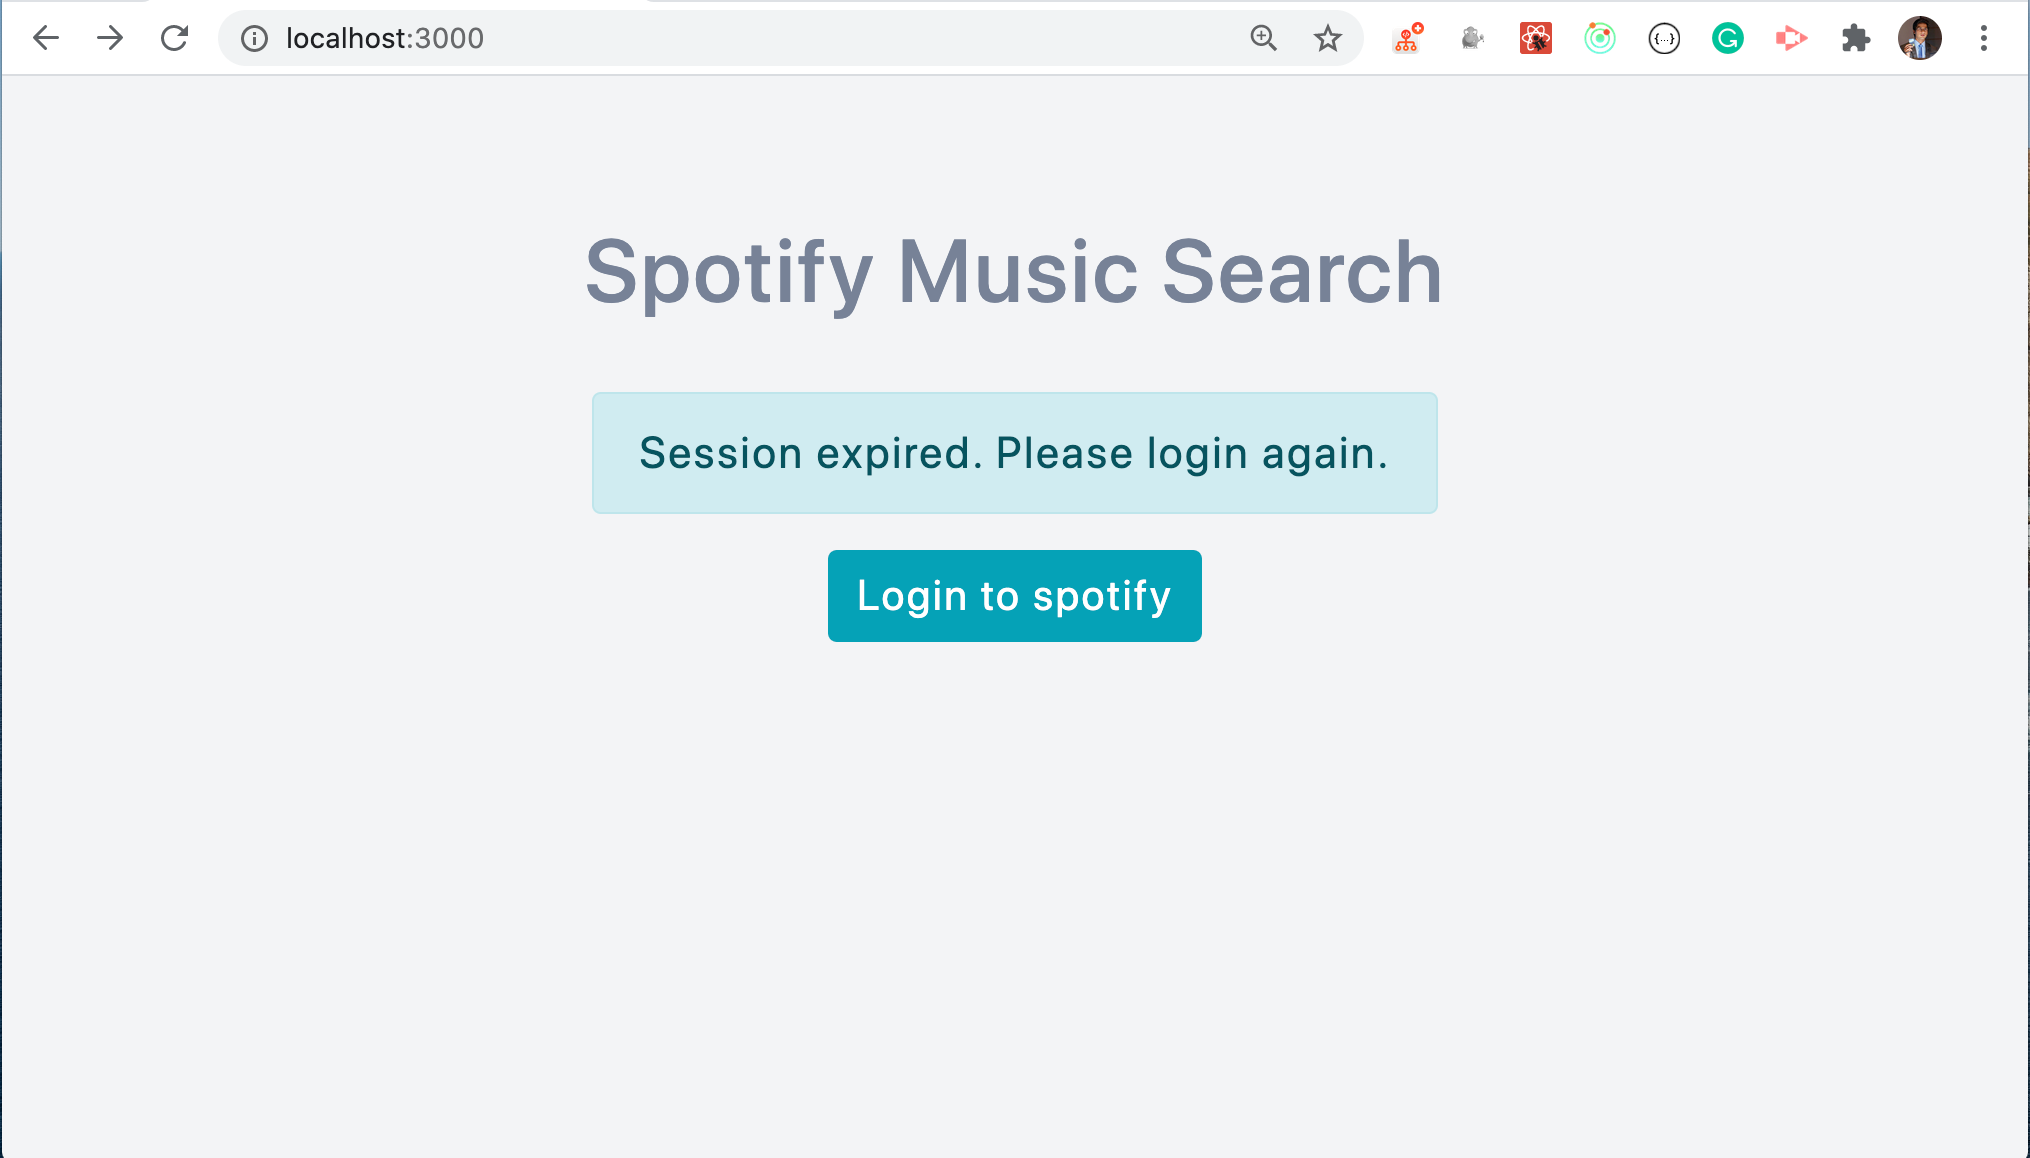
export default connect()(Home);Here, we have the code to redirect to /dashboard page if the session is valid otherwise redirected to the login page. Also displayed the message of session expired so the user will get an idea of why the page is redirected to the login page.
在这里,如果会话有效,我们将具有重定向到/dashboard页面的代码,否则将重定向到登录页面。 还显示会话已过期的消息,因此用户将了解为什么页面被重定向到登录页面。
{sessionExpired && (
  <Alert variant="info">Session expired. Please login again.</Alert>
)}
Now, open the AppRouter.js file and pass the isValidSession function to the Home and Dashboard route.
现在,打开AppRouter.js文件,并将isValidSession函数传递到Home和Dashboard路由。
render() {
  return (
    <BrowserRouter>
      <div className="main">
        <Switch>
          <Route
            path="/"
            exact={true}
            render={(props) => (
              <Home isValidSession={this.isValidSession} {...props} />
            )}
          />
          <Route
            path="/redirect"
            render={(props) => (
              <RedirectPage
                isValidSession={this.isValidSession}
                setExpiryTime={this.setExpiryTime}
                {...props}
              />
            )}
          />
          <Route
            path="/dashboard"
            render={(props) => (
              <Dashboard isValidSession={this.isValidSession} {...props} />
            )}
          />
          <Route component={NotFoundPage} />
        </Switch>
      </div>
    </BrowserRouter>
  );
}
You will see the following screen once the session is timed out.
会话超时后,您将看到以下屏幕。
You can find code until this point in this branch.
您可以在此分支中找到此代码。
结论 (Conclusion)
You have now finished creating a Spotify Music Search App using React. You can find the complete source code for this application here
您现在已完成使用React创建Spotify音乐搜索应用程序。 您可以在这里找到此应用程序的完整源代码
Don’t forget to subscribe to get my weekly newsletter with amazing tips, tricks and articles directly in your inbox here.
不要忘记订阅,直接在这里的收件箱中获取我的每周新闻,其中包含惊人的提示,技巧和文章。
翻译自: https://levelup.gitconnected.com/how-to-create-a-spotify-music-search-app-in-react-1d71c8007e45
创建react应用程序


 1854
1854


 被折叠的 条评论
为什么被折叠?
被折叠的 条评论
为什么被折叠?
 到【灌水乐园】发言


