


入门教程
Hello there, welcome back! Thank you for stopping by! In this article, we will add super cool looking parallax scrolling effects to an existing mock-up of a single page application or SPA. The SPA was built with React.js and uses components from react-materialize, and was styled with materialize-css.
您好,欢迎回来! 谢谢您的光临! 在本文中,我们将为单页应用程序或SPA的现有模型添加超酷的视差滚动效果。 SPA使用React.js构建,并使用react-materialize中的组件,并使用materialize-css进行样式设置。
I recently learned about materialize-css and wanted to see how I could use it in a react app. I researched a bit and found react-materialize that helps me do just that.
我最近了解了materialize-css,并想看看如何在react应用程序中使用它。 我研究了一下,发现实现React可以帮助我做到这一点。
什么是materialize-css? (What is materialize-css?)
MaterializeA modern responsive front-end framework based on Material DesignBy utilizing elements and principles of Material Design, we were able to create a framework that incorporates components and animations that provide more feedback to users. Additionally, a single underlying responsive system across all platforms allow for a more unified user experience.
Materialize基于Material Design的现代响应式前端框架通过利用Material Design的元素和原理,我们能够创建一个框架,该框架结合了可以向用户提供更多反馈的组件和动画。 此外,跨所有平台的单个基础响应系统可提供更统一的用户体验。
什么是React物化? (What is react-materialize?)
From the creators and documentation:
来自创作者和文档:
The main goal of this project is to provide react components for materializecss.You should use React Materialize if you want to use materialize-css components in your react application.This is only a wrapper around materialize-css for ease of use.
该项目的主要目标是为实现提供React组件。 如果要在React应用程序中使用materialize-css组件,则应使用React Materialize。这只是为便于使用而包装的materialize-css。
我们走吧! (Let’s go!)
To use the frameworks you can use either CDN or NPM methods.
要使用框架,可以使用CDN或NPM方法。
// Materialize CSS// NMP method
npm install materialize-css@next// CDN method
// This should go in the header tag
// Compiled and minified CSS<link rel="stylesheet" href="https://cdnjs.cloudflare.com/ajax/libs/materialize/1.0.0/css/materialize.min.css">// This should go at the bottom of the body tag.
// Compiled and minified JavaScript
<script src="https://cdnjs.cloudflare.com/ajax/libs/materialize/1.0.0/js/materialize.min.js"></script>
应用程式 (The App)
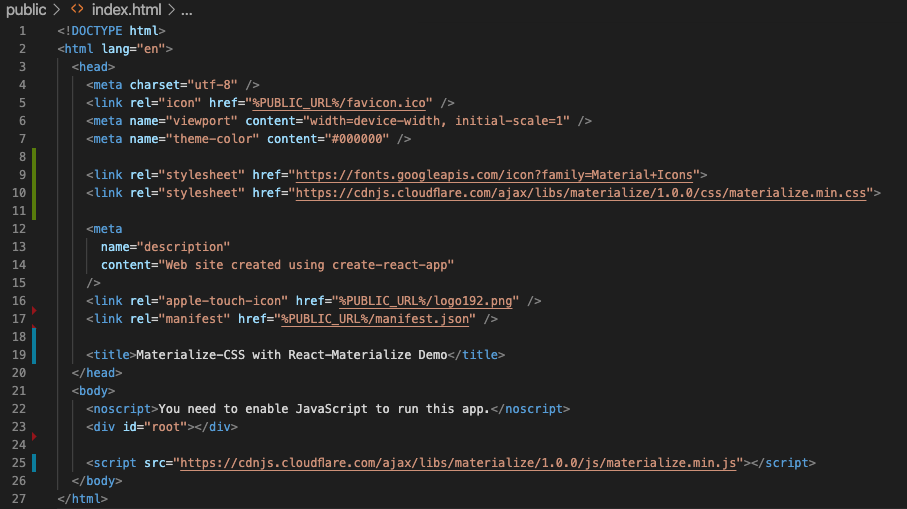
In this example, we used both methods to get it all working. We installed materialize-css using npm and in our index.html file, we included the <link> tags in the <head> (lines 9 and 10)and the <script> at the bottom of the <body> tag (line 25).
在此示例中,我们使用了两种方法来使其全部正常工作。 我们使用npm安装了materialize-css并在我们的index.html文件中,在<head> (第9和10行)中包含了<link>标签,在<body>标签的底部(第25行)中包含了<script> 。 )。
Photo credits for all photos used in this example.
此示例中使用的所有照片的图片来源。
James Wheeler from Pexels
Paul IJsendoorn from Pexels
Fabian Wiktor from Pexels
Tobias Bjørkli from Pexels
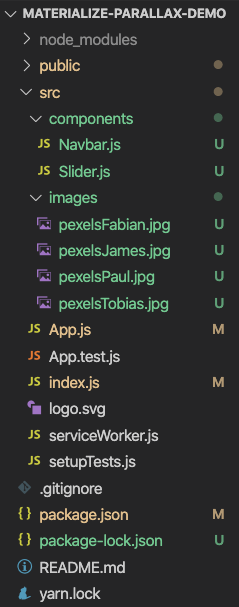
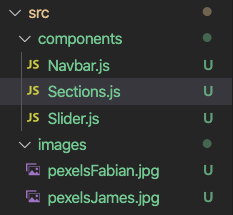
Our App was bootstrapped using the create-react-app your-app-name command and has two components. A Navbar and a Slider. The components are in their own directory named components and there is also a directory for the images we will be using. Notice there is no CSS file in our file tree.
我们的应用是使用create-react-app your-app-name命令引导的,它具有两个组件。 Navbar和Slider 。 这些组件位于它们自己的名为“ components的目录中,还有一个目录供我们使用。 请注意,我们的文件树中没有CSS文件。
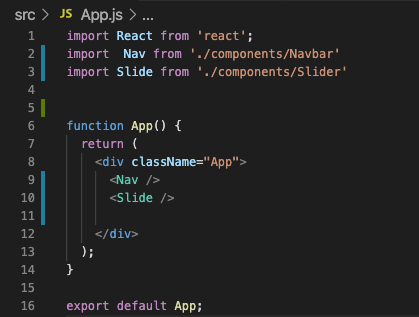
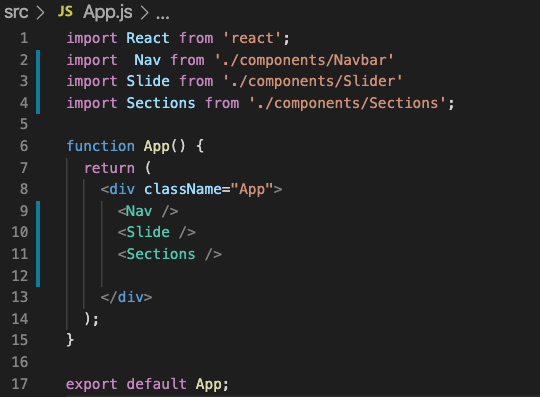
Our components are fairly simple. This is in App.js
我们的组件非常简单。 这在App.js中
Here is the Navbarcomponent.
这是Navbar组件。
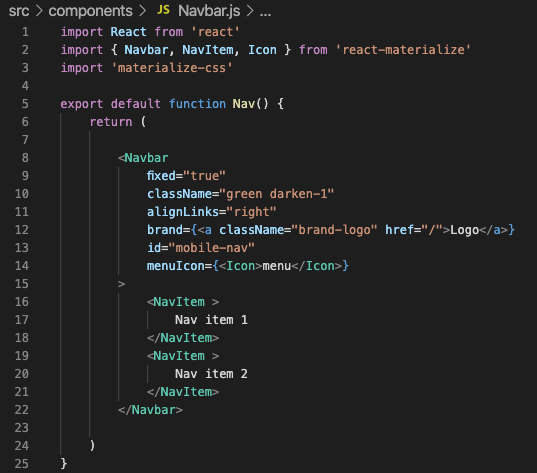
Here we start using our react-materialize components. In line 2 above, we import all the components we will be using. In line 3, we simply import materialize-css to make our styles and components available. With react-materialize, we access styles and components via the className= attribute. Each component will have a set of attributes you can use to modify the style and functionality of your components. Line 10 above sets our Nav bar to be green and uses the option darken-1 to modify the default color. These range from darken-1 to darken-5 there is also a lighten- option you can use. Be sure to check out the documentation to see the APIs and example code.
在这里,我们开始使用react-materialize组件。 在上面的第2行中,我们导入了将要使用的所有组件。 在第3行中,我们只需导入materialize-css即可使用我们的样式和组件。 使用react-materialize ,我们可以通过className=属性访问样式和组件。 每个组件都有一组属性,可用于修改组件的样式和功能。 上方的第10行将导航栏设置为绿色,并使用选项darken-1修改了默认颜色。 这些范围从变暗1到变暗5,您还可以使用一个变亮选项。 请务必查看文档以查看API和示例代码。
Here is the Slider component. I have only written functions that initialize effects. Like the sliding of images in our Slider component (lines 9 to 12 below).
这是Slider组件。 我只有编写初始化效果的函数。 就像在Slider组件中滑动图像一样(下面的9至12行)。
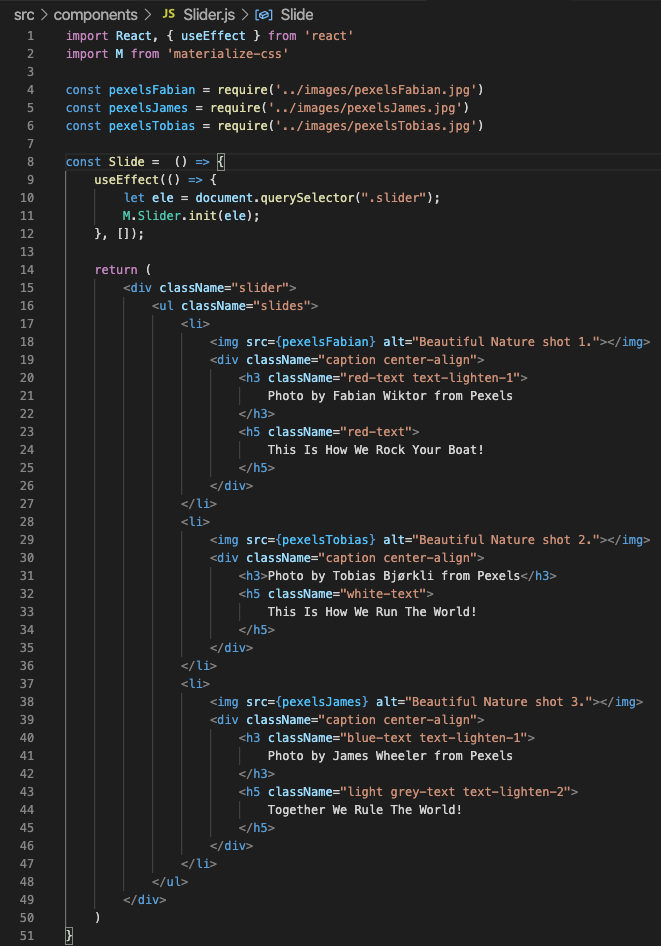
Composing the slider itself is fairly simple too. We start with a <div> with a className of “slider”(line 15 above) then inside of the “slider” <div> we add an unordered list using a <ul> tag(line 16 above). Inside the list, we wrap the items to be displayed in the slider with<li> tags(lines 17 and 27) This is one slide if you need more you rinse and repeat. Note that the image is required for each slide in the slider.
组成滑块本身也非常简单。 我们从className为“ slider”的<div>开始(上面的第15行),然后在“ slider” <div>内部,使用<ul>标记添加一个无序列表(上面的第16行)。 在列表内部,我们用<li>标签包装要显示在滑块中的项目(第17和27行)。如果您需要更多冲洗和重复操作,则这是一张幻灯片。 请注意,滑块中的每个幻灯片都需要图像。
So in this component, we have 3 list items, each one with its own image and text. You can definitely make this more dynamic when you have a DB or more items for the slider but I just added them manually for this example.
因此,在此组件中,我们有3个列表项,每个列表项都有自己的图像和文本。 当您有一个或多个滑块的项目时,您绝对可以使此过程更加动态,但是在此示例中,我只是手动添加了它们。
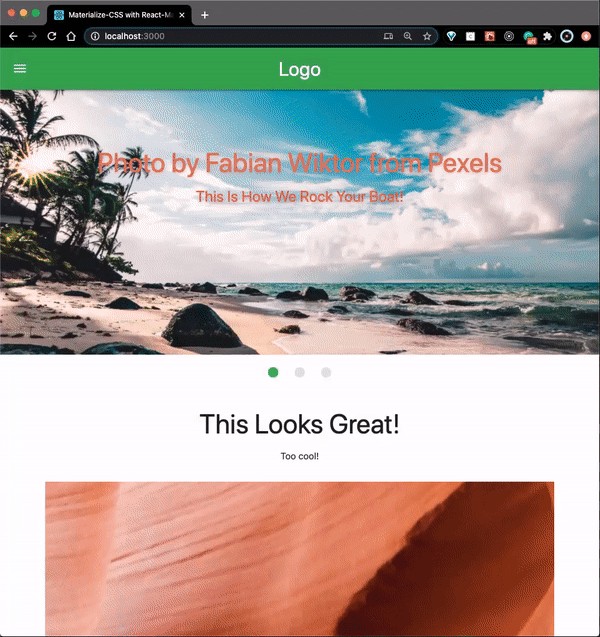
Currently, this is what our application looks like.
当前,这就是我们的应用程序的外观。
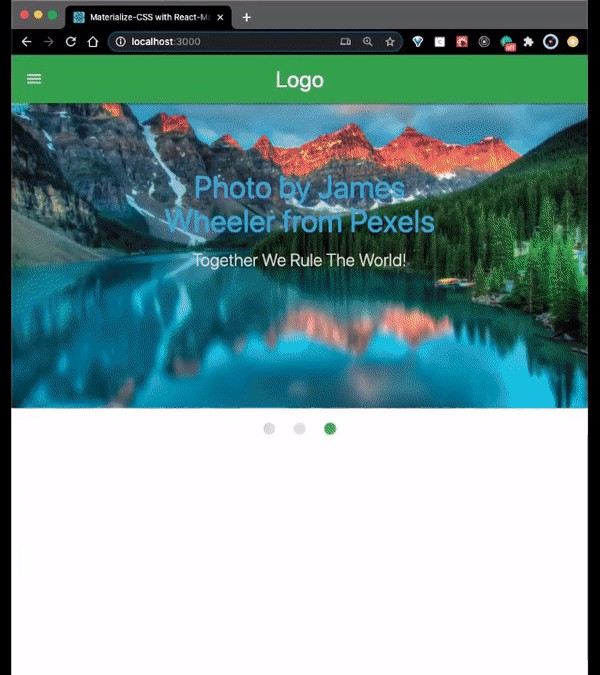
It looks pretty cool considering we haven’t done much to it. Now let’s make this really cool.
考虑到我们还没有做很多事情,它看起来很酷。 现在,让它变得非常酷。
视差效果 (The Parallax Effect)
No, sorry it really doesn’t involve magical kitties. The parallax scrolling effect in web development is when an image in the background moves at a different speed than that of the foreground when the user takes an action on the screen like scrolling up or down. This gives the viewer a sense of depth and 3D feel which is super dope in my opinion. It makes sites look much more professional and engaging.
不,对不起,它确实不包含魔法小猫。 Web开发中的视差滚动效果是当用户在屏幕上进行向上或向下滚动等操作时,背景中的图像以与前景不同的速度移动。 这给观看者一种深度感和3D感觉,在我看来这是超级完美的体验。 它使网站看起来更加专业和有吸引力。
All right so how do we do this?!
好吧,我们该怎么做呢?
We’ll start by adding a new file in our components directory called Sections.js in which we will write our code.
首先,在components目录中添加一个名为Sections.js的新文件,在该文件中编写代码。
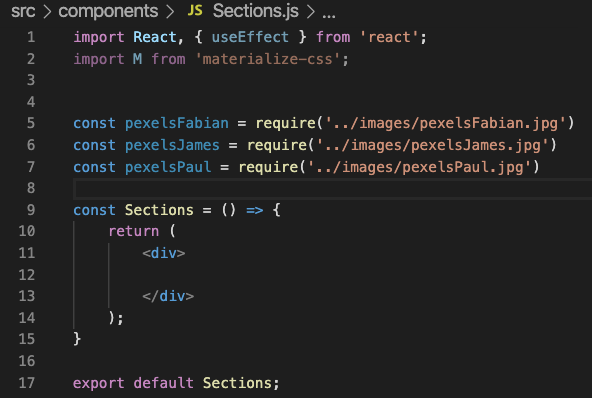
Now, we go through our imports and stub out a functional component.
现在,我们完成导入,并存入一个功能组件。
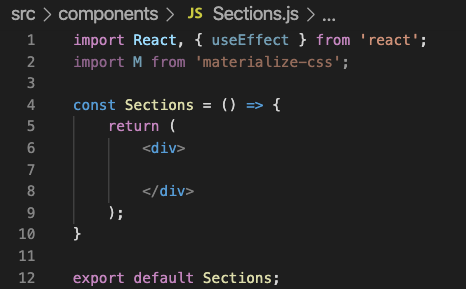
Notice how we used a variable M this time when importing materialize-css. This is because we will need to initialize our effects as we did in the Slider component.
注意,这次我们在导入materialize-css时是如何使用变量M 。 这是因为我们需要像在Slider组件中一样初始化效果。
We are going to need some images so we create some variables for them.
我们将需要一些图像,因此我们为它们创建了一些变量。
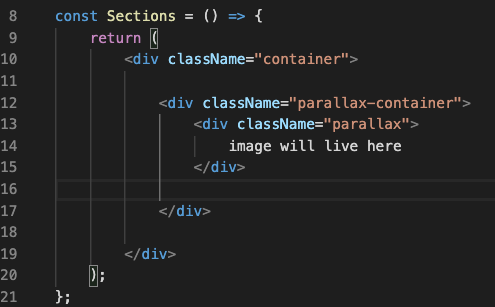
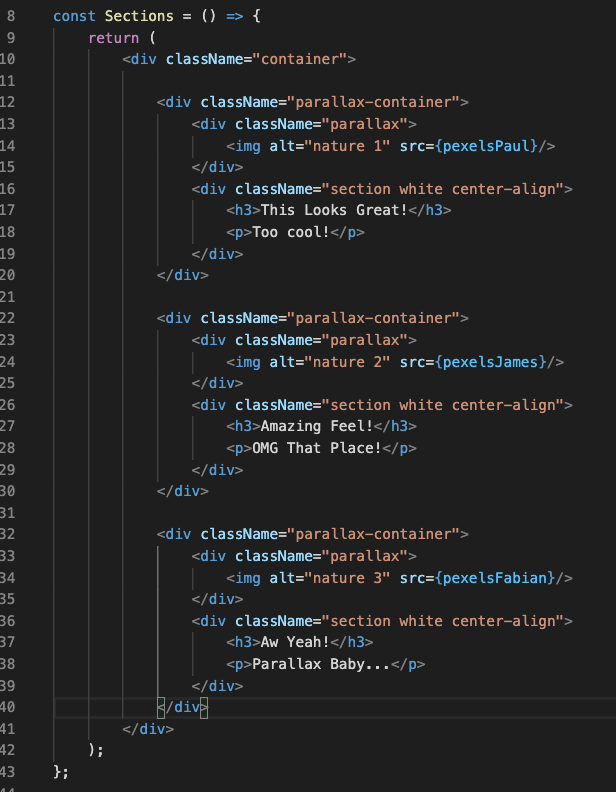
With this, we are ready to start working on our parallax. Parallax scrolling looks best when there are multiple elements together. That said, each parallax item must be wrapped by its own parallax-container and all parallax-containers must be inside a container.
这样,我们就可以开始研究视差了。 当多个元素在一起时,视差滚动效果最佳。 就是说,每个视差物品必须由其自己的parallax-container包装,并且所有parallax-containers必须位于container 。
Right, so we give the first <div> a className="container" attribute to achieve this. Then we continue by adding the first parallax-container <div>. Inside of that, we add the parallax <div> which will hold the image. Below that we need a section to separate the images and display some content.
正确,因此我们给第一个<div>一个className="container"属性以实现此目的。 然后,我们继续添加第一个parallax-container <div> 。 在其中,我们添加了将保存图像的parallax <div> 。 在其下方,我们需要一个部分来分离图像并显示一些内容。
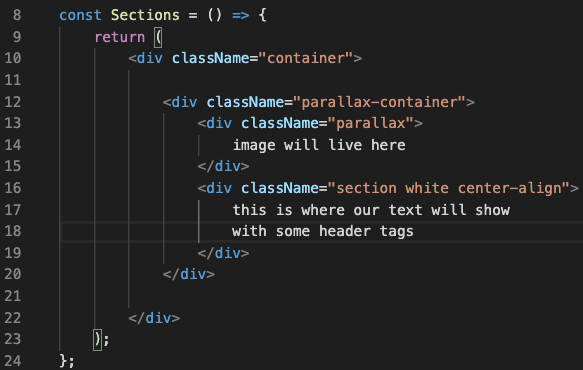
Now, we add the needed section that will hold the text content that will display between individual parallax images. We want the section to have a white background and display our text nice and centered. To do that we use another <div>and give it a className="section white center-align'.
现在,我们添加需要的部分,该部分将保存将在各个视差图像之间显示的文本内容。 我们希望该部分具有白色背景,并以优美且居中的方式显示文本。 为此,我们使用另一个<div>并给它一个className="section white center-align' 。
Now, we can add our image and text.
现在,我们可以添加图像和文本。
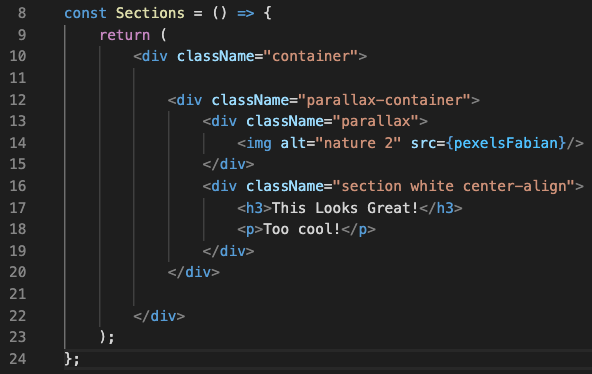
As you can see above, lines 12 through 20 are one single parallax-container, we need multiple to get the effect we want so now we can just copy and paste this for each image we have or if we wanted to get fancy we could write a function to iterate over all our images and return a parallax for each one. For this example, we are just going to copy-paste since we only have three images.
如您在上方看到的,第12到20行是一个parallax-container ,我们需要多个才能获得想要的效果,所以现在我们可以为每张图像复制并粘贴该图像,或者如果我们想花哨的话可以编写遍历我们所有图像并为每个图像返回视差的函数。 对于此示例,我们将仅复制粘贴,因为我们只有三个图像。
All we need to do now is make sure we are initializing all our parallax items when the component mounts. Since we are using a functional component, we will use the useEffect() hook from React. To make this hook behave like the componentDidMount() lifecycle method, we pass it an empty array as a second argument. This empty array indicates that it will only run once when the component mounts.
现在我们需要做的就是确保在安装组件时初始化所有视差项。 由于我们使用的是功能组件,因此我们将使用React的useEffect()钩子。 为了使此挂钩的行为类似于componentDidMount()生命周期方法,我们将其传递给一个空数组作为第二个参数。 此空数组表示仅在安装组件时运行一次。

On line 11 above, we are grabbing all elements in our document with a class of “.parallax” and assigning them to the element variable. We then use the M variable to call on the Parallax.init() function provided by materialize-css. We take each element and pass it to this function so they are initialized.
在上面的第11行,我们使用“ .parallax”类捕获文档中的所有元素,并将其分配给element变量。 然后,我们使用M变量来调用materialize-css提供的Parallax.init()函数。 我们将每个element传递给此函数,以便对其进行初始化。
All right, we are nearly there!!
好吧,我们快到了!!
Now, we just need to import our component in App.js and see our work in action!
现在,我们只需要在App.js导入我们的组件并查看我们的工作即可!
Behold, The Parallax Effect!
看,视差效果!
I hope you enjoyed that as much as I did! If you found this helpful, interesting, or amusing I’d love to hear your thoughts in the comments. Stay healthy, stay curious.
希望您能像我一样喜欢它! 如果您觉得这有帮助,有趣或有趣,请在评论中听听您的想法。 保持健康,保持好奇心。
翻译自: https://medium.com/swlh/getting-started-with-7186a946f513
入门教程


 被折叠的 条评论
为什么被折叠?
被折叠的 条评论
为什么被折叠?
 到【灌水乐园】发言


