


 本文介绍了一种通过Python,Google表格和Google Cloud为Tableau Public构建自动数据刷新管道的方法,适用于需要频繁更新数据的Tableau仪表盘。
bottom sheets
This post walks through the steps needed to build an automated data refresh pipeline for Tableau Public through python, Google Sheets, and Google Cloud. In a previous post Auto Refreshing Tableau Public, I explained how to connect a Tableau Public workbook to Google Sheets to take advantage of the daily Tableau Public-Google Sheet refresh. I described how to schedule a launch daemon locally to update the data contained within the Google Sheet, thereby refreshing the data in the connected Tableau Public workbook. While this setup works well for relatively infrequent refresh cycles, it does not work well for data that needs to be updated daily (or more frequently). The setup detailed below solves for this problem to create a truly automated data refresh procedure.
本文介绍了通过python,Google表格和Google Cloud为Tableau Public构建自动数据刷新管道所需的步骤。 在上一篇文章《 自动刷新Tableau Public》中 ,我解释了如何将Tableau Public工作簿连接到Google Sheets,以利用Tableau Public-Google Sheet的每日刷新。 我描述了如何在本地计划启动守护程序以更新Google表格中包含的数据,从而刷新连接的Tableau Public工作簿中的数据。 虽然此设置在相对不频繁的刷新周期中效果很好,但是对于每天(或更频繁)需要更新的数据来说效果并不理想。 下面详细介绍的设置解决了此问题,从而创建了真正的自动化数据刷新过程。
为什么要自动化刷新管道? (Why should you automate your refresh pipeline?)
While I was pretty pleased with my original data refresh approach to update the Premier League table every week, I’ve since built Tableau dashboards that needed to be updated more frequently. For my MLB Batting Average Projection Tool, I needed to refresh the data on a daily basis for it to be relevant. Opening my personal computer every single day of the MLB season wasn’t a great option, so I started looking around for a reliable task scheduling approach. I ultimately settled on the workflow below:
虽然我对每周更新英超联赛表的原始数据刷新方法感到非常满意,但此后我建立了Tableau仪表盘,该仪表盘需要更频繁地更新。 对于我的MLB击球平均预测工具 ,我需要每天刷新一次数据才能使它有意义。 在MLB赛季的每一天都没有打开我的个人计算机的选择,所以我开始寻找一种可靠的任务调度方法。 我最终选择了以下工作流程:
- Schedule an instance to run using Google Cloud Scheduler 安排实例使用Google Cloud Scheduler运行
Kick off a cron job within the instance to run my code to pull the updated data and load it to Google Sheets
启动实例中的cron作业以运行我的代码以提取更新的数据并将其加载到Google表格中
- Schedule the instance to stop running using Google Cloud Scheduler (to save money since it only really needs to be on for five minutes a day) 使用Google Cloud Scheduler安排实例停止运行(以节省资金,因为它实际上只需要每天打开五分钟)
I considered using Google Cloud Scheduler to execute the script directly, instead of using cron in the instance, but I like having the instance to ssh into and I was already familiar with using a virtual instance, so it was the path of least resistance. I also considered using Airflow, which I use at work, but it would have required a similar scheduling setup and an extra layer of deployment with the web server. However, I am in the process of transitioning this process to Airflow, so I can more easily schedule new jobs in the future and will update with a follow-on post once complete.
我考虑过使用Google Cloud Scheduler直接执行脚本,而不是在实例中使用cron,但是我喜欢将实例ssh放入其中,而且我已经熟悉使用虚拟实例,因此这是阻力最小的途径。 我还考虑过使用工作中使用的Airflow,但它需要类似的计划设置和Web服务器的额外部署层。 但是,我正在将该流程转换为Airflow,因此我可以更轻松地安排将来的新工作,并在完成后更新后续工作。
Google Cloud入门 (Getting started with Google Cloud)
If you’re setting up Google Cloud for the first time, I’d recommend following this guide. First time users on Google Cloud get a $300 credit for the first year, though you must enable billing and fill in credit card information to use it. You can also use Google Cloud’s free tier, which has usage limits. The free tier limits your available memory and processing power, but you should certainly have enough to perform basic operations. I use the second smallest tier instance size for this script, but it’s very cheap since I only run this for 5 minutes a day.
如果您是首次设置Google Cloud,建议您遵循本指南 。 首次使用Google Cloud的用户在第一年会获得$ 300的信用额,尽管您必须启用结算功能并填写信用卡信息才能使用。 您还可以使用Google Cloud的免费套餐 ,该套餐有使用限制。 免费层限制了您的可用内存和处理能力,但是您当然应该有足够的能力来执行基本操作。 我为此脚本使用了第二小的层实例大小,但是它非常便宜,因为我每天只运行5分钟。
创建一个实例 (Creating an instance)
I use the same instance each time so I can store my code for repeated use. There is probably a better way to do it, but this was the most straightforward method way for me. To move code between my local machine and the instance, I use GitHub. Obviously GitHub makes version control easier, but it’s also a much simpler way to move code than scp-ing (secure copying) from my local machine to the instance each time I need to update the script.
我每次都使用相同的实例,因此我可以存储代码以供重复使用。 可能有更好的方法,但这对我来说是最直接的方法。 为了在本地计算机和实例之间移动代码,我使用GitHub。 显然,GitHub使版本控制变得更加容易,但是,这比每次需要更新脚本时将代码从本地计算机上的scp(安全复制)移动到实例的方法要简单得多。
建立专案 (Creating a project)
To get started, you’ll first need to create a new project, since Google Cloud organizes everything within projects. To create a new project, go to the project page and click “create project”. You can name it whatever you want, but make sure it’s something easy to type in case you end up referencing it from command line. After you’ve set up your project, you’ll probably want to enable the Compute Engine API. Go to your project’s console (the home page for your project — to get there click Google Cloud Platform in the upper left) and click on APIs. At the top of the next screen, click “Enable APIs and Services”, then search for the Compute Engine API and add it.
首先,您首先需要创建一个新项目,因为Google Cloud会组织项目中的所有内容。 要创建一个新项目,请转到项目页面 ,然后单击“创建项目”。 您可以随意命名,但要确保它易于输入,以防最终从命令行引用它。 设置完项目后,您可能需要启用Compute Engine API。 转到项目的控制台(项目的主页-要到达那里,请单击左上角的Google Cloud Platform),然后单击API。 在下一个屏幕的顶部,单击“启用API和服务”,然后搜索Compute Engine API并将其添加。
启动实例 (Launching an instance)
After enabling the API, you can navigate back to console and click on the “Go to Compute Engine” link (if it doesn’t appear, click on the sidebar icon in the upper left, scroll down and click on Compute Engine). When you land in the Compute Engine, you’ll have the option to create an instance. Click “Create” to create your instance. You can give your instance a name (again, preferably an easy one to type), then select a region and availability zone. These are the Google Cloud server locations where you can host your virtual machine. The typical guidance is to choose a region close to you, but I don’t think it matters that much. Your zone selection isn’t particularly important either. However, when you go to launch your instance, it will launch in that region, zone combination by default. You can move it across zones in case your default zone is down (which happens occasionally), but I’ve never needed this option.
启用API后,您可以导航回控制台并单击“转到Compute Engine”链接(如果未出现,请单击左上方的侧边栏图标,向下滚动并单击Compute Engine)。 进入Compute Engine时,您可以选择创建实例。 单击“创建”以创建您的实例。 您可以为您的实例命名(同样,最好输入一个简单的名称),然后选择一个区域和可用区。 这些是您可以托管虚拟机的Google Cloud服务器位置。 典型的指导是选择一个区域靠近你,但我不认为它很重要那么多 。 您对区域的选择也不是特别重要。 但是, 当您启动实例时,它将在该区域(默认为区域组合)中启动 。 您可以在默认区域关闭的情况下跨区域移动它(偶尔发生),但是我从来不需要此选项。
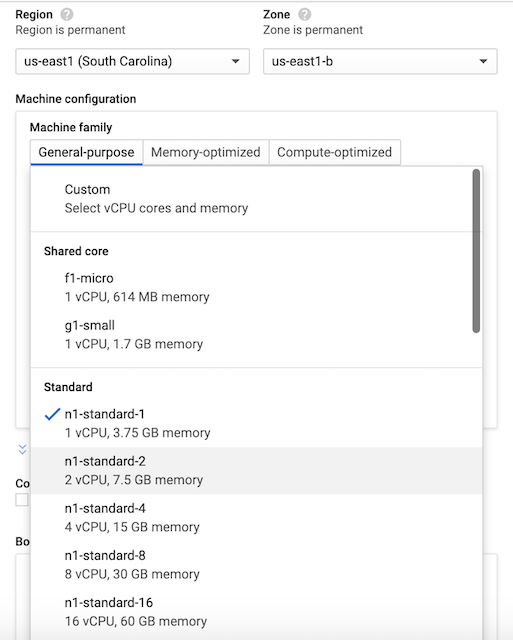
After selecting your region and zone, you’ll select your instance type. I use the series N1, machine-type g1-small. There are a whole bunch of options based on your computing needs. The g1-small has served me well for this and other efforts so I’ve kept it!
选择区域和区域后,您将选择实例类型。 我使用系列N1,机器类型g1-small。 根据您的计算需求,有很多选择。 g1-small在这项工作和其他工作上对我很有帮助,所以我一直坚持下去!
From there, you’ll want to click “Allow full access to Cloud APIs” under Access Scopes. This will ensure your instance can be scheduled to start and stop. Lastly, you’ll want to allow HTTP and HTTPS traffic. You’ll need them to run a script that gets data from somewhere, then stores it in Google Sheets. You can change these options later, but it’s easier to set them up from the start. Once your instance is set up, you can launch it by clicking on the instance, then hitting start!
在此处,您将要单击“访问范围”下的“允许完全访问Cloud API”。 这将确保可以安排您的实例启动和停止。 最后,您需要允许HTTP和HTTPS通信。 您需要他们运行一个脚本,该脚本从某个地方获取数据,然后将其存储在Google表格中。 您可以稍后更改这些选项,但是从一开始就更容易设置它们。 设置好实例后,可以通过单击实例然后单击开始来启动它!
设置您的实例 (Setting up your instance)
To connect to your instance, you can either open the connection in a new window, follow one of the other options to open it in browser, use another ssh client, or connect through gcloud (the Google Cloud command line interface).
要连接到您的实例,您可以在新窗口中打开连接,或者按照其他选项之一在浏览器中打开连接,使用其他ssh客户端,或者通过gcloud(Google Cloud命令行界面)进行连接。

I use a mix of Console and gcloud to work with Google Cloud, but you can comfortably use either. However, when connecting to instances, I prefer gcloud so I can interact with them more natively. To install gcloud, follow the instructions here. To connect to your newly created instance through gcloud, you can either type out the command in your local terminal or copy the command from the dropdown and paste it into your local terminal. If you aren’t sure if it worked, you’ll know you’re in your instance if you see that your terminal lists your location as <your google username>@<your instance name> (for me that’s irarickman@instance-1). Congrats, you’re now in your virtual machine!
我混合使用了Console和gcloud来与Google Cloud一起使用,但是您都可以舒适地使用它们。 但是,当连接到实例时,我更喜欢gcloud,这样我就可以与它们进行更本地的交互。 要安装gcloud,请按照此处的说明进行操作。 要通过gcloud连接到新创建的实例,您可以在本地终端中键入命令 ,也可以从下拉菜单中复制命令并将其粘贴到本地终端中。 如果不确定它是否有效, 则看到终端将您的位置列为<您的google用户名> @ <您的实例名称> (对我来说是irarickman @ instance-1), 您就会知道自己在实例中 )。 恭喜,您现在在虚拟机中!
安装软件包和工具 (Installing packages and tools)
For my specific use case, I needed to set up a few things to get it ready to run my MLB data refresh script. Your own setup may differ depending on your needs, but I needed the following
对于我的特定用例,我需要进行一些设置以使其准备好运行我的MLB数据刷新脚本。 根据您的需要,您自己的设置可能有所不同,但是我需要以下内容
Python packages — Your VM should come with Python. If it doesn’t, follow step two
Python软件包 -您的VM应该随附Python。 如果不是,请执行第二步
Run sudo apt update
运行sudo apt update
(If you don’t have python) Run sudo apt install python3
(如果没有python)运行sudo apt install python3
Run sudo apt install python3-pip to install the latest pip
运行sudo apt install python3-pip以安装最新的pip
- Install any packages you need via pip3. For me, this was mainly pybaseball, pygsheets, and a few smaller ones. 通过pip3安装所需的任何软件包。 对我来说,主要是pybaseball,pygsheets和一些较小的。
Install Git and clone your code repo — If you don’t have Git installed already, follow the steps below. This assumes you want to pull code from Github or Gitlab. If not, skip this step!
安装Git并克隆您的代码存储库 -如果尚未安装Git,请按照以下步骤操作。 假设您要从Github或Gitlab中提取代码。 如果没有,请跳过此步骤!
Run sudo apt install git
运行sudo apt install git
- Clone your repo as you normally would! I used https auth, which may prompt you for your username and password. If you use SSH, you’ll need to go through the normal ssh keygen set up. 像往常一样克隆您的仓库! 我使用了https auth,它可能会提示您输入用户名和密码。 如果使用SSH,则需要完成常规的ssh密钥生成器设置。
Create a Google Sheets API app and connect to it — To avoid recreating another tutorial, I recommend following Erik Rood’s excellent Google Sheets API setup. After you’ve set up your credentials, you will want to secure copy them into your instance for use. To secure copy, open a new terminal tab so you’re back in your local directory and run
创建一个Google Sheets API应用并连接到它 -为避免重新创建另一个教程,我建议遵循Erik Rood出色的Google Sheets API设置 。 设置凭据后,将需要安全地将其复制到实例中以供使用。 要保护副本,请打开一个新的终端选项卡,以便您返回本地目录并运行
gcloud compute scp <file_path>/client_secret.json <googleusername>@<instance-name>:<~/file path>.The first time you scp you’ll be asked to create a passphrase. If you just press enter twice, it will not create one. If you do enter a passphrase, you’ll need to enter it each time you scp. Skipping the passphrase can be very helpful if you try to scp again months from now and can’t remember your passphrase. If you run into any errors connecting to the instance, you may need to specify the project and zone (remember it also needs to be running)! For more guidance, I recommend checking out the GCP documentation.
第一次使用scp时,系统会要求您创建一个密码短语。 如果仅按两次Enter键,则不会创建一个。 如果确实输入了密码,则每次scp都需要输入密码。 如果您从现在开始几个月后再次尝试scp,并且忘记了密码,则跳过密码很有用。 如果在连接到实例时遇到任何错误,则可能需要指定项目和区域(请记住它也需要运行)! 有关更多指南,建议您查阅GCP文档 。
Once your creds are loaded, you can authenticate your app. This is a one time authentication. Your browser may try to warn you that the application is unsafe. You can hit advanced and proceed anyhow. To set up authentication, you can either just try running your script (and making sure you set your authorization file location appropriately) or running python from the command line in the location where you moved your credentials and typing:
加载凭据后,即可对应用进行身份验证。 这是一次性身份验证。 您的浏览器可能会警告您该应用程序不安全。 您可以按高级进行,然后继续进行。 要设置身份验证,您可以尝试运行脚本(并确保正确设置授权文件的位置 ),也可以在移动凭据并输入以下位置的命令行中运行python:
import pygsheets
gc = pygsheets.authorize()
You’ll be directed to complete the authentication flow by copying a url into browser. Follow the ensuing instructions and paste the key into the command line and you should be all set! You can see how my code uses Google Sheets here.
您将被引导通过将URL复制到浏览器中来完成身份验证流程。 按照随后的说明进行操作,然后将密钥粘贴到命令行中,就可以完成所有工作! 您可以在此处查看我的代码如何使用Google表格。
安排您的实例 (Scheduling your instance)
This is the part that allows you to start and stop your instance on a regular schedule. To set up the full workflow, you’ll need to create each of the following
这是允许您定期启动和停止实例的部分。 要设置完整的工作流程,您需要创建以下各项
Pub/Sub topic— A message that will carry the notification to kick off an event.
发布/订阅主题 -一条消息,其中包含启动事件的通知。
Cloud Function— A function to actually perform an event.
云功能 -实际执行事件的功能。
Cloud Schedule Task — A scheduled command to kick off the workflow.
云计划任务 -启动工作流程的计划命令。
设置发布/订阅主题 (Setting up the Pub/Sub topic)
To start, navigate to Pub/Sub and click on “Create Topic”. You’ll want to give it an easy name to track, such as “start-instance”.
首先,导航到发布/订阅 ,然后单击“创建主题”。 您需要给它起一个易于跟踪的名称,例如“ start-instance”。
设置云功能 (Setting up the Cloud Function)
Next, hop on over to your cloud functions and click “Create Function”, then follow the steps below:
接下来,跳至您的云功能并单击“创建功能”,然后执行以下步骤:
- Give your function a name, probably something like “startInstance”. 给您的函数起一个名字,大概像“ startInstance”。
- Pick your region (again, probably want to keep it in the same region). 选择您的地区(再次,可能希望将其保留在同一地区)。
- Select Pub/Sub as your Trigger. This is what will kick off your function. The Pub/Sub topic is really just delivering a message to your function to let it know it needs to start. In this case, it also delivers the zone and instance to start. 选择发布/订阅作为触发器。 这将启动您的功能。 Pub / Sub主题实际上只是向函数传递一条消息,以使其知道需要启动。 在这种情况下,它还会交付要启动的区域和实例。
- Choose the “start instance” Pub/Sub in the drop-down. You can choose whether to “retry on failure”. Depending on the frequency of your task and structure you may or may not need to retry. I do not for mine. 在下拉菜单中选择“启动实例”发布/订阅。 您可以选择是否“重试失败”。 根据您的任务和结构的频率,您可能需要重试,也可能不需要重试。 我不是我的。
- Hit “Next” and arrive at a code editor. 点击“下一步”,到达代码编辑器。
- In the “Entry Point” input field, enter the name of the function (e.g., startInstance). 在“入口点”输入字段中,输入函数的名称(例如,startInstance)。
In the index.js editor, erase the existing code in the editor and enter the code below. Be sure to replace your function name where it says “exports.<enter function name e.g., startInstance>” on lines 33 and 77. This code can also be found on google’s tutorial repo, however I made a few small changes in lines 38–39, 82–83, and 120–122 . The script provided by Google calls for a label to be passed in the schedule task. I don’t label my Google Cloud resources, so I removed the label component from the search. The version below can be pasted into the index.js editor for both the start and stop function, just remember to change the stop function name. To be clear, you do not need the start and stop code to be in the respective start and stop functions, but for convenience you can find all the code below.
在index.js编辑器中 ,清除编辑器中的现有代码,然后输入以下代码。 请务必在第33和77行上替换为“ exports。<输入函数名称,例如startInstance> ”的函数名称 。此代码也可以在google的教程存储库中找到 ,但是我在第38行进行了一些小改动– 39、82–83和120–122 。 Google提供的脚本要求在计划任务中传递标签。 我没有标记我的Google Cloud资源,所以我从搜索中删除了标签组件。 可以将以下版本粘贴到index.js编辑器中,用于start和stop函数,只需记住更改stop函数名即可 。 需要明确的是,您不需要在各自的启动和停止功能中包含启动和停止代码,但是为了方便起见,您可以在下面找到所有代码。
// Copyright 2018 Google LLC
//
// Licensed under the Apache License, Version 2.0 (the “License”);
// you may not use this file except in compliance with the License.
// You may obtain a copy of the License at
//
// http://www.apache.org/licenses/LICENSE-2.0
//
// Unless required by applicable law or agreed to in writing, software
// distributed under the License is distributed on an “AS IS” BASIS,
// WITHOUT WARRANTIES OR CONDITIONS OF ANY KIND, either express or implied.
// See the License for the specific language governing permissions and
// limitations under the License.// [START functions_start_instance_pubsub]
// [START functions_stop_instance_pubsub]
const Compute = require(‘@google-cloud/compute’);
const compute = new Compute();
// [END functions_stop_instance_pubsub]/**
 * Starts Compute Engine instances.
 *
 * Expects a PubSub message with JSON-formatted event data containing the
 * following attributes:
 * zone — the GCP zone the instances are located in.
 * label — the label of instances to start.
 *
 * @param {!object} event Cloud Function PubSub message event.
 * @param {!object} callback Cloud Function PubSub callback indicating
 * completion.
 */
exports.<enter start function name> = async (event, context, callback) => {
 try {
 const payload = _validatePayload(
 JSON.parse(Buffer.from(event.data, ‘base64’).toString())
 );
 //const options = {filter: `labels.${payload.label}`};
 const [vms] = await compute.getVMs();
 await Promise.all(
 vms.map(async (instance) => {
 if (payload.zone === instance.zone.id) {
 const [operation] = await compute
 .zone(payload.zone)
 .vm(instance.name)
 .start();// Operation pending
 return operation.promise();
 }
 })
 );// Operation complete. Instance successfully started.
 const message = `Successfully started instance(s)`;
 console.log(message);
 callback(null, message);
 } catch (err) {
 console.log(err);
 callback(err);
 }
};
// [END functions_start_instance_pubsub]
// [START functions_stop_instance_pubsub]/**
 * Stops Compute Engine instances.
 *
 * Expects a PubSub message with JSON-formatted event data containing the
 * following attributes:
 * zone — the GCP zone the instances are located in.
 * label — the label of instances to stop.
 *
 * @param {!object} event Cloud Function PubSub message event.
 * @param {!object} callback Cloud Function PubSub callback indicating completion.
 */
exports.<enter stop function name> = async (event, context, callback) => {
 try {
 const payload = _validatePayload(
 JSON.parse(Buffer.from(event.data, ‘base64’).toString())
 );
 //const options = {filter: `labels.${payload.label}`};
 const [vms] = await compute.getVMs();
 await Promise.all(
 vms.map(async (instance) => {
 if (payload.zone === instance.zone.id) {
 const [operation] = await compute
 .zone(payload.zone)
 .vm(instance.name)
 .stop();// Operation pending
 return operation.promise();
 } else {
 return Promise.resolve();
 }
 })
 );// Operation complete. Instance successfully stopped.
 const message = `Successfully stopped instance(s)`;
 console.log(message);
 callback(null, message);
 } catch (err) {
 console.log(err);
 callback(err);
 }
};
// [START functions_start_instance_pubsub]/**
 * Validates that a request payload contains the expected fields.
 *
 * @param {!object} payload the request payload to validate.
 * @return {!object} the payload object.
 */
const _validatePayload = (payload) => {
 if (!payload.zone) {
 throw new Error(`Attribute ‘zone’ missing from payload`);
 } //else if (!payload.label) {
 //throw new Error(`Attribute ‘label’ missing from payload`);
 //}
 return payload;
};
// [END functions_start_instance_pubsub]
// [END functions_stop_instance_pubsub]
In the package.json editor, erase the existing code in the editor and enter the following:
在package.json编辑器中 ,清除编辑器中的现有代码,然后输入以下内容:
{
 “name”: “cloud-functions-schedule-instance”,
 “version”: “0.1.0”,
 “private”: true,
 “license”: “Apache-2.0”,
 “author”: “Google Inc.”,
 “repository”: {
 “type”: “git”,
 “url”: “https://github.com/GoogleCloudPlatform/nodejs-docs-samples.git"
 },
 “engines”: {
 “node”: “>=10.0.0”
 },
 “scripts”: {
 “test”: “mocha test/\*.test.js — timeout=20000”
 },
 “devDependencies”: {
 “mocha”: “⁸.0.0”,
 “proxyquire”: “².0.0”,
 “sinon”: “⁹.0.0”
 },
 “dependencies”: {
 “@google-cloud/compute”: “².0.0”
 }
}
Click Deploy and your function should be set up! Note, in the step below, we’ll pass the zone and instance name from the scheduler, which will be delivered via Pub/Sub to the function so it knows what to start!
单击部署,您的功能应已设置! 注意,在下面的步骤中,我们将从调度程序中传递区域名称和实例名称,这些名称将通过Pub / Sub传递给函数,因此它知道从哪里开始!
设置您的云计划任务 (Setting up your Cloud Schedule Task)
Finally, go to the Cloud Scheduler, hit “Create”, then follow the steps below:
最后,转到Cloud Scheduler,点击“创建”,然后按照以下步骤操作:
- Select a region for your job (probably the same as your instance). 为您的工作选择一个区域(可能与您的实例相同)。
- On the next page, give your job a name and description. I use “start-instance” for the one that starts it and “stop-instance” for the one that stops it! 在下一页上,给您的工作起一个名称和描述。 我将“ start-instance”用于启动它,将“ stop-instance”用于停止它!
Specify the schedule. The caption below offers more information, but you’ll need to use the unix-cron format to schedule. The nice thing about cron scheduling is that it’s flexible enough to schedule for every 5 minutes or the third day of every month at midnight. For more info, check out this help page.
指定时间表。 下面的标题提供了更多信息,但是您需要使用unix-cron格式进行计划。 Cron计划的好处在于它足够灵活,可以每5分钟或每月的第三天午夜进行计划。 有关更多信息,请查看此帮助页面 。
Select your timezone. Be careful when doing so. Later on we’ll discuss setting cron jobs in your instance. These default to UTC, so if you decide not to change your cron timezone, you’ll want to make sure the schedules are aligned. I like using UTC for both as it is not affected by daylight savings.
选择您的时区。 这样做时要小心。 稍后,我们将讨论在您的实例中设置cron作业。 这些默认设置为UTC,因此,如果您决定不更改cron时区,则需要确保时间表一致。 我喜欢同时使用UTC,因为它不受夏令时的影响。
- Select your target as Pub/Sub. 选择您的目标作为发布/订阅。
- Enter your topic name — it should be the name you used in the Pub/Sub step above. 输入您的主题名称-它应该是您在上面的“发布/订阅”步骤中使用的名称。
- In the payload section, you’ll tell your task what zone and instance to start. Paste in and edit the code below: 在有效负载部分,您将告诉您的任务要启动的区域和实例。 粘贴并编辑以下代码:
{“zone”:”<zone>”,”instance”:”<instance-name>”}设置停止实例工作流程 (Setting up the stop instance workflow)
The workflow above is great for starting your instance, but the whole point of this process is to start, then stop the instance. To set up the stopping workflow, follow the same steps, just change the names to stop and double check that you fill in the stop function name in the cloud function script. Remember to set the time intervals between starting and stopping appropriately so you stop the script after it’s been started (and vice versa).
上面的工作流程非常适合启动您的实例,但是此过程的整个重点是先启动然后停止实例 。 要设置停止工作流程,请执行相同的步骤,只需将名称更改为stop,然后再次检查您是否在云功能脚本中填写了stop函数名称。 请记住,要适当设置启动和停止之间的时间间隔,以便在脚本启动后停止脚本(反之亦然)。
安排您的python脚本 (Scheduling your python script)
Once you’ve set up your instance to start and stop, you’ll want to set up your script to run via crontab in the instance. This process is fortunately much more straightforward. Start up your instance and ssh in. Once in your instance, type crontab -e. You’ll be asked to choose your editor, (I prefer nano) then you’ll be taken to the crontab file. To read more about this file, checkout crontab.guru. There you can also find a helpful editor for testing crontab timing.
将实例设置为启动和停止后,您将需要设置脚本以通过实例中的crontab运行。 幸运的是,此过程更加简单。 启动实例并ssh进入。进入实例后,键入crontab -e 。 系统会要求您选择编辑器(我更喜欢nano),然后将您转到crontab文件。 要了解有关此文件的更多信息,请签出crontab.guru 。 在这里,您还可以找到一个有用的编辑器来测试crontab计时。
Once in your crontab file, you can schedule your script. Again, be mindful of timing and time zones! The goal is to schedule your crontab to run while your instance is running. Your crontab will be running on UTC by default. You’ll therefore want to take into account the appropriate UTC time to align with your instance’s start/stop time. Once you find the right time, enter a command similar to the one below to schedule your script:
放入crontab文件后,您可以安排脚本。 同样,请注意时间和时区! 目标是安排crontab在实例运行时运行。 默认情况下,您的crontab将在UTC上运行。 因此,您需要考虑适当的UTC时间,以与实例的开始/停止时间保持一致。 找到合适的时间后,输入与以下命令类似的命令来调度脚本:
0 10 * * * python3 /home/<google username>/projections_code/update_batting_avg-gcp.pyIf you have multiple python installations (e.g., python 2.7, anaconda, etc.) you will need to specify exactly which python executable to use. Similarly, you will likely want to adjust your path based on where your file is located.
如果您安装了多个python(例如python 2.7,anaconda等),则需要确切指定要使用的python可执行文件。 同样,您可能希望根据文件的位置调整路径。
Lastly, I recommend testing your scheduler and cron times to make sure they’re in alignment. I tested mine by setting the timelines to run a few minutes later, then adjusting the actual scripts once I knew it worked. While it was a good amount of work up front, it’s certainly saved me some time since and makes for a fun Tableau dashboard. I hope you found this guide informative — please feel free to reach out with feedback!
最后,我建议测试您的调度程序和cron时间,以确保它们对齐。 我通过将时间表设置为在几分钟后运行来测试了我的游戏,然后在我知道它可行的情况下调整了实际脚本。 尽管前期工作量很大,但自那以来确实为我节省了一些时间,并且使Tableau仪表板变得有趣。 希望您能从本指南中找到有用的信息-请随时与我们联系以获取反馈!
bottom sheets


 被折叠的 条评论
为什么被折叠?
被折叠的 条评论
为什么被折叠?
 到【灌水乐园】发言


