


流媒体专用知识
Like many others, I use Zoom to replace what I previously did in person, on campus, in a lab. As the Fall semester begins, I wanted to address the following concerns:
像许多其他人一样,我使用Zoom来代替以前在校园,实验室中亲自做的事情。 在秋季学期开始时,我想解决以下问题:
- I want to see all of my students on one big screen, all the time. 我想一直在一个大屏幕上看到我所有的学生。
- I want to see what my students see at all times. 我想看看我的学生一直在看什么。
- I want to firewall my laptop from the streaming process. 我想从流式传输过程中为笔记本电脑添加防火墙。
- I want physical buttons to switch among video sources. 我希望物理按钮在视频源之间切换。
- I want to spend as little money as possible because any purchases are coming out of my pocket. 我想花最少的钱,因为所有购买都从我的口袋里掏出来。
My solution to these challenges was to move everything to HDMI signals and use a hardware switcher. I needed two cameras that could output a clean HDMI signal. ‘Clean HDMI’ has a specific meaning in the video camera world. It isn’t good enough to have a camera with an HDMI output. You have to have one that outputs a ‘clean’ signal, without all the metering and graphics overlays that all cameras have.
对于这些挑战,我的解决方案是将所有内容转移到HDMI信号并使用硬件切换器。 我需要两个可以输出干净HDMI信号的摄像机。 “清洁HDMI”在摄像机世界中具有特定含义。 拥有带HDMI输出的相机是不够的。 您必须有一个输出“干净”信号的信号,而没有所有摄像机具有的所有测光和图形叠加层。
I have one camera that qualifies already, but I need to have a dedicated front facing camera. The idea here is to get rid of software switching of video sources and unfortunately that means that at the start of this, We’re already at -1 cameras because we can’t use the laptop camera anymore.
我已经有一部合格的相机,但是我需要有一台专用的前置摄像头。 这里的想法是摆脱视频源的软件切换,不幸的是,这意味着在开始时,我们已经是-1相机,因为我们不能再使用笔记本电脑相机了。
For my second camera, I picked up a Zoom Q2n-4K. It’s… ok. It outputs a clean HDMI signal. It’s small. It has a 150-degree field of view. There is an easily-accessed software option to change from wide-angle to a telephoto-ish view. I suspect this is a combination of cropping and fisheye distortion rectification software. Doesn’t matter. It’s fine for the reverse angle.
对于第二台相机,我选择了Zoom Q2n-4K 。 没关系。 它输出干净的HDMI信号。 它很小。 它具有150度的视野。 有一个易于使用的软件选项,可以从广角切换为远摄。 我怀疑这是裁剪和鱼眼失真校正软件的组合。 没关系 反向角度很好。

Here is what you need to know if you buy a Zoom Q2n-4K. It comes with nothing. No cables are included whatsoever. If you’re using this as a live camera (and not as a portable, battery-powered recorder, which, arguably is the use case it was designed for), you’re going to need long cables for both power and video. The video output of the Q2n-4K is on a micro HDMI cable and this is something I’ve never encountered before. For power, there is micro USB. If you have extra HDMI cables already and you’re thinking you might get an HDMI to micro HDMI adapter, understand these two connecters are so close to each other, plugging both in simultaneously is a very tight fit.
如果您购买Zoom Q2n-4K,这是您需要知道的。 它什么都没有。 不含任何电缆。 如果您将其用作实时摄像机(而不是便携式电池供电的记录仪,可以说是它的设计用例),则将需要较长的电缆来连接电源和视频。 Q2n-4K的视频输出是通过微型 HDMI电缆连接的,这是我以前从未遇到过的事情。 为了供电,有微型USB。 如果您已经有额外的HDMI电缆,并且您可能会想获得一个HDMI到micro HDMI适配器,那么请了解这两个连接器之间的距离非常近,同时插入两者非常紧密。
The most important component is the switcher. I’m using the Blackmagic ATEM Mini. This device accepts four HDMI inputs and outputs a signal over USB-C that is understood by Zoom to be an available video camera. The buttons are large, illuminated and feel great. Switching is instantaneous and perfect without flicker, delay or waiting for sync. It feels more like a miniature broadcast mixer than a switcher and I guess that’s because it is exactly that. The ATEM Mini is insanely popular for good reason.
最重要的组件是切换台。 我正在使用Blackmagic ATEM Mini 。 该设备接受四个HDMI输入并通过USB-C输出信号,Zoom认为这是可用的摄像机。 按钮很大,有照明,感觉很棒。 切换是瞬时且完美的,没有闪烁,延迟或等待同步。 它感觉更像是一个微型广播调音台,而不是切换台,我想那是因为它就是这样。 ATEM Mini非常受欢迎,这是有充分理由的。

I use the ATEM Mini to switch among four video sources:
我使用ATEM Mini在四个视频源之间切换:
- front-facing camera (for addressing my students) 前置摄像头(用于向我的学生讲话)
- reverse angle (for demoing hardware) 反向角度(用于演示硬件)
- HDMI output from laptop (for demoing software, Keynote) 笔记本电脑的HDMI输出(用于演示软件,主题演讲)
- HDMI output from iPad (whiteboard with Apple Pencil) iPad的HDMI输出(使用Apple Pencil的白板)

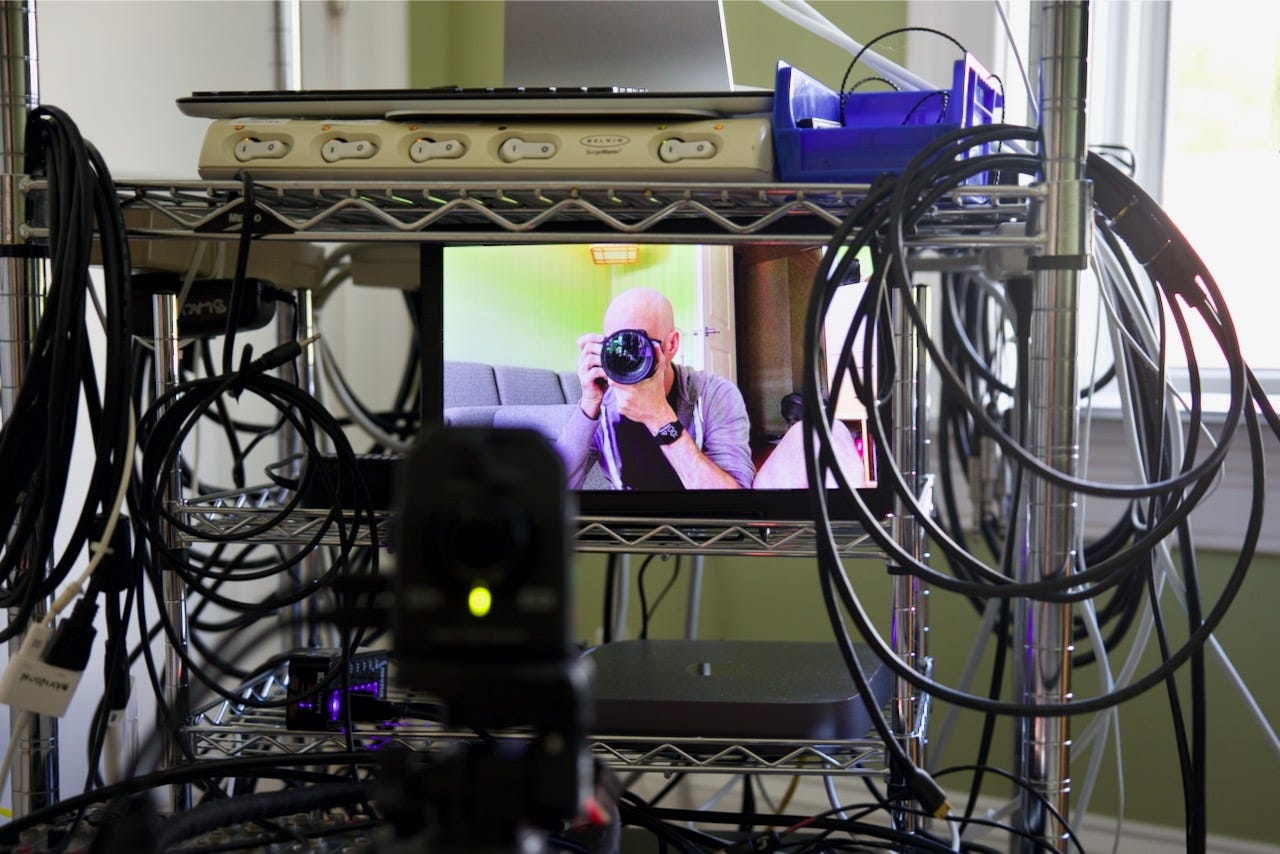
I have the HDMI output of the ATEM Mini connected to a 7” HDMI monitor I purchased online. This serves as the dedicated monitor of my broadcast signal. Whatever I see on this display is what my students see.
我将ATEM Mini的HDMI输出连接到我在线购买的7英寸HDMI监视器 。 这用作我的广播信号的专用监视器。 我在显示器上看到的就是我的学生看到的。
The computerFire-walling the streaming process from my laptop necessitates a dedicated computer. Zoom is cross platform so it really doesn’t matter if you’re using Mac or Windows, but has to be supported by the ATEM Mini. I have a Mac Mini that I run in the basement as a media server and I kept it down there because I don’t want to listen to the hard drives. So, at the cost of the inconvenience of powering down hard drives when they’re not needed, I have a computer that can work for this task.
计算机要从我的笔记本电脑中屏蔽流传输过程,必须使用一台专用计算机。 Zoom是跨平台的,因此无论您使用的是Mac还是Windows,它都没有关系,但必须由ATEM Mini支持。 我有一台Mac Mini,可在地下室作为媒体服务器运行,但由于不想听硬盘驱动器,所以将它存放在那儿。 因此,以不需要硬盘时关闭电源的不便为代价,我有一台可以完成此任务的计算机。
Configuring ZoomZoom’s primary use case is people who are using the built in mic and speakers on their laptop. If you’re using an audio interface, headphones and a mic, you an improve the audio quality you’re sending by disabling echo cancelation which you don’t need anymore.
配置Zoom Zoom的主要用例是在笔记本电脑上使用内置麦克风和扬声器的人。 如果您使用音频接口,耳机和麦克风,则可以通过禁用不再需要的回声消除功能来改善所发送的音频质量。
Under Settings > Audio > Advanced, enable all options:
在设置>音频>高级下,启用所有选项:

Zoom compresses graphics (screen sharing) differently than video, so if you’re sending computer video over HDMI, Zoom treats it like video, not graphics. This will result in poor quality graphics and illegible text. It’ll look great to you, but terrible to your audience. For this reason, you must enable HD video. This will consume greater bandwidth, and may not work for everyone, unfortunately. For this reason, I am also prepared to migrate on screen presentations to the streaming computer (like Keynote presentations) and not from the laptop. Zoom’s native screen sharing will always outperform (in efficiency and qualty) video over HDMI.
缩放对图形(屏幕共享)的压缩与对视频的压缩不同,因此,如果通过HDMI发送计算机视频,则缩放将其视为视频,而不是图形。 这将导致图形质量差和文本难以辨认。 它对您来说很棒,但对您的观众来说却很糟糕。 因此,您必须启用高清视频。 不幸的是,这将消耗更多的带宽,并且可能不适用于所有人。 因此,我也准备将屏幕演示文稿迁移到流式计算机(例如Keynote演示文稿),而不是从笔记本电脑迁移。 Zoom的本机屏幕共享将始终优于HDMI上的视频(在效率和质量上)。
Under Settings > Video, Enable HD
在设置>视频下,启用高清

Computer displayMy Mac Mini server ran happily without a display, but now that I’m using it as an acutual computer, I needed another display, so I wondered if I could repurpose a very old Apple Cinema Display I had in storage.
电脑显示器我的Mac Mini服务器在没有显示器的情况下运行得很愉快,但是现在我将其用作辅助计算机,因此我需要另一个显示器,因此我想知道是否可以重新利用存储中的非常老的Apple Cinema Display。
The Cinema diplay looks like a Thunderbolt connecter, so I tried a Thunderbolt to USB adapter I had on hand aaaaaaaannd, nothing. It turns out that won’t work because it doesn’t wrap DisplayPort signals inside of the Thunderbolt 2 specification, so the data doesn’t pass over the adapter.
Cinema diplay看起来像一个Thunderbolt连接器,所以我尝试了手头上的Thunderbolt转USB适配器aaaaaaaannd,什么也没有。 事实证明这是行不通的,因为它没有将DisplayPort信号包装在Thunderbolt 2规范内,因此数据不会通过适配器。
However, it’s still just DisplayPort. This adapter will allow you to use a Apple Cinema Display with DisplayPort on a Mac with USB-C.
但是,它仍然只是DisplayPort。 使用此适配器,您可以在带有USB-C的Mac上使用带DisplayPort的Apple Cinema Display。

With a display connected over USB, I can use the Mac Mini’s HDMI output port for a second display. For this, I’m using the TV that’s already in my studio. This large display is where I put the gallery of my class and this helps me feel more connected to my students.
通过USB连接显示器后,我可以将Mac Mini的HDMI输出端口用于第二个显示器。 为此,我使用的是工作室中的电视。 这种大的显示屏是我放置班级画廊的地方,这使我感到与学生之间的联系更加紧密。
For the reverse camera and my own person, I constructed a couple umbilical cables using split loom tubing to combine several cables into a pigtail that connects to the streaming rig. I’m using a Lavalier mic instead of something more stationary and ‘proximity-effecty’/’podcasty’, because I have to move around the room when I teach. The umbilical clips to my belt.
对于倒车摄像头和我自己的人,我使用分体织机油管构造了几根脐带缆线,将多条缆线组合成辫子,并与流式钻井平台相连。 我使用的是Lavalier麦克风,而不是固定的和“接近效果” /“播客”的麦克风,因为教书时我必须在房间四处走动。 脐带夹在我的皮带上。


The audio side of my streaming system is handled by a MOTU M4 audio interface. It mixes my mic, a stereo pair of whatever I want to send to my students (usually my modular or synthesizer, mixer or another audio interface) and loops any computer-generated audio back out to the stream without any additional software. If you consider that Loopback costs $99 and the M4 includes that functionality, but costs $220 and you also get an audio interface, that’s an insanely great value.
我的流媒体系统的音频端由MOTU M4音频接口处理。 它混合了我的麦克风,立体声对,无论我想发送给学生的什么(通常是我的模块化或合成器,混音器或其他音频接口),并且无需任何其他软件即可将任何计算机生成的音频循环回流。 如果您认为Loopback的价格为99美元,M4包含该功能,但价格为220美元,并且还提供了音频接口,那真是物超所值。
The reason I use two audio interfaces is I want my music laptop to function exactly the way it would in front of an audience, without reconfiguration. The audio interface routings with my modular can get quite complicated and non-audio software (like Zoom) has a habit of not acknowledging the existence of audio interfaces with multiple inputs and outputs (please, please please if you let me select an audio interface, also let me select which input or output… pleeeeeeeese) Figuring out audio routings is difficult enough without adding streaming into the mix.
我使用两个音频接口的原因是我希望我的音乐笔记本电脑能够完全像在听众面前那样工作,而无需重新配置。 使用我的模块化设备的音频接口路由会变得非常复杂,非音频软件(例如Zoom)习惯不承认存在多个输入和输出的音频接口(请让我选择一个音频接口,请,还让我选择哪个输入或输出…pleeeeeeeese)如果不将流添加到混音中,找出音频路由就足够困难了。
With this setup, I can simply take the stereo output of my music audio interface (the Ultralite AVB) and plug it into the streaming computer interface (M4) as if I were sending a stereo signal at a live performance. Exactly the same.
通过此设置,我可以简单地获取音乐音频接口(Ultralite AVB)的立体声输出并将其插入流式计算机接口(M4),就好像我正在现场表演中发送立体声信号一样。 完全相同的。
I put all the components on a cart on casters so I can move it around my studio as needed. The bonus is this system can also stream to Twitch or Youtube easily with OBS running on the streaming computer, or by setting up the ATEM Mini to stream directly out its Ethernet port without a computer.
我将所有组件放在脚轮上的推车上,以便可以根据需要在工作室中移动它。 好处是,该系统还可以通过在流式计算机上运行的OBS轻松地流到Twitch或Youtube,或者通过设置ATEM Mini在不使用计算机的情况下直接流出其以太网端口。
In summaryI teach seven sections of six different classes as well as several meetings a week. In the Fall, I’ll be streaming eight hours a day with very short breaks to reconfigure for the next class. I needed a solid reliable system that will allow me to improvise if I need to. There are still some aspects that can be improved, but I’m confiendent I can improve the overal educational experience for my students.
总之,我教六个不同班级的七个部分,以及每周几次会议。 在秋季,我将每天直播八小时,非常短暂的休息时间以重新配置下一堂课。 我需要一个可靠的可靠系统,以便在需要时即兴发挥。 还有一些方面可以改进,但是我有信心可以改善对学生的总体教育体验。
翻译自: https://medium.com/swlh/how-i-built-a-dedicated-streaming-computer-8ee686aa270e
流媒体专用知识


 1706
1706


 被折叠的 条评论
为什么被折叠?
被折叠的 条评论
为什么被折叠?
 到【灌水乐园】发言


