


虚拟dom和直接操作dom
Most of the time, we are using javascript techniques inside angular. we almost forget about the Framework’s features. Let's utilize them.
大多数时候,我们在angular中使用javascript技术。 我们几乎忘记了框架的功能。 让我们利用它们。
Most of the angular developers were starting their career in Javascript and then they came up into Angular. So they are more comfortable in javascript. Yeah! That’s pretty cool. But still, we are using javascript techniques inside angular mostly. One of them is DOM Manipulation.
大多数有角度的开发人员都从Java开始其职业生涯,然后他们进入了Angular。 因此,他们对javascript更加满意。 是的 太酷了。 但是,我们仍然主要在angular内使用javascript技术。 其中之一是DOM操作。
For a long time, I was using core javascript techniques to manipulate the DOM in Angular. I always use “document. ” object in angular. I don’t even use template reference variables. I directly manipulate the DOM. Is that correct? No, it is not. Don’t do that mistake. Angular has a lot of features. Angular makes our DOM manipulation easy and it makes our code more structured and scalable. Alright, Let see about DOM manipulation in angular.
长期以来,我一直在使用核心JavaScript技术在Angular中操作DOM。 我总是使用“文档”。 有角度的物体。 我什至不使用模板引用变量。 我直接操作DOM。 那是对的吗? 不它不是。 不要犯那个错误。 Angular具有很多功能。 Angular使我们的DOM操作变得容易,并使我们的代码更加结构化和可扩展。 好了,让我们来看看Angular中的DOM操作。
Usually, there are two concepts in DOM Manipulations.
通常,DOM操作中有两个概念。
- Modifying DOM Elements. 修改DOM元素。
- Modifying DOM Structure. 修改DOM结构。
修改DOM元素: (Modifying DOM Elements:)
We are familiar with a lot of javascript methods that modify the DOM element. Some of them below,
我们熟悉许多修改DOM元素JavaScript方法。 下面一些
- classList.add() classList.add()
- setAttribute() setAttribute()
- style.setProperty() style.setProperty()
These all are javascript native DOM element methods.
这些都是javascript本机DOM元素方法。
There are multiple ways to modify the DOM elements in angular. We will discuss almost every method and choose the best among them.
有多种方法可以按角度修改DOM元素。 我们将讨论几乎所有方法,并从中选择最佳方法。
方法:1 (Method: 1)
概念: (Concepts:)
- Template reference variables. 模板参考变量。
- ElementRef. ElementRef。
- @Viewchild/@Viewchildren. @ Viewchild / @ Viewchildren。
- AfterViewInit. AfterViewInit。
定义: (Definitions:)
Template reference — Reference to a particular DOM element.
模板参考 —对特定DOM元素的参考。
ElementRef — ElementRef is a class, which consists of all native DOM elements. Using nativeElement object we can access all DOM elements in angular.
ElementRef — ElementRef是一个类,由所有本机DOM元素组成。 使用nativeElement对象,我们可以按角度访问所有DOM元素。
@Viewchild/@Viewchildren — Select child or all children elements from the DOM.
@ Viewchild / @ Viewchildren-从DOM中选择子元素或所有子元素。
AfterViewInit — One of this Lifecycle hook is called after the angular component initialized its view.
AfterViewInit —在角度组件初始化其视图之后,将调用此Lifecycle挂钩之一。
例: (Example:)

脚步: (Steps:)
Step: 1
第1步
In this example, I am using template reference and @viewchild query to get an HTML element.
在此示例中,我使用模板引用和@viewchild查询来获取HTML元素。
`<span #el>I am manoj.</span> <span>I am a web developer.</span>`
`<span #el >我是manoj。</ span> <span>我是Web开发人员。</ span>`
@ViewChild(‘el’) span: ElementRef;
@ViewChild ('el')span:ElementRef;
Step: 2
第2步
setAttribute of native DOM element is using to add the attribute.
本机DOM元素的setAttribute用于添加属性。
this.span.nativeElement.setAttribute(‘highlight’, ‘’);
this.span.nativeElement。 setAttribute ('highlight','');
输出: (Output:)

So, it is working fine. But there is a problem with this method. Here, we are mixing rendering and presentation logic.
因此,它工作正常。 但是这种方法存在问题。 在这里,我们混合了渲染和表示逻辑 。
Usually, Components have presentation logic such as defining arrays, Objects, and iterations, and so on.
通常, 组件具有表示逻辑,例如定义数组,对象和迭代等。
Rendering logics are actually modifying the DOM elements. We should maintain rendering logics in a separate directive.
渲染逻辑 实际上正在修改DOM元素。 我们应该在单独的指令中维护渲染逻辑 。
We can communicate components and directives through Data Binding Mechanism.
我们可以通过数据绑定机制传达组件和指令。
So now, let see another method to overcome this problem.
现在,让我们看看另一种克服此问题的方法。
方法:2 (Method: 2)
Let’s create a directive and put all rendering logics inside that directive.
让我们创建一个指令并将所有渲染逻辑放入该指令中。
概念: (Concepts:)
- ElementRef 元素引用
- @Input() — Decorator @Input()—装饰器
- ngOnInit() ngOnInit()
定义: (Definitions:)
- ElementRef — It helps to access DOM elements. ElementRef —它有助于访问DOM元素。
- @Input() — Data binding to communicate component and directive. @Input()—数据绑定以通信组件和指令。
- ngOnInit() — Initial Lifecycle hook, which is called after angular created the component. ngOnInit()—初始生命周期挂钩,在angular创建组件之后调用。
例: (Example:)
Directive:
指示:

Component:
零件:
脚步: (Steps:)
Step: 1
第1步
Inject ElementRef into a directive file’s constructor.
将ElementRef注入指令文件的构造函数中。
constructor( private element: ElementRef) { }
构造函数 (私有元素: ElementRef ){}
Step: 2
第2步
Add @input decorator to the directive.
将@input装饰器添加到指令。
@Input() appHighlight;
@Input ()appHighlight;
Step: 3
步骤:3
Use setAttribute() native element method to add an attribute in ngOnInit() lifecycle hook.
使用setAttribute()本机元素方法在ngOnInit()生命周期挂钩中添加属性。
ngOnInit(){this.element.nativeElement.setAttribute(this.appHighlight, ‘’)}
ngOnInit (){this.element.nativeElement。 setAttribute (this.appHighlight,'')}
Step: 4
第4步
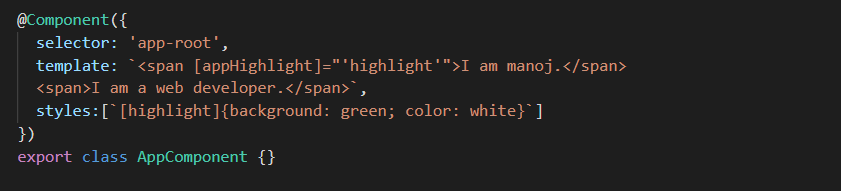
Apply the directive to the span element in the component template.
将指令应用于组件模板中的span元素。
<span [appHighlight]=”’highlight’”>I am manoj.</span>
<span [appHighlight] =”'highlight'”>我是manoj。</ span>
输出: (Output:)
The output is the same as previous but here render logics are moved from component to directive. It helps to reuse the corresponding component and directives anywhere. (code reuse)
输出与先前的输出相同,但此处为渲染逻辑 被感动 从组件到指令。 它有助于在任何地方重用相应的组件和指令。 ( 代码重用 )
But here we are accessing the DOM elements directly using ElementRef Class. Permitting direct access to the DOM can make our applications more vulnerable and XSS attacks.
但是这里我们 使用ElementRef类直接访问DOM元素 。 允许直接访问DOM可以使我们的应用程序更容易受到XSS攻击。
If we access DOM elements directly, we could not deploy our application into a web worker. Because there is no DOM in web workers.
如果直接访问DOM元素,则无法将应用程序部署到Web Worker中。 因为Web worker中没有DOM。
Most of the people use ElementRef in all places. So now our question is what should we use to access DOM elements safely? Yeah, we have a solution for that. Let’s see another method.
大多数人在所有地方都使用ElementRef。 所以现在我们的问题是,我们应该使用什么来安全地访问DOM元素? 是的,我们有解决方案。 让我们看看另一种方法。
方法:3 (Method: 3)
概念: (Concepts:)
- Renderer 渲染器
定义: (Definitions:)
Renderer — Makes direct DOM access safe and it is Platform independent. It modifies the DOM elements without touch the DOM directly. A renderer is a service that consists of some methods. It helps to manipulate the DOM.
渲染器 —使直接DOM访问变得安全,并且与平台无关。 它修改DOM元素,而无需直接接触DOM。 渲染器是一种由某些方法组成的服务。 它有助于操纵DOM。
I listed out some renderer methods below,
我在下面列出了一些渲染器方法,
- addClass() addClass()
- removeClass() removeClass()
- setStyle() setStyle()
- removeStyle() removeStyle()
- setProperty() setProperty()
例: (Example:)

脚步 (Steps)
Step: 1
第1步
Inject renderer into directive file’s constructor.
将渲染器注入到指令文件的构造函数中。
constructor( private renderer: Renderer2) { }
构造函数 (私有渲染器: Renderer2 ){}
Step: 2
第2步
Use renderer setAttribute() method to add an attribute in ngOnInit() lifecycle hook.
使用渲染器setAttribute()方法在ngOnInit()生命周期挂钩中添加属性。
ngOnInit(){
ngOnInit (){
this.renderer.setAttribute(this.element.nativeElement , this.appHighlight, ‘’)}
此渲染器。 setAttribute (this.element.nativeElement,this.appHighlight,'')}
输出: (Output:)
The output is the same here. But we modified the DOM properly and more securely.
输出在这里是相同的。 但是,我们正确,安全地修改了DOM。
Here, doubt may occur on one point. In this method, we are using ElementRef. So what will happen, while we run the application in other platforms such as server-side rendering or web workers or native scripts? The answer is Renderer will handle this scenario under the hood. So no need to care about that.
在这里,可能会产生一点怀疑。 在这种方法中,我们使用ElementRef。 那么,当我们在其他平台(例如服务器端渲染或Web Worker或本机脚本)上运行应用程序时,会发生什么呢? 答案是Renderer会在后台处理这种情况。 因此,无需担心。
Attribute directives such as ngClass, ngStyle are modifying the DOM elements based on the renderer.
诸如ngClass,ngStyle之类的属性指令正在基于渲染器修改DOM元素。
So, hereafter, we will use Renderer to modify the DOM. It is a more proper way too.
因此,此后,我们将使用Renderer修改DOM 。 这也是一种更合适的方法。
修改DOM结构: (Modifying DOM Structure:)
- createElement() createElement()
- remove() 去掉()
- appendChild() appendChild()
- removeChild() removeChild()
These are some examples of javascript methods that modify DOM structures. We are already familiar with those methods. But now we are going to see how to modify the DOM structure in angular.
这些是修改DOM结构的javascript方法的一些示例。 我们已经熟悉这些方法。 但是现在我们将看到如何以角度修改DOM结构。
从DOM中删除一个子组件: (Remove a child component from the DOM:)
方法:1 (Method: 1)
概念: (Concepts:)
- Template Reference 模板参考
- ElementRef 元素引用
- @ViewChildren() @ViewChildren()
- AfterViewChecked AfterViewChecked
- Renderer 渲染器
- QueryList 查询清单
定义: (Definitions:)
Template Reference — Reference of particular DOM Element.
模板参考 -特定DOM元素的参考。
ElementRef — Helps to access DOM elements.
ElementRef —帮助访问DOM元素。
@ViewChildren() — Returns the specified elements or directives from the viewDOM as QueryList.
@ViewChildren() —以QueryList的形式从viewDOM返回指定的元素或指令。
AfterViewChecked — It invoked after the default change detector has completed one change check cycle.
AfterViewChecked —在默认更改检测器完成一个更改检查周期后调用。
Renderer — Makes direct DOM access safer.
渲染器 —使直接DOM访问更加安全。
QueryList –Return type. It just a list of items. Angular updates QueryList while add or remove list items. It initialized only before the ngAfterViewInit() lifecycle hook.
QueryList –返回类型。 它只是项目列表。 添加或删除列表项时,Angular更新QueryList。 它仅在ngAfterViewInit()生命周期挂钩之前初始化。
例: (Example:)

脚步: (Steps:)
- Use template reference and ViewChildren() to get HTML element. 使用模板引用和ViewChildren()获取HTML元素。
- Inject Renderer and ElementRef into the constructor. 将Renderer和ElementRef注入构造函数。
- Use the removeChild() method of the renderer to remove the child component. 使用渲染器的removeChild()方法删除子组件。
- To get the host element, we need to use ElementRef. 要获取宿主元素,我们需要使用ElementRef。
输出: (Output:)

After Click ‘Remove Child’ Button:
点击“删除孩子”按钮后:

So we have removed the child component successfully. That’s great.
因此,我们已成功删除了子组件。 那很棒。
But, I want to show you the output screen once again with the console log.
但是,我想再次向您显示带有控制台日志的输出屏幕。

Question: we have removed the child component, but still, the child components counts remain 1. Why? How to resolve it?
问题:我们删除了子组件,但是子组件的数量仍然为1。为什么? 怎么解决呢?
Yes, Obviously this question will come to our mind. But don't worry, We have a solution. Let see in detail.
是的,显然我们会想到这个问题。 但请放心,我们有解决方案。 让我们详细看看。
DOM和视图关系: (DOM and View Relationship:)

Angular has a view concept. Look at the diagram; it will give a clear idea about the view and DOM relationship. The view is nothing but the reference of DOM. While we run the angular application, it will create multiple views.
Angular具有视图概念。 看一下图; 它将给出有关视图和DOM关系的清晰思路。 该视图不过是DOM的引用。 当我们运行角度应用程序时,它将创建多个视图。
For each component creation, view also created by angular. We are seeing the component hierarchy outside. But under the hood view hierarchy also created based on components hierarchy.
对于每个组件创建,也按角度创建视图。 我们正在外面看到组件层次结构。 但是在内部,视图层次结构也是基于组件层次结构创建的。
If we made any changes in DOM such as drag, add, or remove the DOM element means, View should be updated immediately. Otherwise, it will be a problem.
如果我们对DOM进行了任何更改(例如拖动,添加或删除DOM元素),则应立即更新View。 否则,将是一个问题。
Change Detection runs based on the Hierarchy of views.
更改检测基于视图的层次结构运行。
Let consider the above scenario(method 1), we removed the child component from the DOM. But view Hierarchy remains the same, that means the view is not updated. So it shows one child. Here this is a small scenario that’s fine, but if we removed the ten components and view is not updated means, angular still runs change detection for all deleted components. That will badly affect our application.
让我们考虑上述场景(方法1),我们从DOM中删除了子组件。 但是视图层次结构保持不变,这意味着视图不会更新。 因此显示一个孩子。 在这里,这是一个很好的小方案,但是如果我们删除了十个组件并且视图未更新,则angular仍然会对所有已删除的组件运行更改检测。 这将严重影响我们的应用程序。
查看容器(viewContainerRef): (View Container (viewContainerRef):)
View Container makes DOM structure changes safe.
View Container使DOM结构更改安全。
方法: (Methods:)
- insert() 插()
- move() 移动()
- remove() 去掉()
- createEmbeddedView() createEmbeddedView()
初始化视图容器: (Initializing a View Container:)
We can make any DOM element as a view container. But usually, all the people commonly take <ng-container> as a view container. ng-container is nothing but an HTML tag but it is angular specific.
我们可以将任何DOM元素用作视图容器。 但通常,所有人通常都将<ng-container>用作视图容器。 ng-container只不过是HTML标记,而是特定于角度的。
There are two types of views.
有两种类型的视图。
Embedded Views — Always be a part of the view container.
嵌入式视图 —始终是视图容器的一部分。
Host Views — Always be a part of a view container and also be standalone.
主机视图 -始终成为视图容器的一部分,也可以独立使用。
Let see how to make the DOM element a view.
让我们看看如何使DOM元素成为视图。
脚步: (Steps:)
Step: 1
第1步
Add ng-container tag into the template file.
将ng-container标签添加到模板文件中。
<ng-container #viewcontainer></ng-container>
<ng-container #viewcontainer> </ ng-container>
Step: 2
第2步
Add viewchild query to select element.
添加viewchild查询以选择元素。
@ViewChild(‘viewcontainer’, {‘read’: ViewContainerRef}) viewcontainer;
@ViewChild ('viewcontainer',{'read': ViewContainerRef })viewcontainer;
Here, ViewContainerRef is a very important part, which makes the DOM node as a view container.
在这里,ViewContainerRef是非常重要的部分,它使DOM节点成为视图容器。
Step: 3
步骤:3
This step creates the view and adds the view into view container.
此步骤创建视图,并将视图添加到视图容器中。
Viewcontainer.CreateEmbeddedView(TemplateRef);
Viewcontainer。 CreateEmbeddedView (TemplateRef);
创建一个模板: (Create a Template:)
It is very similar to creating a view container. Let see how to create them.
这与创建视图容器非常相似。 让我们看看如何创建它们。
脚步: (Steps:)
Step:1
第1步
Add ng-template tag into the template file.
将ng-template标记添加到模板文件中。
<ng-template #t></ng-template>
<ng-template #t> </ ng-template>
Step: 2
第2步
Create a template using this.
使用此创建模板。
@ViewChild(‘t’, {‘read’: TemplateRef}) template: Templateref;
@ViewChild ('t',{'read': TemplateRef })template:Templateref;
例: (Example:)
Template file:
模板文件:

Class File:
类文件:

Solution: This example is nothing but a solution to our question. Now, If we remove the DOM element angular directly update the views.
解决方案:此示例仅是我们问题的解决方案。 现在,如果我们删除DOM元素,则可以直接更新角度。
Let see the solution below,
让我们看看下面的解决方案,

Finally, We did it. I hope we all are clear about views.
最后,我们做到了。 希望大家都清楚自己的看法。
Structural directives such as *ngIf, *ngFor, *ngSwitch are modifying the DOM structure based on view containers.
* ngIf,* ngFor,* ngSwitch等结构性指令正在基于视图容器修改DOM结构。
Hereafter, we will use viewContainerRef and templateRef to change the DOM structure.
此后,我们将使用viewContainerRef和templateRef更改DOM结构。
注意: (Note:)
We can separate rendering logics into separate directive as we did in Modify DOM elements section. It will be very useful. We can use our directive such as *ngFor, *ngIf. That’s great right.
我们可以像在“修改DOM元素”部分中所做的那样,将渲染逻辑分为单独的指令。 这将非常有用。 我们可以使用诸如* ngFor,* ngIf的指令。 很好。
If DOM elements created by angular, Views will be created by default. If we use jquery or javascript to change the DOM structure directly, then no views will be updated. Angular doesn’t know that the DOM element is created. So change detection not works for that DOM element.
如果DOM元素是由angular创建的,则默认情况下将创建Views。 如果我们使用jquery或javascript直接更改DOM结构,则不会更新任何视图。 Angular不知道已创建DOM元素。 因此,更改检测不适用于该DOM元素。
结论: (Conclusion:)
Modify DOM elements — Use Renderer service.
修改DOM元素 -使用Renderer服务 。
Modify DOM Structure — Use ViewContainerRef and TemplateRef classes.
修改DOM结构 -使用ViewContainerRef和TemplateRef类 。
Separate rendering logics into directives. It helps to reuse the code.
将渲染逻辑分为指令。 它有助于重用代码 。
Avoid straight forward DOM manipulation using javascript or jquery. Try to use Framework’s available features.
避免使用javascript或jquery直接进行DOM操作。 尝试使用Framework的可用功能 。
I hope all are clear with the DOM manipulation concept in Angular. If you have any suggestions please leave it in the comment.
我希望所有人都对Angular中的DOM操作概念有所了解。 如果您有任何建议,请在评论中保留。
I have learned these concepts from Maxim Koretskyi tutorials. Those are very clear. You can take a look at that also.
我已经从Maxim Koretskyi教程中学到了这些概念。 那些很清楚。 您也可以看看。
翻译自: https://medium.com/weekly-webtips/how-to-do-dom-manipulation-properly-in-angular-e6fdb70a6e0e
虚拟dom和直接操作dom


 1184
1184

 被折叠的 条评论
为什么被折叠?
被折叠的 条评论
为什么被折叠?
 到【灌水乐园】发言


