


 本文介绍了Android导航组件如何简化应用程序内的导航、数据传递和创建导航抽屉等任务。通过集中式的导航图,NavHostFragment和NavController,开发者可以更轻松地管理片段和用户路径。此外,组件还支持处理碎片事务、深层链接和提供导航UI模式。
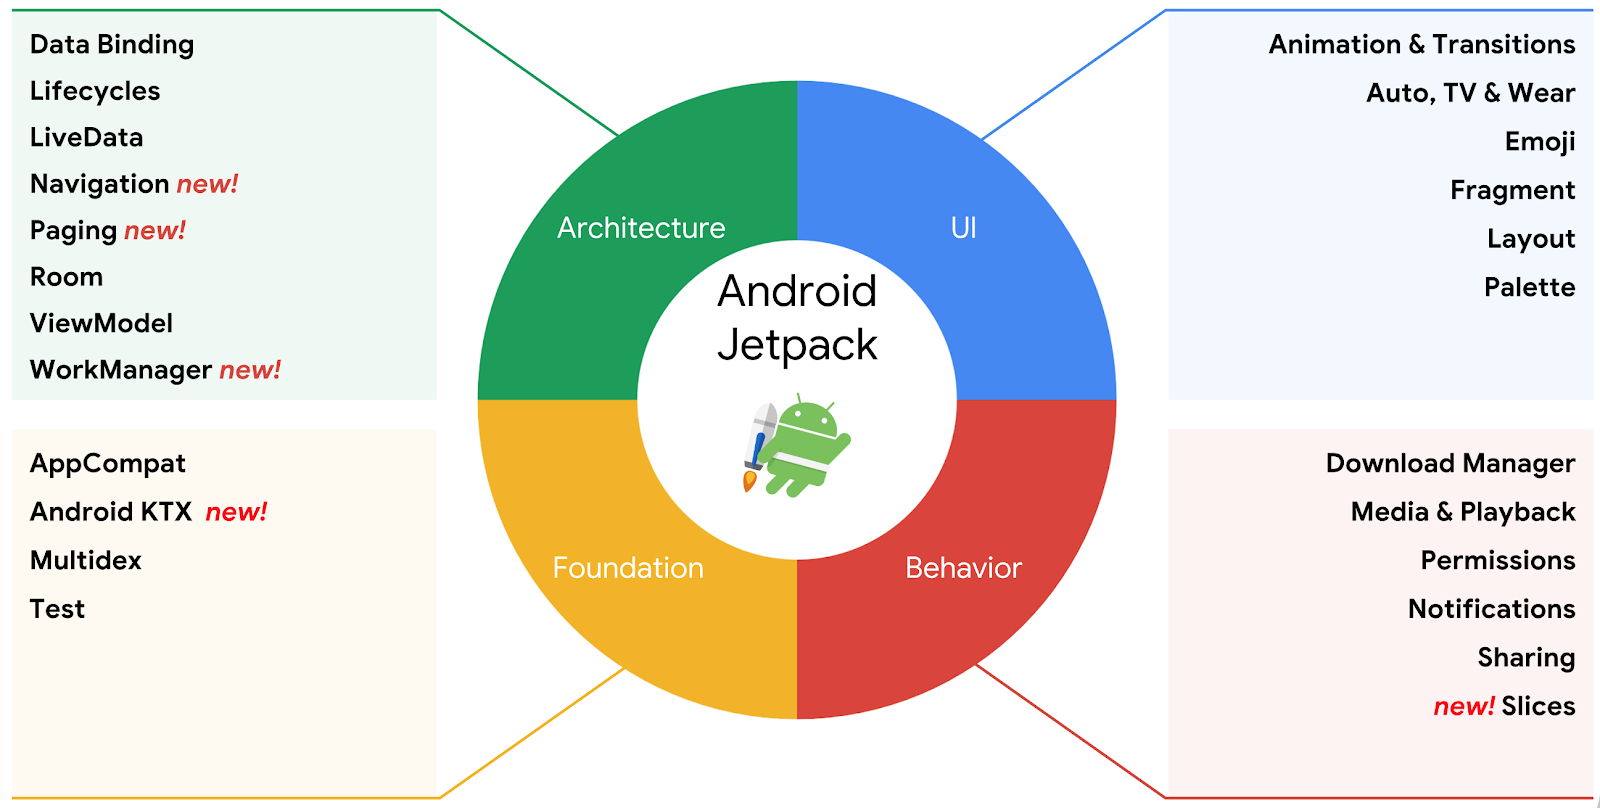
Gone are those days when we had to write intents for navigating from one activity to another and get those ‘supportFragmentManger’ errors that we faced while dealing with fragment navigation and data exchange. Android navigation component is here to take care of the in-app navigation, data passing, navigation drawer creation, and other cool stuff. It is a part of the Android Jetpack (an awesome set of libraries that google provides us for android development).
那些日子,我们不得不写出从一个活动导航到另一个活动的意图,并得到那些在处理片段导航和数据交换时遇到的“ supportFragmentManger”错误的日子已经一去不复返了。 Android导航组件在这里负责应用程序内导航,数据传递,导航抽屉创建以及其他很棒的工作。 它是Android Jetpack(谷歌为我们提供的用于Android开发的一组很棒的库)的一部分。
In this blog, we will see the ways in which the navigation component makes our lives easier.
在此博客中,我们将看到导航组件使我们的生活更轻松的方式。
概述: (Overview:)
Navigation refers to the interactions that allow users to navigate across, into, and back out from the different pieces of content within your app. Android Jetpack’s Navigation component helps you implement navigation, from simple button clicks to more complex patterns, such as app bars and the navigation drawer. The Navigation component also ensures a consistent and predictable user experience by adhering to an established set of principles.
导航是指允许用户在应用程序中的不同内容之间进行浏览,浏览和退出的交互。 Android Jetpack的导航组件可帮助您实现导航,从简单的按钮单击到更复杂的模式,例如应用程序栏和导航抽屉。 导航组件还通过遵循一套既定的原则来确保一致且可预测的用户体验。
The Navigation component consists of three key parts that are described below:
导航组件由三个关键部分组成,如下所述:
Navigation graph: An XML resource that contains all navigation-related information in one centralized location. This includes all of the individual content areas within your app, called destinations, as well as the possible paths that a user can take through your app.
导航图:一种XML资源,在一个集中位置包含所有与导航有关的信息。 这包括您应用程序中的所有单个内容区域(称为destinations) ,以及用户可以通过您的应用程序访问的可能路径。
NavHost: An empty container that displays destinations from your navigation graph. The Navigation component contains a default
NavHostimplementation,NavHostFragment, which displays fragment destinations.NavHost:一个空容器,用于显示导航图中的目的地。 导航组件包含默认的
NavHost实现NavHostFragment,它显示片段的目的地。NavController: An object that manages app navigation within a
NavHost. TheNavControllerorchestrates the swapping of destination content in theNavHostas users move throughout your app.NavController:在NavHost中管理应用程序导航的
NavHost。 当用户在整个应用程序中移动时,NavHost会在NavController协调目标内容的交换。
As you navigate through your app, you tell the NavController that you want to navigate either along a specific path in your navigation graph or directly to a specific destination. The NavController then shows the appropriate destination in the NavHost.
在浏览应用程序时,您告诉NavController您想要沿着导航图中的特定路径或直接导航到特定目的地。 该NavController然后显示在相应的目的地NavHost 。
The Navigation component provides a number of other benefits, including the following:
导航组件提供了许多其他好处,包括:
- Handling fragment transactions. 处理碎片交易。
- Handling Up and Back actions correctly by default. 默认情况下,正确处理上下动作。
- Providing standardized resources for animations and transitions. 提供动画和过渡的标准化资源。
- Implementing and handling deep linking (outside the app like web URLs). 实施和处理深层链接(在应用程序外部,例如Web URL)。
- Including Navigation UI patterns, such as navigation drawers and bottom navigation, with minimal additional work. 包括导航UI模式,例如导航抽屉和底部导航,而无需进行任何额外的工作。
Safe Args — a Gradle plugin that provides type safety when navigating and passing data between destinations.
Safe Args-一个Gradle插件,在目的地之间导航和传递数据时提供类型安全。
ViewModelsupport - you can scope aViewModelto a navigation graph to share UI-related data between the graph's destinations.ViewModel支持-您可以将ViewModel作用域ViewModel在导航图上,以在图的目标之间共享与UI相关的数据。
In addition, you can use Android Studio’s Navigation Editor to view and edit your navigation graphs.
此外,您可以使用Android Studio的导航编辑器来查看和编辑导航图。
让我们深入研究代码: (Let’s Dive into the Code:)
1.在构建文件中添加导航依赖项: (1. Add navigation dependency in the build file:)
In build.gradle (project)//check for latest versionnav_version = '2.3.0-alpha02'
In build.gradle (app)//navigation
implementation "androidx.navigation:navigation-fragment-ktx:$nav_version"
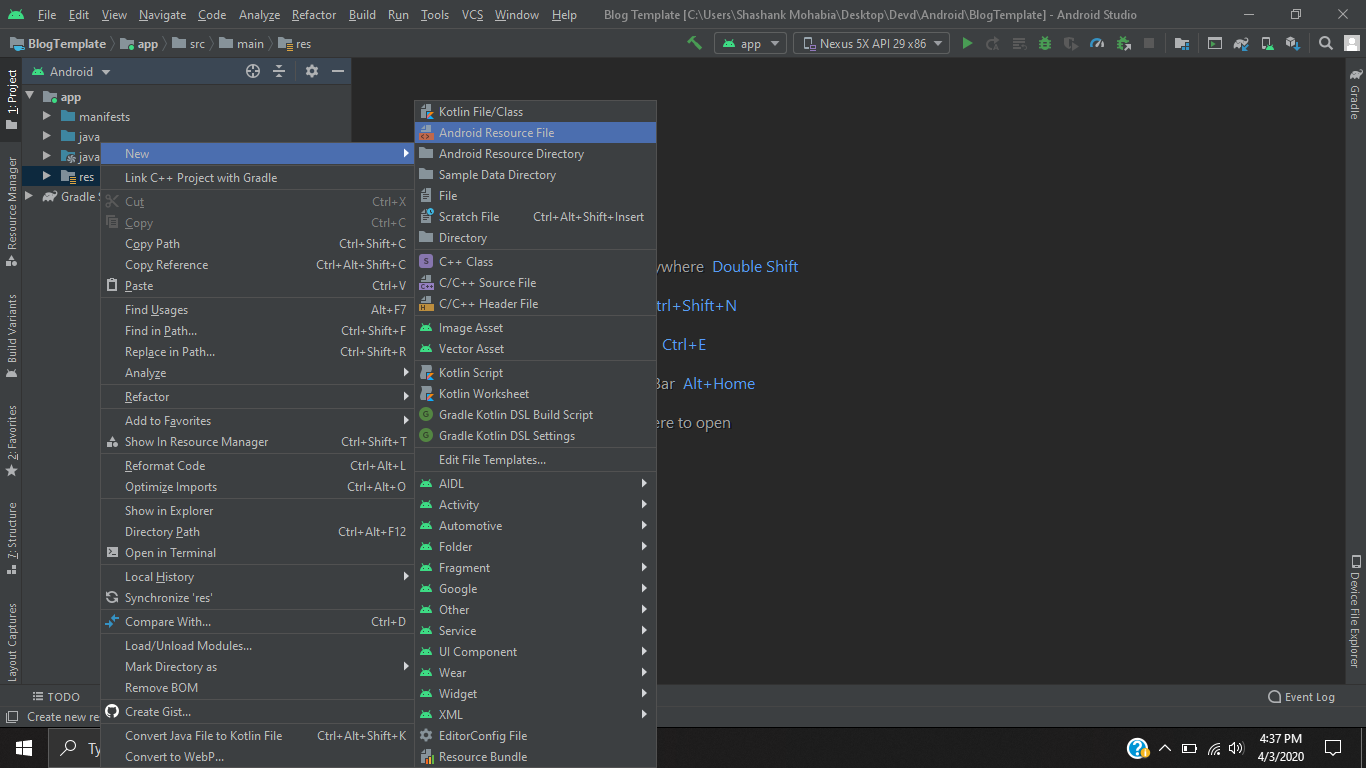
implementation "androidx.navigation:navigation-ui-ktx:$nav_version"2.在Res文件夹中创建一个导航图: (2. Create a navigation graph in Res folder:)
Now we will create a nav graph (separate for each activity preferably) which will include all the destinations (fragments, other nav graphs, activities) and their connections.
现在,我们将创建一个导航图(最好对每个活动都分开),其中将包括所有目的地(片段,其他导航图,活动)及其连接。
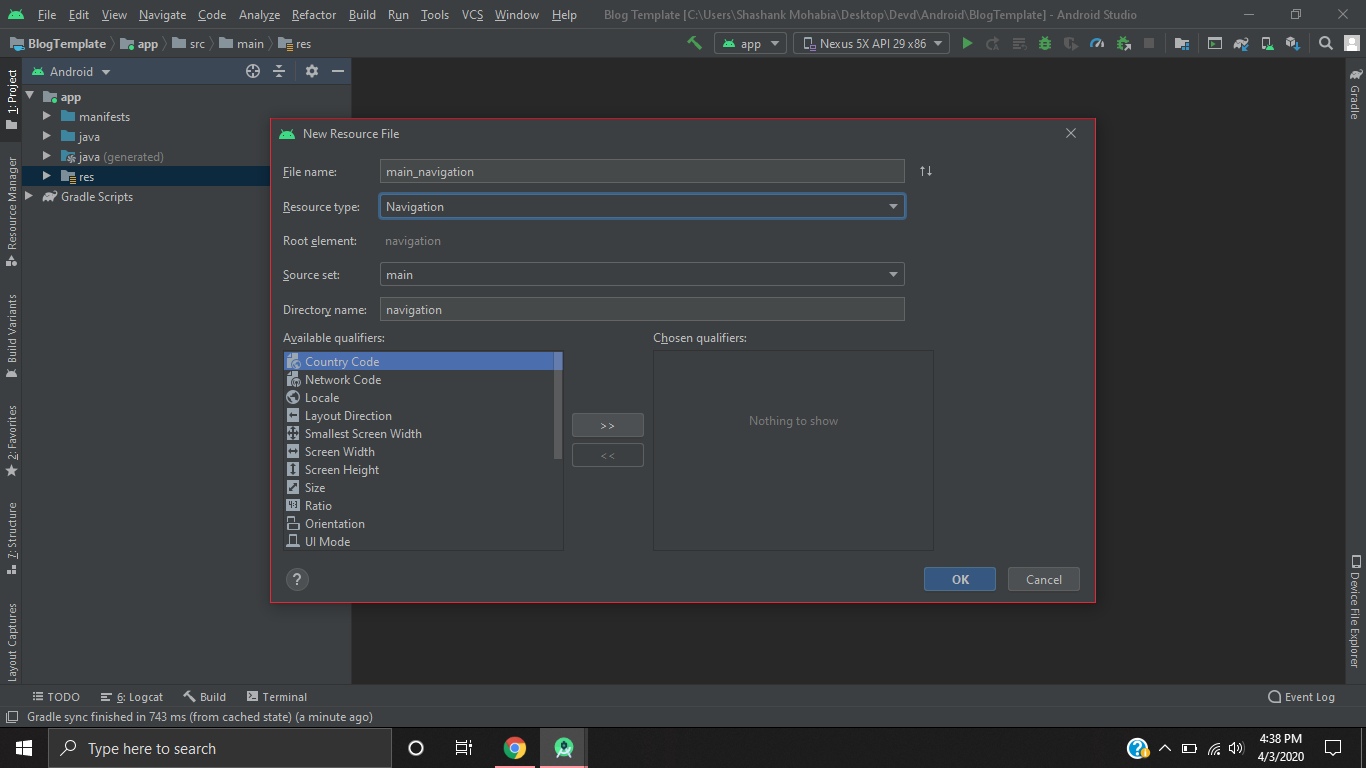
For creating a nav graph follow the steps:
要创建导航图,请遵循以下步骤:
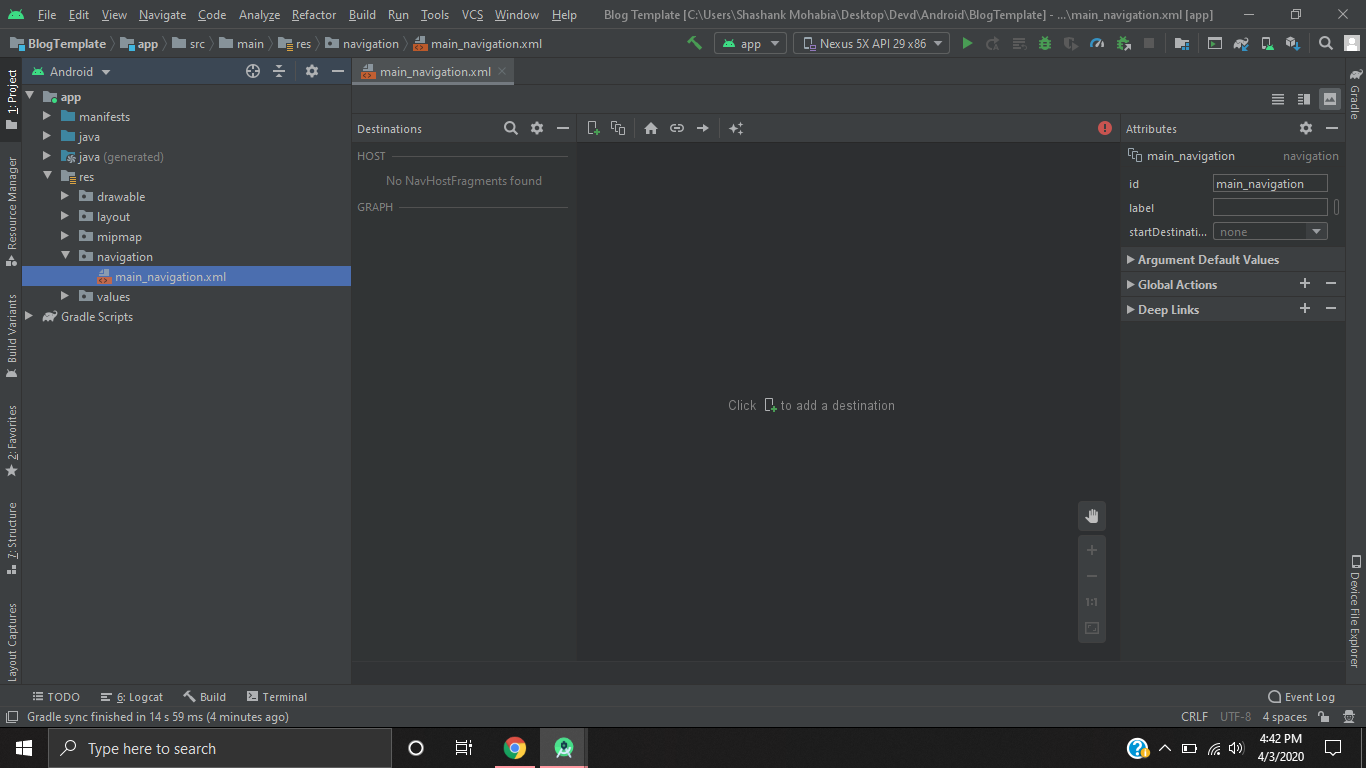
After this, you will get an empty file like this
之后,您将得到一个空文件,像这样
Now we will add a destination (fragment) in the graph
现在,我们将在图中添加一个目标(片段)

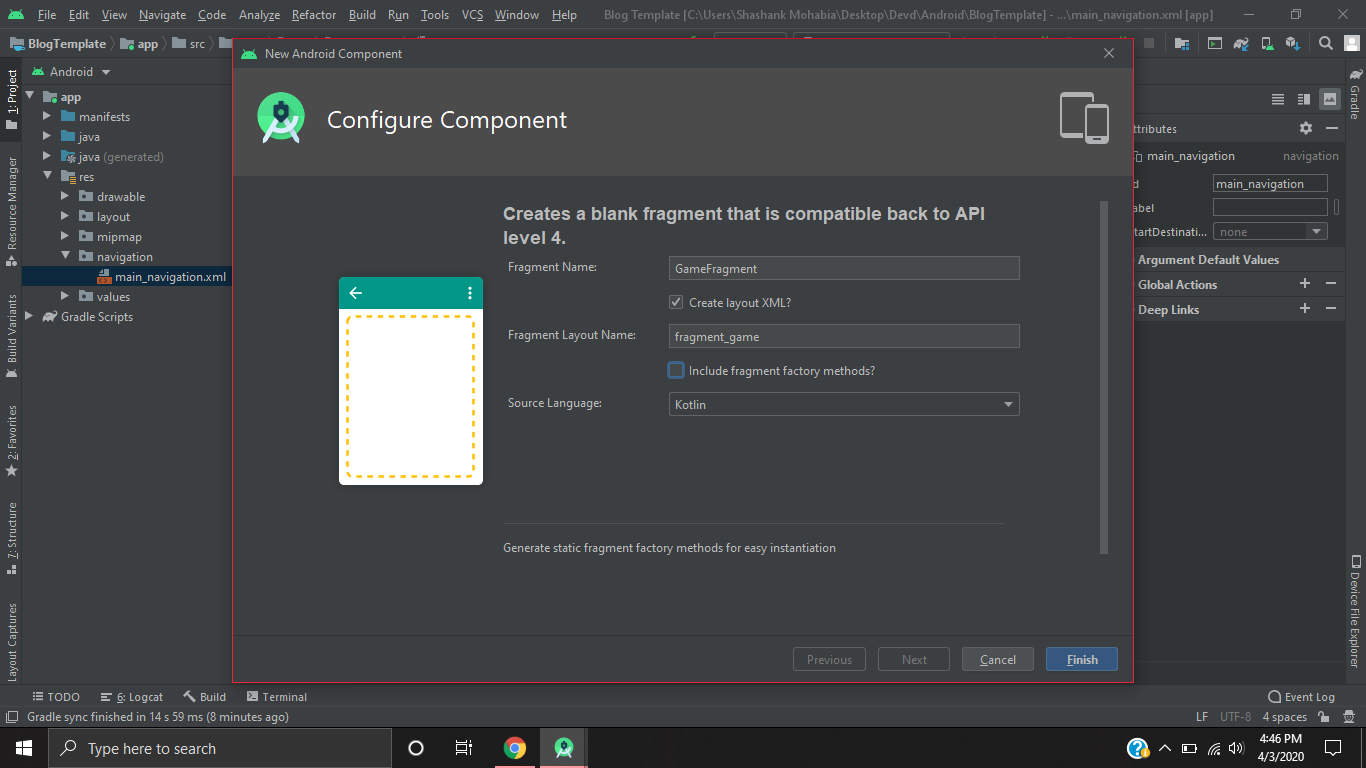
After getting created you will see a GameFragment.kt class in the java folder and fragment_game.xml in the layout folder.
创建后,您将在java文件夹中看到GameFragment.kt类,在布局文件夹中看到fragment_game.xml。
In the text section of main_navigation.xml you can see the fragment destination which has the following properties:
在main_navigation.xml的文本部分中,您可以看到具有以下属性的片段目标:
<fragment
    android:id="@+id/gameFragment"
    android:name="com.example.blogtemplate.GameFragment"
    android:label="fragment_game"
    tools:layout="@layout/fragment_game" />
The label is the one that appears on the title bar in the actual app.
标签是实际应用程序标题栏中显示的标签。
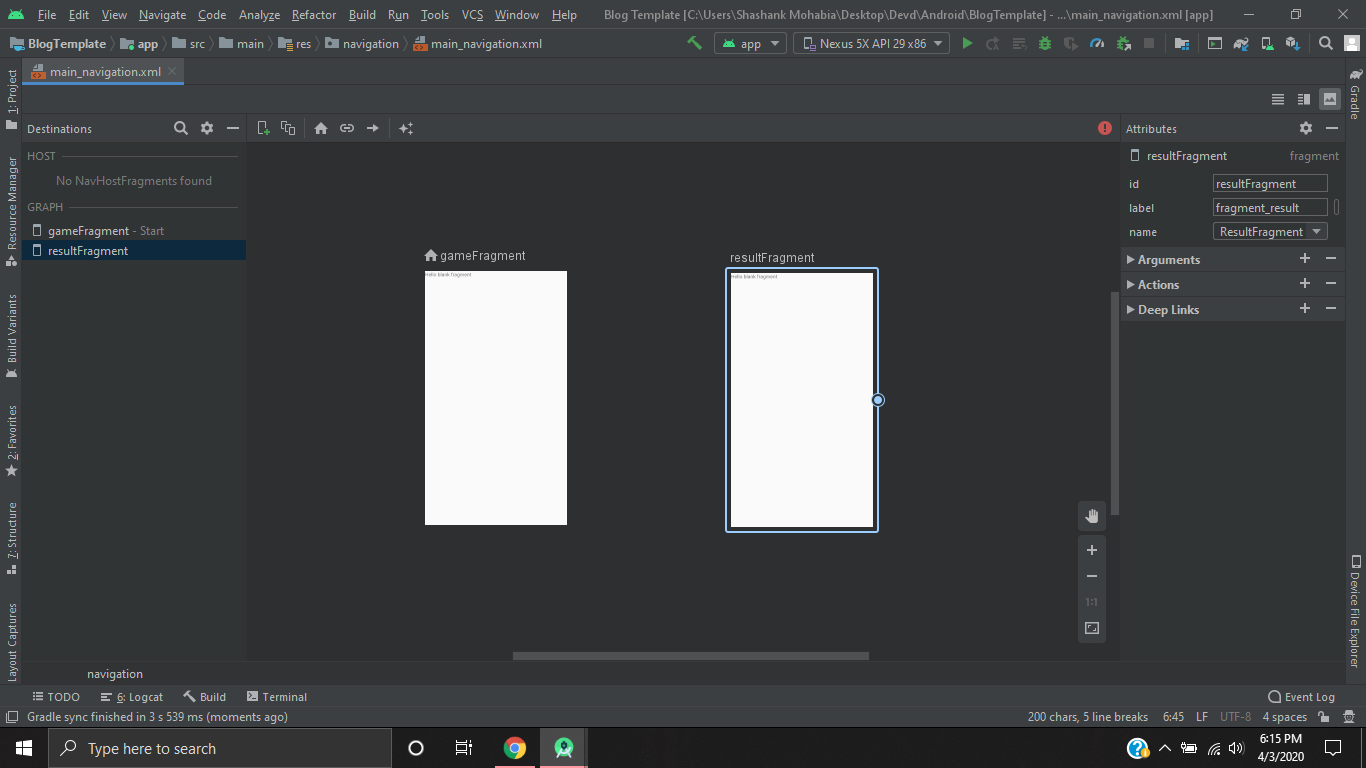
Now add one more destination with name ResultFragment and then the final picture would be like the one below
现在再添加一个名称为ResultFragment的目的地,然后最后一张图片如下所示
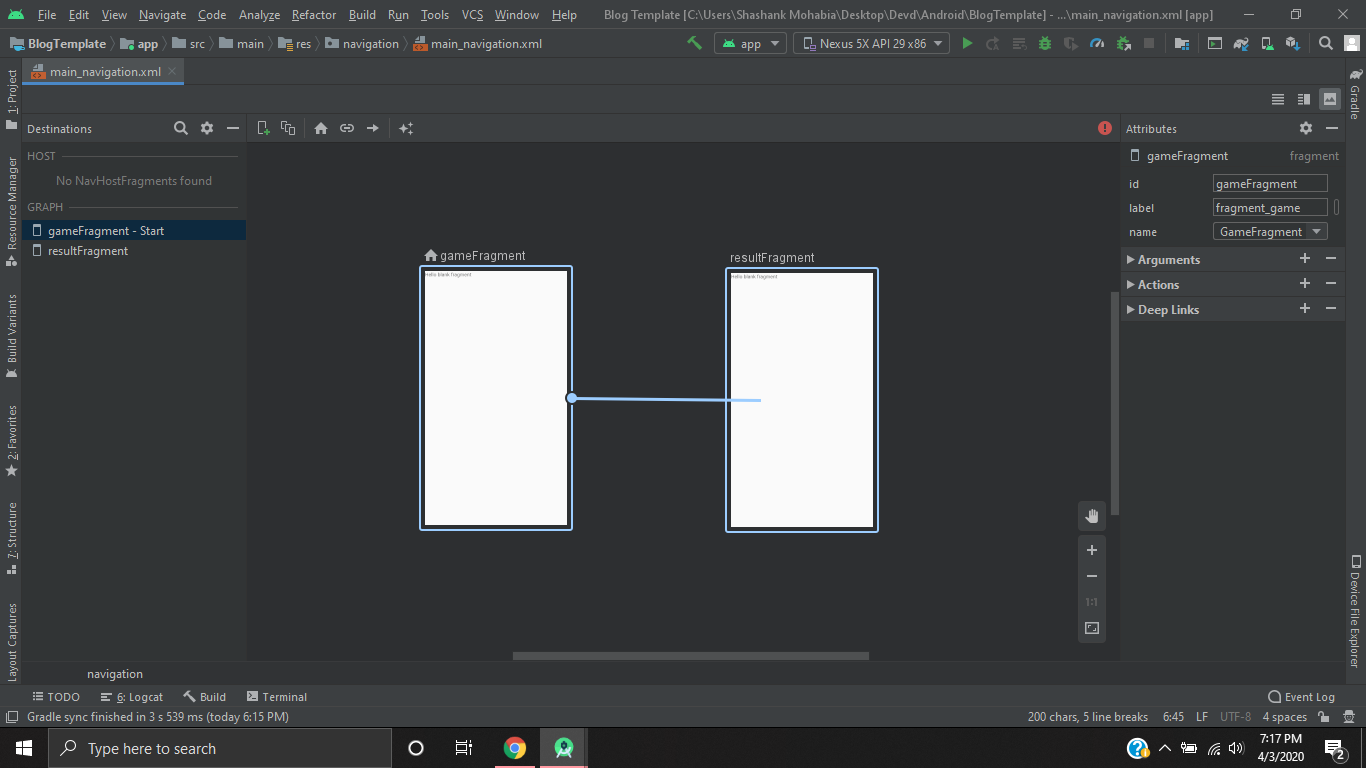
Notice that in the graph list on the left the gameFragment is the starting point in this navigation. This destination can be made the starting point.
注意,在左侧的图形列表中,gameFragment是此导航的起点。 可以将此目的地作为起点。
3.在活动中创建NavHostFragment: (3. Create NavHostFragment in Activity:)
Now we need to create a container where this nav graph can fill the views. For this remove all the child views and create a navHostFragment in your activity’s layout file.
现在,我们需要创建一个容器,该导航图可以在其中填充视图。 为此,请删除所有子视图,并在活动的布局文件中创建navHostFragment。
<?xml version="1.0" encoding="utf-8"?>
<androidx.constraintlayout.widget.ConstraintLayout xmlns:android="http://schemas.android.com/apk/res/android"
<merge xmlns:android="http://schemas.android.com/apk/res/android"
    xmlns:app="http://schemas.android.com/apk/res-auto"
    xmlns:tools="http://schemas.android.com/tools"
    android:layout_width="match_parent"
    android:layout_height="match_parent"
    tools:context=".MainActivity">


    <fragment
        android:id="@+id/nav_host_fragment"
        android:name="androidx.navigation.fragment.NavHostFragment"
        android:layout_width="match_parent"
        android:layout_height="match_parent"
        app:defaultNavHost="true"
        app:navGraph="@navigation/main_navigation" />


</androidx.constraintlayout.widget.ConstraintLayout>
</merge>
Few things to note here:
这里要注意的几件事:
Android Studio will suggest you to change the <fragment> to its androidx component i.e <androidx.fragment.app.FragmentContainerView> but that will create a problem as the navigation library is built for using a fragment and not FragmentContainerView. So don’t change it.
Android Studio建议您将<fragment>更改为其androidx组件,即<androidx.fragment.app.FragmentContainerView>,但这会产生问题,因为导航库是为使用片段而不是FragmentContainerView而构建的。 所以不要改变它。
- The ‘name’ property declares the fragment as a NavHostFragment. “名称”属性将片段声明为NavHostFragment。
- The navGraph property attaches our nav graph to the fragment. navGraph属性将我们的导航图附加到片段。
Update the text in both fragments and run the app and you will see the GameFragment there but there is no navigation going on right now.
更新两个片段中的文本并运行应用程序,您将在其中看到GameFragment,但现在没有导航。
4.添加要导航的动作: (4. Add Actions to Navigate:)
Now let’s add an action to navigate from gameFragment to ResultFragment.
现在让我们添加一个动作,以从gameFragment导航到ResultFragment。
Click on the gameFragment and using the dot drags line to the resultFragment.
单击gameFragment,然后使用点拖线将其拖到resultFragment。
One thing to notice here is the popUpTo attribute on the left as shown below. Setting a value to it means that when we navigate using this action then all the fragments till the one set as the value will be popped from the stack i.e in simpler terms on pressing back we will skip till the given fragment is reached. The inclusive checkbox pops even the fragment which is set as the value for the popUpTo property.
此处需要注意的一件事是左侧的popUpTo属性,如下所示。 为其设置一个值意味着当我们使用此操作导航时,所有片段(直到将其作为值的一个片段)将从堆栈中弹出,即,简单地按一下,我们将跳过直到到达给定的片段。 包含在内的复选框甚至会弹出设置为popUpTo属性值的片段。
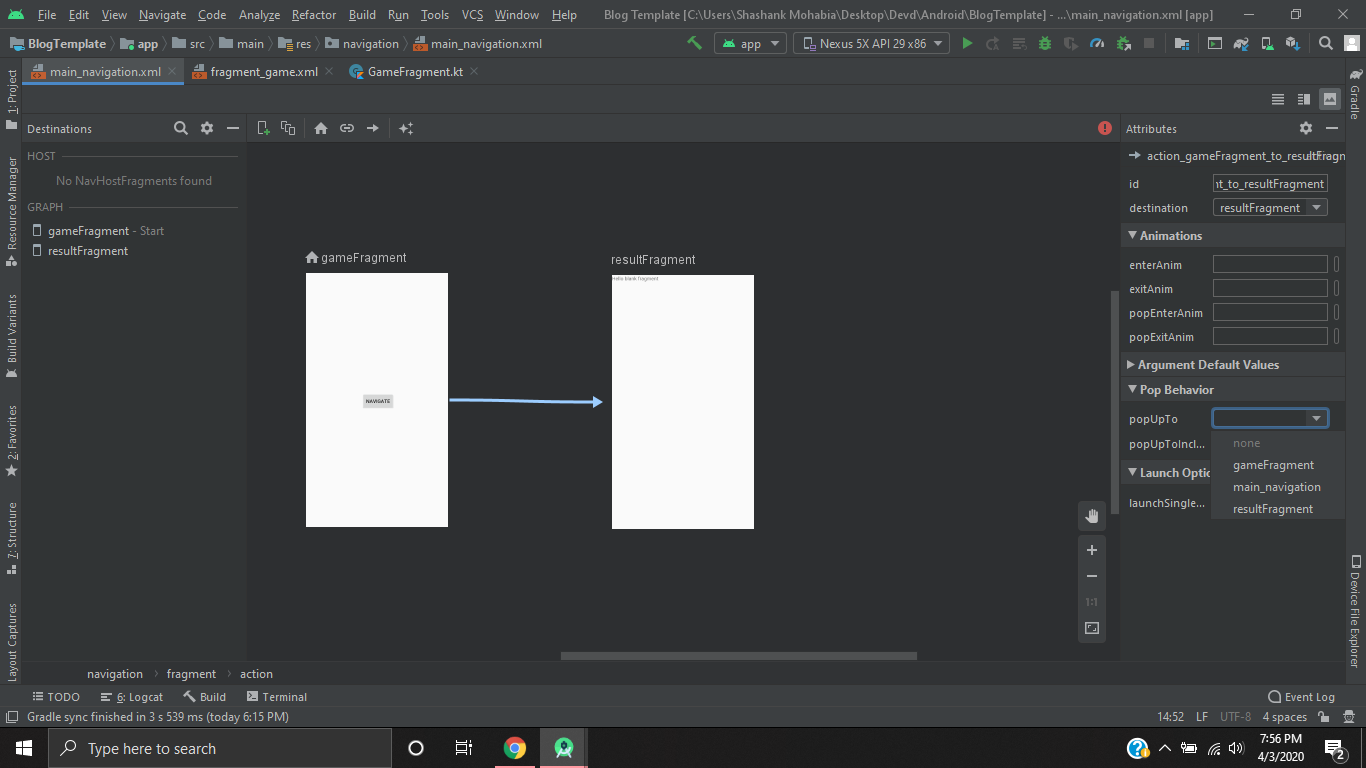
You can also add animations for the navigation from the attributes section on the right. The id will be used to navigate.
您也可以从右侧的“ 属性”部分添加用于导航的动画。 该ID将用于导航。
5.使用操作导航: (5. Navigate Using Action:)
Now we need something that can trigger navigation, so let’s add a button to the GameFragment and then the onClickListener can act as the trigger. our final fragment_game.xml should like this:
现在我们需要可以触发导航的内容,因此让我们向GameFragment添加一个按钮,然后onClickListener可以充当触发器。 我们最终的fragment_game.xml应该是这样的:
<?xml version="1.0" encoding="utf-8"?>
<androidx.appcompat.widget.LinearLayoutCompat xmlns:android="http://schemas.android.com/apk/res/android"
    xmlns:tools="http://schemas.android.com/tools"
    android:layout_width="match_parent"
    android:layout_height="match_parent"
    android:gravity="center"
    tools:context=".GameFragment">


    <androidx.appcompat.widget.AppCompatButton
        android:id="@+id/navigate_button"
        android:layout_width="wrap_content"
        android:layout_height="wrap_content"
        android:text="navigate" />


</androidx.appcompat.widget.LinearLayoutCompat>
Now to trigger the navigation let’s add an onClickListener in the GameFragment.kt
现在触发导航,让我们在GameFragment.kt中添加一个onClickListener
class GameFragment : Fragment() {


    override fun onCreateView(
        inflater: LayoutInflater, container: ViewGroup?,
        savedInstanceState: Bundle?
    ): View? {

        navigate_button.setOnClickListener {
            NavHostFragment.findNavController(this).navigate(R.id.action_gameFragment_to_resultFragment)
        }

        return inflater.inflate(R.layout.fragment_game, container, false)
    }


}
Now run the app and test it by clicking the navigate button. It will navigate it to the resultFragment.
现在运行该应用程序并通过单击导航按钮对其进行测试。 它将导航到resultFragment。
This is the entire process to navigate up and down the app by adding more destinations to it. The nav graph can be a bit more complex as the one shown in the cover picture of this blog but believe me if you don’t use it and try to navigate using intents you will have to write a lot of similar code and also get a lot of errors will be there, so best of luck😉.
这是通过向应用程序添加更多目的地来向上和向下导航应用程序的整个过程。 导航图可能有点复杂,如本博客的封面图片所示,但请相信我,如果您不使用它并尝试使用意图进行导航,则您将不得不编写很多类似的代码,并获得一个会有很多错误,所以祝你好运。
In the next part of this series, we will see the way in which we can pass data between the fragments using navigation and safe args.
在本系列的下一部分中,我们将看到使用导航和安全参数在片段之间传递数据的方式。
Feel free to comment if there are doubts or if you feel anything needs to be corrected😀.
如果有任何疑问或您觉得需要纠正任何问题,请随时发表评论😀。
翻译自: https://medium.com/swlh/android-navigation-component-part-1-6191323eaf39


 1461
1461

 被折叠的 条评论
为什么被折叠?
被折叠的 条评论
为什么被折叠?
 到【灌水乐园】发言


