


 本文档介绍如何使用Flutter将图像上传到Amazon S3。内容来源于Medium上的一篇教程,指导开发者进行实际操作。
flutter 图片上传
Welcome to this tutorial for uploading images to AWS S3 — part 1
欢迎使用本教程,将图像上传到AWS S3-第1部分
You can connect with me on Instagram
您可以在Instagram上与我联系
Make sure you also checkout the new updated article for uploading single photo-
确保您还签出了新的更新文章以上传单张照片,
让我们从看到最终目标开始 (Let’s start by seeing our end goal)
Disclaimer: This might be more than what you were looking for.
免责声明:这可能超出您的期望。
If you just want to know how to upload files to AWS S3, check the Problem 3 solution.
如果您仅想知道如何将文件上传到AWS S3,请查看问题3解决方案 。
分解 (Breaking down)
- Handle photos permission 处理照片权限
- Open image picker, select and load image 打开图像选择器,选择并加载图像
- Upload image to AWS S3 bucket 将图像上传到AWS S3存储桶
- Show loading and error uploading image 显示加载和错误上传图片
- Open image 开启图片
- Save images 保存图像
- Delete image 删除图片
首先解决问题1 (Let’s solve problem 1 first)
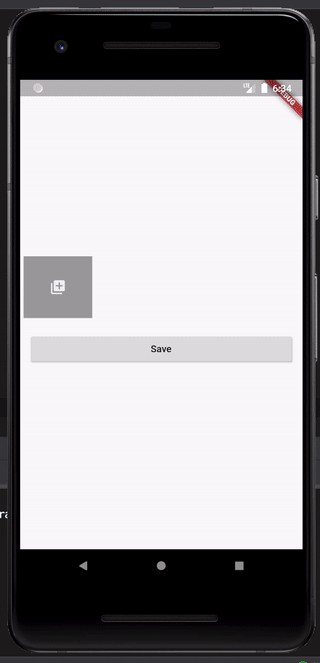
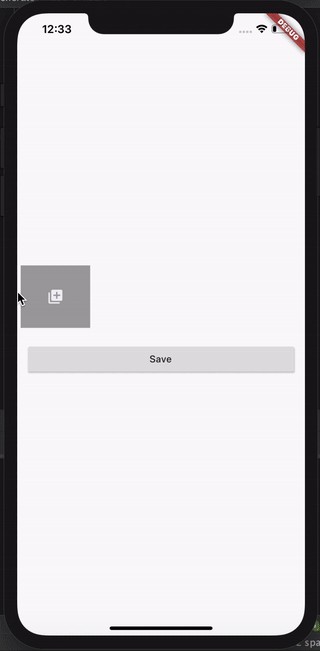
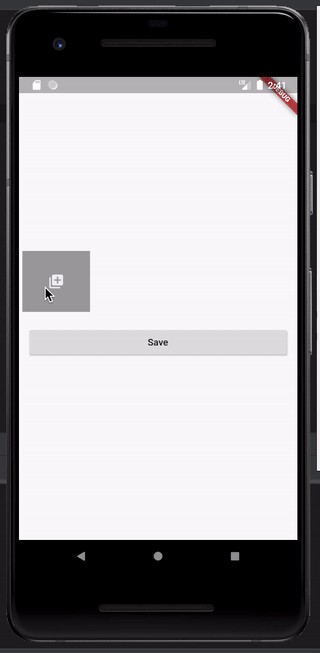
First we need a starter code for layout-
首先,我们需要一个用于布局的入门代码-
让我们检查输出- (Lets check the output-)

我们做了什么? (What did we do?)
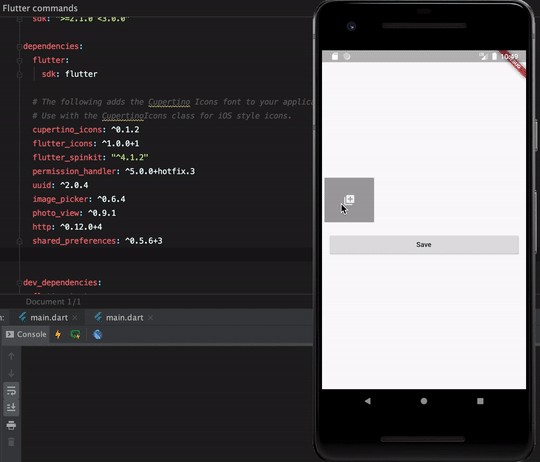
Add flutter_icons: ^1.0.0+1 to pubspec.yaml
将flutter_icons:^ 1.0.0 + 1添加到pubspec.yaml
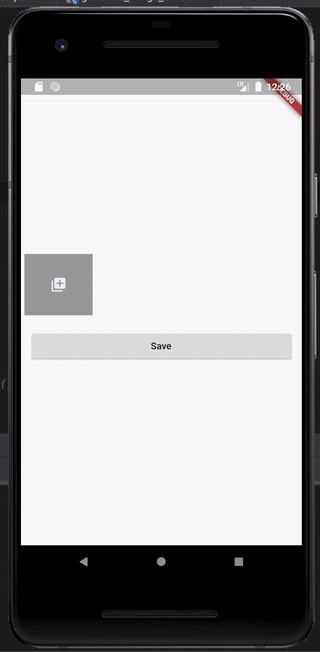
- We created a list view with at least 1 item 我们创建了一个至少包含1个项目的列表视图
- The first item is used to add photos 第一项用于添加照片
- More images will be added to the end of the list 更多图像将添加到列表的末尾
We also added a PhotoSource list which will keep the source of each image
我们还添加了一个PhotoSource列表,该列表将保留每个图像的来源
现在让我们处理权限- (Now let's handle permissions-)
让我们检查输出- (Let's check the output-)
For Android-
对于Android-
For IOS-
对于IOS-
我们做了什么? (What did we do?)
Added library permission_handler: ^5.0.0+hotfix.3 to pubspec.yaml.
在pubspec.yaml中添加了库permission_handler:^ 5.0.0 + hotfix.3。
- Created a common class to display dialogs based on platform. 创建一个通用类来显示基于平台的对话框。
- As you can see from the above two videos, different dialog is shown based on platform. 从以上两个视频中可以看到,基于平台显示了不同的对话框。
让我们看一下程序流程 (Lets see the program flow)
NOTE: In the above videos, the app is installed with no existing version.
注意:在以上视频中,该应用程序未安装任何版本。
NOTE 2: We need storage permission from Android and photos permission for IOS.
注意2:我们需要Android的存储权限和IOS的照片权限。
For Android-
对于Android-
When clicking on add photo button
单击添加照片按钮时
For the first time- Permission status is undetermined and we can ask the user for permission. What we do- We deny the permission.
首次 -权限状态不确定 ,我们可以向用户询问权限。 我们做什么-我们拒绝允许。
For the second time- Permission status is denied, but we can still ask the user for permission. What we do- We deny the permission with the option to Don’t ask again.
第二次-权限状态被拒绝 ,但是我们仍然可以向用户请求权限。 我们做什么-我们拒绝许可,并带有“不再询问 ”选项。
For the third time- Permission status is permanentlyDenied because we selected the Don’t ask again option. So if we request permission again, we won’t see that dialog. But to still allow the user to change permission, we show user a dialog which lets the user go to the app settings and change permission. What we do- Change the storage permission from Off to On.
第三次-权限状态被永久 拒绝,因为我们选择了“不再询问”选项。 因此,如果我们再次请求许可,我们将不会看到该对话框。 但是为了仍然允许用户更改权限,我们向用户显示一个对话框,该对话框允许用户转到应用程序设置并更改权限。 我们的工作-将存储权限从“ 关闭”更改为“ 打开”。
For the fourth time- Permission status is granted because we changed and allowed the permissions from app settings.
第四次, 授予权限状态,因为我们更改并允许来自应用设置的权限。
For IOS-
对于IOS-
When clicking on the add photo button
单击添加照片按钮时
For the first time- Permission status is undetermined and we can ask the user for permission. What we do- We deny the permission.
首次-权限状态不确定 ,我们可以向用户询问权限。 我们做什么-我们拒绝允许。
For the second time- Permission status is denied. So if we request permission again we won’t see that dialog, but to still allow the user to change permission, we show the user a dialog which lets the user go to the app settings and change permission. What we do- Change the permission from Never to Read and Write.
第二次-权限状态被拒绝。 因此,如果我们再次请求权限,我们将不会看到该对话框,但仍允许用户更改权限,我们将向用户显示一个对话框,该对话框允许用户转到应用程序设置并更改权限。 我们的工作-将权限从“ 从不”更改为“ 读写”。
For the third time- Permission status is granted because we changed and allowed the permissions from app settings.
第三次- 授予权限状态,因为我们更改并允许来自应用设置的权限。
As we can see, in case of permission status is denied, we can request permission in Android but not in IOS.
如我们所见,如果权限状态被拒绝,我们可以在Android中 请求权限,但不能在IOS中 请求权限。
Problem 1 solved.
问题1解决了。
现在解决问题2 (Let’s solve problem 2 now)
Problem 2: Open image picker, select and load image
问题2:打开图像选择器,选择并加载图像
NOTE: We also added a GalleryItem list to _ImagePickerWidgetState class
注意: 我们还 向 _ImagePickerWidgetState 类 添加了 GalleryItem 列表。
让我们检查输出- (Let's check the output-)
For Android-
对于Android-
For IOS-
对于IOS-
我们做了什么? (What did we do?)
Added library image_picker: ^0.6.4, uuid: ^2.0.4 and path: ^1.6.4 to pubspec.yaml.
向pubspec.yaml添加了库image_picker:^ 0.6.4,uuid:^ 2.0.4和路径:^ 1.6.4 。
If the permission is granted, we will use the image_picker to open gallery.
如果授予该权限,我们将使用image_picker打开图库。
If an image was selected, we will add that photo to our lists and use setState() to refresh
如果选择了图像 ,我们将把该照片添加到列表中,并使用setState()刷新
Problem 2 is solved.
问题2已解决。
现在让我们解决问题3 (Lets solve problem 3 now)
Problem 3: Upload image to AWS S3 bucket
问题3:将图像上传到AWS S3存储桶
Prerequisite:
先决条件:
- A public bucket in AWS S3 AWS S3中的公共存储桶
- Access token and secret token with access to AWS S3 bucket 可访问AWS S3存储桶的访问令牌和秘密令牌
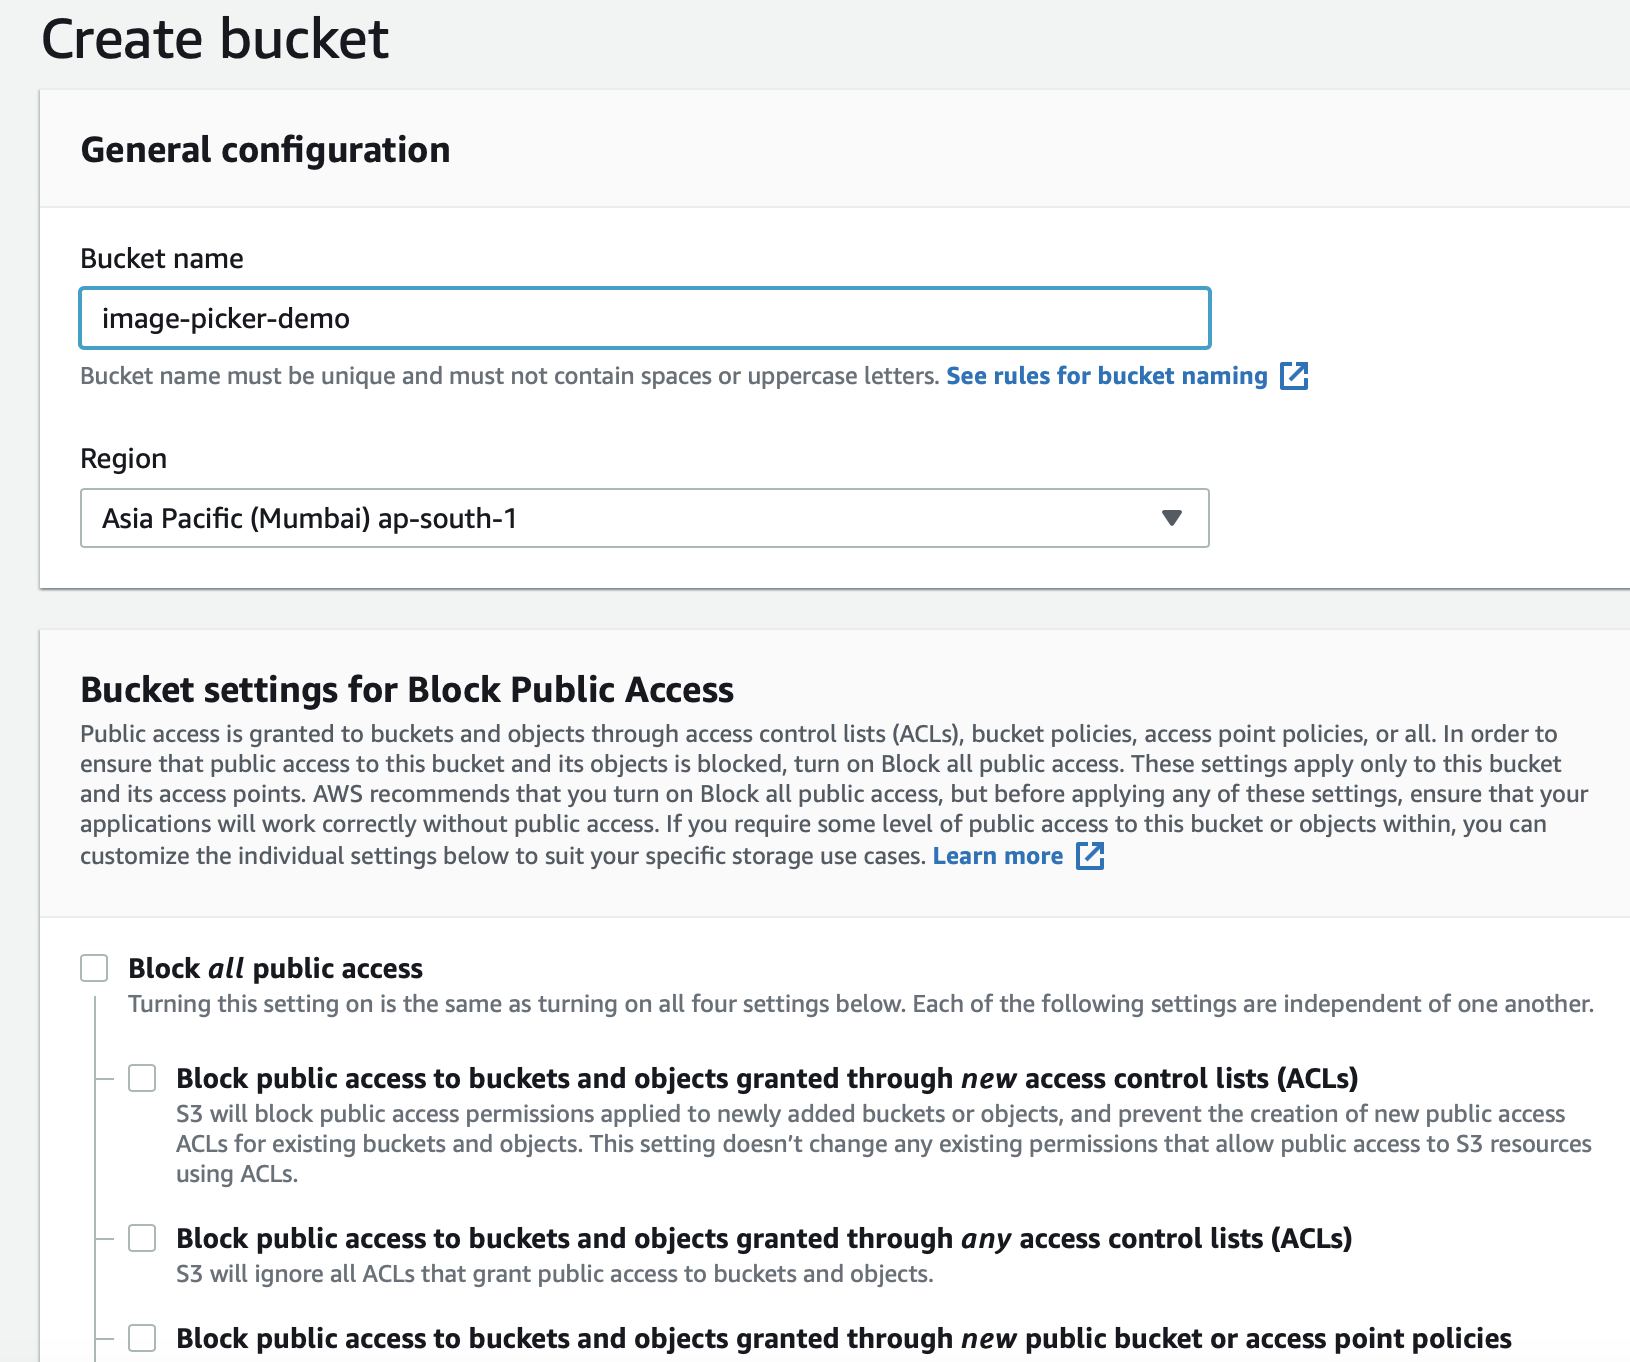
创建公共存储桶: (To create a public bucket:)
Step 1: Login or Create an account on AWS
步骤1:在AWS上登录或创建帐户
Step 2: Go to AWS S3 Service
步骤2:转到AWS S3服务
Step 3: Create a bucket with public access and region based on your users' geolocation
第3步:根据用户的地理位置创建具有公共访问权限和区域的存储桶
要创建/获取访问令牌和秘密令牌: (To Create/Get access token and secret token:)
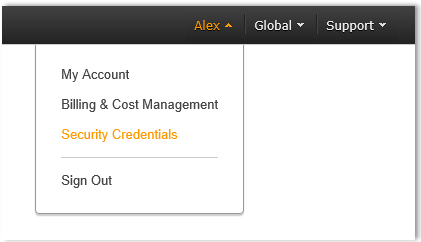
Step 1: Go to Amazon Web Services console and click on the name of your account (it is located in the top right corner of the console). Then, in the expanded drop-down list, select Security Credentials.
步骤1:转到Amazon Web Services控制台,然后单击您的帐户名称(该名称位于控制台的右上角)。 然后,在展开的下拉列表中,选择“ 安全凭据” 。
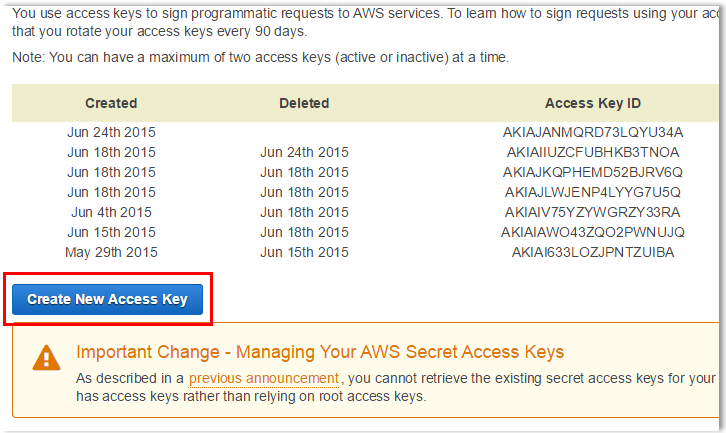
Step 2: Expand the Access Keys (Access Key ID and Secret Access Key) option. You will see the list of your active and deleted access keys.
步骤2:展开访问密钥(访问密钥ID和秘密访问密钥)选项。 您将看到活动和已删除访问键的列表。
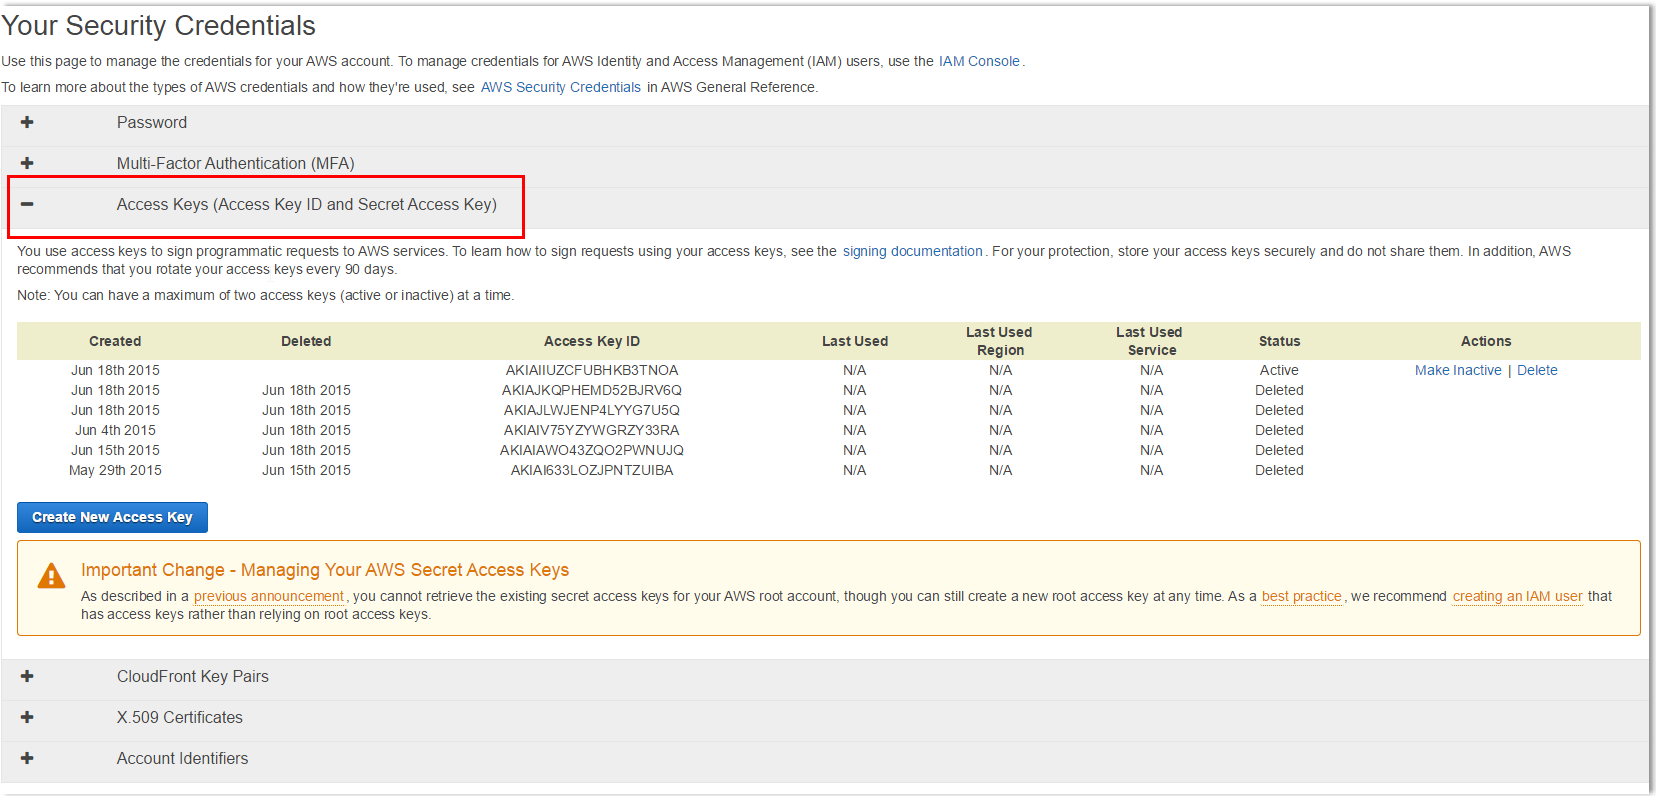
Step 3: To generate new access keys, click the Create New Access Key button.
步骤3:要生成新的访问密钥,请单击创建新的访问密钥按钮。
Step 4: Click Show Access Key to have it displayed on the screen. Note, that you can download it to your machine as a file and open it whenever needed. To download it, just click the Download Key File button.
步骤4:单击Show Access Key(显示访问密钥)以使其显示在屏幕上。 请注意,您可以将其作为文件下载到计算机上,并在需要时将其打开。 要下载它,只需单击“ 下载密钥文件”按钮。
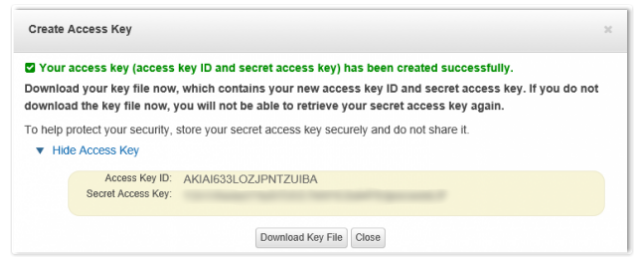
IMPORTANT: If you do not download the key file to your computer before you press “Close” or “Cancel” you will not be able to retrieve the secret key in future.
重要说明:如果您在按“关闭”或“取消”之前未将密钥文件下载到计算机,则以后将无法检索密钥。
Now that we have all the prerequisites, lets start uploading.
现在我们已经具备所有先决条件,让我们开始上传。
What will be use?
有什么用?
NodeJs server with express framework.
具有快速框架的NodeJs服务器。
How will we upload images?
我们将如何上传图像?
Request our NodeJs server to give us a download and upload Url.
请求我们的NodeJs服务器为我们提供下载和上传网址。
Then upload the image to the upload Url.
然后将图像上传到上传网址。
Save the download url and use it to show images.
保存下载 URL并使用它显示图像。
Lets get the server ready first
让我们先准备好服务器
It's already ready for you :)
已经为您准备好了:)
What do you need to do?
你需要做什么?
- Download the repository 下载资料库
Update config-aws.js.
更新config-aws.js 。
- Open repository in terminal 在终端中打开存储库
Install node packages using npm install
使用npm install安装节点软件包
Run server using npm start
使用npm start运行服务器
现在服务器已准备就绪并且正在运行。 (Now the server is ready and running.)
现在让我们从应用程序上传图像 (Now lets upload images from app)
IMPORTANT: Remember to use url in GenerateFileUrl based on your emulator.
重要说明:请记住要根据模拟器在GenerateFileUrl中使用url。
我们做了什么? (What did we do?)
Added library http: ^0.12.0+4 to pubspec.yaml.
已将库http:^ 0.12.0 + 4添加到pubspec.yaml。
Called our NodeJs function from GenerateImageUrl to return an upload and download url as the response.
从GenerateImageUrl调用了我们的NodeJs函数,以返回上传和下载URL作为响应。
Then stored the upload and download url in our generateImageUrl object instance.
然后将上传和下载URL存储在我们的genateateImageUrl对象实例中。
Then use the UploadFile object instance in uploadFile function to upload image to upload url.
然后在uploadFile函数中使用UploadFile对象实例上传图片以上传url。
If the upload is successful, we add the download url to photoUrls list.
如果上传成功 ,我们将下载网址添加到photoUrls列表中。
让我们检查输出- (Let's check the output-)
For Android-
对于Android-
For IOS-
对于IOS-
Let's check our AWS S3 bucket-
让我们检查一下我们的AWS S3存储桶-
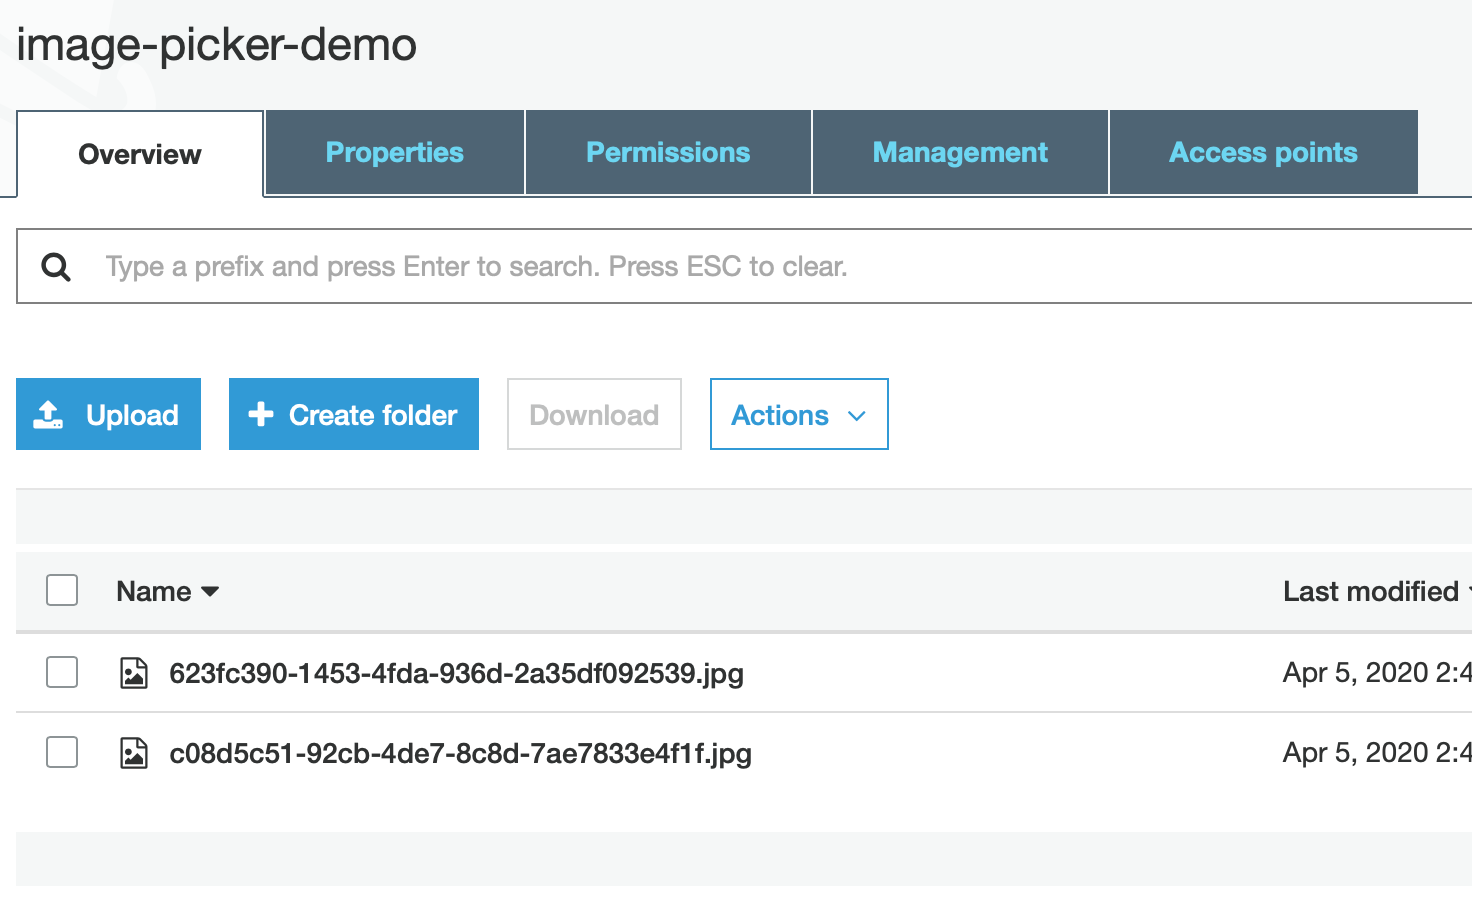
Now we have both the files we uploaded in our AWS S3 bucket.
现在,我们将两个文件都上传到了AWS S3存储桶中。
Problem 3 is solved.
问题3已解决。
Part 2 is available here.
第2部分在这里可用。
Check the full project here.
Thank you for staying
谢谢你留下来
更多颤振微博 (More flutter spinner blogs)
I will be posting more about flutter, so stay tuned :)
我将发布更多有关颤振的信息,敬请期待:)
翻译自: https://medium.com/swlh/uploading-images-to-s3-flutter-part-1-92c52ce62432
flutter 图片上传


 被折叠的 条评论
为什么被折叠?
被折叠的 条评论
为什么被折叠?
 到【灌水乐园】发言


