


“Simplicity is the ultimate sophistication” ~ Leonardo da Vinci
“简单是终极的成熟”〜达芬奇(Leonardo da Vinci)
Today, I will share my journey of building and hosting a Recipe app using Angular, Firebase (for hosting the angular app), and a public API called Recipe-Food-Nutrition by spoonacular hosted at RapidAPI.
今天,我将分享我的构建和托管采用了棱角分明,火力地堡配方应用的旅程(主办角应用程序),以及一个名为公共API 配方食品,营养通过spoonacular在托管RapidAPI 。
As we are not going to discuss on how to set up an Angular application with material library and firebase, I would assume that you have good knowledge. Otherwise, I would recommend you to refer to my article.
由于我们不打算讨论如何使用材质库和firebase设置Angular应用程序,因此我认为您具有丰富的知识。 否则,我建议您参考我的文章 。
我们要学什么? (What are we about to learn?)
- Setting up RapidAPI account 设置RapidAPI帐户
- Using RapidAPI to build a recipe search app in angular 使用RapidAPI以角度构建食谱搜索应用程序
1.设置RapidAPI帐户 (1. Setting up RapidAPI account)
Setting up rapidapi account is pretty straight forward and it involves no fee. I would recommend joining using google account and once you are logged in search for food and you should see Recipe-Food-Nutrition API. Currently, this API is popular so it should be your first result
设置Rapidapi帐户非常简单,无需任何费用。 我建议您使用Google帐户加入,一旦您登录搜索食物,您应该会看到Recipe-Food-Nutrition API 。 目前,此API很流行,因此它应该是您的第一个结果
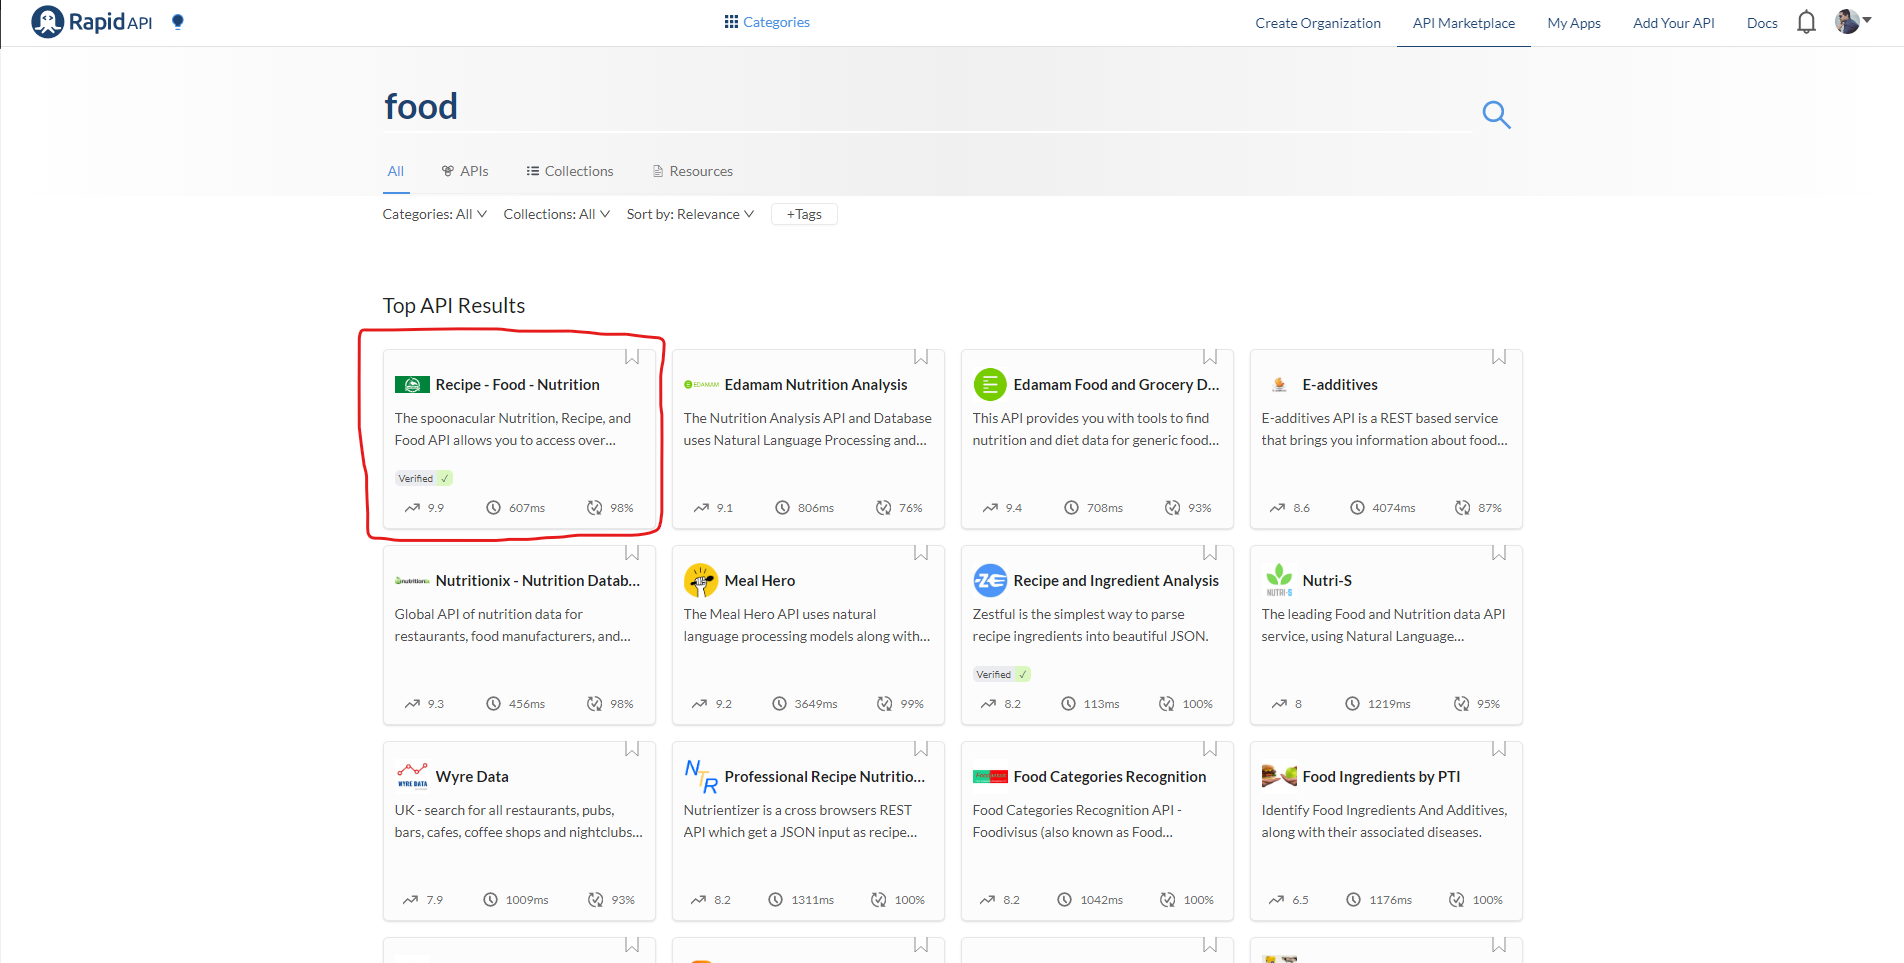
Once you click on the API, it will take you to API details and endpoints screen as below.
单击API后,将带您进入如下的API详细信息和端点屏幕。

We have to subscribe before we can test any endpoint. So go ahead and hit subscribe to test.
我们必须先订阅,然后才能测试任何端点。 因此,继续并点击订阅测试。

Select a basic plan which will allow us to make 50 large and 500 tiny requests per day.
选择一个基本计划,该计划将允许我们每天提出50个大请求和500个小请求。
At this stage, you have noticed this API has a lot of endpoints but we are going to use “Autocomplete recipe search” and “Get recipe information”.
在此阶段,您已经注意到该API有很多端点,但是我们将使用“自动完成配方搜索”和“获取配方信息”。
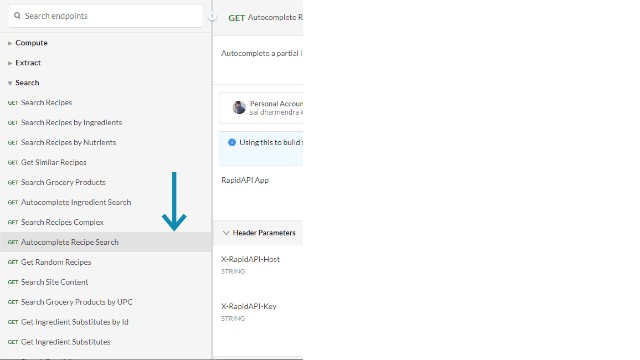
Documentation doesn’t have any information saying which endpoint is tiny and which one is considered as large request. In my experimentation, I found out that “Autocomplete recipe search” is tiny, and “Get Recipe information” is being considered as a large request. In essence, we can make 50 Get recipe information requests and 500 autocomplete recipe search requests per day.
文档没有任何信息说明哪个端点很小,哪个端点被认为是大请求。 在我的实验中,我发现“自动完成食谱搜索”很小,而“获取食谱信息”被认为是一个大请求。 从本质上讲,我们每天可以发出50个“获取食谱信息”请求和500个“自动完成”食谱搜索请求。
One more thing to keep in mind is we can see how many requests left in the response headers.
要记住的另一件事是,我们可以看到响应头中还剩下多少个请求。

You might be wondering how you can manage your development stage when you are limited to make only 50 free requests. This is where the JSON server comes to play and it requires a separate article to explain (which I will do).
您可能想知道当您只能提交50个免费请求时,如何管理开发阶段。 这是JSON服务器发挥作用的地方,它需要单独的文章进行解释(我将做)。
For now, we will proceed to our next step of using rapid API in our angular app.
现在,我们将继续下一步,在我们的角度应用程序中使用快速API。
2.使用RapidAPI构建食谱搜索应用 (2. Using RapidAPI to build a Recipe search app)
Once you have the basic angular app up and running, let’s begin by creating a lazy-loaded module called recipe using Angular CLI
基本的角度应用程序启动并运行后,让我们开始使用Angular CLI创建一个名为食谱的延迟加载模块
ng g m recipe — route recipe — module app.moduleThis will create a folder named recipe with `recipe.module.ts` and the default recipe component for this module. In addition, `app-routing.module.ts` will be updated as below
这将创建一个名为“ recipe.module.ts”的配方文件夹,以及该模块的默认配方组件。 另外,` app-routing.module.ts`将更新如下
import { NgModule } from '@angular/core';
import { Routes, RouterModule } from '@angular/router';


const routes: Routes = [
  {
    path: '',
    redirectTo: 'recipe',
    pathMatch: 'full',
  },
  {
    path: 'recipe',
    loadChildren: () =>
      import('./recipe/recipe.module').then((m) => m.RecipeModule),
  },
];


@NgModule({
  imports: [RouterModule.forRoot(routes)],
  exports: [RouterModule],
})
export class AppRoutingModule {}
Let’s create components & services in the recipe module for searching recipes and showing details of the selected recipe by using Angular CLI
让我们在配方模块中创建组件和服务,以使用Angular CLI搜索配方并显示所选配方的详细信息
ng g c recipe/r-search
ng g c recipe/r-info
ng g s recipe/services/recipe
ng g s recipe/services/store
Now, we need a typeahead for the user to search for recipes. For this, I have used MatAutocompleteModule from the material library.
现在,我们需要用户输入搜索食谱的密码。 为此,我使用了材料库中的MatAutocompleteModule 。
<mat-form-field style="width: 75%">
        <input
          type="text"
          placeholder="Search your favourite recipe"
          matInput
          [formControl]="recipeAutoComplete"
          [matAutocomplete]="auto"
        />


        <mat-autocomplete
          autoActiveFirstOption
          #auto="matAutocomplete"
          [displayWith]="recipeDisplayValue"
          (optionSelected)="onRecipeSelect($event)"
        >
          <mat-option
            *ngFor="let recipe of recipeAutoComplete$ | async"
            [value]="recipe"
          >
            {{ recipe.title }}
          </mat-option>
        </mat-autocomplete>
      </mat-form-field>
Let’s look at the component code to handle recipe typeahead.
让我们看一下处理配方提前的组件代码。
recipeAutoComplete: FormControl = new FormControl();
  recipeAutoComplete$: Observable<RecipeAutocomplete[]>;

  ngOnInit(): void {
    this.onRecipeAutoCompleteValueChange();
  }


  onRecipeSelect(selectedEvent: MatAutocompleteSelectedEvent): void {
    const selectedRecipe: RecipeAutocomplete = selectedEvent.option.value;
    this.isInitial = false;
    this.getRecipeInfo(selectedRecipe.id);
  }


  private getRecipeInfo(recipeId: number): void {
    this.loaderService.showProgressBar();
    this.recipeService
      .getRecipeInfo(recipeId)
      .pipe(finalize(() => this.loaderService.hideProgressBar()))
      .subscribe((recipeInfo) => this.store.updateRecipeInfo(recipeInfo));
  }

  private onRecipeAutoCompleteValueChange(): void {
    this.recipeAutoComplete$ = this.recipeAutoComplete.valueChanges.pipe(
      debounceTime(1000),
      distinctUntilChanged(),
      tap(() => (this.loading = true)),
      switchMap((val) =>
        this.searchRecipes(val).pipe(finalize(() => (this.loading = false)))
      )
    );
  }


  private searchRecipes(query: string): Observable<RecipeAutocomplete[]> {
    return this.recipeService.getRecipeAutoComplete(query);
  }
I’ll suggest writing some meaningful function names so, the code explains itself.
我建议编写一些有意义的函数名称,以便代码说明自身。
Let’s look at the r-info component where we are showing the recipe information
让我们看一下显示配方信息的r-info组件
export class RInfoComponent implements OnInit {
  recipe$: Observable<RecipeInfo> = this.store.recipeInfoObs;


  constructor(private store: StoreService) {}


  ngOnInit(): void {}


  showIngredients(ingredients: Ingredient[]): string {
    return ingredients.reduce(
      (prev, curr) => `${prev ? prev + ', ' : ''}${curr.name}`,
      ''
    );
  }
}
<div *ngIf="recipe$ | async as recipe" @slideUp class="info-main">
<div class="recipe-info-section">
<div style="display: flex; align-items: center">
<h1>{{ recipe.title }}</h1>
<div
*ngIf="recipe.vegetarian"
style="margin-bottom: 16px; margin-left: 5px; color: darkgreen"
>
(Veg {{ recipe.vegan ? ", Vegan" : ""
}}{{ recipe.glutenFree ? ", Gluten free" : ""
}}{{ recipe.dairyFree ? ", Dairy free" : "" }})
</div>
</div>
<img [src]="recipe.image" alt="Dish image" />
<h4>
{{ recipe.readyInMinutes }} minutes preparation time for
{{ recipe.servings }} Servings
</h4>
<h4 class="heading">Summary</h4>
<p [innerHTML]="recipe.summary"></p>
<div>
<h3 class="heading">Instructions:</h3>
<div
*ngFor="let instruction of recipe.analyzedInstructions"
style="margin-left: 5px"
>
<div *ngFor="let step of instruction.steps">
<h4 class="heading">
Step {{ step.number }}
<span style="font-weight: normal"
>(Ingredients: {{ showIngredients(step.ingredients) }})</span
>
</h4>
<p>
{{ step.step }}
</p>
</div>
</div>
</div>
<div style="font-size: 16px">Stay safe and healthy!</div>
</div>
</div>I’ll briefly explain the control flow:
我将简要解释控制流程:
First, We’ll get the user input by listening to valueChanges event of autocomplete, RxJS debounceTime operator to wait for a second until user type-out, switchMap operator to avoid multiple active HTTP calls.
首先,我们会得到通过听自动完成的valueChanges事件的用户输入,RxJS debounceTime操作等待第二直到用户类型手续, switchMap操作以避免多个活动HTTP调用。
We take the user input received and get autocomplete suggestions using Autocomplete recipe search
我们接受收到的用户输入,并使用“ 自动完成配方搜索”获得自动完成建议
Once the user selects any recipe from the suggestions, we will take the recipe id and get the recipe information using Get Recipe Information
用户从建议中选择任何食谱后,我们将获取食谱ID,并使用“ 获取食谱信息”获取食谱信息
- And once we receive the result, we will update our store service. 收到结果后,我们将更新商店服务。
- Finally, In the recipe info component, we are listening to store changes and showing recipe details. 最后,在配方信息组件中,我们正在侦听存储更改并显示配方详细信息。
You can access the source code here and the working website here.
Keep exploring!
继续探索!
翻译自: https://medium.com/swlh/how-i-created-a-recipe-app-using-angular-firebase-and-rapidapi-6e87f28f338d


 4254
4254


 被折叠的 条评论
为什么被折叠?
被折叠的 条评论
为什么被折叠?
 到【灌水乐园】发言


