


总览 (Overview)
In iOS development, the table view is one of the most basic and reused design interfaces. It can present a large amount of data using rows arrange in a column. In this tutorial, we will learn how to configure a basic TableView in iOS using default and custom cell. So let’s get started
在iOS开发中,表格视图是最基本且可重复使用的设计界面之一。 它可以使用排列在列中的行来显示大量数据。 在本教程中,我们将学习如何使用默认和自定义单元在iOS中配置基本TableView。 所以我们开始吧
This tutorial is written using Swift 5, Xcode 11.2, iOS 13 & Storyboard Interface.
本教程使用Swift 5,Xcode 11.2,iOS 13和Storyboard Interface编写。
Configure TableView using default cell: Let’s see how we can configure a table view using the default cell step by step.
使用默认单元格配置TableView:让我们逐步了解如何使用默认单元格配置表视图。
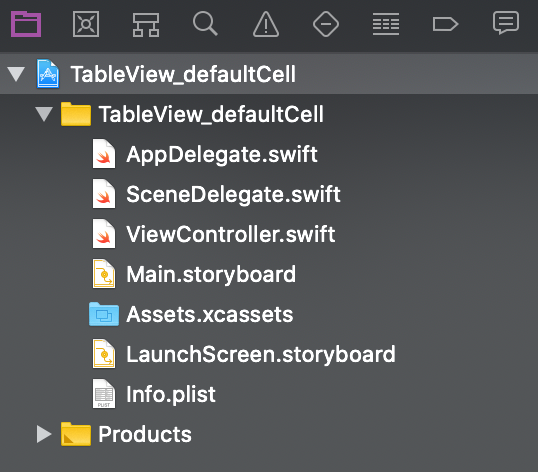
Step 1: Create an Xcode project & setup TableView: Open your Xcode -> create a new Xcode project -> Choose ios and single view application as your project template -> name it as you want -> create. After that, your file structure should seem like this.
步骤1 : 创建一个Xcode项目并设置TableView :打开Xcode->创建一个新的Xcode项目->选择ios和单视图应用程序作为项目模板->根据需要命名->创建。 之后,您的文件结构应如下所示。
Open your “Main.storyboard” file, you will find a view controller there. Drag and drop a TableView from the library. Set constrain as (0,0,0,0) as following
打开“ Main.storyboard”文件,您将在其中找到一个视图控制器。 从库中拖放一个TableView。 设置约束为(0,0,0,0)如下
Now open your “ViewController.swift” file from the project navigator by “Option + click” on that. Insert outlate of your TableView to the view controller file.
现在,通过在项目导航器中单击“ Option +单击”打开“ ViewController.swift”文件。 将TableView的外部插入到视图控制器文件中。

Extends your “ViewController” class to “UITableViewDelegate” and “UITableViewDataSource”. You have to add some protocol stubs, add them. You “ViewController” should seem like this
将“ ViewController”类扩展为“ UITableViewDelegate”和“ UITableViewDataSource”。 您必须添加一些协议存根,然后将其添加。 您的“ ViewController”应该看起来像这样

Now set delegate and data source for your TableView. You can do it by writing two lines of code into your “viewDidLoad” method. In my case those are
现在为TableView设置委托和数据源。 您可以通过在“ viewDidLoad”方法中编写两行代码来实现。 以我为例
exampleTableView.delegate = selfexampleTableView.dataSource = selfor you can set it using the storyboard like this
或者您可以像这样使用情节提要进行设置
That’s it. Your TableView is configured and set to show data.
而已。 TableView已配置并设置为显示数据。
Step 2: Setup TableView cell: Now drag and drop a TableView cell from the library to your table. Create a new Cocoa Touch file. Create a class subclassing “UITableViewCell”.
步骤2:设置TableView单元 :现在将TableView单元从库中拖放到表中。 创建一个新的Cocoa Touch文件。 创建一个子类化为“ UITableViewCell”的类。
Select the TableView cell from the storyboard, set the Custom class for the cell that we just created.
从情节提要中选择TableView单元,为刚刚创建的单元设置Custom类。

Set an identifier for the cell. In my case, I named the identifier as the class name for simplicity.
设置单元格的标识符。 就我而言,为简单起见,我将标识符命名为类名。

That’s it for your cell configuration.
这就是您的单元配置。
Step 3: Show data: Now we will show data using TableView and its cell. We will use the following array as our data source.
步骤3:显示数据:现在,我们将使用TableView及其单元格显示数据。 我们将使用以下数组作为数据源。
var name = ["John", "Mike", "Adam", "Ricky", "Helen"]Edit your “numberOfRowsInSection” method as following. This method actually returns the number of rows that TableView has.
如下编辑“ numberOfRowsInSection”方法。 此方法实际上返回TableView具有的行数。
func tableView(_ tableView: UITableView, numberOfRowsInSection section: Int) -> Int {return name.count}Configure your “cellForRowAt” function as following. This method will configure your every cell of the TableView using the class and identifier of the cell. We set the default label text of the TableView cell using each element of the array.
如下配置“ cellForRowAt”函数。 此方法将使用单元格的类和标识符配置TableView的每个单元格。 我们使用数组的每个元素设置TableView单元格的默认标签文本。
func tableView(_ tableView: UITableView, cellForRowAt indexPath: IndexPath) -> UITableViewCell {let cell = tableView.dequeueReusableCell(withIdentifier: "exampleTableViewCell", for: indexPath) as! exampleTableViewCellcell.textLabel?.text = name[indexPath.row]return cell}Complete code snippet of your “ViewController” class should something like this.
您的“ ViewController”类的完整代码段应如下所示。
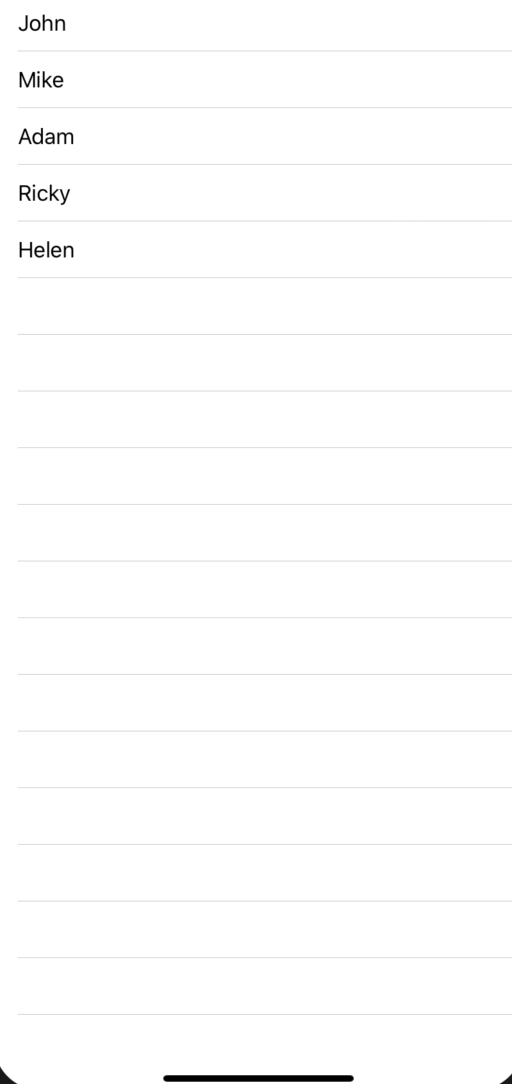
import UIKitclass ViewController: UIViewController, UITableViewDelegate, UITableViewDataSource {@IBOutlet weak var exampleTableView: UITableView!var name = ["John", "Mike", "Adam", "Ricky", "Helen"]override func viewDidLoad() {super.viewDidLoad()exampleTableView.delegate = selfexampleTableView.dataSource = self}func tableView(_ tableView: UITableView, numberOfRowsInSection section: Int) -> Int {return name.count}func tableView(_ tableView: UITableView, cellForRowAt indexPath: IndexPath) -> UITableViewCell {let cell = tableView.dequeueReusableCell(withIdentifier: "exampleTableViewCell", for: indexPath) as! exampleTableViewCellcell.textLabel?.text = name[indexPath.row]return cell}}Build and Run project on the simulator. You will definitely see something like this.
在模拟器上生成并运行项目。 您肯定会看到类似这样的内容。
2. Configure TableView using custom cell: We can also create a cell using a XIB file and configure it with TableView. Let's see how can we make it.
2. 使用自定义单元格配置TableView:我们还可以使用XIB文件创建单元格,并使用TableView对其进行配置。 让我们看看如何做到这一点。
Step 1: Create an Xcode project & setup TableView: We will use the same project and TableView in this tutorial. You can make a different project and TableView as I describe above.
步骤1 : 创建一个Xcode项目并设置TableView :在本教程中,我们将使用相同的项目和TableView。 您可以按照我上面的描述创建其他项目和TableView。
Step 2: Setup TableView cell: Create a new Cocoa Touch file. Create a class subclassing “UITableViewCell”. Please make sure you are tick mark on the “also create XIB file” box. Set an identifier for the cell.
步骤2:设置TableView单元格 :创建一个新的Cocoa Touch文件。 创建一个子类化为“ UITableViewCell”的类。 请确保在“同时创建XIB文件”框中打勾 。 设置单元格的标识符。
Drag and drop a label into the custom cell and set constrain for the label as central horizontally and vertically in the center.
将标签拖放到自定义单元格中,然后将标签的约束设置为水平居中,垂直居中。

Take an outlet of this label to its cell class as nameLbl as we take the outlet of TableView above. Your cell class should have code shipped like this.
就像上面的TableView的出口一样,将此标签的出口作为nameLbl移到其单元格类中。 您的单元格类应具有这样的代码。
import UIKitclass CustomTableViewCell: UITableViewCell {@IBOutlet weak var nameLbl: UILabel!override func awakeFromNib() {super.awakeFromNib()}override func setSelected(_ selected: Bool, animated: Bool) {super.setSelected(selected, animated: animated)}}We are using a XIB file as the cell for our TableView that’s why we have to register cells with our TableView. We can register the cell using its name and identifier. Write this into the “viewDidLoad()” of your “ViewController” class.
我们将XIB文件用作TableView的单元格,这就是为什么我们必须向TableView注册单元格的原因。 我们可以使用其名称和标识符来注册该单元格。 将此写入“ ViewController”类的“ viewDidLoad()”。
exampleTableView.register(UINib(nibName: "CustomTableViewCell", bundle: nil), forCellReuseIdentifier: "CustomTableViewCell")Change your TableView delegate and data source method as follow to show data using the custom cell.
如下更改TableView委托和数据源方法,以使用自定义单元格显示数据。
func tableView(_ tableView: UITableView, numberOfRowsInSection section: Int) -> Int {return name.count}func tableView(_ tableView: UITableView, cellForRowAt indexPath: IndexPath) -> UITableViewCell {let cell = tableView.dequeueReusableCell(withIdentifier: "CustomTableViewCell", for: indexPath) as! CustomTableViewCellcell.nameLbl.text = name[indexPath.row]return cell}Complete code snippet of your “ViewController” class should something like this.
您的“ ViewController”类的完整代码段应如下所示。
import UIKitclass ViewController: UIViewController, UITableViewDelegate, UITableViewDataSource {@IBOutlet weak var exampleTableView: UITableView!var name = ["John", "Mike", "Adam", "Ricky", "Helen"]override func viewDidLoad() {super.viewDidLoad()exampleTableView.delegate = selfexampleTableView.dataSource = selfexampleTableView.register(UINib(nibName: "CustomTableViewCell", bundle: nil), forCellReuseIdentifier: "CustomTableViewCell")}func tableView(_ tableView: UITableView, numberOfRowsInSection section: Int) -> Int {return name.count}func tableView(_ tableView: UITableView, cellForRowAt indexPath: IndexPath) -> UITableViewCell {let cell = tableView.dequeueReusableCell(withIdentifier: "CustomTableViewCell", for: indexPath) as! CustomTableViewCellcell.nameLbl.text = name[indexPath.row]return cell}}Build and Run again, you will see the data is loaded into your TableView using a custom XIB cell.
再次构建并运行,您将看到使用自定义XIB单元将数据加载到TableView中。

Congratulation 🎉 🎉 🎉 Now you know how to configure a TableView with a default and custom cell. You can do a lot of cool stuff using different kinds of TableView methods. Please check the Apple documentation for further classification.
祝贺您,现在您知道如何使用默认和自定义单元配置TableView。 使用不同种类的TableView方法,您可以做很多很酷的事情。 请检查Apple文档以进行进一步分类。
If you found this article useful please share and give some clap 👏👏👏Check my other articles on Medium and connect me on LinkedIn.
如果您觉得这篇文章很有用,请分享并给予一些鼓掌 。👏👏👏查看我在Medium上的其他文章,并在LinkedIn上与我联系。
Thank you for reading & Happy coding 🙂
感谢您的阅读和快乐的编码🙂
翻译自: https://levelup.gitconnected.com/getting-started-with-uitableview-in-swift-9b04e6fd8b9a


 被折叠的 条评论
为什么被折叠?
被折叠的 条评论
为什么被折叠?
 到【灌水乐园】发言


