


ios自定义分段控件
In this article, I’ll be sharing my implementation of a custom SegmentedPicker in SwiftUI. You may ask, “Why go through the pain of implementing this yourself?”
在本文中,我将分享我在SwiftUI中自定义SegmentedPicker的实现。 您可能会问:“为什么要自己解决这一难题?”
Well, using a SwiftUI picker with .pickerStyle(SegmentedPickerStyle()) is a native way to get segmented control functionality without too much overhead:
好吧,将SwiftUI picker与.pickerStyle(SegmentedPickerStyle())是一种获得分段控制功能的本地方法,而不会产生太多开销:

But there’s a huge downside: The animations that come with the native picker mean that it’s hard to encapsulate the selection variable without some funny behavior. For example:
但是有一个很大的缺点:本地选择器附带的动画意味着,如果没有一些有趣的行为,很难封装选择变量。 例如:
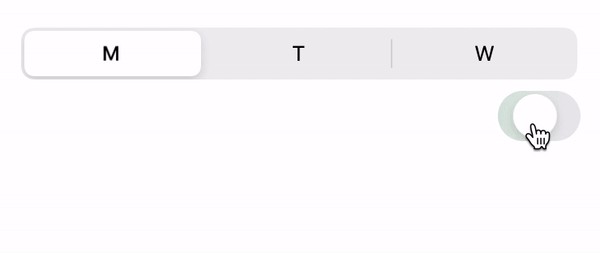
See that annoying flickering?
看到那烦人的闪烁?
It’s also nearly impossible to customize the appearance of the picker, so to move beyond these constraints, I’ve decided to implement my own segmented control in SwiftUI.
定制选择器的外观几乎也是不可能的,因此要克服这些限制,我决定在SwiftUI中实现自己的分段控件。
1.概述 (1. Overview)
So, here’s what we’re going to build:
因此,这是我们要构建的:

We might be tempted to just do something like this:
我们可能会尝试做这样的事情:
This is essentially just adding a white RoundedRectangle background to the currently selected index. This works well for simple use cases but doesn't support nice sliding animations between selection transitions.
这实际上只是在当前选定的索引中添加白色的RoundedRectangle背景。 这对于简单的用例来说效果很好,但是在选择过渡之间不支持漂亮的滑动动画。
To make this more elegant, we have three basic elements of the segmented control:
为了使它更加美观,我们具有分段控件的三个基本元素:
- The rounded rectangle background view 圆角矩形背景视图
- The text for each item 每个项目的文字
- The rounded rectangle that denotes the current selection 表示当前选择的圆角矩形
2.创建容器和物品 (2. Creating the Container and Items)
Let’s define a simple view that just enumerates the items for the segmented control:
让我们定义一个简单的视图,该视图只枚举分段控件的项目:
This is quite a bit of code. Let’s go over it:
这是很多代码。 让我们来看一下:
- I always strive to keep view constants like padding, font, and text color nice and organized. This allows me to adjust views without re-diving into the implementation of the view itself. These static constants allow me to easily see and edit minor view details. 我一直在努力使填充,字体和文本颜色之类的视图常量保持整洁有序。 这使我可以调整视图,而无需重新划分视图本身的实现。 这些静态常量使我可以轻松查看和编辑次要视图详细信息。
Much like the inputs to the native SwiftUI
Picker, we need some items to display and a@Bindingselection property so that we can propagate state changes to the parent view.就像本机SwiftUI
Picker的输入一样,我们需要显示一些项目和@Binding选择属性,以便我们可以将状态更改传播到父视图。The view itself is simple. It is an
HStackthat places equal-width items horizontally. For each item initems, we call a function to retrieve aTextview element.视图本身很简单。 这是一个
HStack放置等宽项目的HStack。 对于item中的每个items,我们调用一个函数来检索Text视图元素。The function
getSegmentViewreturns aTextelement with the item name for the specified index. We apply some view modifiers here and make sure to check that the index used is actually within the bounds of our array. Some notable points: We compute whether the current index is selected and use slightly darker text to denote the selection. We use.frame(minWidth: 0, maxWidth: .infinity)so that the tappable frame takes up all of the available space instead of wrapping theTextelement.函数
getSegmentView返回带有指定索引的项目名称的Text元素。 我们在此处应用一些视图修饰符,并确保检查使用的索引是否确实在数组的范围内。 一些值得注意的要点:我们计算是否选择了当前索引,并使用稍暗的文本表示选择。 我们使用.frame(minWidth: 0, maxWidth: .infinity)以便可轻敲的帧占用所有可用空间,而不是包装Text元素。We define an
onItemTapmethod. This allows us to change the current selection when we tap on a text element.我们定义一个
onItemTap方法。 这使我们可以在点击文本元素时更改当前选择。
Here’s what we get. Not bad! We’re just missing the active element indicator, which is a simple white RoundedRectangle:
这就是我们得到的。 不错! 我们只是缺少活动元素指示器,它是一个简单的白色RoundedRectangle :

3.活动选择指示器 (3. Active Selection Indicator)
The background for the selected element is a RoundedRectangle. To show this rectangle behind our available selections, we wrap our HStack in a ZStack as follows:
所选元素的背景是RoundedRectangle 。 为了在可用选择项后面显示此矩形,我们将HStack包裹在ZStack ,如下所示:
We now see a rounded rectangle in the background, but we need to define the size of the rectangle and its relative position depending on the currently active selection.
现在,我们在背景中看到一个圆角矩形,但是我们需要根据当前活动的选择来定义矩形的大小及其相对位置。
To define the sizes and offset, we need to somehow get the size of each item. To do this in SwiftUI, we take advantage of PreferenceKey.
要定义大小和偏移量,我们需要以某种方式获取每个项目的大小。 为了在SwiftUI中做到这一点,我们利用了PreferenceKey 。
3.1 PreferenceKey获取项目宽度 (3.1 PreferenceKey to get item width)
This blog post goes over SwiftUI PreferenceKeys. In short, we can define a PreferenceKey to pass an attribute from a subview to its superview. In our case, we need to pass the size of each text item. Our HStack divides up each item into equal width, so we essentially just need the width of one segment view created in the ForEach loop.
这篇博客文章介绍了SwiftUI PreferenceKeys 。 简而言之,我们可以定义一个PreferenceKey来将属性从子视图传递到其父视图。 在我们的例子中,我们需要传递每个文本项的大小。 我们的HStack将每个项目划分为相等的宽度,因此我们基本上只需要在ForEach循环中创建的一个分段视图的宽度。
Let’s define a PreferenceKey to retrieve the size. We can then use a neat little trick to get a view's intrinsic size by defining a GeometryReader on the background of the view. We then use a custom ViewModifier to encapsulate all of the operations needed to retrieve the view size and update a binding:
让我们定义一个PreferenceKey来检索大小。 然后,我们可以通过在视图的背景上定义GeometryReader ,使用巧妙的小技巧来获得视图的固有大小。 然后,我们使用自定义ViewModifier封装检索视图大小和更新绑定所需的所有操作:
Going through the items:
浏览项目:
This is the
PreferenceKeyto retrieve the size. We define the type of the retrieved value as aCGSize, which contains width and height information.这是用于检索大小的
PreferenceKey。 我们将检索到的值的类型定义为CGSize,其中包含宽度和高度信息。We define a helper View (
BackgroundGeometryReader) that will serve as the background of our text items. This uses the trick I mentioned earlier — defining aGeometryReaderon the background gives us the intrinsic size of the view. Note that we attach theSizePreferenceKeyand pass to it the view size.我们定义了一个辅助视图(
BackgroundGeometryReader),它将用作文本项的背景。 这使用了我之前提到的技巧-在背景上定义GeometryReader为我们提供视图的固有大小。 请注意,我们附加了SizePreferenceKey并将视图大小传递给它。We define
SizeAwareViewModifierto encapsulate all of this logic. It takes as input aBindingforviewSize. This is so that updates in the size can be propagated up the view hierarchy. Note that we attach the backgroundBackgroundGeometryReader, which attaches theSizePreferenceKeyto the view. We then watch for changes in the values of thePreferenceKeyby callingonPreferenceChange. The callback watches for updates inSizePreferenceKeyvalues, then updates the binding accordingly.我们定义
SizeAwareViewModifier来封装所有这些逻辑。 它以viewSize的Binding作为输入。 这样一来,大小的更新就可以沿视图层次结构传播。 请注意,我们附加了背景BackgroundGeometryReader,后者将SizePreferenceKey到视图。 然后,我们通过调用onPreferenceChangePreferenceKey值的变化。 回调SizePreferenceKey值中的更新,然后相应地更新绑定。
Great! Now we just attach the new ViewModifier:
大! 现在,我们只需附加新的ViewModifier :
Now that we have access to the intrinsic size of one of the segments, we can build the active selection indicator properly.
既然我们可以访问细分市场之一的内在规模,那么我们就可以正确地建立主动选择指标了。
3.2使用视图大小创建活动的选择指示器 (3.2 Using view size to create an active selection indicator)
As a recap, this is what our final product should look like. The active selection indicator is the white background that slides with the current selection:
回顾一下,这就是我们最终产品的外观。 活动的选择指示器是与当前选择一起滑动的白色背景:

We have two main challenges:
我们面临两个主要挑战:
- Defining an appropriate size for the active selection indicator. 为活动选择指示器定义适当的大小。
- Determining the correct position for the indicator depending on the current selection. 根据当前选择确定指示器的正确位置。
Before, we defined a simple RoundedRectangle in a ZStack as our active segment view. Let's do the following:
之前,我们定义了一个简单的RoundedRectangle在ZStack作为我们的主动段视图。 让我们执行以下操作:
- Extract the view as a variable to keep things nice and clean. 将视图提取为变量,以保持外观整洁。
Change the
ZStackalignment to.leading. This means that all the views in theZStackwill be lined up to the leading edge of the frame (rather than the center). This makes calculating the active segment location a lot easier!将
ZStack对齐方式更改为.leading。 这意味着ZStack中的所有视图都将对齐到框架的前边缘(而不是中心)。 这使计算活动段的位置更加容易!Define a method called
computeActiveSegmentHorizontalOffset. This gives us the location of the active segment indicator.定义一个称为
computeActiveSegmentHorizontalOffset的方法。 这为我们提供了活动细分指标的位置。
The code should be relatively straightforward, with the exception of computeActiveSegmentHorizontalOffset(). In this method, we use the assumption that our ZStack is aligned to the leading edge (the left edge for most locales). We know the effective horizontal width of each item within our picker to be (self.segmentSize.width + SegmentedPicker.SegmentXPadding / 2). Thus, the value of the offset from the leading edge is just the index selection multiplied by this width.
该代码应相对简单明了,但computeActiveSegmentHorizontalOffset() 。 在这种方法中,我们假设ZStack与前沿(大多数语言环境的左边缘)对齐。 我们知道选择器中每个项目的有效水平宽度为(self.segmentSize.width + SegmentedPicker.SegmentXPadding / 2) 。 因此,从前沿的偏移量的值就是索引选择乘以该宽度。
And that’s it! We now see this result:
就是这样! 现在,我们看到以下结果:

To get the complete code, see this gist. Happy coding!
要获取完整的代码,请参见本要点 。 编码愉快!
翻译自: https://medium.com/better-programming/custom-ios-segmented-control-with-swiftui-473b386d0b51
ios自定义分段控件


 1688
1688


 被折叠的 条评论
为什么被折叠?
被折叠的 条评论
为什么被折叠?
 到【灌水乐园】发言


