


从头开始 制作办公系统
Hi everyone!
嗨,大家好!
In this post, I’ll guide you step by step on creating a WatchOS app using SwiftUI and a couple of libraries to handle network requests and JSON responses. In 35 minutes, we will have a beautiful and functional, independent app for your Apple Watch.
在本文中,我将指导您逐步使用SwiftUI和几个库来创建WatchOS应用程序,以处理网络请求和JSON响应。 在35分钟内,我们将为您的Apple Watch提供一个美观实用的独立应用程序。
Prerequisites
先决条件
- Xcode 11 (You can download it from the Mac App Store) Xcode 11(您可以从Mac App Store下载)
- Cocoapods (https://guides.cocoapods.org/using/getting-started.html) Cocoapods(https://guides.cocoapods.org/using/getting-started.html)
An API key for using NewsAPI.org (Get yours for free from https://newsapi.org/)
使用NewsAPI.org的API密钥(可从https://newsapi.org/免费获取)
- Visual Studio Code or some text editor if you’re unfamiliar with terminal-based code editors. Visual Studio Code或某些文本编辑器(如果您不熟悉基于终端的代码编辑器)。
For previewing your App
用于预览您的应用
- iPhone 苹果手机
- Apple Watch 苹果手表
- Lightning cable to connect your iPhone to your Mac 闪电电缆将您的iPhone连接到Mac
We will create an app that fetches data from NewsAPI (https://newsapi.org/) and displays the different articles we fetch in a list, so we can tap and read some bits of news on the go.
我们将创建一个应用程序,该应用程序从NewsAPI(https://newsapi.org/)获取数据,并在列表中显示我们获取的不同文章,以便我们可以随时随地点击和阅读一些新闻。
We’ll be using the AlamoFire library (https://github.com/Alamofire/Alamofire) for making network requests quickly, as well as SwiftyJSON (https://github.com/SwiftyJSON/SwiftyJSON) to handle the response easily and turn it into usable elements on our UI, and KingFisher (https://github.com/onevcat/Kingfisher/wiki/Installation-Guide) to download and cache images easily on to our App.
我们将使用AlamoFire库(https://github.com/Alamofire/Alamofire)快速发出网络请求,并使用SwiftyJSON(https://github.com/SwiftyJSON/SwiftyJSON)轻松处理响应并将其转换为用户界面上的可用元素,然后使用KingFisher(https://github.com/onevcat/Kingfisher/wiki/Installation-Guide)将图像轻松下载并缓存到我们的应用程序中。
So, if you have all the prerequisites ready, let’s begin!
因此,如果您已准备好所有先决条件,那就开始吧!
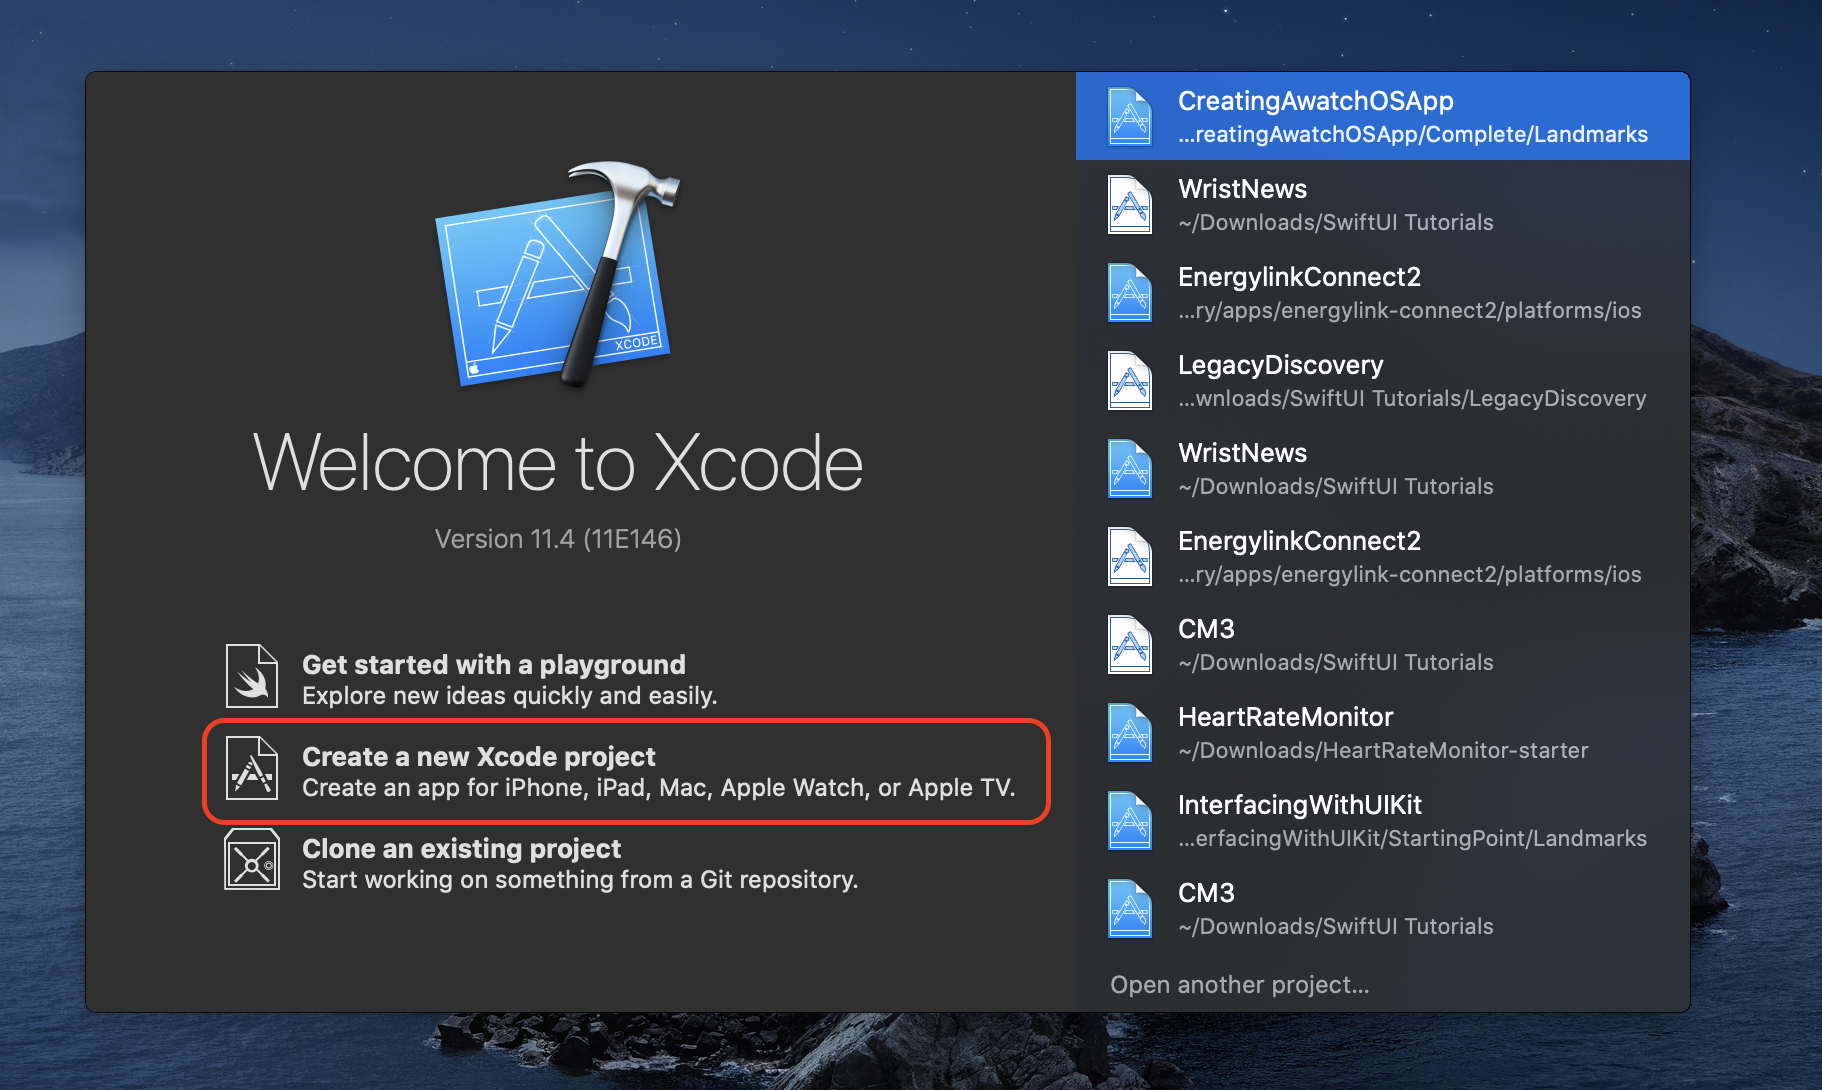
To start, open Xcode and tap on Create a new Xcode project.
首先,打开Xcode并点击Create a new Xcode project。
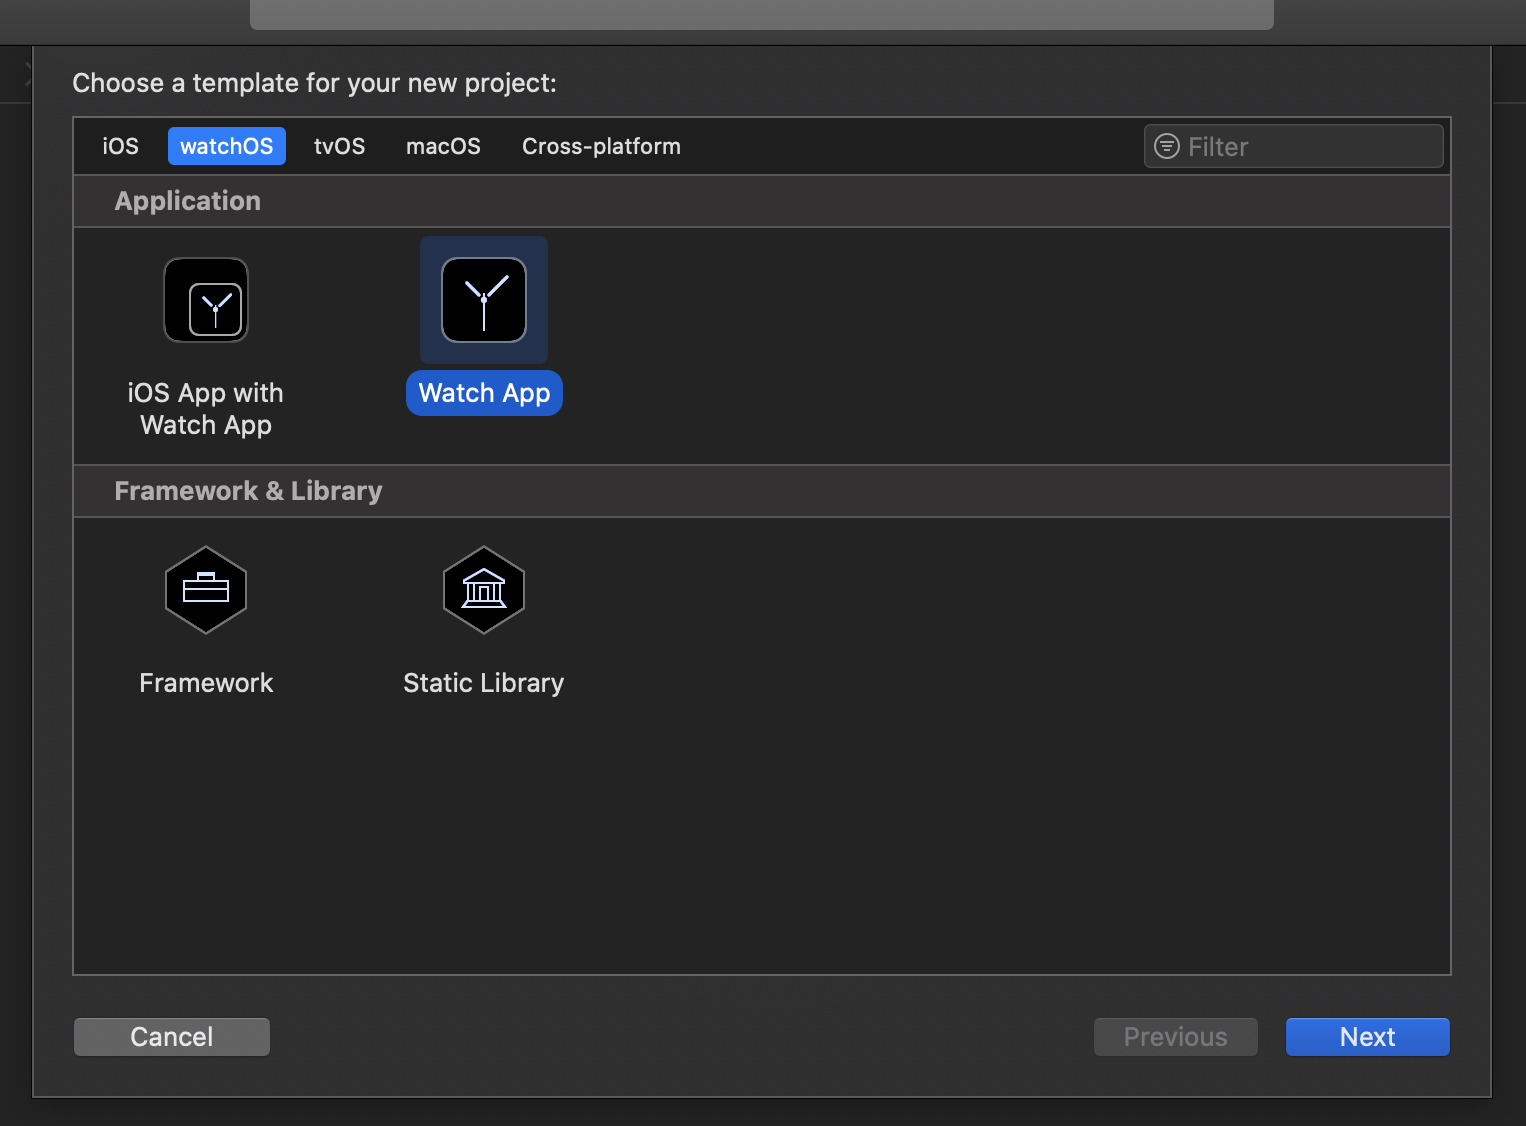
On the WatchOS tab, select Watch App
在WatchOS选项卡上,选择Watch App
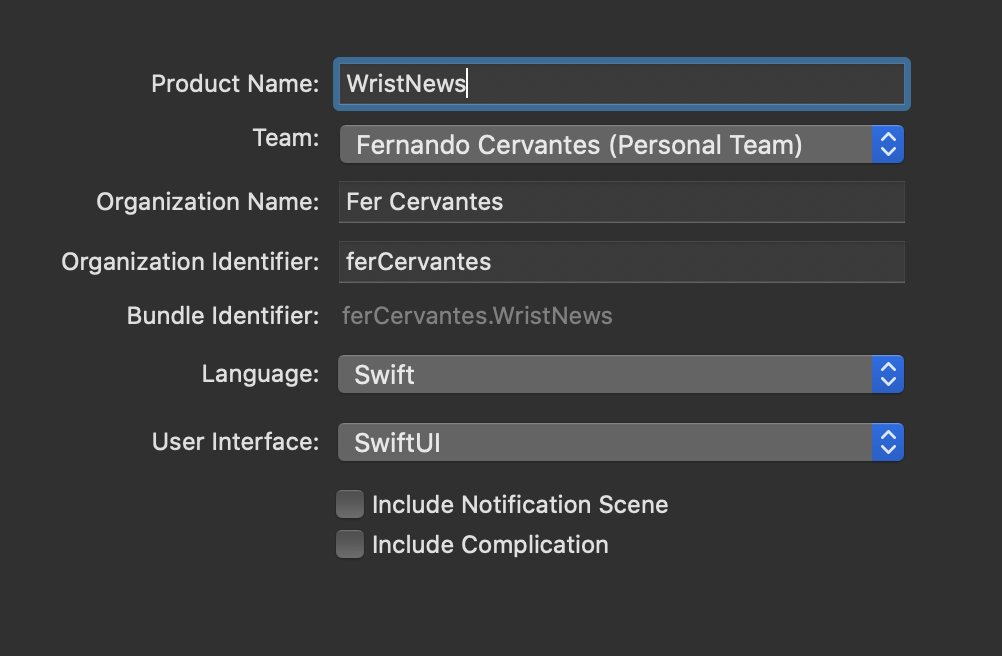
I’ll name my App WristNews, but feel free to call it however you want! Make sure you have Swift as Language and SwiftUI as User Interface and save it in an easy to access directory since we’ll access to it later via the terminal.
我将命名为App WristNews,但随时可以随意调用它! 确保您将Swift作为语言,将SwiftUI作为用户界面,并将其保存在易于访问的目录中,因为稍后我们将通过终端对其进行访问。
Now that we created our App, let’s jump to code!
现在我们创建了我们的应用程序,让我们跳到代码!
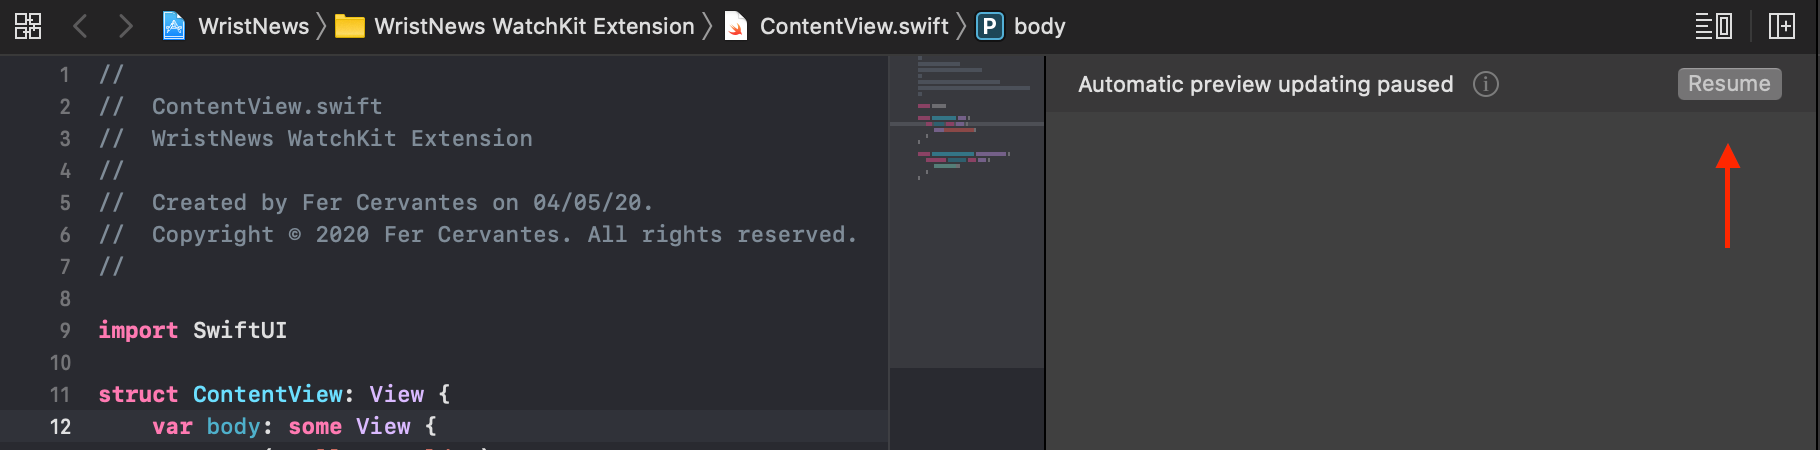
On the right side, tap on the Resume button to quickly build your App and trigger the preview on the canvas.
在右侧,点击“继续”按钮以快速构建您的应用并在画布上触发预览。
Now, you have the code on the left side and the preview on the right side. We will edit code and rebuild the preview so we can see our App come to life with each step.
现在,您的代码在左侧,预览在右侧。 我们将编辑代码并重建预览,以便每个步骤都能看到我们的应用程序。
Replace the “Hello, World” text on the text element by “WristNews” and add the .font(.title) and .fontWeight(.thin) modifiers at the end.
用“ WristNews”替换文本元素上的“ Hello,World”文本,并在末尾添加.font(.title)和.fontWeight(.thin)修饰符。
import SwiftUIstruct ContentView: View {
    var body: some View {
        Text("WristNews")            .font(.title)
            .fontWeight(.thin)
    }
}struct ContentView_Previews: PreviewProvider {
    static var previews: some View {
        ContentView()
    }
}
Notice how the preview updates as you change the code. You can also tap on each element in the preview to get a visual interface to make changes to your UI. This interface to the right side is called The Inspector.
注意更改代码时预览如何更新。 您还可以点击预览中的每个元素以获取可视界面,以对UI进行更改。 右侧的此接口称为“检查器”。
Wrap your Text element in a VStack. A VStack is a container that stacks elements vertically. It is useful for keeping consistency and order in your UI. It also will let you apply alignment and padding properties to the whole container instead of trying to accommodate each element on the screen manually.
将您的Text元素包装在VStack中。 VStack是一个垂直堆叠元素的容器。 这对于保持UI的一致性和顺序很有用。 它还使您可以将对齐和填充属性应用于整个容器,而不必尝试手动在屏幕上容纳每个元素。
import SwiftUIstruct ContentView: View {
    var body: some View {        VStack{
            Text("WristNews")
                .font(.title)
                .fontWeight(.thin)}
    }
}struct ContentView_Previews: PreviewProvider {
    static var previews: some View {
        ContentView()
    }
}
After having done this, let’s add some more elements to our View.
完成此操作后,让我们向视图中添加更多元素。
Let’s add another Text element below the one we already have.
让我们在已有的文本元素下方添加另一个Text元素。
import SwiftUIstruct ContentView: View {
    var body: some View {
        VStack{
            Text("WristNews")
                .font(.title)
                .fontWeight(.thin)            Text("Daily news, delivered on your wrist.")
                .fontWeight(.thin)        }
    }
}struct ContentView_Previews: PreviewProvider {
    static var previews: some View {
        ContentView()
    }
}
Now, we’re going to use the inspector to make a change in our UI.
现在,我们将使用检查器对UI进行更改。
Tap on any place of the word VStack, and notice how a blue box appears around the Text elements on your preview, as well as the inspector populating with different options. Now, tap on the second to last button on the alignment options to align the content on our VStack to the left.
点击单词VStack的任何位置,然后注意预览中Text元素周围如何出现一个蓝色框,以及检查器中填充了不同的选项。 现在,点击对齐选项上的倒数第二个按钮,将VStack上的内容向左对齐。
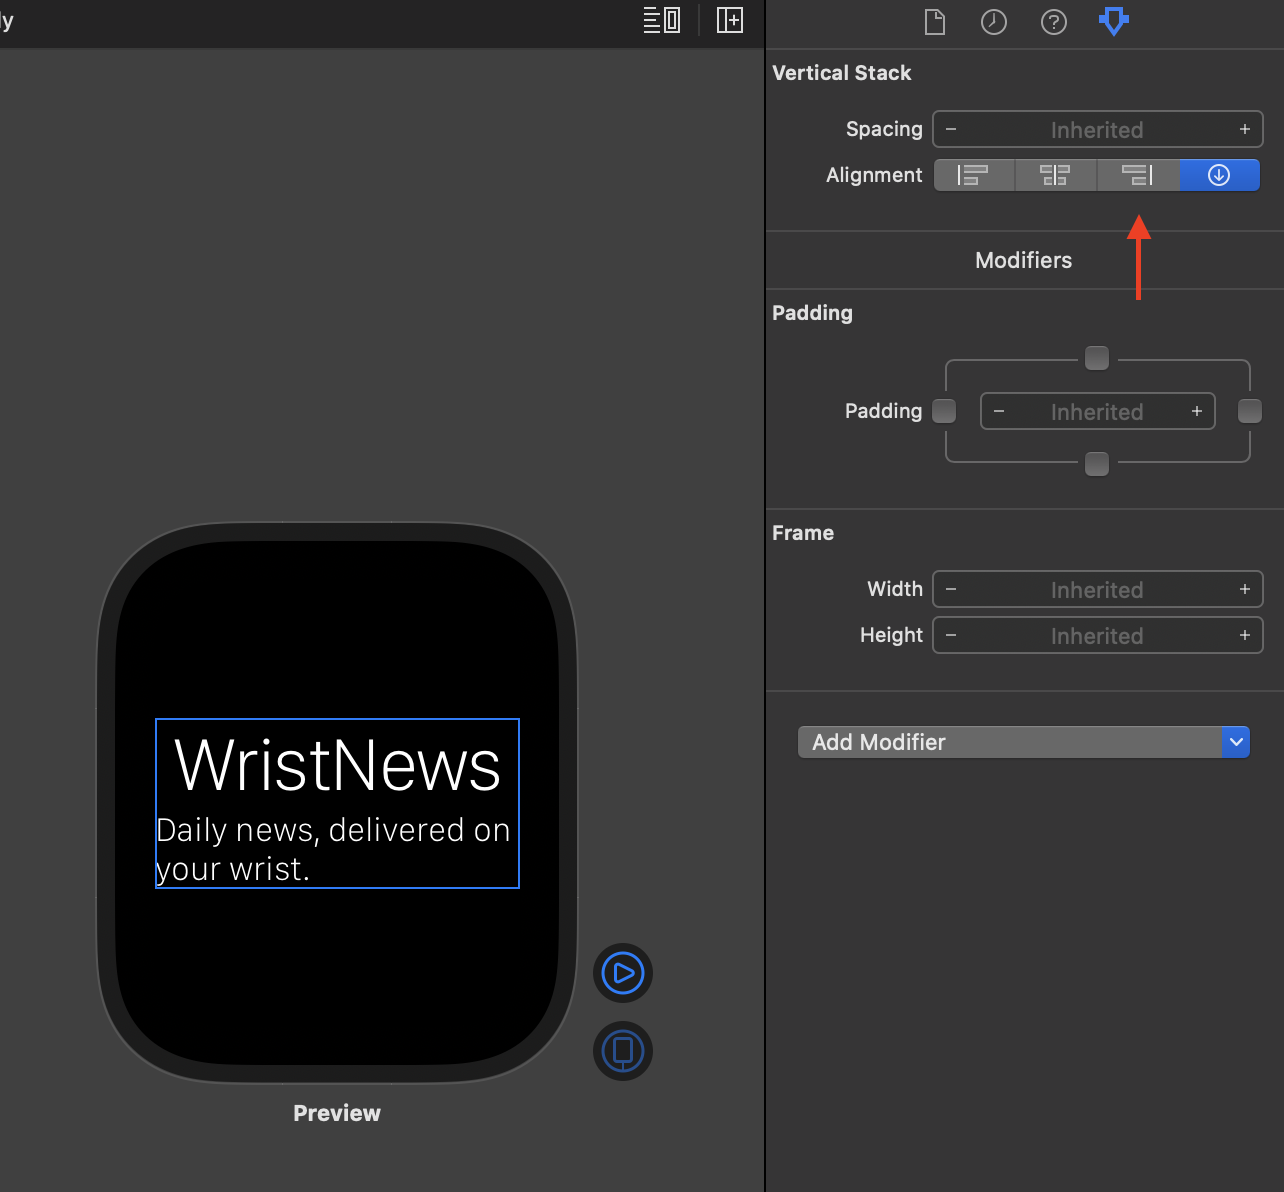
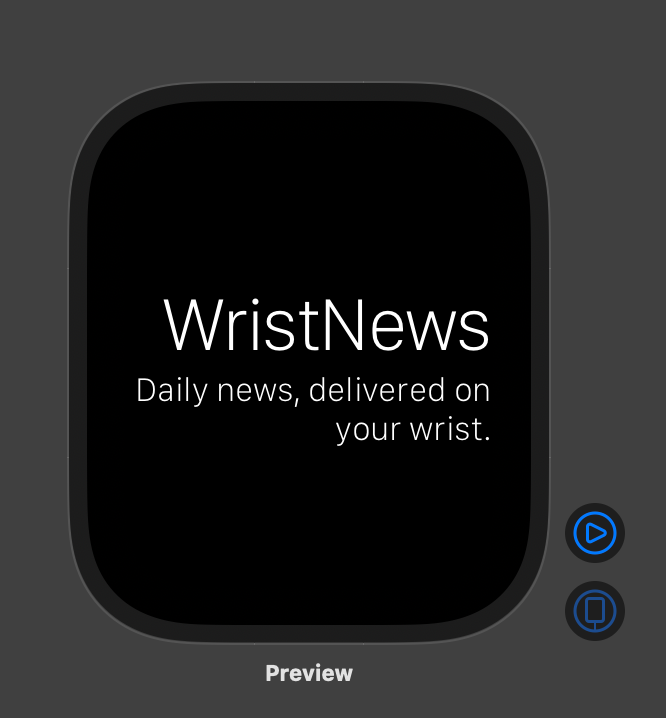
Then, on your preview, tap the second Text we added, and apply a left alignment to it as well, so our preview ends up looking like this:
然后,在您的预览中,点击我们添加的第二个文本,并对其应用左对齐,这样我们的预览最终将如下所示:
Now, we’re going to create another view that takes us to the List of articles.
现在,我们将创建另一个视图,将我们带到文章列表。
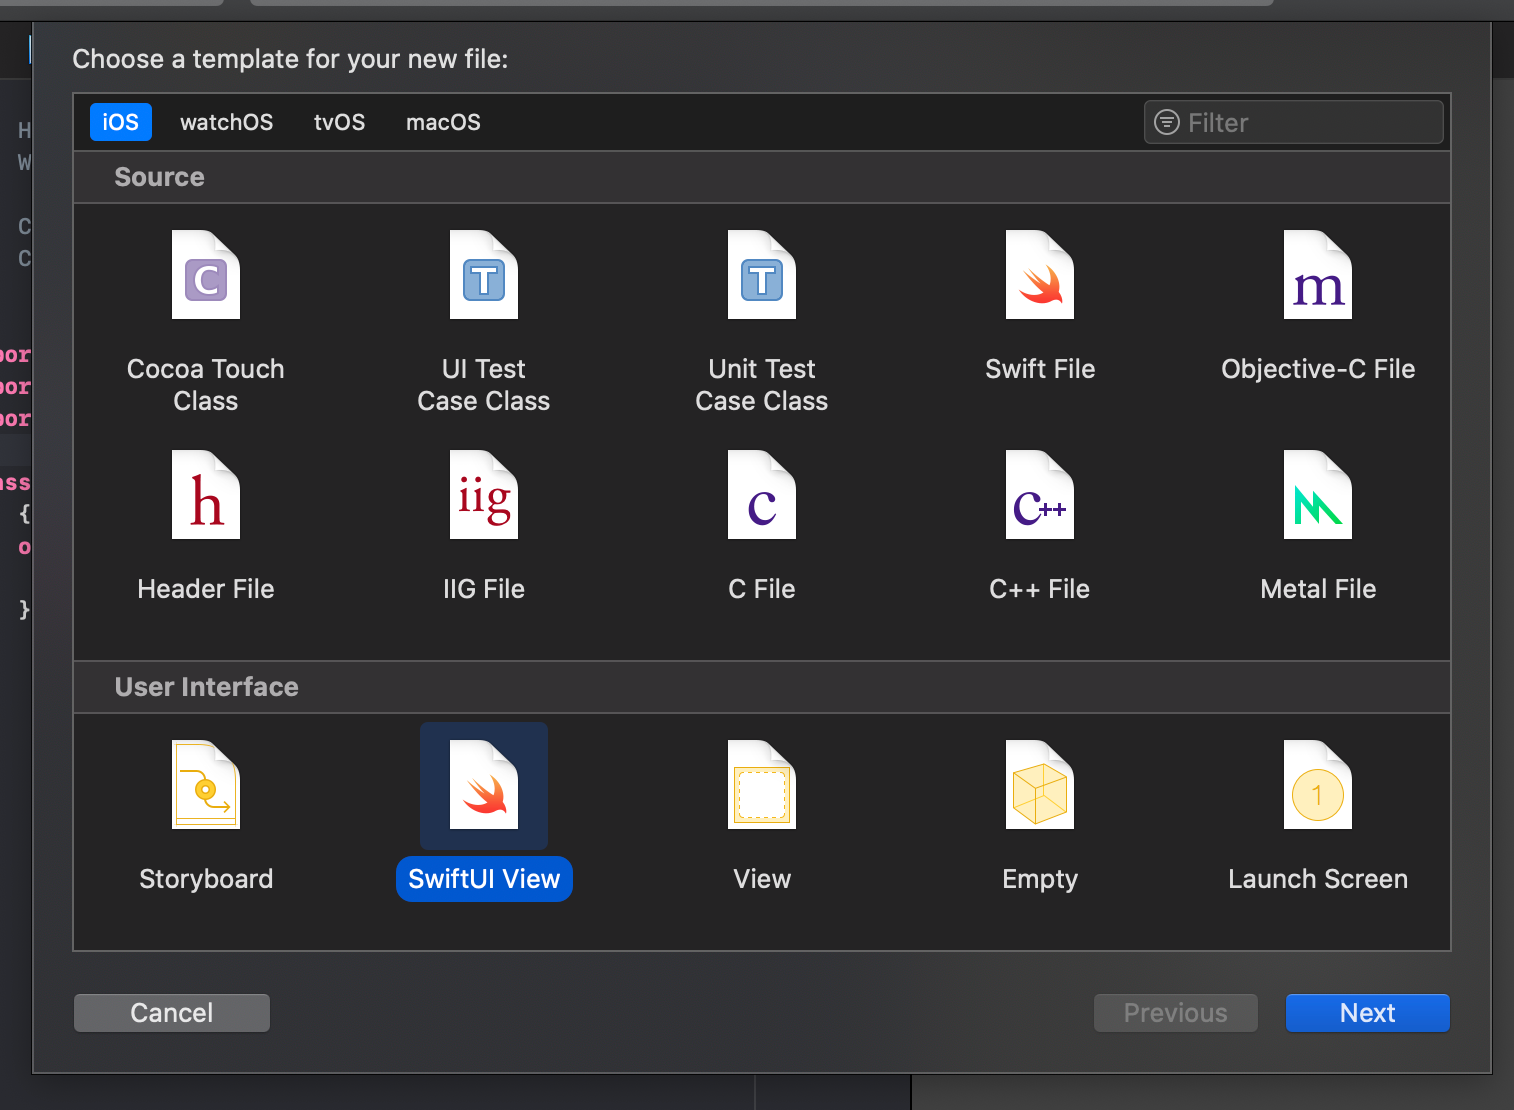
Press CMD+N to create a new file, and select SwiftUI View from the List of options.
按CMD + N创建一个新文件,然后从选项列表中选择SwiftUI视图。
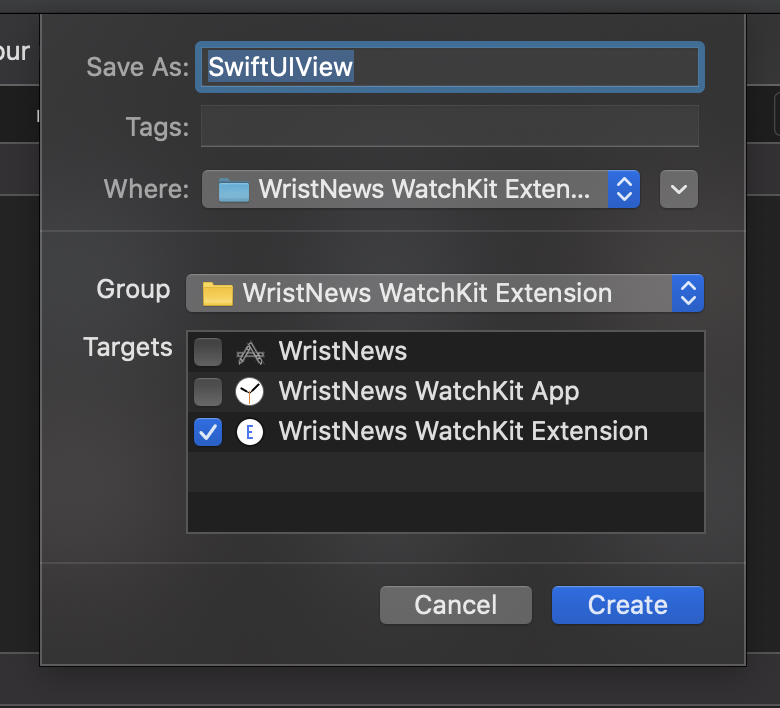
Let’s save the View with the name ArticlesView, and make sure that it’s saved on the WristNews WatchKit Extension Group, as well as the same Target checked. It must look like on the image below, except with ArticlesView instead of SwiftUIView.
让我们使用名为ArticlesView的名称保存视图,并确保将其保存在WristNews WatchKit扩展组中,并选中相同的Target。 除了使用ArticlesView而不是SwiftUIView之外,它的外观必须与下图类似。
Replace the “Hello World” text with “Articles” and wrap it in a VStack. We may remove it later, but let’s leave it like that for now. We’ll come back to this file later.
将“ Hello World”文本替换为“ Articles”,并将其包装在VStack中。 我们可能会在以后将其删除,但现在就让它保持原样。 稍后我们将返回此文件。
import SwiftUIstruct ArticlesView: View {
    var body: some View {VStack{
            Text("Articles")
        }
    }
}struct ArticlesView_Previews: PreviewProvider {
    static var previews: some View {
        ArticlesView()
    }
}
Now, before we start adding articles, we first need to define what an article is, and what will it contain, in order to tell the UI what to display.
现在,在开始添加文章之前,我们首先需要定义文章是什么以及文章将包含什么,以便告诉UI要显示的内容。
This is a sample of the data we’re going to get from NewsAPI, so we’ll base on this sample to define the Article object.
这是我们将从NewsAPI获得的数据的示例,因此我们将基于此示例定义Article对象。
{
 "status": "ok",
 "totalResults": 38,
 "articles": [
  {
   "source": {
    "id": null,
    "name": "Vogue.com"
   },
   "author": "Estelle Tang",
   "title": "Rosalía Shares Her All-Time Favorite Songs in a Met Gala–Themed Playlist - Vogue",
   "description": "\"This playlist is a celebratory playlist for the Met, with nods to my all-time favorite songs,     sounds, artists, and references. It has not been possible to celebrate the Met as God intended, but we can     celebrate it in our own way from home.\"",
   "url": "https://www.vogue.com/article/rosalia-met-gala-about-time-playlist",
   "urlToImage": "https://assets.vogue.com/photos/5eb0a75cd5f359c964b7e0e4/16:9/w_1280,c_limit/    GettyImages-1162355675.jpg",
   "publishedAt": "2020-05-05T00:20:29Z",
   "content": "To commemorate a very different first Monday in May this year, Vogue asked some of our favorite stars to create a playlist featuring timeless songs inspired by the theme of this year's Met gala and the upcoming Costume Institute exhibition, About Time: Fashio… [+2158 chars]"
  },
 ]
}
Create a new file, but this time, select Swift File from the List (it should already be selected) and name it Article.
创建一个新文件,但是这次,从列表中选择Swift File(应该已经选择了它)并将其命名为Article。
On this file, we’ll start by defining the Article struct like this:
在此文件上,我们将从定义如下的Article结构开始:
import Foundationstruct Article: Hashable, Identifiable {
 public var id: String
 public var title: String
 public var description: String
 public var author: String
 public var link: String
 public var imageLink: String
 public var publishedAt: String
 public var content: String
}
Each Article will contain:
每篇文章将包含:
- A unique identifier 唯一标识符
- A Title 标题
- A short description or headline 简短说明或标题
- The author’s name 作者的名字
- A link to the article on its source 文章来源的链接
- A link to the headline image 标题图片的链接
- Time and date of publication 出版时间和日期
- A short snippet of the content (unless you paid for the NewsAPI service) 内容的简短摘要(除非您为NewsAPI服务付费)
If you paid for the NewsAPI service, you would be able to get the full article content here.
如果您为NewsAPI服务付费,则可以在此处获得完整的文章内容。
Now, we’re going to add the initializer method, which will let us create Article objects and represent them visually.
现在,我们将添加初始化方法,这将使我们能够创建Article对象并以可视方式表示它们。
import Foundationstruct Article: Hashable, Identifiable {
 public var id: String
 public var title: String
 public var description: String
 public var author: String
 public var link: String
 public var imageLink: String
 public var publishedAt: String
 public var content: Stringinit(title: String, description: String, author: String, link: String, imageLink: String, publishedAt: String, content:String){
  self.id = UUID().uuidString
  self.title = title
  self.description = description
  self.author = author
  self.link = link
  self.imageLink = imageLink
  self.publishedAt = publishedAt
  self.content = content
 }
}
The initializer method takes everything that an Article requires and transforms it into a usable object.
初始值设定项方法将Article所需的所有内容转换为可用的对象。
On this moment, we will proceed to install the libraries we will require for our App, so save and close Xcode, and open your terminal
此时,我们将继续安装应用程序所需的库,因此请保存并关闭Xcode,然后打开您的终端
cd into the folder of your App, and on the root folder (where your .xcodeproj file is), run the following command
cd进入应用程序的文件夹,然后在根文件夹(.xcodeproj文件所在的位置)上,运行以下命令
pod initThis will create a new file called Podfile in your root folder. Now open that file with your preferred text editor, and add the following lines under
这将在您的根文件夹中创建一个名为Podfile的新文件。 现在,使用您喜欢的文本编辑器打开该文件,并在下面添加以下行
# Pods for WristNews WatchKit ExtensionAnd add a # before all the use_frameworks! statements. It should look like this:
并在所有use_frameworks之前添加#。 陈述。 它看起来应该像这样:
# Uncomment the next line to define a global platform for your project
# platform :ios, '9.0'target 'WristNews' do
  # Comment the next line if you don't want to use dynamic frameworks  #use_frameworks!# Pods for WristNewsendtarget 'WristNews WatchKit App' do
  # Comment the next line if you don't want to use dynamic frameworks  #use_frameworks!# Pods for WristNews WatchKit Appendtarget 'WristNews WatchKit Extension' do
  # Comment the next line if you don't want to use dynamic frameworks  #use_frameworks!# Pods for WristNews WatchKit Extension  pod ‘Kingfisher/SwiftUI’, ‘~> 5.0’
  pod 'Alamofire', '~> 5.1'
  pod 'SwiftyJSON', '~> 4.0'
end
You should grab those three lines from their respective webpages (links on the top), since they may have changed by the time you check this tutorial.
您应该从各自的网页(顶部的链接)中抓住这三行,因为在您阅读本教程时,它们可能已经更改。
Save and close the file, and on the terminal, enter:
保存并关闭文件,然后在终端上输入:
pod installAnd wait for it to finish. After that, to open this folder in Finder, enter:
并等待它完成。 之后,要在Finder中打开此文件夹,请输入:
open .You will notice we now have a new file that ends in .xcworkspace, and we will continue with that file from now on.
您会注意到我们现在有一个以.xcworkspace结尾的新文件,从现在开始我们将继续处理该文件。
Before you open it, make sure all instances of Xcode are closed. You can now close the terminal.
在打开它之前,请确保所有 Xcode实例都已关闭 。 您现在可以关闭终端。
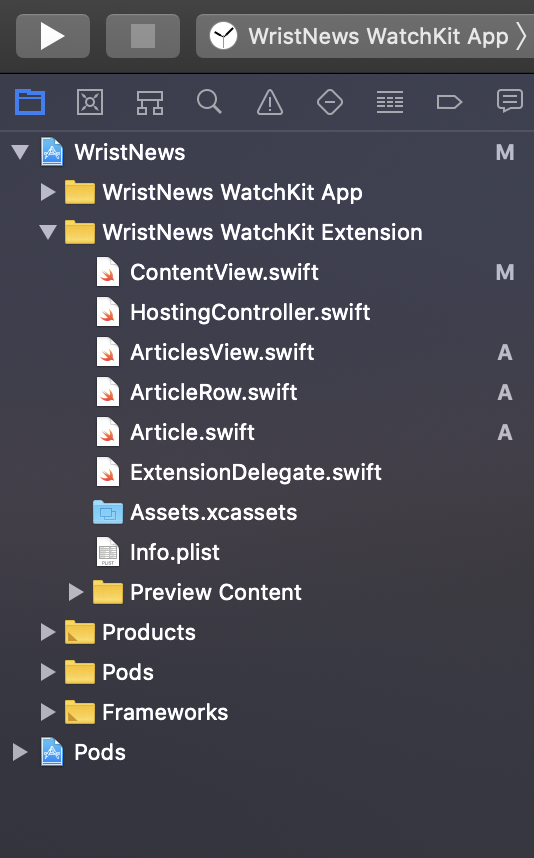
On the project navigator, you will find your working files under WristNews > WristNews WatchKit Extension.
在项目导航器上,您将在WristNews> WristNews WatchKit Extension下找到您的工作文件。
Now, we’re going to create a UI element that represents an Article.
现在,我们将创建一个表示文章的UI元素。
Create a new file, select SwiftUI View from the List, and name it ArticleRow.
创建一个新文件,从列表中选择SwiftUI View,并将其命名为ArticleRow。
Since we’re going to use the KingFisher library here to fetch our image, let’s import it at the top with the statement:
由于我们将在这里使用KingFisher库来获取图像,因此让我们在语句的顶部导入它:
import struct Kingfisher.KFImageAdd a variable called article of type Article on to our View. This tells SwiftUI that this View requires an Article object to work.
在我们的视图中添加一个名为Article类型的article的变量。 这告诉SwiftUI,此View需要Article对象才能工作。
struct ArticleRow: View {    var article: Article
    var body: some View {
        Text("Hello, World!")
    }
}
This, of course, will trigger an error on the preview struct below, since we have to provide an Article to the View to work with.
当然,这将在下面的预览结构上触发错误,因为我们必须向View提供一个Article才能使用。
You can remove the ArticleRow_Previews struct and replace it by copying and pasting this one, since its too much to type by hand:
您可以删除ArticleRow_Previews结构,并通过复制和粘贴该结构来替换它,因为它太多了,无法手动输入:
struct ArticleRow_Previews: PreviewProvider {
 static var previews: some View {
  ArticleRow(article: Article(
   title: "Rosalía Shares Her All-Time Favorite Songs in a Met Gala–Themed Playlist - Vogue",
   description: "This playlist is a celebratory playlist for the Met, with nods to my all-time favorite songs, sounds, artists, and references. It has not been possible to celebrate the Met as God intended, but we can celebrate it in our own way from home.",
   author: "Estelle Tang",
   link:"https://www.vogue.com/article/rosalia-met-gala-about-time-playlist",
   imageLink: "https://assets.vogue.com/photos/5eb0a75cd5f359c964b7e0e4/16:9/w_1280,c_limit/ GettyImages-1162355675.jpg",
   publishedAt: "2020-05-05T00:20:29Z",
   content: "To commemorate a very different first Monday in May this year, Vogue asked some of our favorite stars to create a playlist featuring timeless songs inspired by the theme of this year's Met gala and the upcoming Costume Institute exhibition, About Time: Fashio… [+2158 chars]"
  ))
 }
}
Now, we will take some elements from there to form our Article Row
现在,我们将从那里开始使用一些元素来形成文章行
Wrap the Text element in an HStack and replace the “Hello, World!” string with article.title in order to use the title of the provided article
将Text元素包装在HStack中,然后替换“ Hello,World!” 带有article.title的字符串,以便使用所提供文章的标题
var body: some View { HStack{
Text(article.title)}
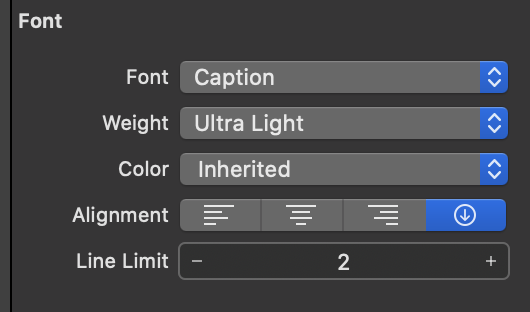
}Let’s add some modifiers to make the text occupy as small as possible, so we can fit more text into our ArticleRow. You can add these via code or via the inspector. If you use the inspector, you should choose the following options:
让我们添加一些修饰符以使文本尽可能小,以便我们可以在ArticleRow中容纳更多文本。 您可以通过代码或检查器添加它们。 如果使用检查器,则应选择以下选项:
Otherwise, if you’re adding the modifiers directly on the code, it should end up like this
否则,如果直接在代码上添加修饰符,则应以如下所示结束
Text(article.title)
 .font(.caption)
 .fontWeight(.ultraLight)
 .lineLimit(2)
And now, we’re going to add a small thumbnail image to the left side of our row, so this will leave less space for the article title, but having reduced the text size will help here.
现在,我们将在行的左侧添加一个小的缩略图图像,这样将为文章标题保留较少的空间,但是减小文本大小将对此有所帮助。
We’re going to add a KFImage object, which takes a URL object in order to download the image. The resizable() and .frame modifiers will provide an optimal size for the UI element.
我们将添加一个KFImage对象,该对象需要一个URL对象才能下载图像。 resizable()和.frame修饰符将为UI元素提供最佳大小。
HStack{    KFImage(URL(string: article.imageLink))
        .resizable()
        .frame(width: 50, height: 50)
    Text(article.title)
       .font(.caption)
       .fontWeight(.ultraLight)
       .lineLimit(2)
}
You may notice that the image isn’t being shown on the preview, no worries, when we push the image to our watch, we will be able to see it. In the meantime, let’s add a placeholder, so we at least have some visual cue to indicate that the image is being downloaded, as well as some style touches, like .cornerRadius(3.0), which applies rounded corners to our image, so it looks a little bit nicer, as well as adding vertical padding to our HStack so our image has a little bit of vertical space around it.
您可能会注意到图像没有显示在预览中,不用担心,当我们将图像推入手表时,我们将能够看到它。 同时,让我们添加一个占位符,这样我们至少有了一些视觉提示来表明正在下载图像,以及一些样式修饰,例如.cornerRadius(3.0) ,它对图像应用了圆角,因此看起来更好一些,以及向我们的HStack添加垂直填充,因此我们的图像周围有一点垂直空间。
Notice the .scaledToFill() modifier below .resizable(), this modifier takes our image and scales it enough to fit the frame below, while keeping its aspect ratio.
注意.scaledToFill()修改器下面.resizable(),此改性剂需要我们的图像和鳞它足以容纳下方的框架,同时保持其高宽比。
HStack{
    KFImage(URL(string: article.imageLink)).placeholder {
            Image(systemName: "arrow.2.circlepath.circle")
               .font(.largeTitle)
               .opacity(0.3)
         }
        .resizable()        .scaledToFill()
        .frame(width: 50, height: 50)        .cornerRadius(3.0)Text(article.title)
        .font(.caption)
        .fontWeight(.ultraLight)
        .lineLimit(2)
}.padding(.vertical)
Now, we’re going to get our hands dirty and work on the logic for fetching the actual articles.
现在,我们将动手实践,并研究获取实际文章的逻辑。
Create a new swift file and name it ArticleFetcher
创建一个新的swift文件并将其命名为ArticleFetcher
At the very top, let’s import SwiftUI plus the two libraries we’re gonna use to fetch and handle the data easily
在最顶部,让我们导入SwiftUI以及我们将用于轻松获取和处理数据的两个库
import SwiftUI
import Alamofire
import SwiftyJSON
Let’s create a public class with the same file name, and let’s make it an ObservableObject, so our ArticleView can use it to fetch the articles from NewsAPI
让我们创建一个具有相同文件名的公共类,并使其成为一个ObservableObject,以便我们的ArticleView可以使用它从NewsAPI中获取文章。
import Foundation
import SwiftUI
import Alamofire
import SwiftyJSONpublic class ArticleFetcher: ObservableObject{
}
Let’s add two published variables. One that will store the List of articles, and another that will tell us if there was an error while fetching the articles.
让我们添加两个已发布的变量。 一个将存储文章列表,另一个将告诉我们在获取文章时是否有错误。
A published variable can be accessed by other views, and the views will update when their value changes.
其他视图可以访问已发布的变量,并且这些视图的值更改时,这些视图将更新。
import Foundation
import SwiftUI
import Alamofire
import SwiftyJSONpublic class ArticleFetcher: ObservableObject{    @Published var articles: [Article] = []@Published var fetchError: Bool = false
}
Now, we’re going to create the function that fetches the articles. For this, we’ll need our NewsAPI API Key. If you didn’t copy and paste it before closing News API after you created your account, you could just go to https://newsapi.org/ and login to get your API Key.
现在,我们将创建用于获取文章的函数。 为此,我们需要我们的NewsAPI API密钥。 如果您在创建帐户后关闭新闻API之前没有复制并粘贴它,则可以转到https://newsapi.org/并登录以获取API密钥。
Let’s create a variable containing our API Key
让我们创建一个包含API密钥的变量
import Foundation
import SwiftUI
import Alamofire
import SwiftyJSONpublic class ArticleFetcher: ObservableObject{@Published var articles: [Article] = []@Published var fetchError: Bool = false    let myApiKey = “yourAPIkeyHere“
}
Below that, we’re going to start our function. Create a function named fetchArticles(), and in the body, of the function, we’re going to add an AlamoFire request, containing the NewsAPI URL that will deliver the top headlines.
在此之下,我们将开始我们的功能。 创建一个名为fetchArticles()的函数,并在函数的主体中添加一个AlamoFire请求,其中包含将提供头条新闻的NewsAPI URL。
import Foundation
import SwiftUI
import Alamofire
import SwiftyJSONpublic class ArticleFetcher: ObservableObject{@Published var articles: [Article] = []@Published var fetchError: Bool = false
    let myApiKey = “yourAPIkeyHere”    func fetchArticles(){
        AF.request("https://newsapi.org/v2/top-headlines?language=en&apiKey="+myApiKey)
    }
}
Now, we need to take the response as a JSON object and use SwiftyJSON to access the value of the response. We’re going to add a switch statement in there to catch a possible failure, and we will update our published variable fetchError so we can reflect the error in the UI.
现在,我们需要将响应作为JSON对象,并使用SwiftyJSON访问响应的值。 我们将在其中添加一个switch语句以捕获可能的故障,并且我们将更新已发布的变量fetchError,以便我们可以在UI中反映该错误。
func fetchArticles(){
    AF.request("https://newsapi.org/v2/top-headlines?language=en&apiKey="+myApiKey).responseJSON{ response inswitch response.result {
         case .success(let value):
             let json = JSON(value)
         case .failure(let error):
             print(error)
             self.fetchError = true}
 }
}
For what comes next, we will do the following
接下来,我们将执行以下操作
- We will take the array of articles contained in the JSON variable 我们将获取JSON变量中包含的文章数组
- We will create an array that will hold Article type objects 我们将创建一个包含Article类型对象的数组
- We will iterate over each article, and use the data to create an Article object 我们将遍历每篇文章,并使用数据创建一个Article对象
- That Article object will be appended to the array that holds our Articles 该Article对象将被追加到保存我们Articles的数组中
- When we finish iterating, we will copy the contents of our Article array into the published variable that also holds Articles. 完成迭代后,我们将Article数组的内容复制到也包含Articles的已发布变量中。
func fetchArticles(){
  AF.request("https://newsapi.org/v2/top-headlines?language=en&apiKey="+myApiKey).responseJSON{ response in
   switch response.result {
    case .success(let value):
     let json = JSON(value)
     let articles = json["articles"].array ?? []
     var articleArray: [Article] = []
     for item in articles {
      let title = item["title"].string ?? "Untitled Article"
      let author = item["author"].string ?? "No author data"
      let description = item["description"].string ?? "No description"
      let link = item["url"].string ?? ""
      let imageLink = item["urlToImage"].string ?? "https://via.placeholder.com/50x50.png?text=IMG"
      let publishedAt = item["publishedAt"].string ?? "No version data"
      let content = item["content"].string ?? "No article content"
      let articleItem = Article(title: title, description: description, author: author, link: link, imageLink: imageLink, publishedAt: publishedAt, content: content)
      articleArray.append(articleItem)
     }
     self.articles = articleArray
    case .failure(let error):
     print(error)
     self.fetchError = true
   }
  }
 }
As you can see, we provided some fallback values in case that an Article doesn’t contain what we need.
如您所见,如果Article不包含我们所需的内容,我们提供了一些后备值。
At the end, ArticleFetcher should look like this
最后,ArticleFetcher应该看起来像这样
import Foundation
import SwiftUI
import Alamofire
import SwiftyJSONpublic class ArticleFetcher: ObservableObject{@Published var articles: [Article] = []@Published var fetchError: Bool = false
 let myApiKey = "yourApiKeyHere"
 func fetchArticles(){
  AF.request("https://newsapi.org/v2/top-headlines?language=en&apiKey="+myApiKey).responseJSON{ response in
   switch response.result {
    case .success(let value):
     let json = JSON(value)
     let articles = json["articles"].array ?? []
     var articleArray: [Article] = []
     for item in articles {
      let title = item["title"].string ?? "Untitled Article"
      let author = item["author"].string ?? "No author data"
      let description = item["description"].string ?? "No description"
      let link = item["url"].string ?? ""
      let imageLink = item["urlToImage"].string ?? "https://via.placeholder.com/50x50.png?text=IMG"
      let publishedAt = item["publishedAt"].string ?? "No version data"
      let content = item["content"].string ?? "No article content"
      let articleItem = Article(title: title, description: description, author: author, link: link, imageLink: imageLink, publishedAt: publishedAt, content: content)
      articleArray.append(articleItem)
     }
     self.articles = articleArray
    case .failure(let error):
     print(error)
     self.fetchError = true
   }
  }
 }
}
Now, we’re going to get back on to some UI stuff. Let’s go back to ContentView, we’re going to add a button that takes us to ArticlesView.
现在,我们将继续介绍一些UI内容。 让我们回到ContentView,我们将添加一个将我们带到ArticlesView的按钮。
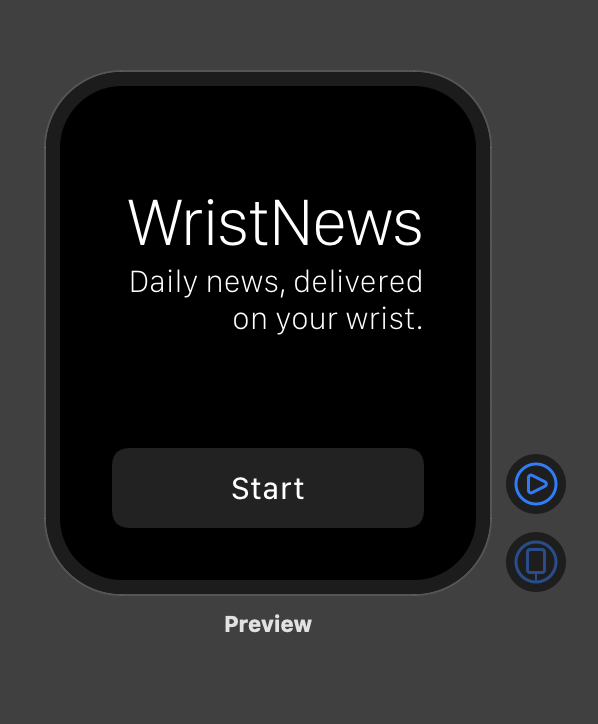
Below the second Text element, let’s add a Spacer() and a NavigationLink with ArticlesView as the destination, wrapping a Text element that says “Start”, or something similar.
在第二个Text元素下面,让我们添加一个Spacer()和一个以ArticlesView为目标的NavigationLink,包装一个说“开始”或类似内容的Text元素。
struct ContentView: View {
    var body: some View {
        VStack(alignment: .trailing){
            Text("WristNews")
                .font(.title)
                .fontWeight(.thin)
            Text("Daily news, delivered on your wrist.")
                .fontWeight(.thin)
                .multilineTextAlignment(.trailing)Spacer()
            NavigationLink(destination: ArticlesView()){
                Text("Start")
            }
        }
    }
}
That Start button will take us to our ArticlesView, where we will now add the List of Articles to populate the View, so let’s go to ArticlesView.
该“开始”按钮将带我们进入ArticlesView,现在我们将在其中添加“文章列表”以填充视图,因此让我们进入ArticlesView。
Right after the struct opens, we’re going to add an ObservedObject variable and name it articleManager, which will be an instance of ArticleFetcher. With it, we can trigger the article fetching from our View, and also access both the List of articles and the possible error that can be displayed.
在该结构打开之后,我们将添加一个ObservedObject变量并将其命名为articleManager,它将是ArticleFetcher的一个实例。 有了它,我们可以触发从视图中获取文章,也可以访问文章列表和可能显示的错误。
struct ArticlesView: View {    @ObservedObject var articleManager = ArticleFetcher()
    var body: some View {
        VStack{
            Text("Articles")
        }
    }
}
Let’s add an onAppear modifier to our VStack, which will let us execute functions when that component appears on the screen. On the onAppear body, we will execute the function that fetches the articles.
让我们在VStack中添加一个onAppear修饰符,当该组件出现在屏幕上时,它将使我们执行功能。 在onAppear主体上,我们将执行获取文章的功能。
struct ArticlesView: View {@ObservedObject var articleManager = ArticleFetcher()
    var body: some View {
        VStack{
            Text("Articles")
        }.onAppear{
            self.articles.fetchArticles()
        }
    }
}
Now, we’re going to add our List of articles into the View. Let’s create a list and pass on to it, the List of articles that articleManager contains. In the body of the List, we will iterate over each Article object, and create an ArticleRow with the article data inside. Just like when we were working on ArticleRow, this time, ArticleRow will take the real data instead of the hardcoded data we used on the Preview struct.
现在,我们将文章列表添加到视图中。 让我们创建一个列表并将其传递给articleManager包含的文章列表。 在列表的主体中,我们将遍历每个Article对象,并在其中包含Article数据创建ArticleRow。 就像这次我们处理ArticleRow一样,ArticleRow将采用真实数据,而不是我们在Preview结构中使用的硬编码数据。
struct ArticlesView: View {@ObservedObject var articleManager = ArticleFetcher()
    var body: some View {
        VStack{
            Text("Articles")            List(self.articleManager.articles) { article in
                ArticleRow(article: article)
            }        }.onAppear{
            self.articleManager.fetchArticles()
        }
    }
}
We’re going to add some UI elements to catch errors, and provide an option to let the user try to fetch the articles again.
我们将添加一些UI元素来捕获错误,并提供一个选项让用户尝试再次获取文章。
For that, we’re going to add an if statement right under our first Text element. That statement will check for the value of fetchError, which will be false until an error comes up.
为此,我们将在第一个Text元素下添加if语句。 该语句将检查fetchError的值,该值将为false,直到出现错误为止。
If fetchError is true, that means that an error occurred while trying to fetch the articles, so we’ll add a Text element in there to tell the user that something happened.
如果fetchError为true,则意味着在尝试获取文章时发生错误,因此我们将在其中添加Text元素以告知用户发生了某些事情。
struct ArticlesView: View {@ObservedObject var articleManager = ArticleFetcher()
    var body: some View {
        VStack{
            Text("Articles")if(self.articleManager.fetchError == true){    Text("There was an error while fetching your news")
            } else {
                List(self.articleManager.articles) { article in
                    ArticleRow(article: article)
                }
            }
        }.onAppear{
            self.articleManager.fetchArticles()
        }
    }
}
Let’s also add in there a button to let the user try to fetch the articles again.
我们还要在其中添加一个按钮,以使用户尝试再次获取文章。
struct ArticlesView: View {@ObservedObject var articleManager = ArticleFetcher()
    var body: some View {
        VStack{
            Text("Articles")
            if(self.articleManager.fetchError == true){
                Text("There was an error while fetching your news")Button(action:{
                    self.articleManager.fetchArticles()
                }){
                    Text("Try Again")
                }
            } else {
                List(self.articleManager.articles) { article in
                    ArticleRow(article: article)
                }
            }
        }.onAppear{
            self.articleManager.fetchArticles()
        }
    }
}
Now, let’s go into ArticleFetcher and we’ll switch the value of fetchError to true, so we can check how our error message looks like in the preview.
现在,让我们进入ArticleFetcher,我们将fetchError的值切换为true,所以我们可以检查我们的错误信息是在预览怎么样。
public class ArticleFetcher: ObservableObject{@Published var articles: [Article] = []@Published var fetchError: Bool = trueAfter doing so, let’s go back to ArticlesView, and let’s remove the first Text element that contains “Articles”, since it’s no longer needed and is somewhat redundant. Resume the preview, and you will see the error message in there.
这样做之后,让我们回到ArticlesView,并删除包含“ Articles”的第一个Text元素,因为它不再需要并且有些多余。 恢复预览,您将在其中看到错误消息。
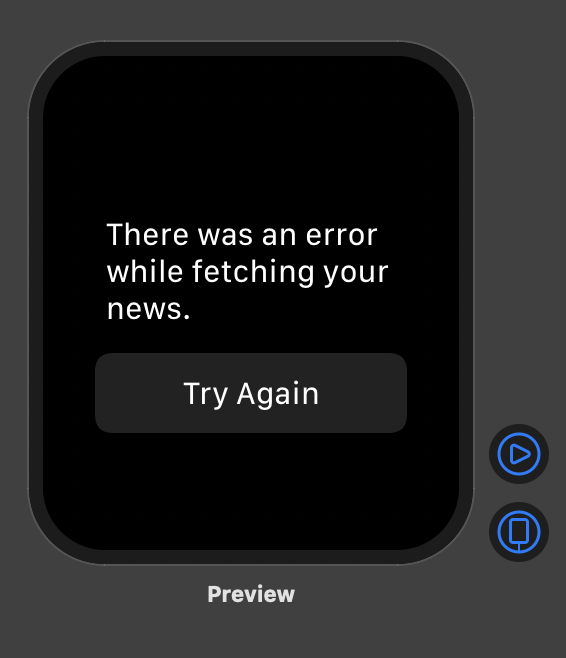
To make this look a little bit better, let’s align the text to the center. You can do so via the inspector by tapping on the text, or via code. It should end up like this on code:
为了使外观更好一点,让我们将文本对齐中心。 您可以通过检查器点击文本或通过代码来执行此操作。 它应该以如下代码结束:
if(self.articleManager.fetchError){
    Text("There was an error while fetching your news.")        .multilineTextAlignment(.center)Button(action:{
        self.articleManager.fetchArticles()
    }){
        Text("Try Again")
    }
} else {
    List(self.articleManager.articles) { article in
        ArticleRow(article: article)
    }
}
Let’s go back to ArticleFetcher, and turn the fetchError value back to false. Also, at the very start of the fetchArticles function, let’s set the value to false, so the error clears everytime we try to fetch the articles. Don’t worry, it’ll turn back to true if we come across an error again.
让我们回到ArticleFetcher ,然后将fetchError值重新设置为false。 另外,在fetchArticles函数的最开始,我们将值设置为false ,因此每次尝试获取文章时都会清除错误。 不用担心,如果再次遇到错误,它将恢复为true 。
public class ArticleFetcher: ObservableObject{@Published var articles: [Article] = []@Published var fetchError: Bool = false
    let myApiKey = "yourApiKeyHere"
    func fetchArticles(){        self.fetchError = false
        AF.request("https://newsapi.org/v2/top-headlines?language=en&apiKey="+myApiKey).responseJSON{ response in...
Now, we’re almost there! The last step will be creating a detailed view so we can tap on our articles and see them in detail, and we will be ready to wrap this up and push the App to our Apple Watch!
现在,我们快到了! 最后一步是创建详细视图,以便我们可以点击我们的文章并对其进行详细查看,我们将准备将其包装起来并将应用程序推送到我们的Apple Watch!
Create a new SwiftUI View and name it ArticleDetail. Same as with ArticleRow, we will require an Article object here, so let’s add that in there, and let’s copy the same hardcoded data we used on the ArticleRow preview over here as well. We also will import Kingfisher to show an image in here as well, but this time, it’s going to be a little bit bigger.
创建一个新的SwiftUI视图并将其命名为ArticleDetail。 与ArticleRow相同,我们将在此处需要一个Article对象,因此让我们在其中添加它,并在此处复制在ArticleRow预览中使用的相同硬编码数据。 我们也将导入Kingfisher以便在此处显示图像,但是这一次它会更大一些。
import SwiftUI
import Kingfisher
import struct Kingfisher.KFImagestruct ArticleDetail: View {
    var article: Article
    var body: some View {
        Text("Hello, World!")
    }
}struct ArticleDetail_Previews: PreviewProvider {
    static var previews: some View {
        ArticleDetail(article: Article(
            title: "Rosalía Shares Her All-Time Favorite Songs in a Met Gala–Themed Playlist - Vogue",
            description: "This playlist is a celebratory playlist for the Met, with nods to my all-time favorite songs, sounds, artists, and references. It has not been possible to celebrate the Met as God intended, but we can celebrate it in our own way from home.",
            author: "Estelle Tang",
            link:"https://www.vogue.com/article/rosalia-met-gala-about-time-playlist",
            imageLink: "https://assets.vogue.com/photos/5eb0a75cd5f359c964b7e0e4/16:9/w_1280,c_limit/ GettyImages-1162355675.jpg",
            publishedAt: "2020-05-05T00:20:29Z",
            content: "To commemorate a very different first Monday in May this year, Vogue asked some of our favorite stars to create a playlist featuring timeless songs inspired by the theme of this year's Met gala and the upcoming Costume Institute exhibition, About Time: Fashio… [+2158 chars]"
        ))
    }
}
Replace “Hello, world!” by article.title, and, below it, add another Text element that contains the author’s name. Let’s make this last text element ultraThin, so it differentiates itself from the title. Wrap everything in a VStack, and then, wrap the VStack inside a ScrollView. This will let us scroll up or down a view that overflows the screen.
替换为“你好,世界!” 按article.title,然后在其下方添加另一个包含作者姓名的Text元素。 让我们将最后一个文本元素设置为ultraThin,以便与标题区分开。 将所有内容包装在VStack中,然后将VStack包装在ScrollView中。 这将使我们上下滚动视图,从而使屏幕溢出。
var body: some View {
 ScrollView{
  VStack(alignment: .leading){Text(article.title)
    .font(.headline)
    .fixedSize(horizontal: false, vertical: true)
   Text("By \(article.author)")
    .fontWeight(.ultraLight)
  }
 }
}
Below the author’s name, we’ll add the image. This time, I won’t add a placeholder, since it’s not immediately obvious we’re expecting an image here, different from the ArticleRow View. It’s up to you though, if you want to add a placeholder, you can take some code from ArticleRow.
在作者姓名下方,我们将添加图片。 这次,我将不添加占位符,因为它并不是立即显而易见的,我们期望这里的图像不同于ArticleRow View。 但是,由您决定,如果要添加占位符,可以从ArticleRow获取一些代码。
After that, let’s add a Divider(), and both the article description and content. We’ll add some modifiers to both of them, to make the text occupy as less space as possible, and the last one to not truncate the text.
之后,让我们添加Divider()以及文章描述和内容。 我们将为它们都添加一些修饰符,以使文本占用尽可能少的空间,最后一个不截断文本。
var body: some View {
 ScrollView{
  VStack(alignment: .leading){
   Text(article.title)
    .font(.headline)
    .fixedSize(horizontal: false, vertical: true)
   Text("By \(article.author)")
    .fontWeight(.ultraLight)Divider()
   Text(article.description)
    .font(.caption)
    .fontWeight(.ultraLight).fixedSize(horizontal: false, vertical: true)
   Text(article.content)
    .font(.caption)
    .fontWeight(.ultraLight)    .fixedSize(horizontal: false, vertical: true)
  }
 }
}
Finally, let’s add another divider, and two more text elements. One to show the date of publication, and the last one to provide a link to the full story.
最后,让我们添加另一个分隔符和另外两个文本元素。 一个显示出版日期,最后一个显示全文的链接。
var body: some View {
 ScrollView{
  VStack(alignment: .leading){
   Text(article.title)
    .font(.headline)
    .fixedSize(horizontal: false, vertical: true)
   Text("By \(article.author)")
    .fontWeight(.ultraLight)
   KFImage(URL(string: article.imageLink))
    .resizable()
    .scaledToFit()
   Divider()
   Text(article.description)
    .font(.caption)
    .fontWeight(.ultraLight)
    .fixedSize(horizontal: false, vertical: true)
   Text(article.content)
    .font(.caption)
    .fontWeight(.ultraLight)
    .fixedSize(horizontal: false, vertical: true)   Divider()
   Text("Published at \(article.publishedAt)")
    .font(.caption)
    .fontWeight(.ultraLight)
    .fixedSize(horizontal: false, vertical: true)
   Text("Read the full story in: \(article.link)")
    .font(.caption)
    .fontWeight(.ultraLight)
    .fixedSize(horizontal: false, vertical: true)
    .padding(.top)    }
  }
}
Now, for the final act, we’re going to link the ArticleRow View to the ArticleDetail View, and we will have completed the App!
现在,对于最后一步,我们将链接ArticleRow视图到ArticleDetail视图,并且我们将完成应用程序!
Let’s go back on to ArticlesView. On the List of articles, we’ll wrap ArticleRow inside a NavigationLink, and let’s set it’s destination to ArticleDetail, while providing the same article we provide to ArticleRow.
让我们回到ArticlesView。 在文章列表中,我们将ArticleRow包装在NavigationLink中,然后将其设置为ArticleDetail的目的地,同时提供与ArticleRow相同的文章。
List(self.articleManager.articles) { article inNavigationLink(destination: ArticleDetail(article: article)){
        ArticleRow(article: article)}
}
And we have finished our App! Now, get your Apple Watch, iPhone, Lightning Cable and plug your iPhone to your Mac.
并且我们已经完成了我们的应用程序! 现在,获取Apple Watch,iPhone,Lightning Cable,并将iPhone插入Mac。
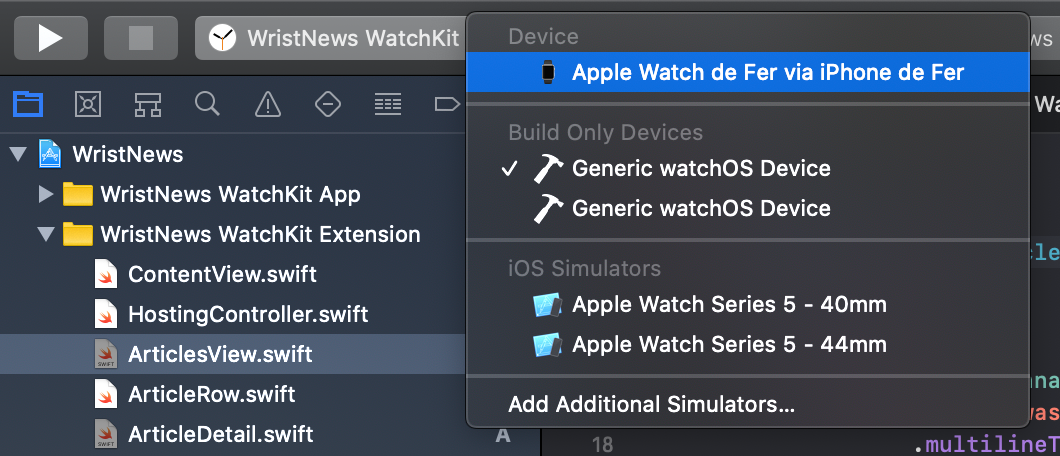
Wait a little bit until it’s detected by Xcode.
稍等片刻,直到Xcode检测到它为止。
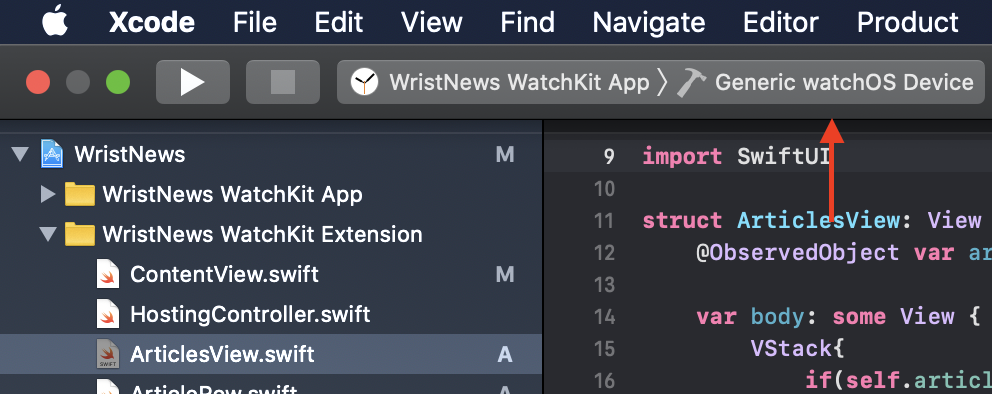
Right above the editor, tap on the active scheme
在编辑器上方,点击活动方案
And at the very top of the List, you should see your Apple Watch via your iPhone.
并且在列表的顶部,您应该通过iPhone看到Apple Watch。
Then, tap on the Play button to finally push the App on to your Apple Watch!
然后,点击“播放”按钮,最终将应用程序推送到Apple Watch!
If this is the first time you do this, most likely you will get an error. Worry not! The App is installed on your Apple Watch, but you have to allow it to run. Press the Digital Crown to open the app drawer, and look for a suspicious icon that looks like a White Crosshair on Gray Background, or like some concentric circles with a cross in the middle. That’s your App.
如果这是您第一次这样做,则很可能会收到错误消息。 不用担心! 该应用程序已安装在Apple Watch上,但必须允许其运行。 按数字王冠打开应用程序抽屉,然后找到可疑图标,该图标看起来像灰色背景上的白色十字准线,或者像是一些中间有叉的同心圆。 那就是你的应用程序。
When you open it, you should see a small message asking for permission to run the App. Tap on Allow, and enjoy!
当您打开它时,您应该会看到一条小消息,要求获得运行该应用程序的许可。 点击允许,然后享受!
I hope you’ve enjoyed this tutorial as much as I enjoyed writing it. Building WatchOS apps with SwiftUI is fun and easy, and it’s amazing how we can do a lot of stuff on a tiny computer that sits on our wrist.
希望您喜欢本教程,也喜欢本教程。 使用SwiftUI构建WatchOS应用既有趣又容易,而且令人惊奇的是,我们如何在手腕上的微型计算机上完成许多工作。
If you have time, feel free to expand your news app! Add more views, change the ones we have a bit, alter the order of the Text elements, and experiment with it!
如果有时间,请随时扩展您的新闻应用程序! 添加更多视图,更改一下视图,更改Text元素的顺序,然后尝试一下!
Thanks for getting to the end of it with me!
感谢您结束我的旅程!
从头开始 制作办公系统


 1256
1256

 被折叠的 条评论
为什么被折叠?
被折叠的 条评论
为什么被折叠?
 到【灌水乐园】发言


