


ios vc中绘图
You must have always wondered how to create different figures & shapes in iOS. Creating a rectangle and circle is easy, every view is itself a rectangle and if you ever want to create a circle you can use cornerRadius property. But what about complex shapes? How can we create a triangle which has a weird shape inside it? It is all possible CAShapeLayer
您一定一直想知道如何在iOS中创建不同的图形和形状。 创建一个矩形和一个圆形很容易,每个视图本身就是一个矩形,如果您想创建一个圆形,则可以使用cornerRadius属性。 但是复杂的形状呢? 我们如何创建一个内部具有怪异形状的三角形? CAShapeLayer都是可能的
We will start by learning how to create simple figures using UIBezierPath and CAShapeLayer , and move on to creating masks and complex figures using the same two things.
我们将首先学习如何使用UIBezierPath和CAShapeLayer创建简单图形,然后继续使用相同的两件事来创建蒙版和复杂图形。
基本形状和图形 (Basic shapes & figures)
Every view in iOS has a CALayer with it which can be used to add multiple customised layer inside it. It works similar to any UIView , we can have a parent view and add multiple child views inside it. Similarly iOS provides us with a parent layer for every view and we will create separate layers for creating different shapes and then add that layer to the main layer.
iOS中的每个视图都有一个CALayer ,可用于在其中添加多个自定义图层。 它的工作原理类似于任何UIView ,我们可以拥有一个父视图并在其中添加多个子视图。 同样,iOS为每个视图提供一个父层,我们将创建单独的层以创建不同的形状,然后将该层添加到主层。
绘制矩形 (Drawing a Rectangle)
Output looks like this:
输出看起来像这样:
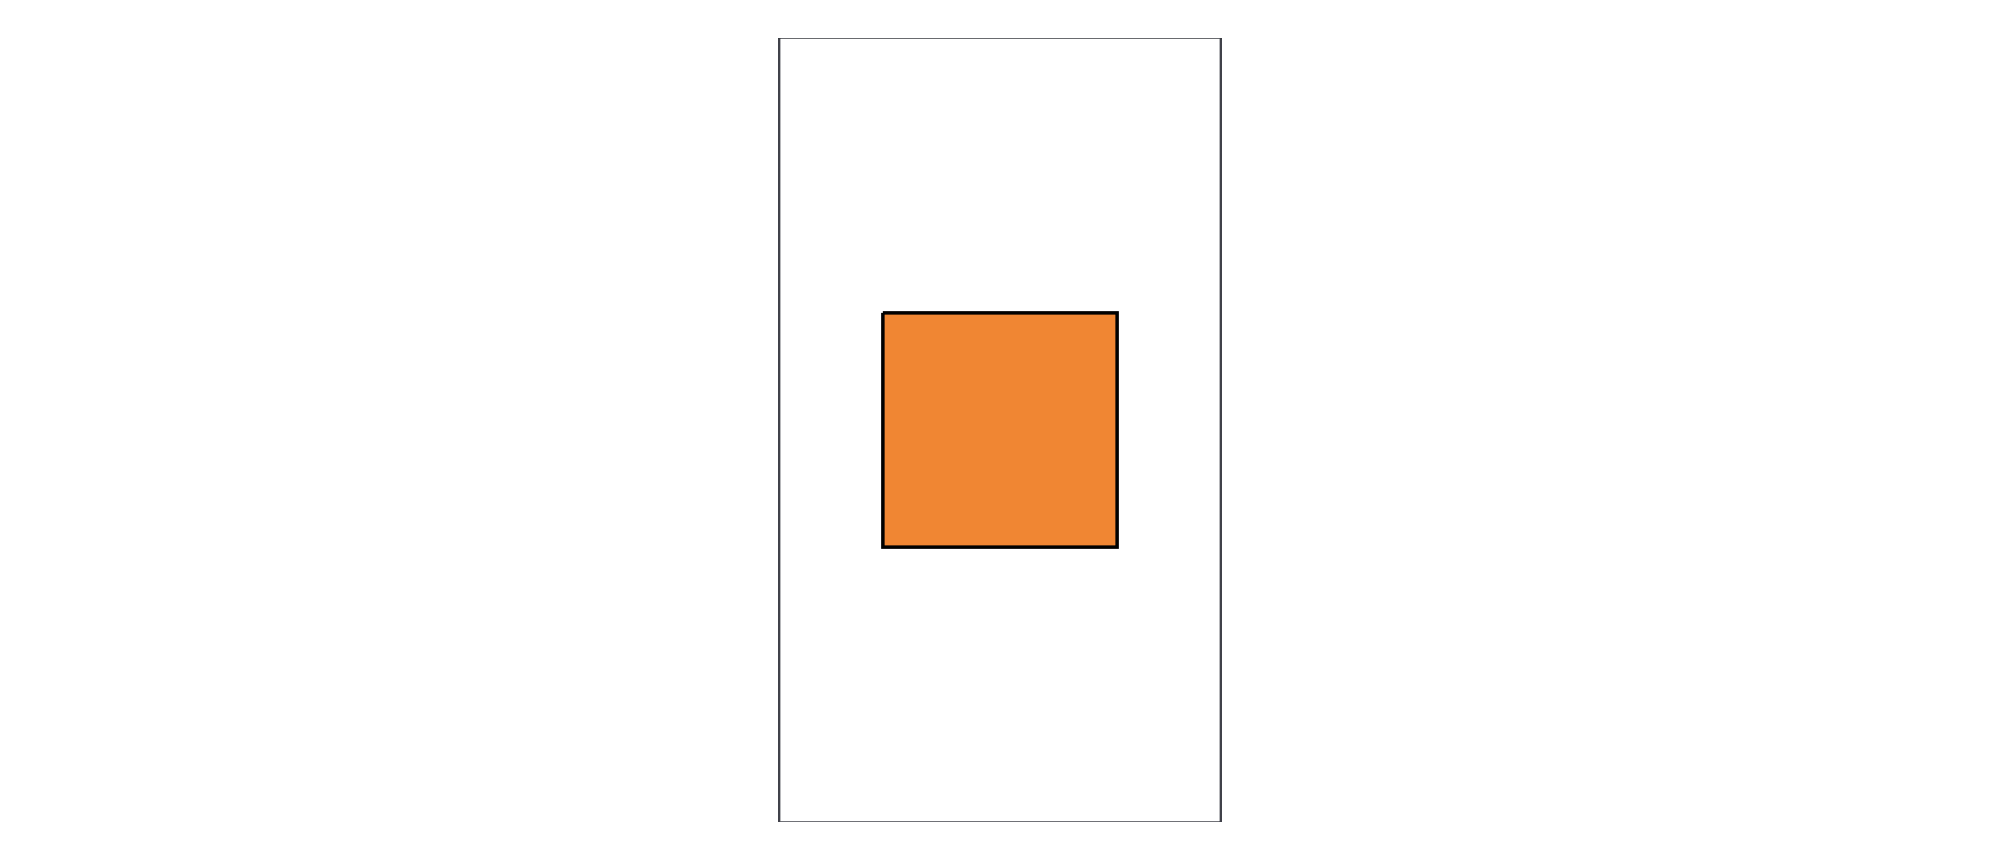
Let’s understand what all we did to achieve this.
让我们了解一下我们为实现这一目标所做的一切。
We have created a
containerViewon which we will draw our custom shapes.我们创建了一个
containerView,将在其上绘制自定义形状。Inside
drawRectanglemethod we first create a path usingUIBezierPathand then draw all the four side of a rectangle usingaddLinemethod. Before adding all the lines we have used a methodmoveTowhich is used to point at the place where our path will start drawing.在
drawRectangle方法内部,我们首先使用UIBezierPath创建路径,然后使用addLine方法绘制矩形的所有四个边。 在添加所有线条之前,我们使用了moveTo方法,该方法用于指向路径开始绘制的位置。After that we have created a new layer of type
CAShapeLayerwhose path is the custom path that we created above. We also assigned some colour properties and line width to make our rectangle look a bit nice.之后,我们创建了一个类型为
CAShapeLayer的新层,其路径是我们在上面创建的自定义路径。 我们还分配了一些颜色属性和线宽,以使矩形看起来更漂亮。At last we used the
containerView'slayer and added our layer to it as asubLayer最后,我们使用了
containerView's图层,并将其作为subLayer添加到该subLayer
画一个三角形 (Drawing a Triangle)
Output looks like this:
输出看起来像这样:
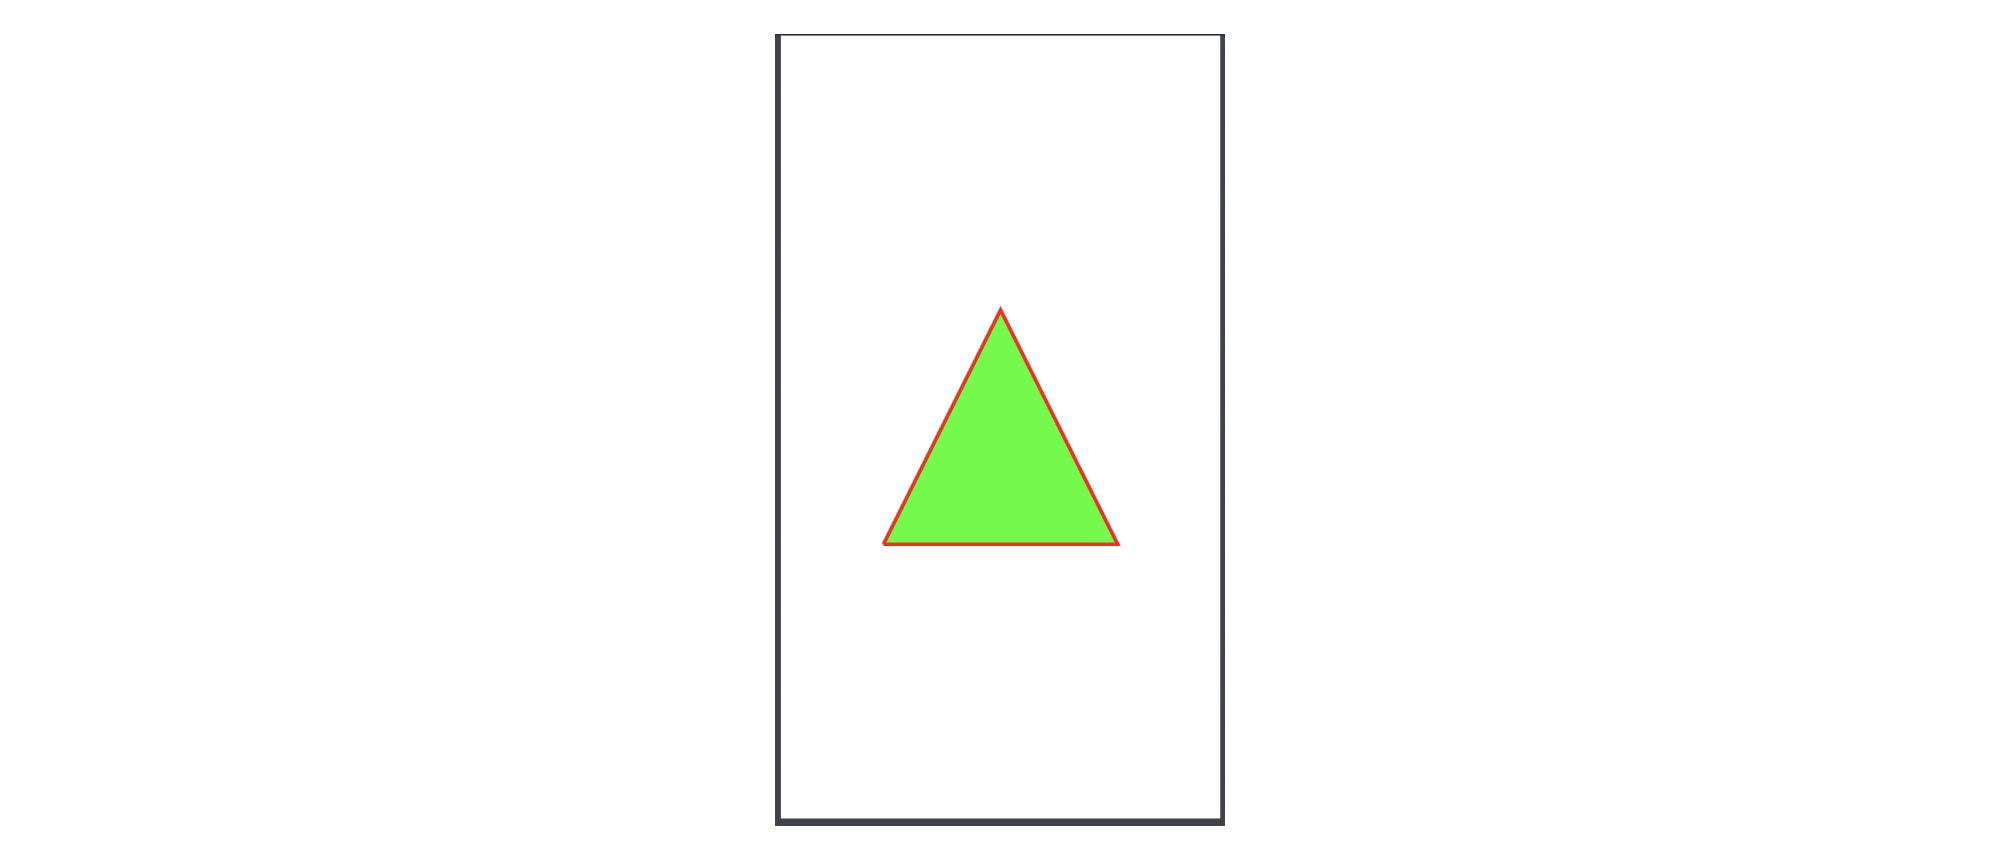
For creating a triangle there’s no magic. We have simply change the CGPoint inside addLine method to make it a rectangle.
创建三角形没有魔术。 我们只需更改addLine方法中的CGPoint使其成为矩形即可。
绘制椭圆/圆 (Drawing an Oval/Circle)
Output looks like this:
输出看起来像这样:

In this we didn’t create the path ourself. Swift provides us with some initialisers of UIBezierPath which can be used to draw shapes for us. In this case we used UIBezierPath(ovalIn: <CGRect>) , what it does is it takes a rectangle as an input and draws the biggest oval possible inside it. The height and width of our containerView is same that is why it created a circle for us, if we increase the height or width then the resulting figure would be an oval.
在这种情况下,我们并没有创造自己的道路。 Swift为我们提供了一些UIBezierPath初始化UIBezierPath ,可用于为我们绘制形状。 在这种情况下,我们使用UIBezierPath(ovalIn: <CGRect>) ,它的作用是将矩形作为输入并在其中绘制最大的椭圆形。 containerView的height和width相同,这就是为什么它为我们创建了一个圆,如果我们增加height或width则生成的图形将是一个椭圆形。
画弧线 (Drawing an Arc)
Output looks like this:
输出看起来像这样:

You will realise that we have used another initialiser for creating an arc using UIBezierPath , we can also create a circle using this method. Let’s breakdown the initialiser and understand what are the different parameters that it takes.
您将意识到,我们使用了另一个初始化程序来使用UIBezierPath创建圆弧,我们也可以使用此方法创建圆。 让我们分解一下初始化程序,了解它需要使用哪些不同的参数。
UIBezierPath(arcCenter: <CGPoint>, radius: <CGFloat>, startAngle: <CGFloat>, endAngle: <CGFloat>, clockwise: <Bool>
UIBezierPath(arcCenter: <CGPoint>, radius: <CGFloat>, startAngle: <CGFloat>, endAngle: <CGFloat>, clockwise: <Bool>
arcCenter-> This is the point from which the arc is drawn using it as a centre.arcCenter>这是以圆弧为中心绘制圆弧的点。radius-> Radius of the arcradius->圆弧半径startAngle-> The angle from which arc startsstartAngle>弧开始的角度endAngle-> The angle where arc endsendAngle>弧结束的角度clockwise-> Whether the arc is drawn clockwise or notclockwise->是否顺时针绘制弧
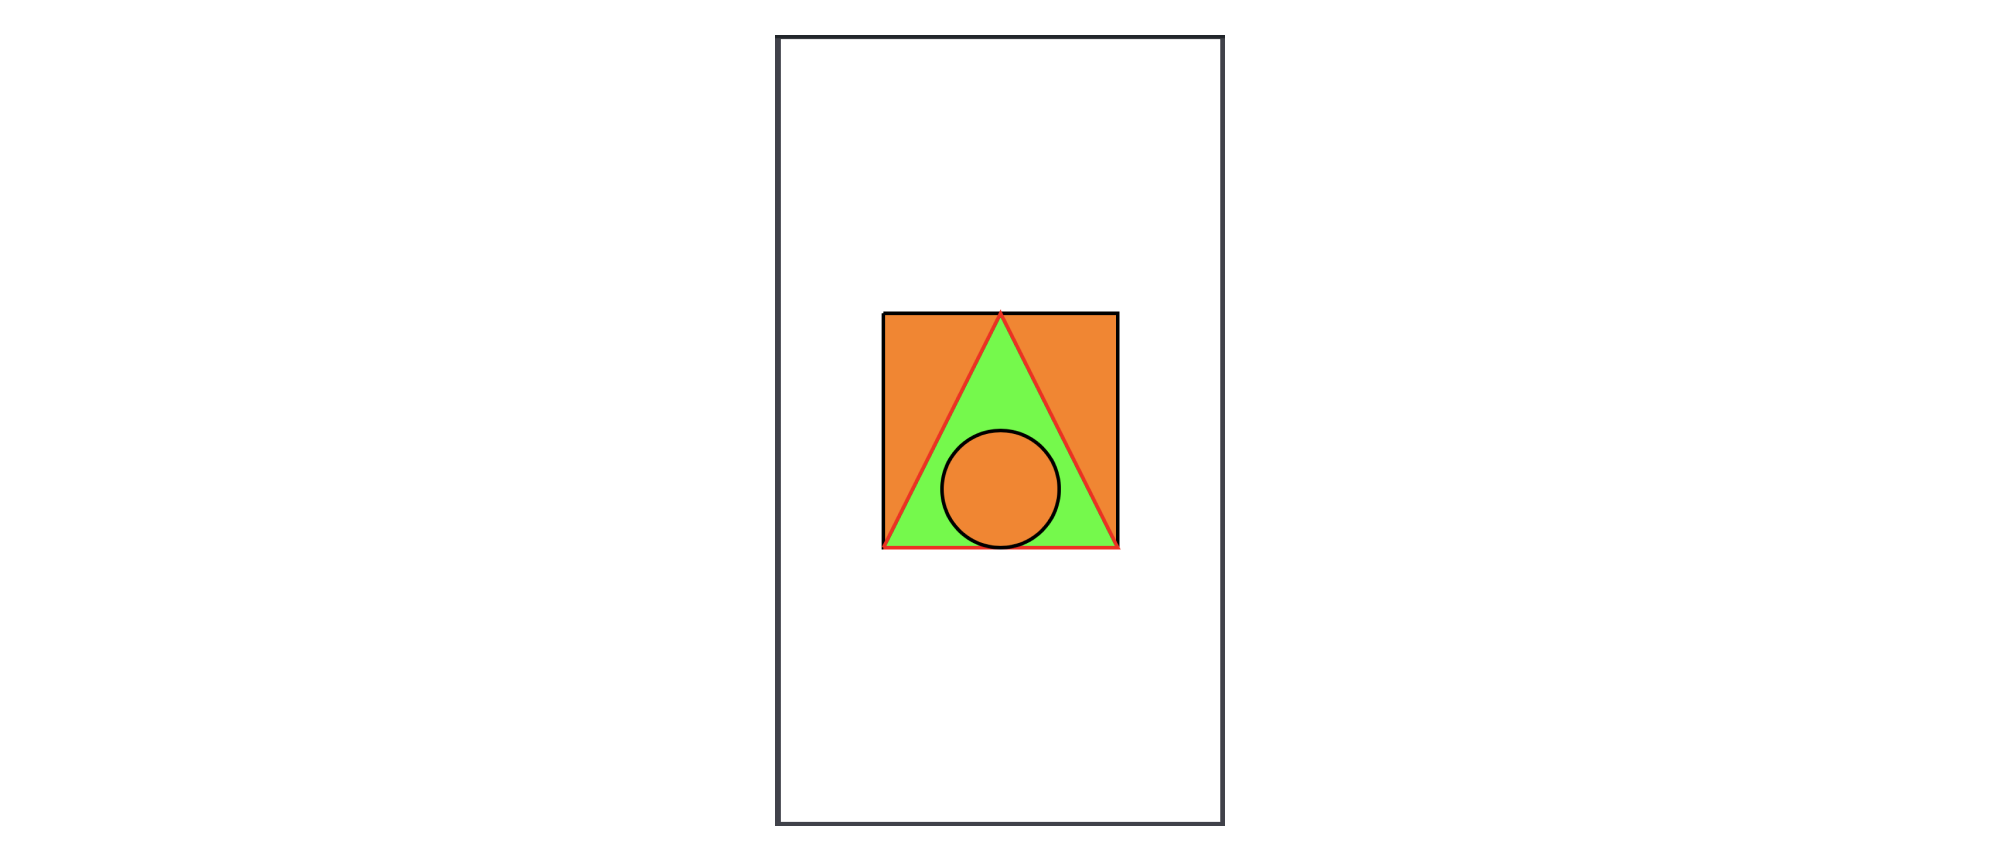
添加多层 (Adding multiple layers)
Recall that every view has a CALayer and we can add many sublayers to it. In this section we are going to create a rectangle which has circle and triangle inside it.
回想一下,每个视图都有一个CALayer ,我们可以向其中添加许多子层。 在本节中,我们将创建一个内部有circle和triangle的rectangle 。
Three are four different methods by which we can insert a sublayer on to a layer:
三种是四种不同的方法,我们可以通过这些方法在层上插入子层:
addSublayer(<CALayer>)-> This simply adds a new layer on the top of the stack of layersaddSublayer(<CALayer>)->这只是在层堆栈的顶部添加一个新层insertSublayer(<CALayer>, at: <UInt32>-> This method takes an extra parameteratwhich inserts the layer at the given position inside the stack of layersinsertSublayer(<CALayer>, at: <UInt32>->此方法采用一个额外的参数,可at该参数at将层插入到层堆栈内的给定位置insertSublayer(<CALayer>, above: <CALayer?>-> This method inserts the layer above a particular layerinsertSublayer(<CALayer>, above: <CALayer?>->此方法将图层插入到特定图层上方insertSublayer(<CALayer>, below: <CALayer?>-> This methods inserts the layer below a particular layerinsertSublayer(<CALayer>, below: <CALayer?>->此方法将层插入到特定层之下
Output looks like this:
输出看起来像这样:
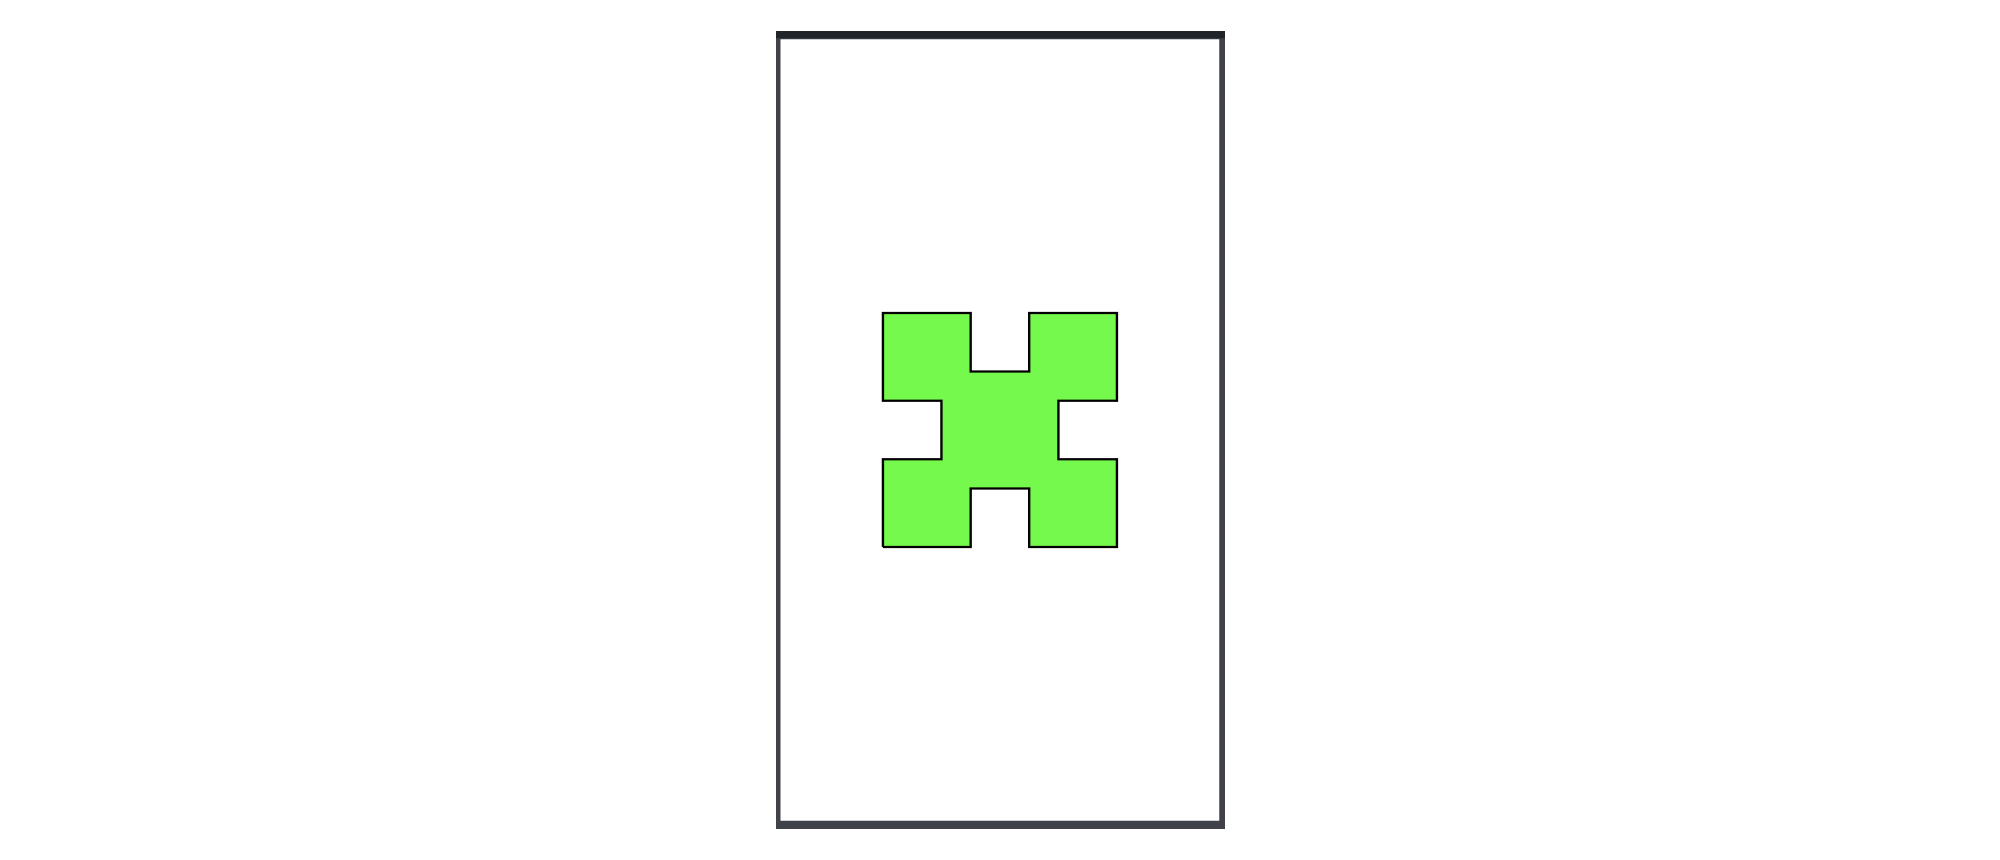
绘制随机形状 (Drawing a random shape)
Let’s create a random shape using all the things that we have learnt so far.
让我们使用到目前为止所学到的所有东西创建一个随机形状。
Output looks like this:
输出看起来像这样:
结语 (Wrapping Up)
This was all about getting started with CAShapeLayer in iOS. If you have any doubts then feel free to discuss in the comments.
这就是在iOS中开始使用CAShapeLayer的全部内容。 如果您有任何疑问,请随时在评论中进行讨论。
您可能喜欢的其他文章 (Other article that you may like)
Data Structures & Algorithms in Swift: Part 1 — Stack
Data Structures & Algorithms in Swift: Part 2 — Queue
Data Structures & Algorithms in Swift: Part 3 — Binary Tree
翻译自: https://medium.com/flawless-app-stories/drawing-using-cashapelayer-in-ios-9a6c83de7eb2
ios vc中绘图


 119
119

 被折叠的 条评论
为什么被折叠?
被折叠的 条评论
为什么被折叠?
 到【灌水乐园】发言


