


 本文介绍了如何使用JavaScript在Node.js环境中实现URL缩短功能,通过解析提供的链接,创建简短的网址替代长链接。
js创建节点选择器
In this article, we’ll create a minimal URL Shortener in Node.js. We’ll be using MongoDB as the database to store the URL.
在本文中,我们将在Node.js中创建一个最小的URL Shortener。 我们将使用MongoDB作为存储URL的数据库。
Let’s now start working!
现在开始工作!
Let’s fire up the terminal and write the following command:
让我们启动终端并编写以下命令:
npm init -yLet’s install some of the packages we need. For that, fire up the terminal and write the following command:
让我们安装一些我们需要的软件包。 为此,启动终端并编写以下命令:
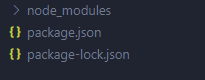
npm i dotenv express mongoose shortid validatorWith this command, we’ve installed dotenv, express, mongoose, shortid, validator. The dotenv package helps us to access .env files. We’ll be using the shortid package to generate a short id for our URL. After the installation is complete, our folder structure should look like this:
使用此命令,我们已经安装了dotenv , express , mongoose , shortid , validator 。 dotenv软件包可帮助我们访问.env文件。 我们将使用shortid包为我们的URL生成一个简短的id。 安装完成后,我们的文件夹结构应如下所示:
Let’s now create a file called .env in our main project directory. Let’s open up the file .env and write the following:
现在,在主项目目录中创建一个名为.env的文件。 让我们打开文件.env并编写以下代码:
MONGO_URI= // Enter mongo URI hereYou need to enter the value to MONGO_URI as specified in the comment above. The MONGO_URI should contain the URL to your Mongo DB database.
您需要按照上面的注释将值输入到MONGO_URI 。 MONGO_URI应该包含您的Mongo DB数据库的URL。
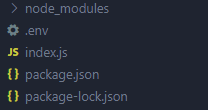
Let’s now create a file called index.js in our main project directory. This should make our folder structure look like this:
现在让我们在主项目目录中创建一个名为index.js的文件。 这应该使我们的文件夹结构如下所示:
Let’s now open up the file index.js and write the following lines of code:
现在,打开文件index.js并编写以下代码行:
const express = require("express");
const mongoose = require("mongoose");


require("dotenv").config();
const route = require("./routes/ShortenerRoute.js");


const app = express();


app.use(express.json());


app.use("", route);


const PORT = process.env.PORT || 3000;


mongoose
  .connect(process.env.MONGO_URI, {
    useNewUrlParser: true,
    useUnifiedTopology: true,
  })
  .then(() => console.log("connected to mongo database"))
  .catch((e) => console.error(e));


app.listen(PORT, () => console.log(`listening on port ${PORT}`));
At line 1, we imported express; at line 2, we imported mongoose. Then, at line 4, we imported and configured dotenv. At line 5, we imported route.
在第1行,我们导入了express ; 在第2行,我们进口了mongoose 。 然后,在第4行,我们导入并配置了dotenv 。 在第5行,我们导入route 。
At line 7, we created an app constant that stores express().
在第7行,我们创建了一个存储express()的app常量。
At line 9, we used the express.json() middleware. This express.json() middleware helps us to read JSON data received from the client.
在第9行,我们使用了express.json()中间件。 这个express.json()中间件可以帮助我们读取从客户端接收的JSON数据。
At line 11, we used the route middleware.
在第11行,我们使用了route中间件。
At line 13, we created a constant for PORT.
在第13行,我们为PORT创建了一个常量。
From line 15 to 21, we connected to MongoDB database using mongoose.connect(). We provided the MongoDB database as the first argument to connect(). If there occurs any error during the connection we log the error (at line 21).
从15到21行,我们使用mongoose.connect()连接到MongoDB数据库。 我们提供MongoDB数据库作为connect()的第一个参数。 如果在连接过程中发生任何错误,我们将记录错误(在第21行)。
At line 23, we started our server at the PORT.
在第23行,我们在PORT启动了服务器。
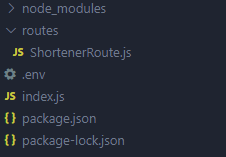
Now that we’ve worked on our index.js file, let’s now work on our routes. For that, let’s create a directory called routes in our main project directory. Let’s create a file called ShortenerRoute.js in our routes directory. After this, our folder structure looks like this:
现在我们已经处理了index.js文件,现在开始处理路由。 为此,让我们在主项目目录中创建一个名为路由的目录。 让我们在路由目录中创建一个名为ShortenerRoute.js的文件。 之后,我们的文件夹结构如下所示:
Let’s now open up the file ShortenerRoute.js and write the following lines of code:
现在让我们打开文件ShortenerRoute.js并编写以下代码行:
const express = require("express");


const { Redirect, AddUrl } = require("../controller/ShortenerController");


const router = express.Router();


// / GET
router.get("/:shortId", Redirect);


// / POST
router.post("/", AddUrl);


module.exports = router;
At line 1, we imported express. At line 3, we imported the Redirect and AddUrl controllers.
在第1行,我们导入了express 。 在第3行,我们导入了Redirect和AddUrl控制器。
At line 5, we created the router constant which stores express.Router().
在第5行,我们创建了存储express.Router()的router常量。
At line 8, we created the route of /:shortId for a GET request and provided the Redirect controller for that route.
在第8行,我们为GET请求创建了/:shortId路由,并为该路由提供了Redirect控制器。
At line 11, we created the route with a POST request and provided the AddUrl controller.
在第11行,我们使用POST请求创建了路由,并提供了AddUrl控制器。
Finally, at line 13, we exported the router.
最后,在第13行,我们导出了router 。
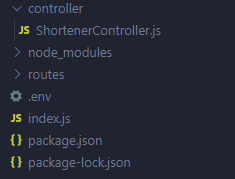
Next up, let’s work on our controller. For that, let’s create a directory called controller in our main project directory. After that, create a file called ShortenerController.js inside of the controller directory. This should make our folder structure look like this:
接下来,让我们研究控制器。 为此,让我们在主项目目录中创建一个名为controller的目录。 之后,在控制器目录内创建一个名为ShortenerController.js的文件。 这应该使我们的文件夹结构如下所示:
Let’s now open up the file ShortenerController.js and write the following lines of code:
现在,打开文件ShortenerController.js并编写以下代码行:
const validator = require("validator");


const Url = require("../models/url");


const Redirect = async (req, res) => {
  const { shortId } = req.params;


  if (!shortId) return res.status(400).json({ msg: "id not provided" });


  try {
    const URL = await Url.findOne({ shortId });
    if (!URL) return res.status(400).json({ msg: "invalid url id" });
    return res.redirect(URL.url);
  } catch (error) {
    console.error(error);
    return res.status(500).json({ msg: "some error occured" });
  }
};


const AddUrl = async (req, res) => {
  const { url } = req.body;


  if (!url) return res.status(400).json({ msg: "url not provided" });


  if (
    !validator.isURL(url, {
      require_protocol: true,
    })
  )
    return res.status(400).json({ msg: "invalid url" });


  try {
    let URL = await Url.findOne({ url });
    if (!URL) {
      let newURL = new Url({ url });
      await newURL.save();
      return res.status(201).json({ shortId: newURL.shortId, url });
    }


    return res.status(200).json({ shortId: URL.shortId, url });
  } catch (error) {
    console.error(error);
    return res.status(500).json({ msg: "some error occured" });
  }
};


module.exports = {
  Redirect,
  AddUrl,
};
At line 1 & 3, we imported validator and Url respectively. Url is a model, which we’ll be working on soon.
在第1行和第3行,我们分别导入了validator和Url 。 Url是一个模型,我们会尽快进行处理。
At line 5, we created an arrow function called Redirect and exported it at line 48. The purpose of this Redirect controller is to redirect users to the URL as per the provided shortId. At line 6, we extracted the shortId from the req.params using object destructure. If the shortId doesn’t exist, we provide an error message of the id isn’t provided — at line 8. With the help of the shortId we queried the Url model, at line 11, and stored it in URL constant. If the URL exists, we redirect the user to the route URL.url at line 13. The url is a field in Url model which stores the URI of the website. We also have shortId field in the Url model which stores the shortId. You’ll get to know what our model looks like in a while when we’ll be working on it. If the URL doesn’t exist, we return an error message at line 12. If there occurs any error during the process, we log the error at line 15. Then, we send the error message at line 16.
在第5行,我们创建了一个名为Redirect的箭头函数,并在第48行将其导出。此Redirect控制器的目的是按照提供的shortId将用户重定向到URL。 在第6行,我们使用对象shortId从req.params提取shortId 。 如果shortId不存在,则在第8行提供错误的ID消息。借助于shortId我们在第11行查询了Url模型,并将其存储在URL常量中。 如果URL存在,我们将用户重定向到的路线URL.url在第13行的url是在外地Url模型存储网站的URI。 我们在Url模型中也有shortId字段,用于存储shortId 。 当我们处理模型时,您将了解模型的外观。 如果URL不存在,则在第12行返回错误消息。如果在此过程中发生任何错误,则在第15行记录错误。然后,在第16行发送错误消息。
At line 20, we created an arrow function called AddUrl and exported it at line 49. The purpose of this function is to add a new URL to the database and provide the user with the unique id. At line 21, we extracted url from req.body. If the url doesn’t exist, we provide an error message at line 23. Then, at line 25 to 30, we ran a validation to the url, using validator. The isUrl method of the validator takes in a string to be validated as the first argument, in our case it’s url. The second argument takes in options object. Here, we’ve set require_protocol to true, at line 27. If the validation doesn’t match, we send the user with an error message at line 30. At line 33, we queried the Url model with the url and stored at URL constant. If the URL exists, we send the user with the same the shortId, from URL.shortId and the url itself at line 40. If the URL doesn’t exist, we create a newUrl from Url model at line 35. Then, we save the newUrl at line 36. After that, we send the shortId and url to the user at line 37. Notice that we haven’t provided shortId while creating newUrl but we’ve received it. That’s because our Url model does the task of generating shortId for us. If there occurs any error during the process, we log the error at line 42. Then, at line 43, we send the error message to the user.
在第20行,我们创建了一个名为AddUrl的箭头函数,并在第49 AddUrl其导出。此函数的目的是向数据库添加新的URL,并为用户提供唯一的ID。 在第21行,我们从req.body提取了url 。 如果该url不存在,则在第23行提供错误消息。然后,在第25至30行,使用validator对url进行validator 。 validator的isUrl方法将要验证的字符串作为第一个参数,在我们的示例中为url 。 第二个参数接受选项对象。 在这里,我们在第27行将require_protocol设置为true 。如果验证不匹配,则在第30行向用户发送错误消息。在第33行,我们用url查询Url模型并存储在URL不变。 如果存在URL ,则从URL.shortId向用户发送相同的shortId ,并在第40行发送url本身。如果URL不存在,则在第35行从Url模型创建一个newUrl 。然后,保存第36行的newUrl 。之后,我们在第37 shortId和url发送给用户。请注意,在创建newUrl我们没有提供shortId ,但我们已经收到了它。 这是因为我们的Url模型完成了为我们生成shortId的任务。 如果在此过程中发生任何错误,我们将在第42行记录错误。然后在第43行,将错误消息发送给用户。
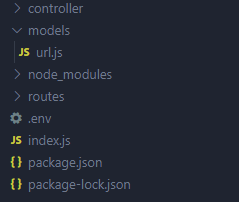
Now that we’ve worked on our controllers, let’s now work on our Url model. For that, let’s create a directory called model in our main project directory. Inside of the directory, create a file called url.js. This should make our folder structure look like this:
现在我们已经在控制器上工作了,现在让我们在Url模型上工作。 为此,让我们在主项目目录中创建一个名为model的目录。 在目录内部,创建一个名为url.js的文件。 这应该使我们的文件夹结构如下所示:
Let’s now open up the file url.js and write the following lines of code:
现在,打开文件url.js并编写以下代码行:
const mongoose = require("mongoose");
const shortid = require("shortid");


const UrlSchema = new mongoose.Schema({
  url: { type: String, required: true },
  shortId: { type: String, required: true, default: shortid.generate() },
});


module.exports = mongoose.model("url", UrlSchema);
Let’s now take a look at the code above. At line, 1 we imported mongoose. At line 2, we imported shortid.
现在让我们看一下上面的代码。 在第1行,我们进口了mongoose 。 在第2行,我们导入了shortid 。
From line 4 to 7, we created a new schema and stored it in UrlSchema constant. The UrlSchema has two fields: url, shortId. The url field stores string and is a required field. The shortId field stores string and is a required field too. We’ve set up a default value for the shortId field as shortid.generate(). This method generates an id that gets stored in shortId field. Then, we finally exported the ”url” model at line 9.
从第4到7行,我们创建了一个新架构,并将其存储在UrlSchema常量中。 UrlSchema有两个字段: url , shortId 。 url字段存储字符串,并且是必填字段。 shortId字段存储字符串,也是必填字段。 我们为shortId字段设置了默认值shortid.generate() 。 此方法生成一个ID,该ID将存储在shortId字段中。 然后,我们最终在第9行导出了”url”模型。
Let’s now try out this app. Try making a post request with Postman to the route localhost:3000/ with url field containing a valid URL. You should receive a shortId from it. Then, open up your browser and enter the URL localhost:3000/:shortId. The :shortId here should be the shortId you received while making the post request to the route localhost:3000/. This should redirect you to the page that’s linked to the shortId.
现在让我们试用这个应用程序。 尝试使用Postman向路由localhost:3000 /发出一个发布请求,并使用包含有效URL的url字段。 您应该shortId收到一个shortId 。 然后,打开浏览器并输入URL localhost:3000 /:shortId 。 :shortId应该是您在向路由localhost:3000 /发出发布请求时收到的shortId。 这应该将您重定向到链接到shortId的页面。
This means we’ve created a URL Shortener!
这意味着我们已经创建了URL缩短器!
普通英语JavaScript (JavaScript In Plain English)
Enjoyed this article? If so, get more similar content by subscribing to Decoded, our YouTube channel!
喜欢这篇文章吗? 如果是这样,请订阅我们的YouTube频道解码,以获得更多类似的内容!
翻译自: https://medium.com/javascript-in-plain-english/how-to-create-url-shortener-in-node-js-568027027b91
js创建节点选择器


 1330
1330

 被折叠的 条评论
为什么被折叠?
被折叠的 条评论
为什么被折叠?
 到【灌水乐园】发言


